Here we follow the process of creating my Gambel's Quail commission for Salt Lake City's Davis Park. The images show armature, lay-up, sculpting process, silicon & fiberglass mold making, wax chase, then the forms return from the foundry in bronze pieces, I weld them together and metal-chase them back to perfection, return to the foundry for patina, then install the works. I have continued to update my shop, and now have my own patina station for large works allowing further in-house production.
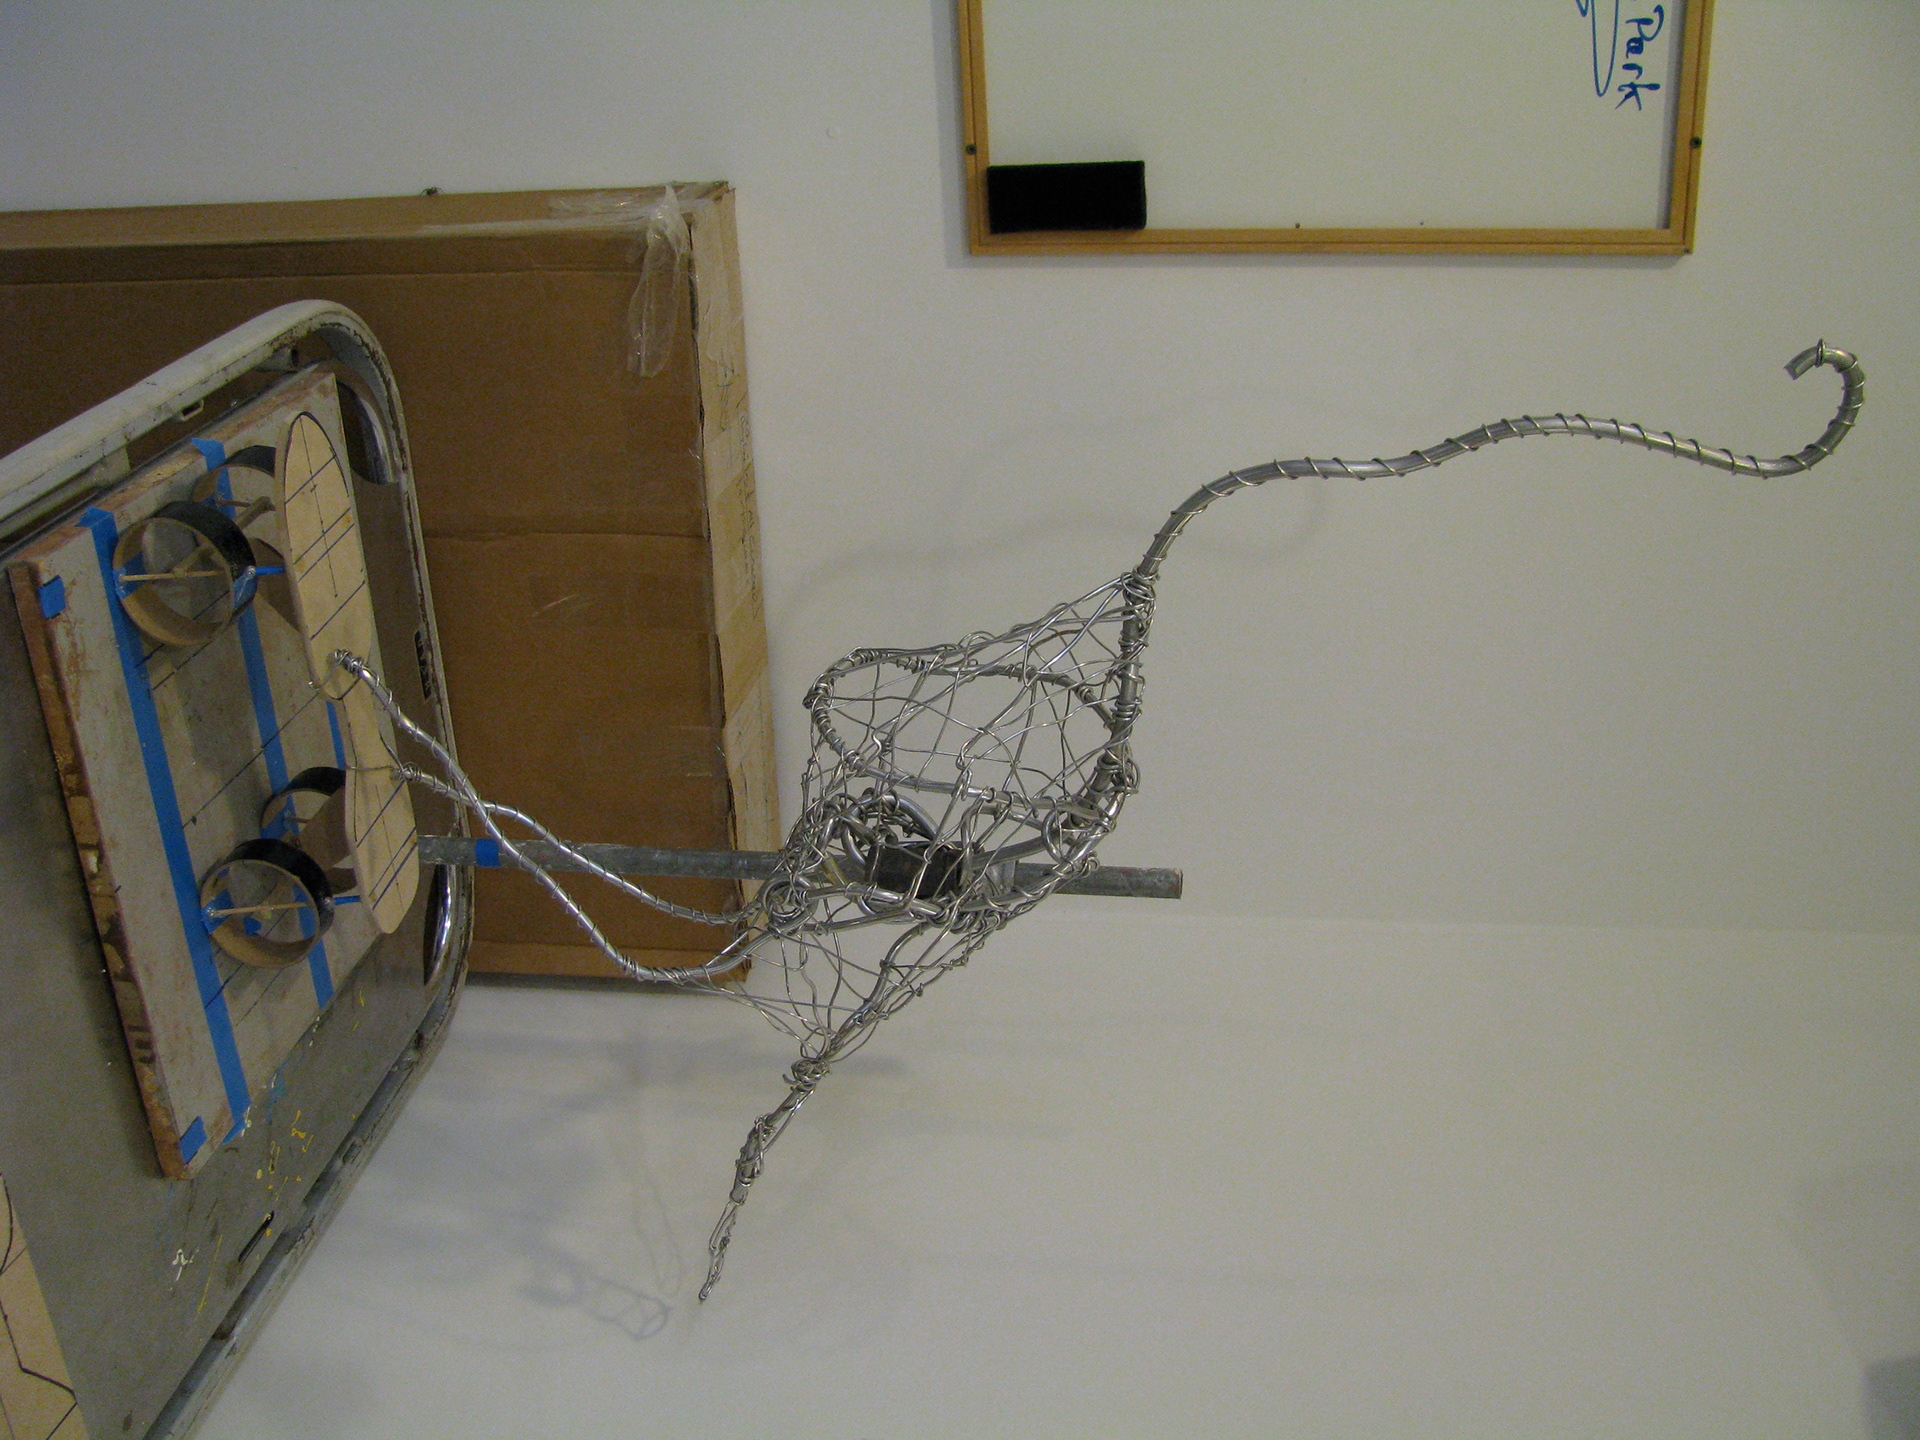
Hen's aluminum armature, and skate of mdf and cardboard tubing. (Sorry about the sideways images. The page-format has no rotation possible, so I would have to run the bug down between iPhoto and this system and re-up all the effected images. Probably not going to happen anytime soon...)
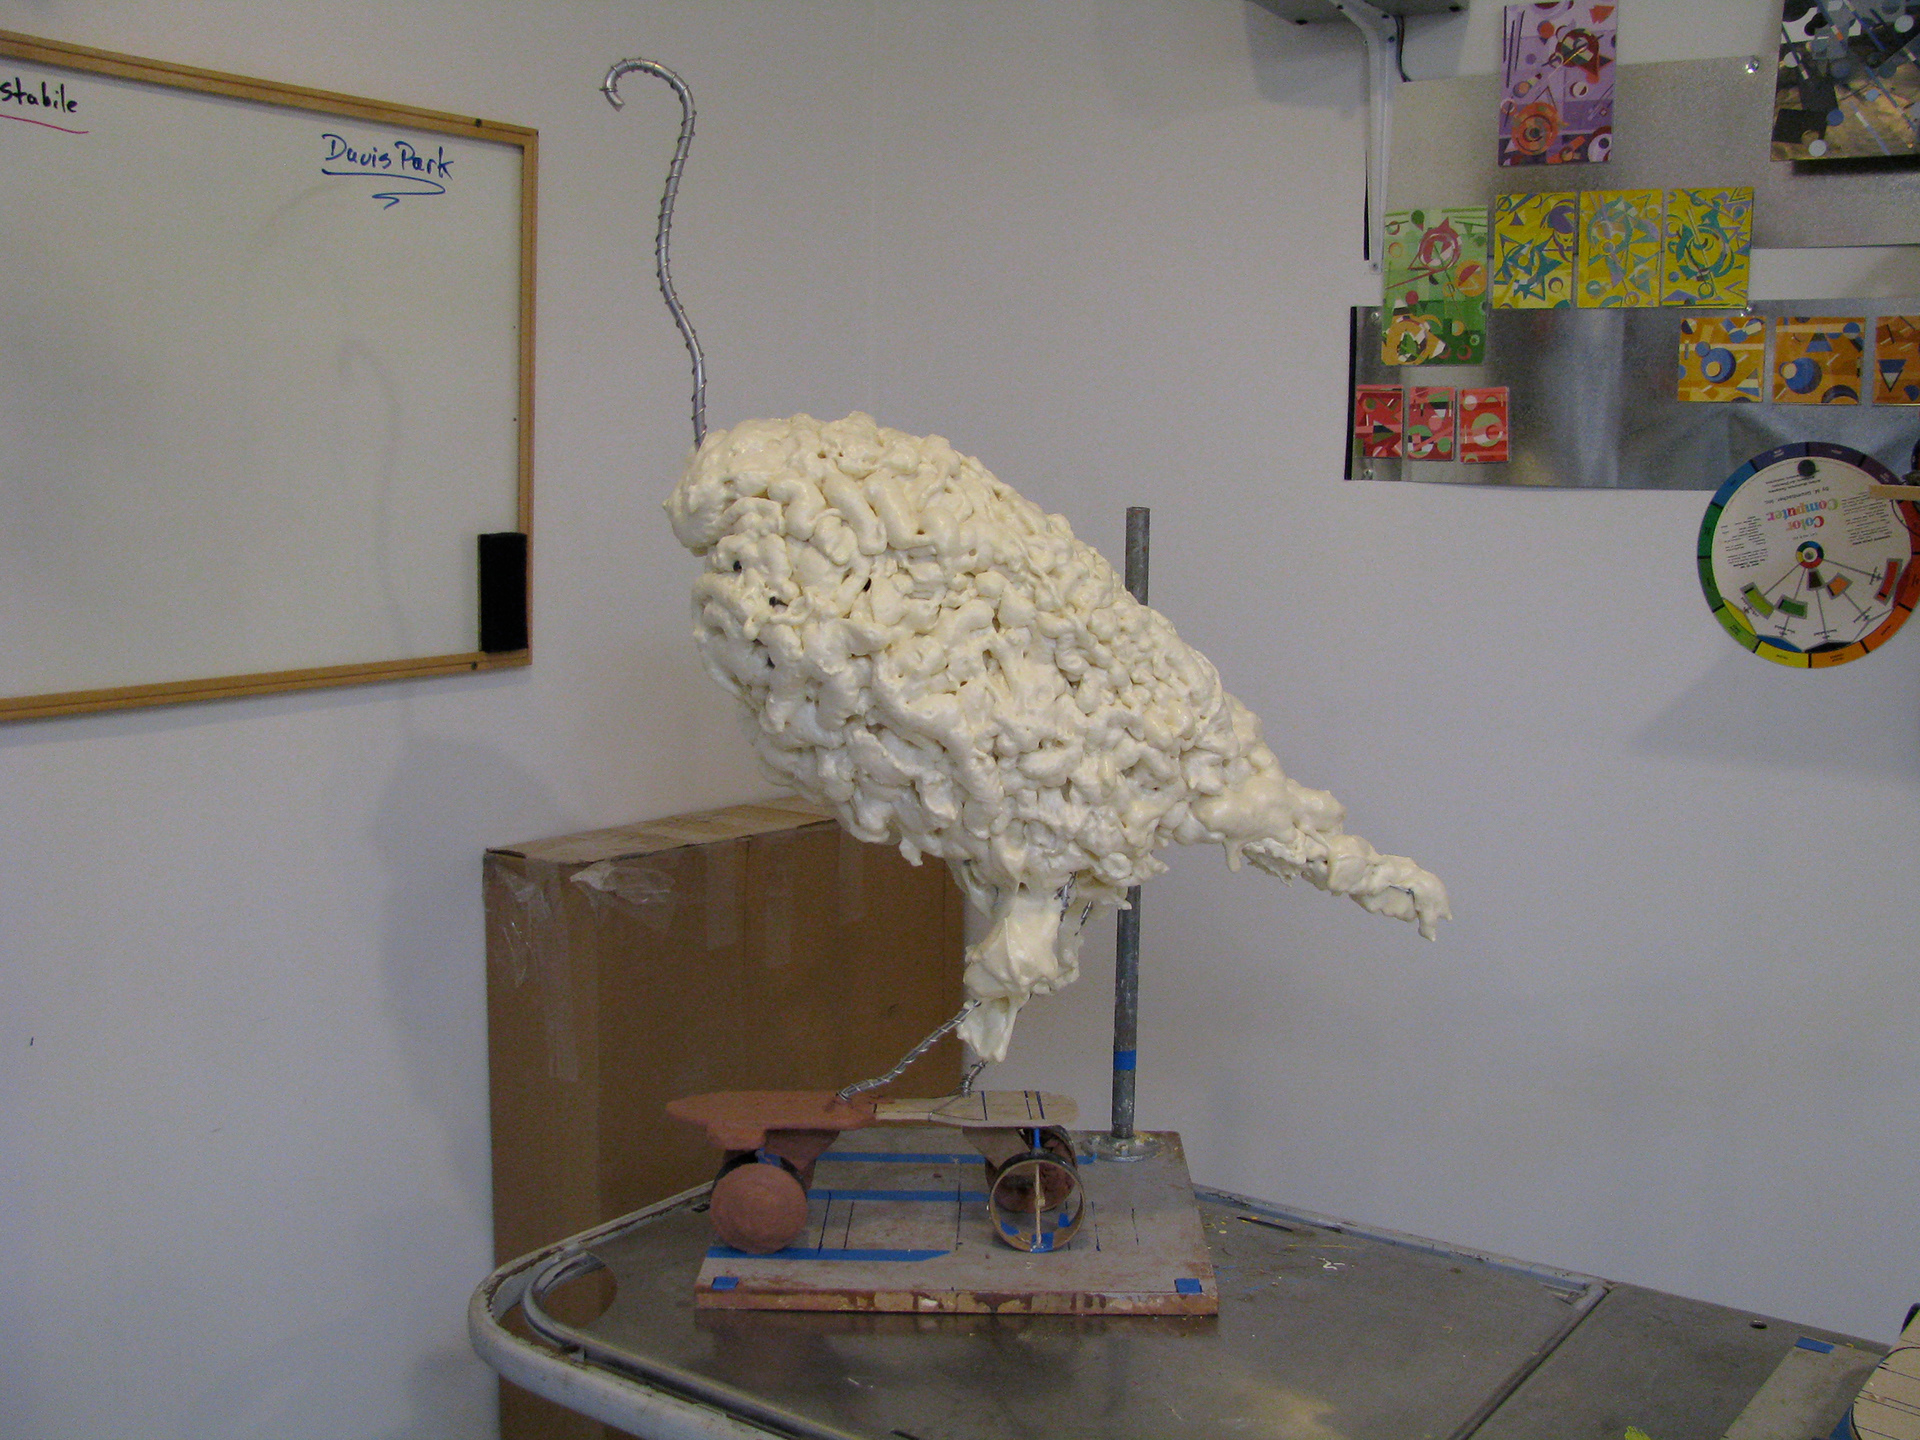
Spray foam adds mass over aluminum armature, and skate sees plasticine skinning.
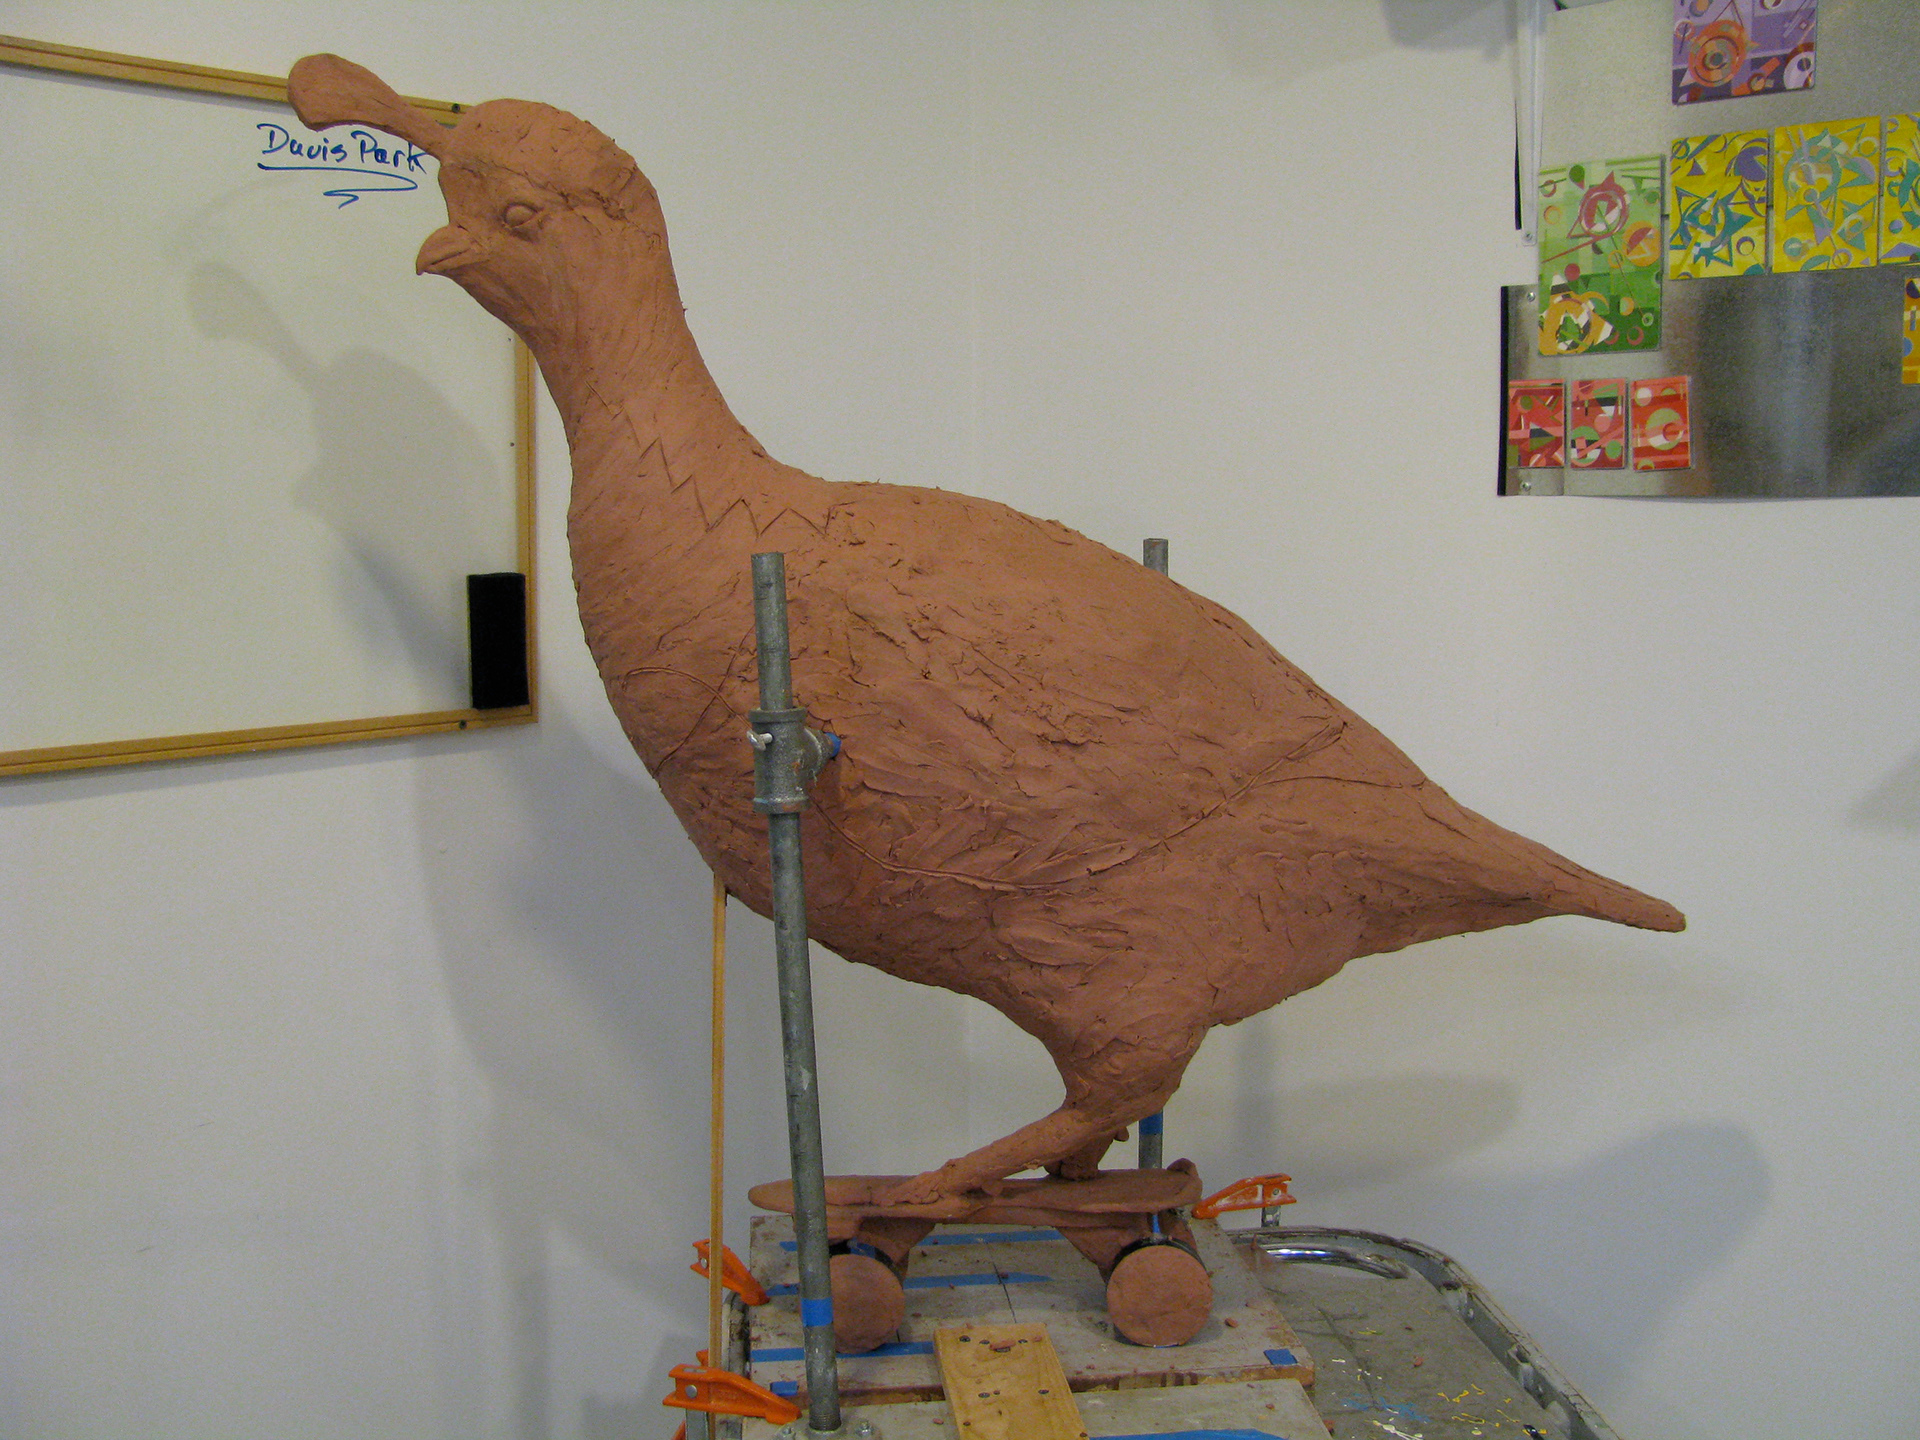
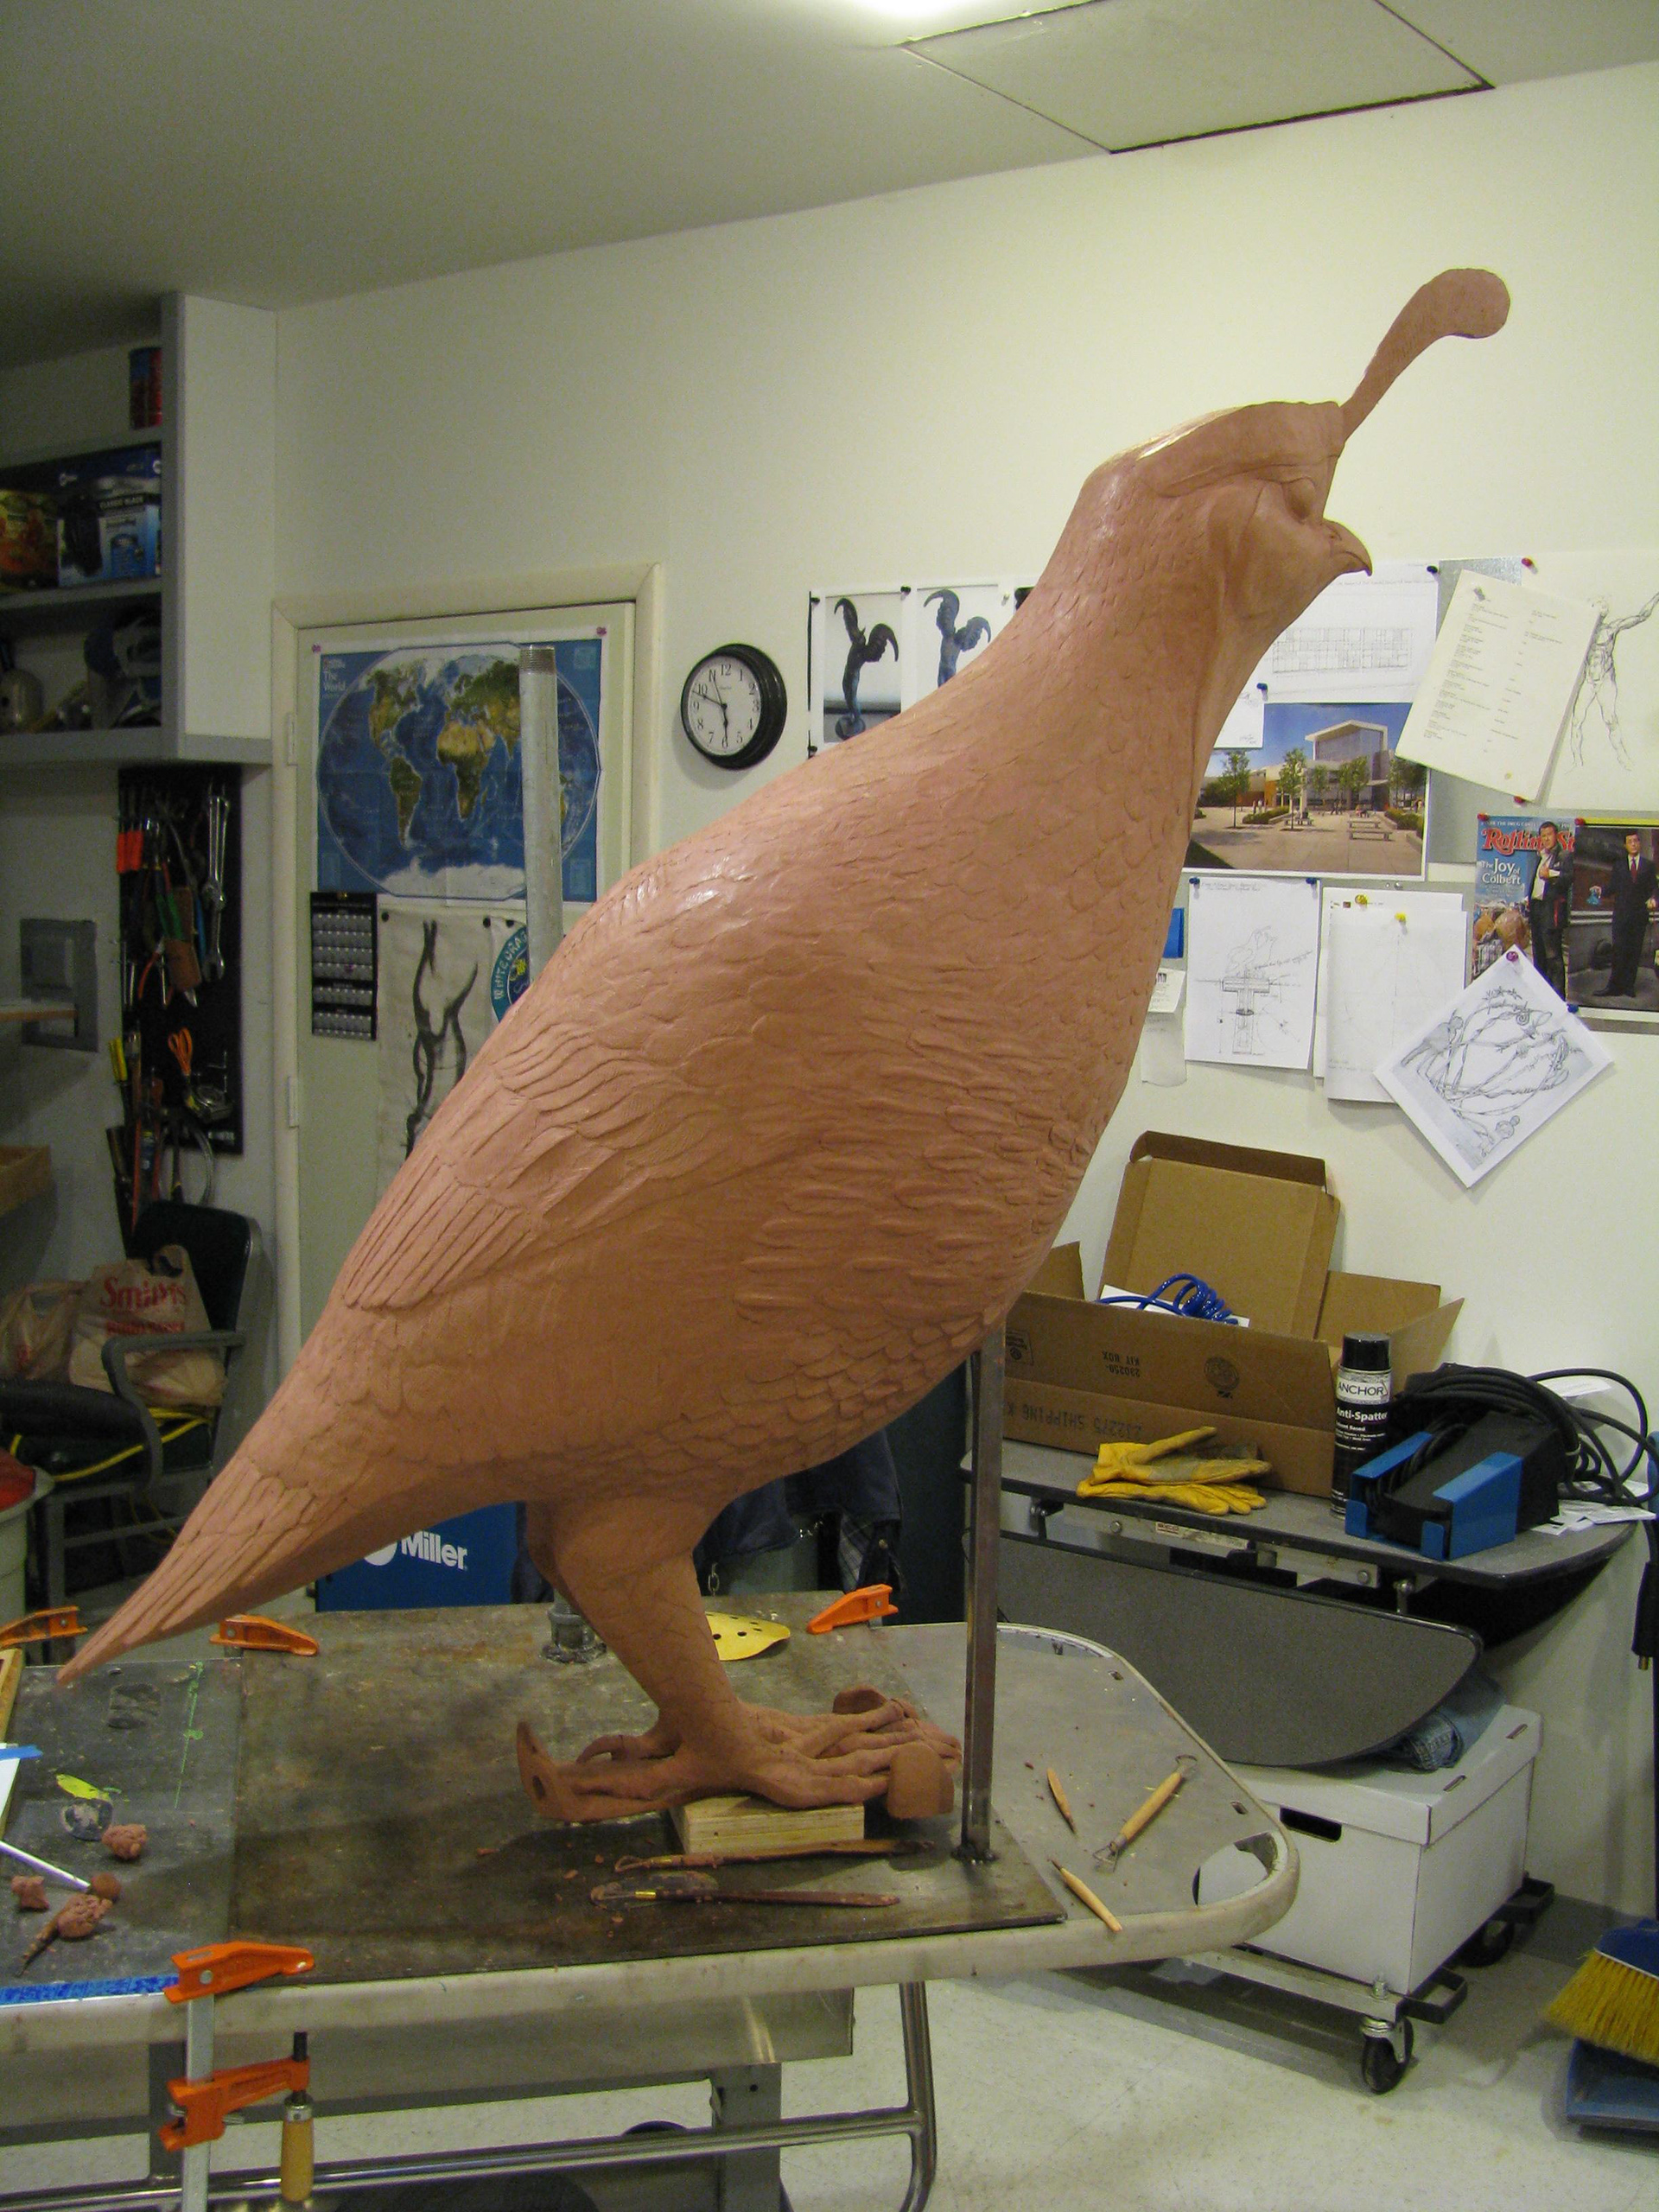
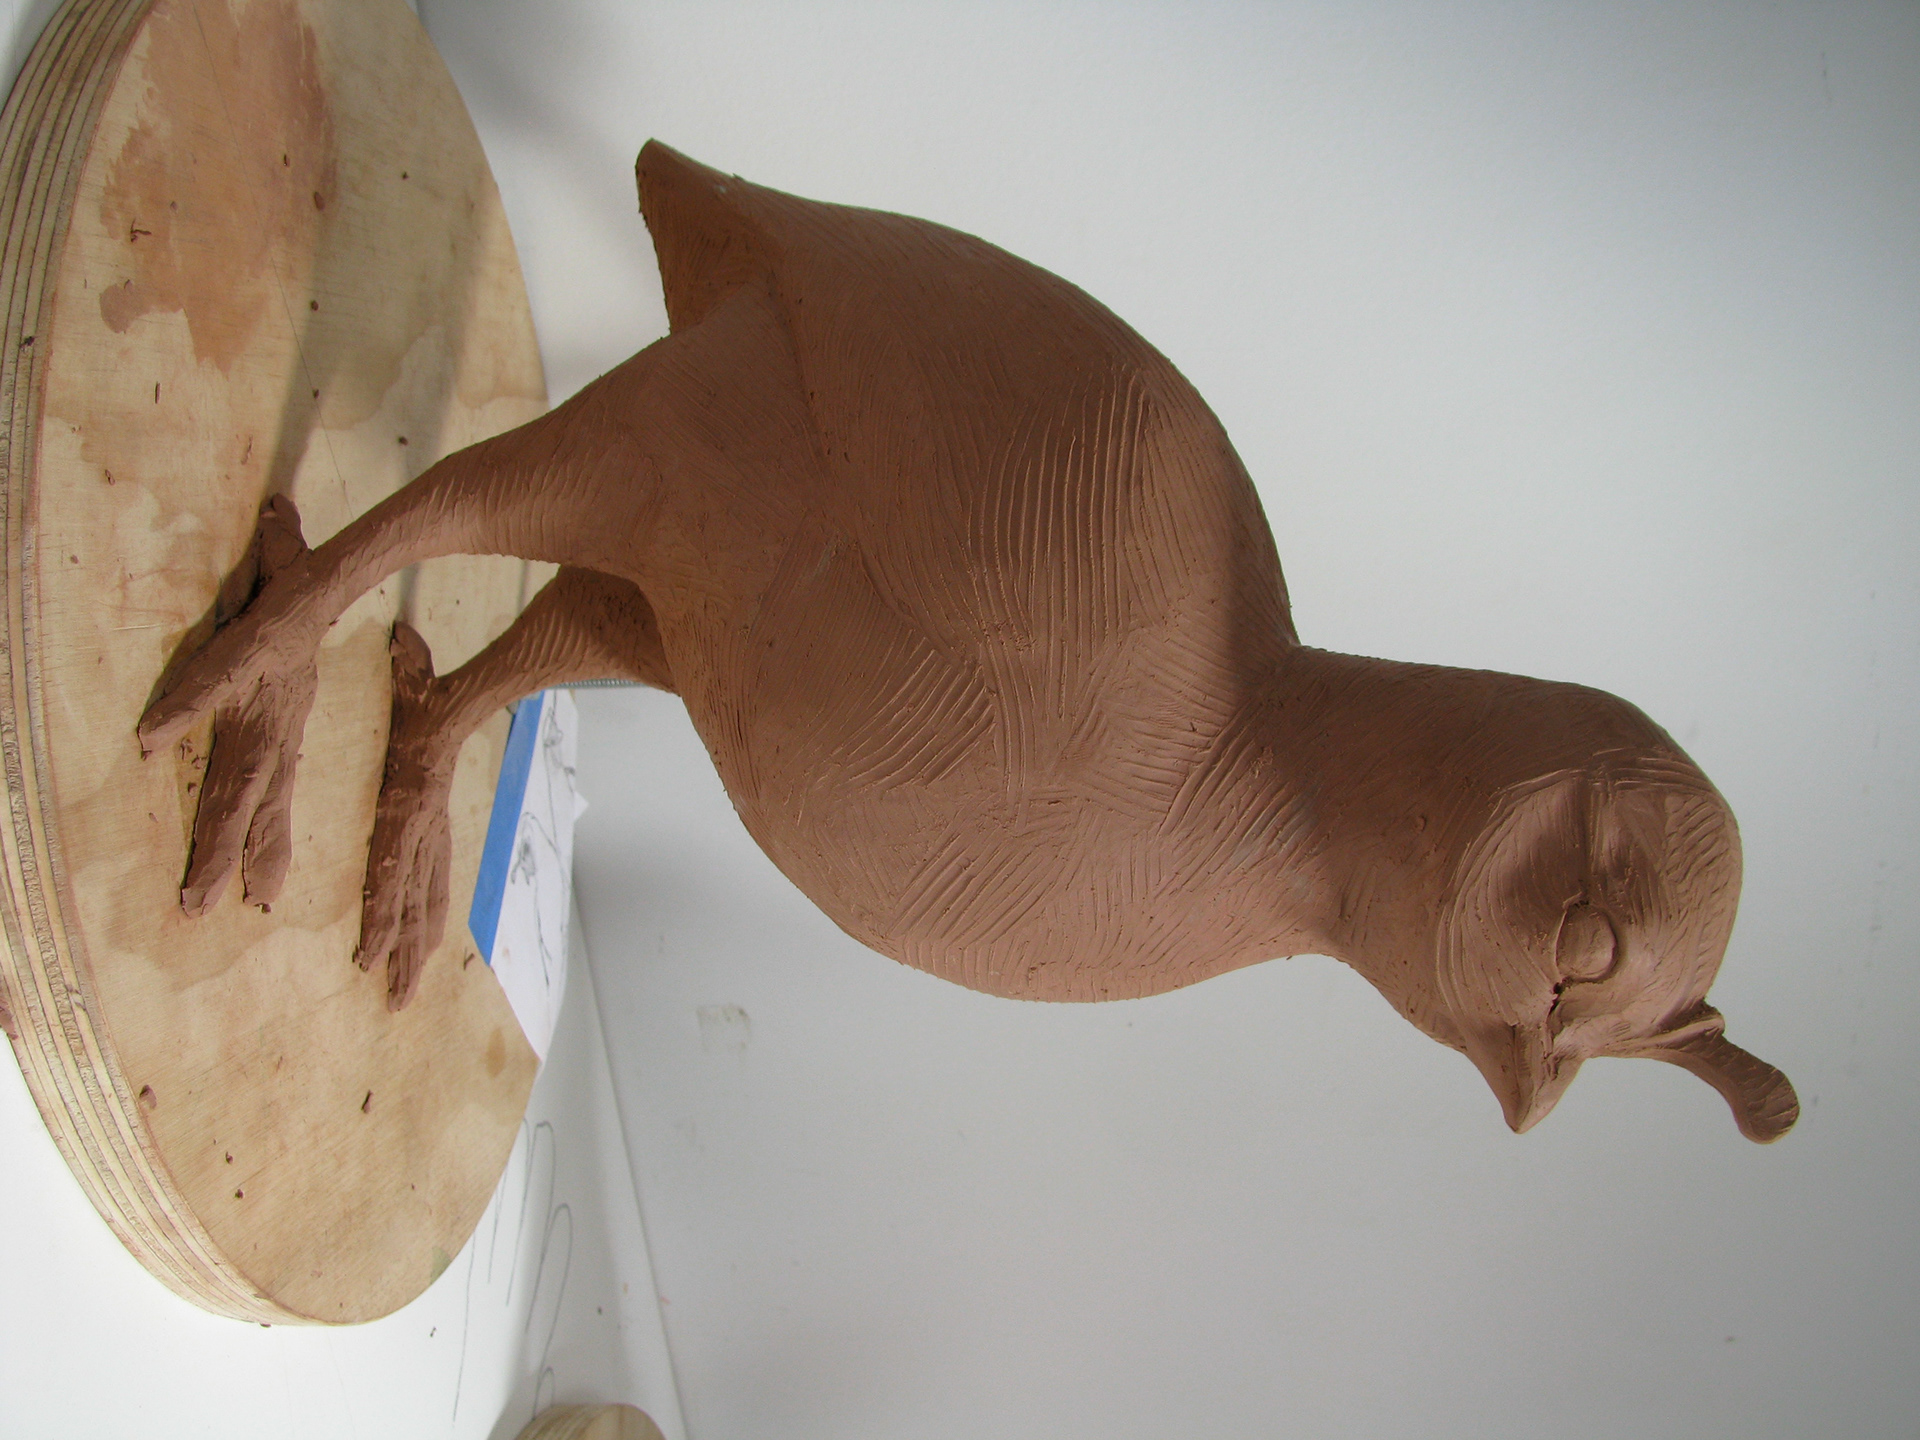
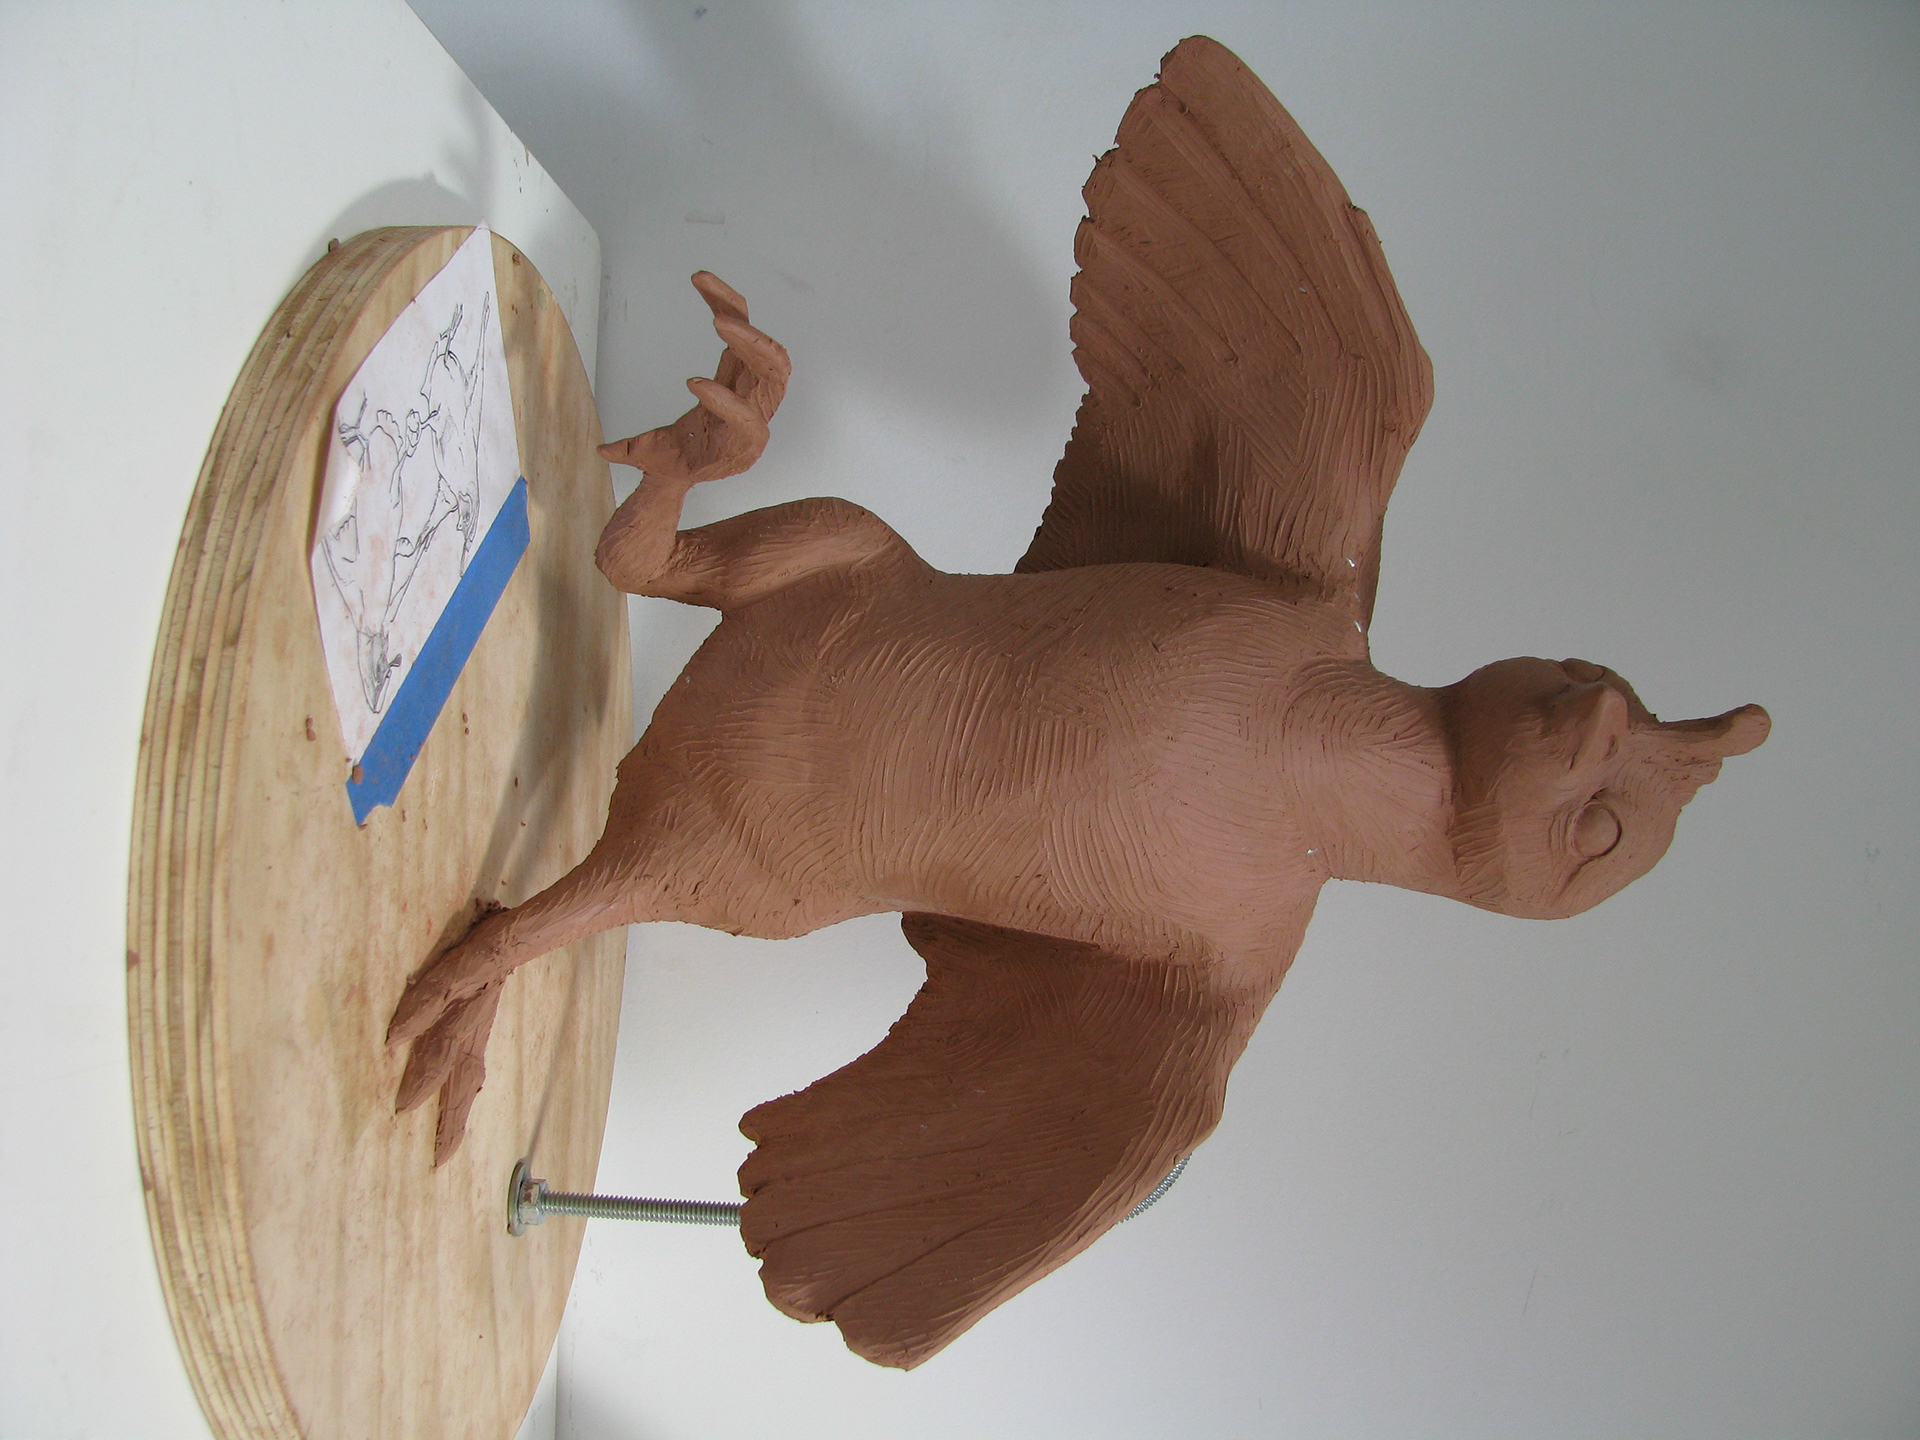
Foam underbody is skinned in clay. For this commission I worked without a maquette, just keeping it loose for awhile .
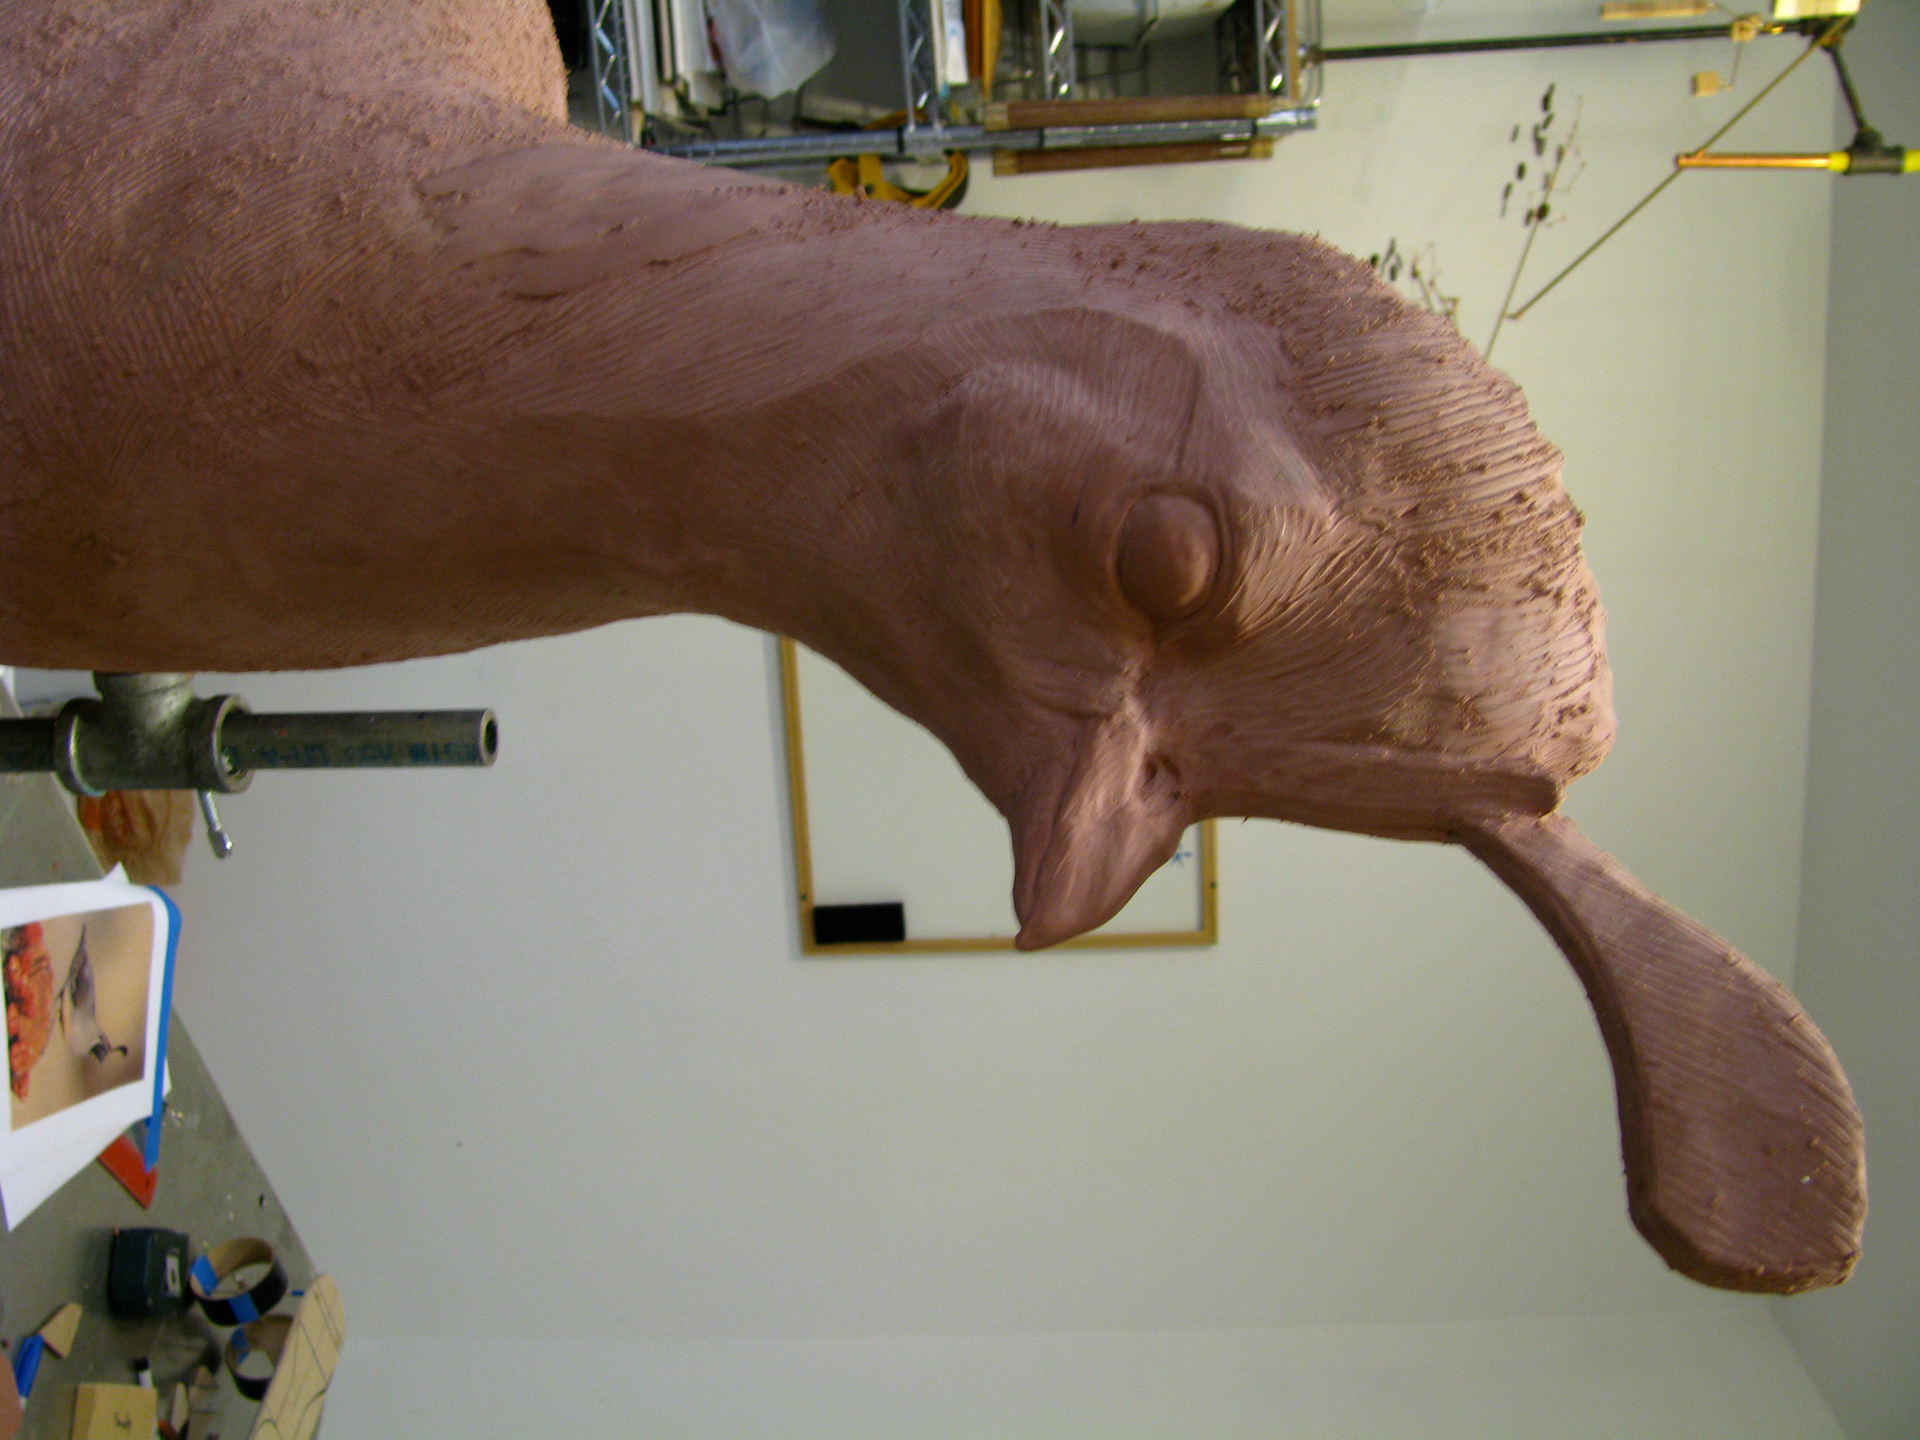
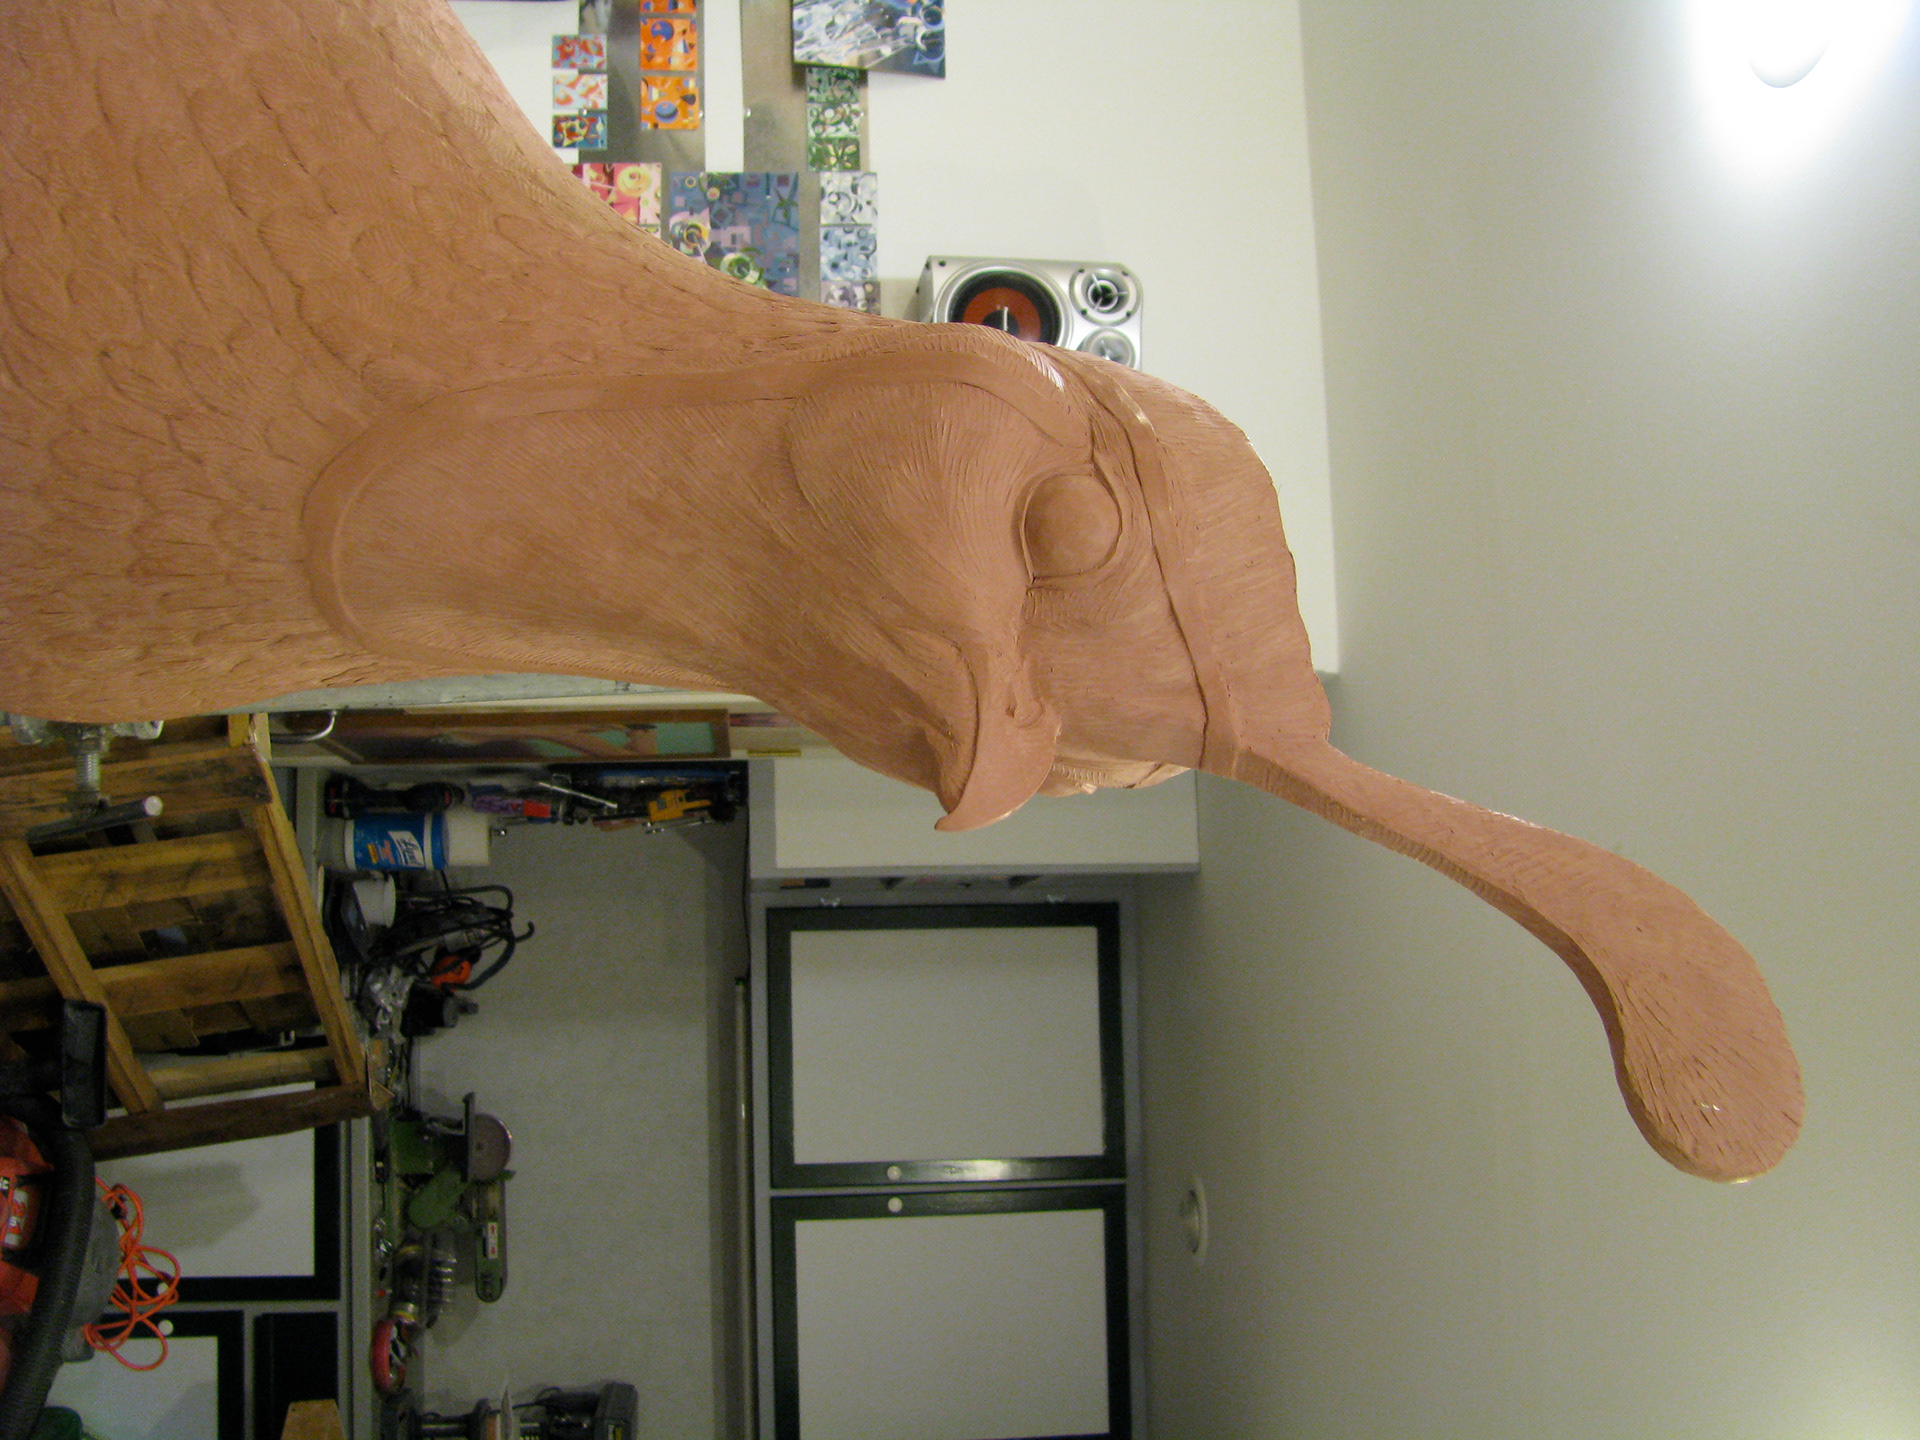
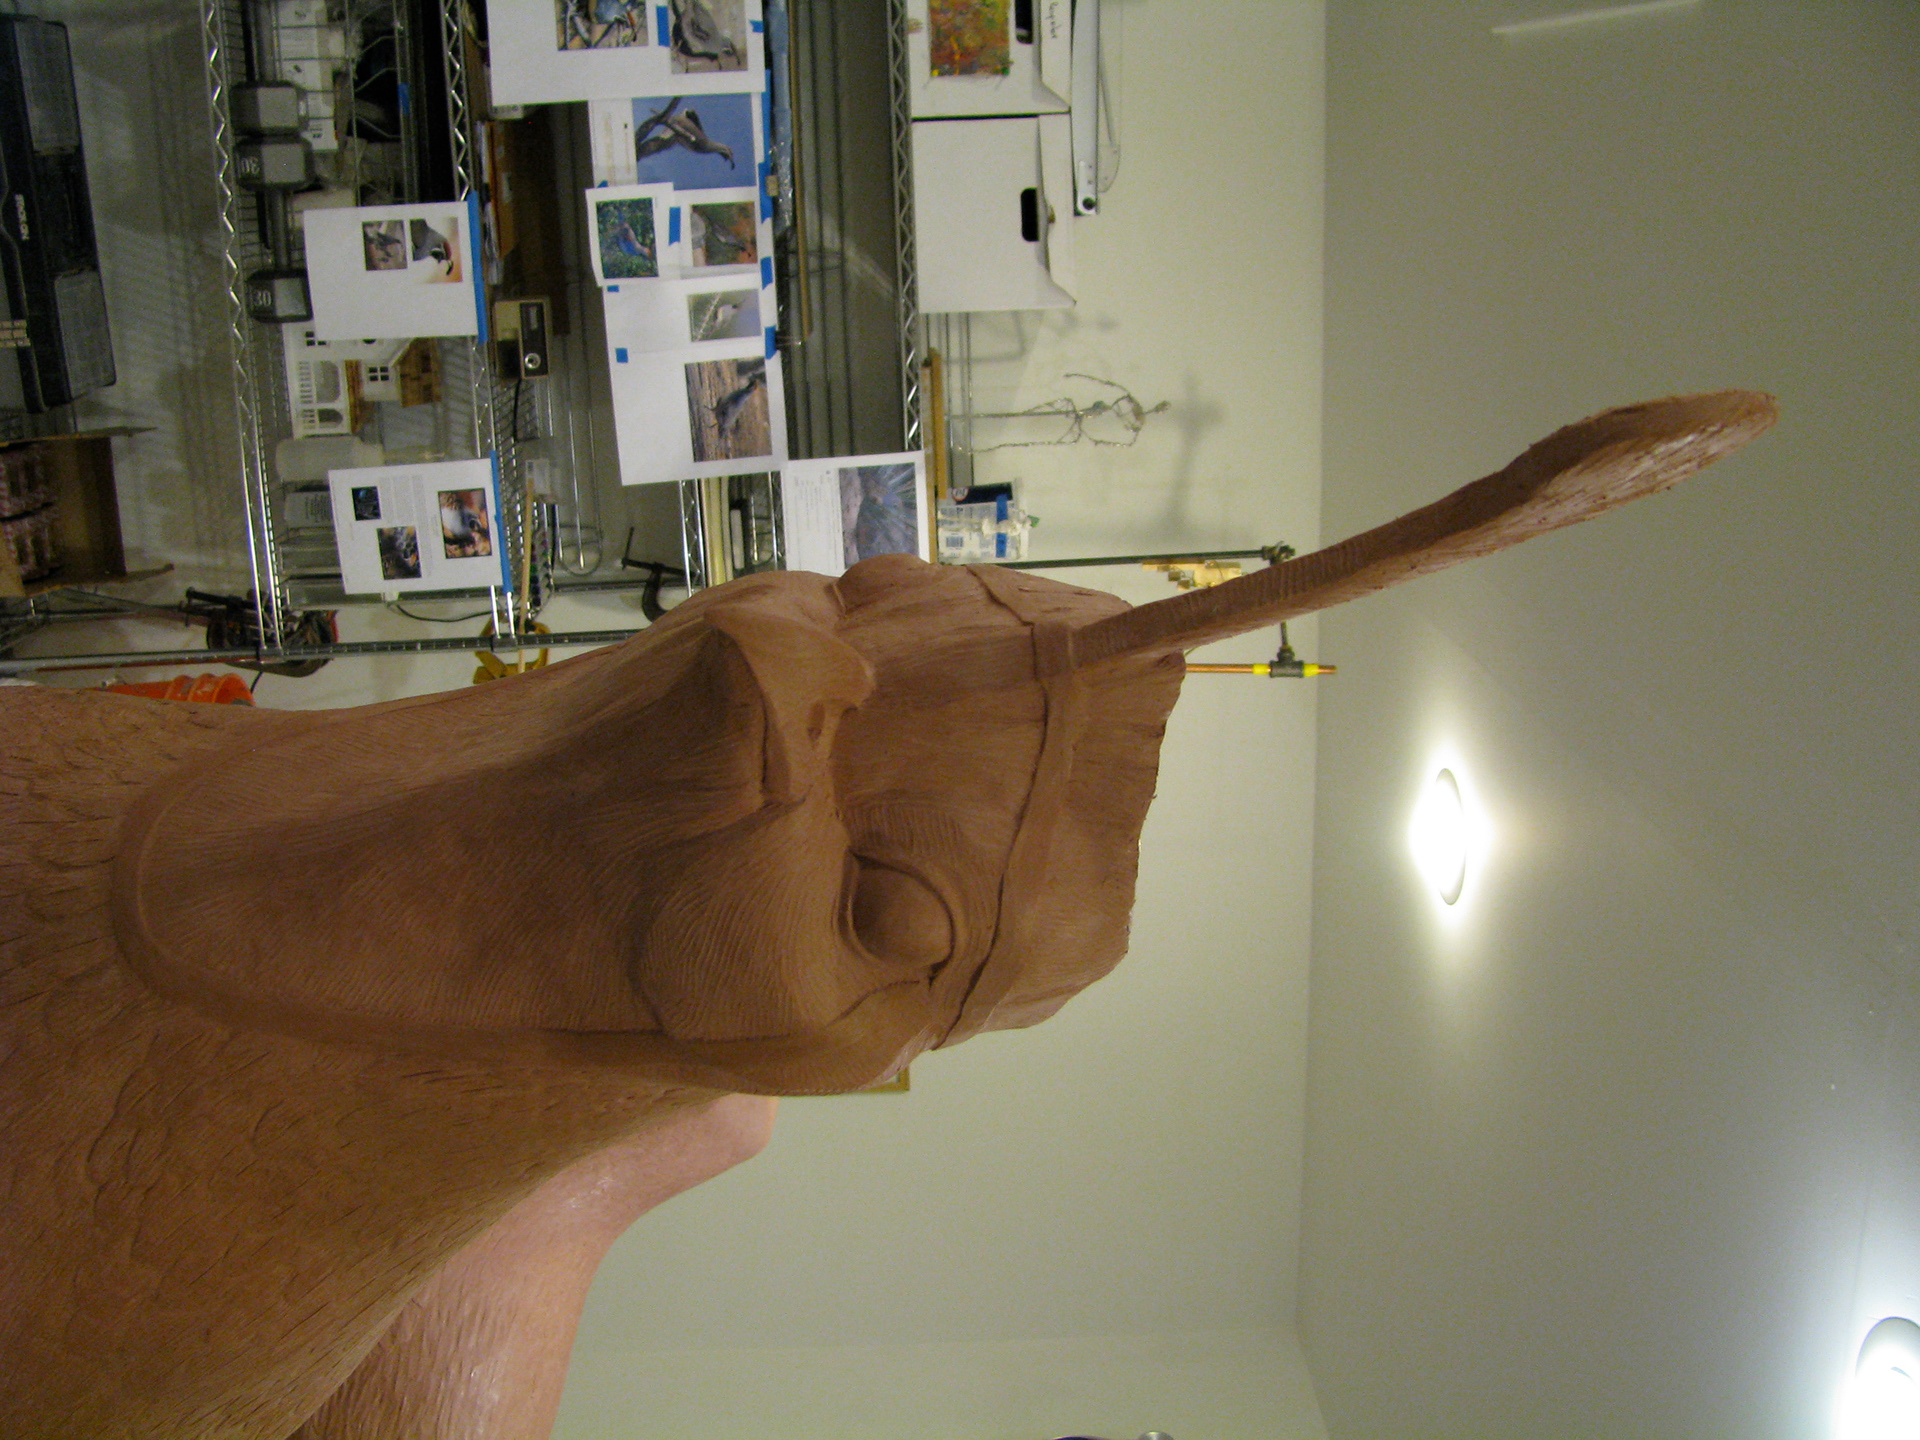
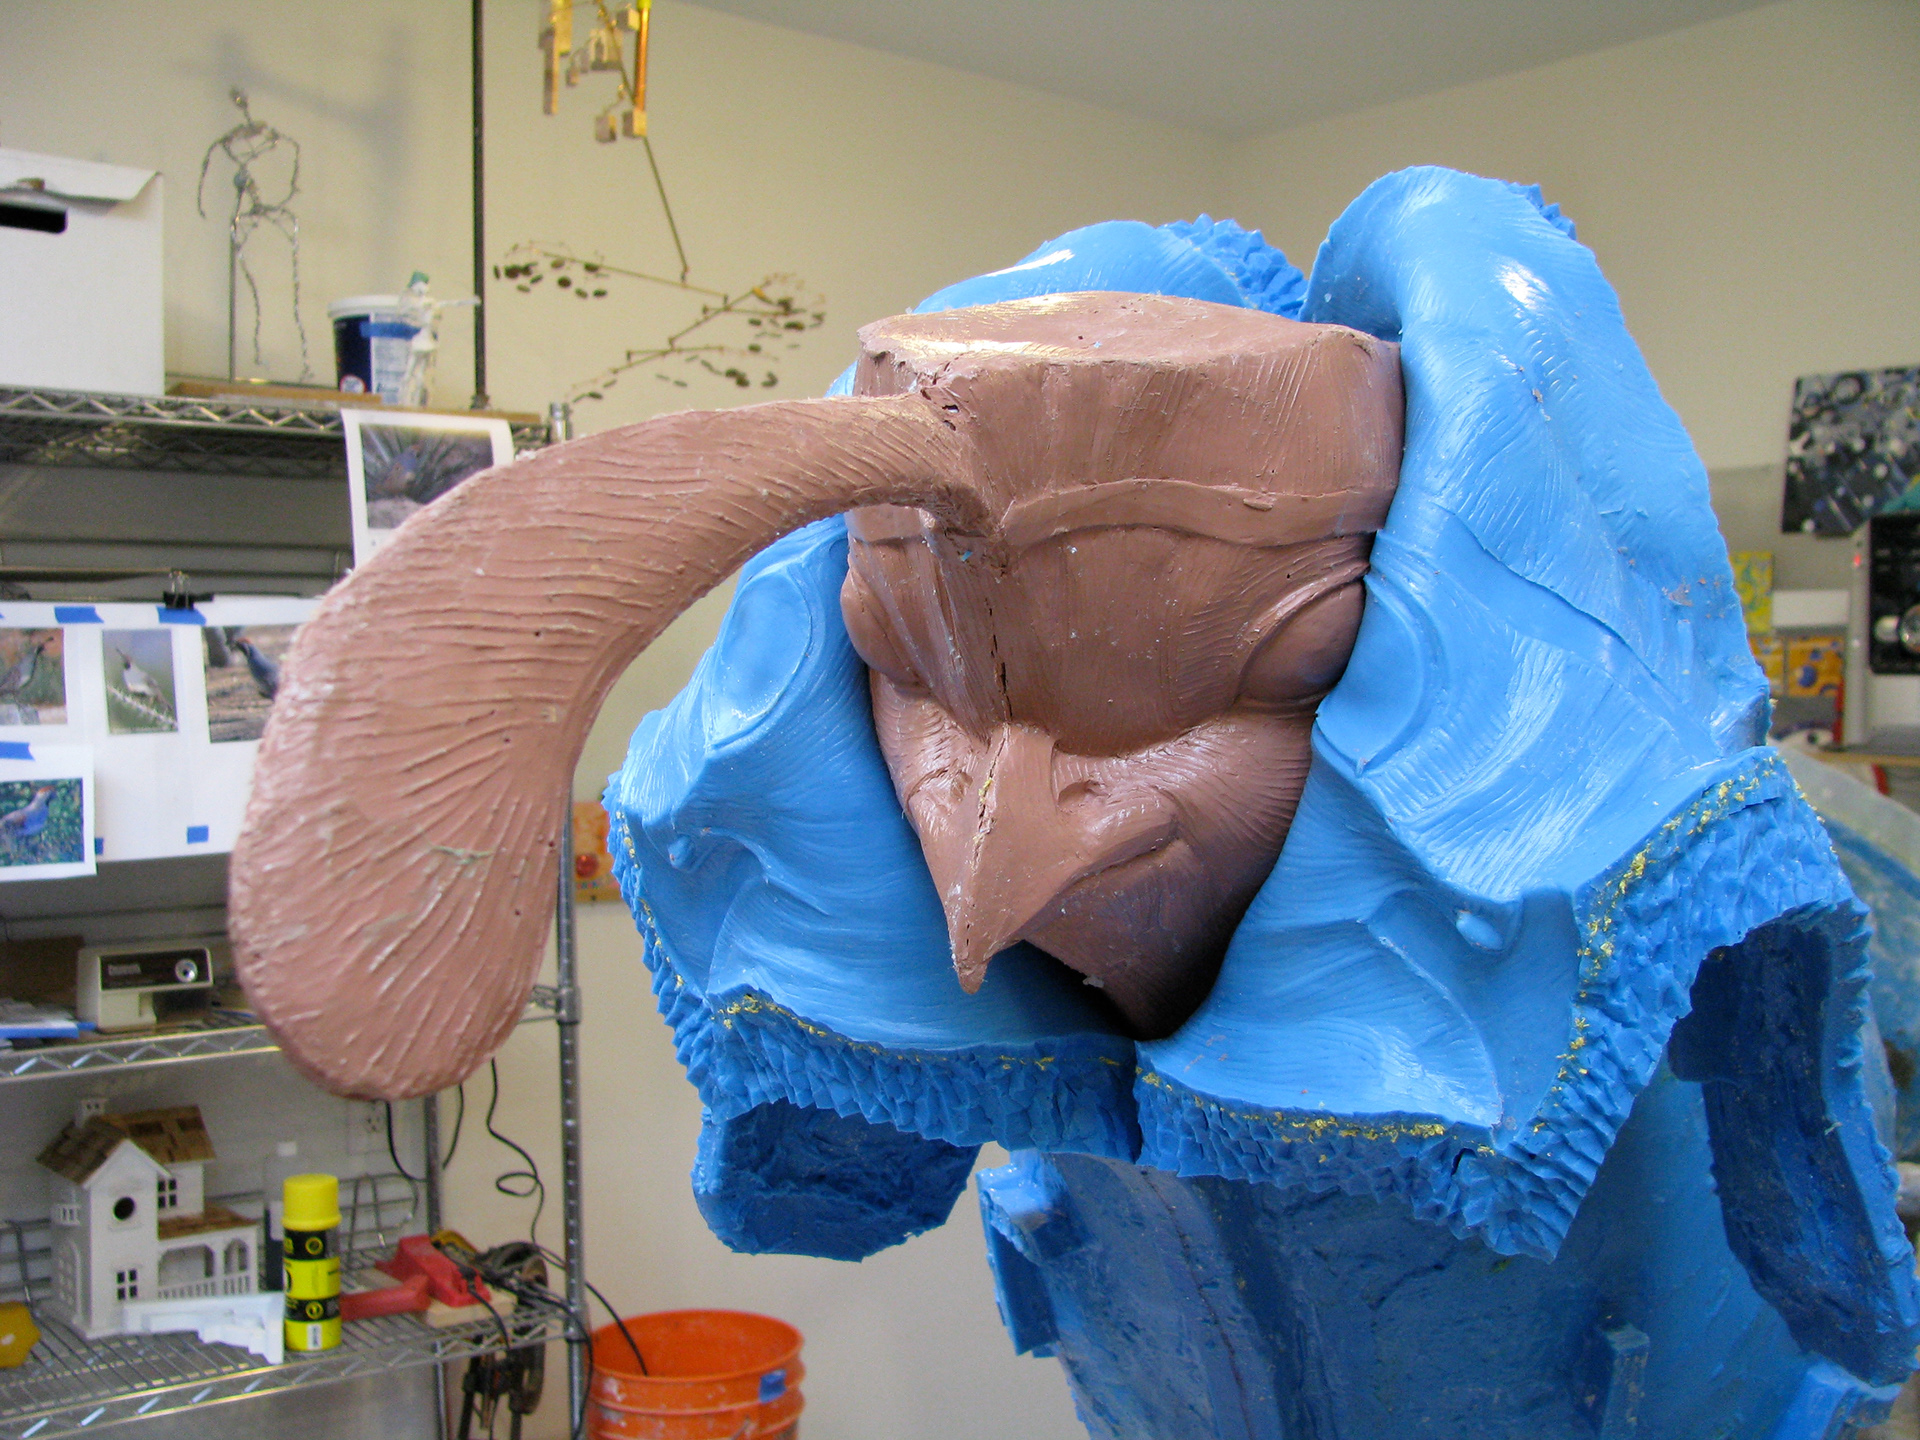
Mid-stage of refining the head.
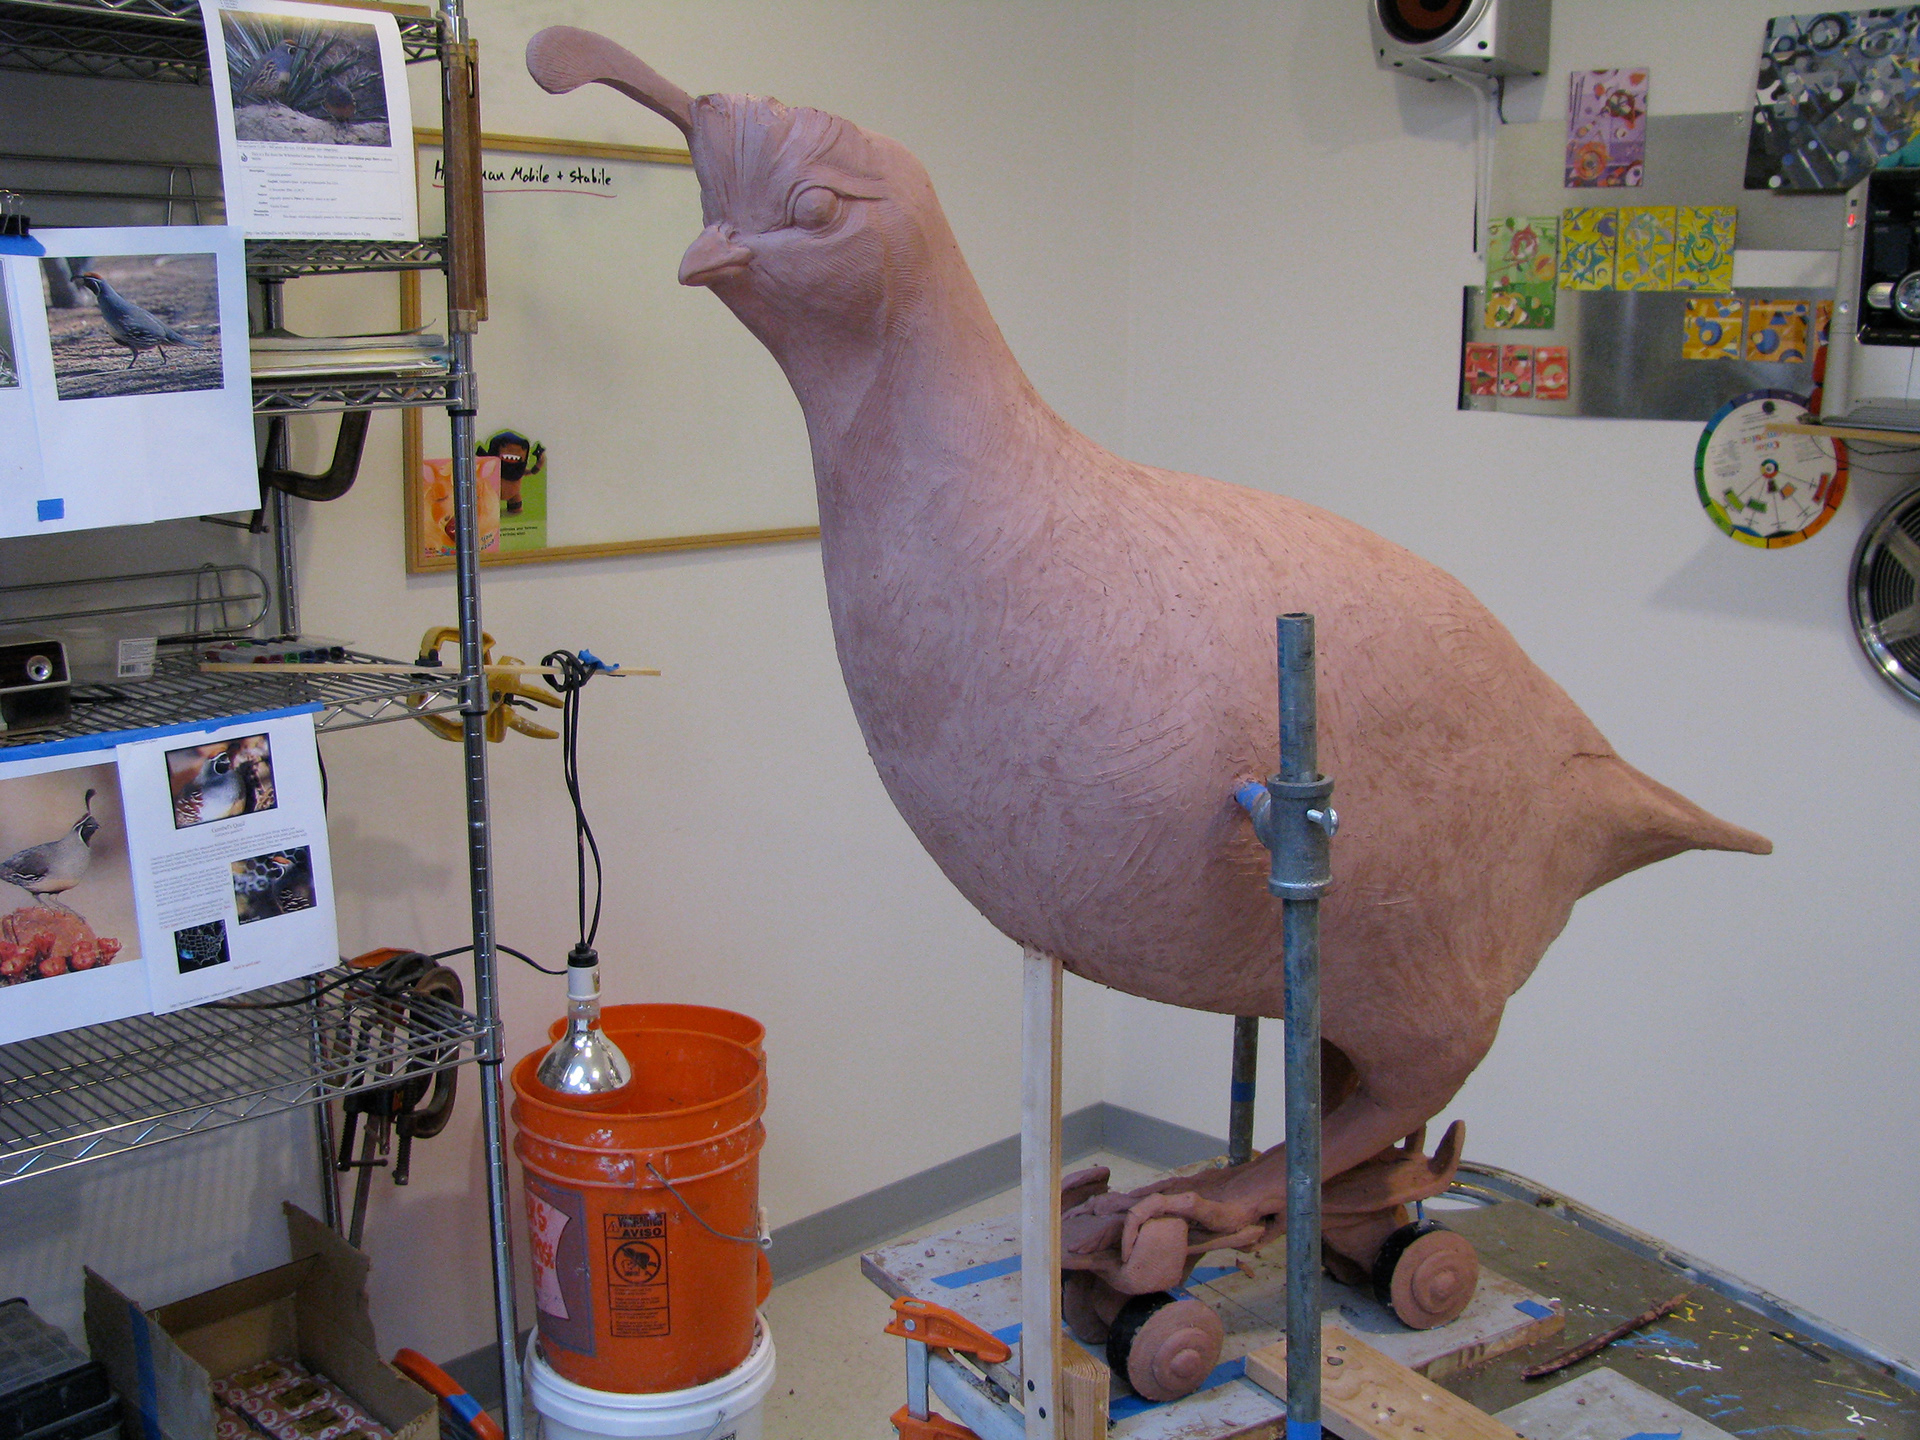
Hen is at the proper volume, and the gesture is working. I added a support board to her chest.
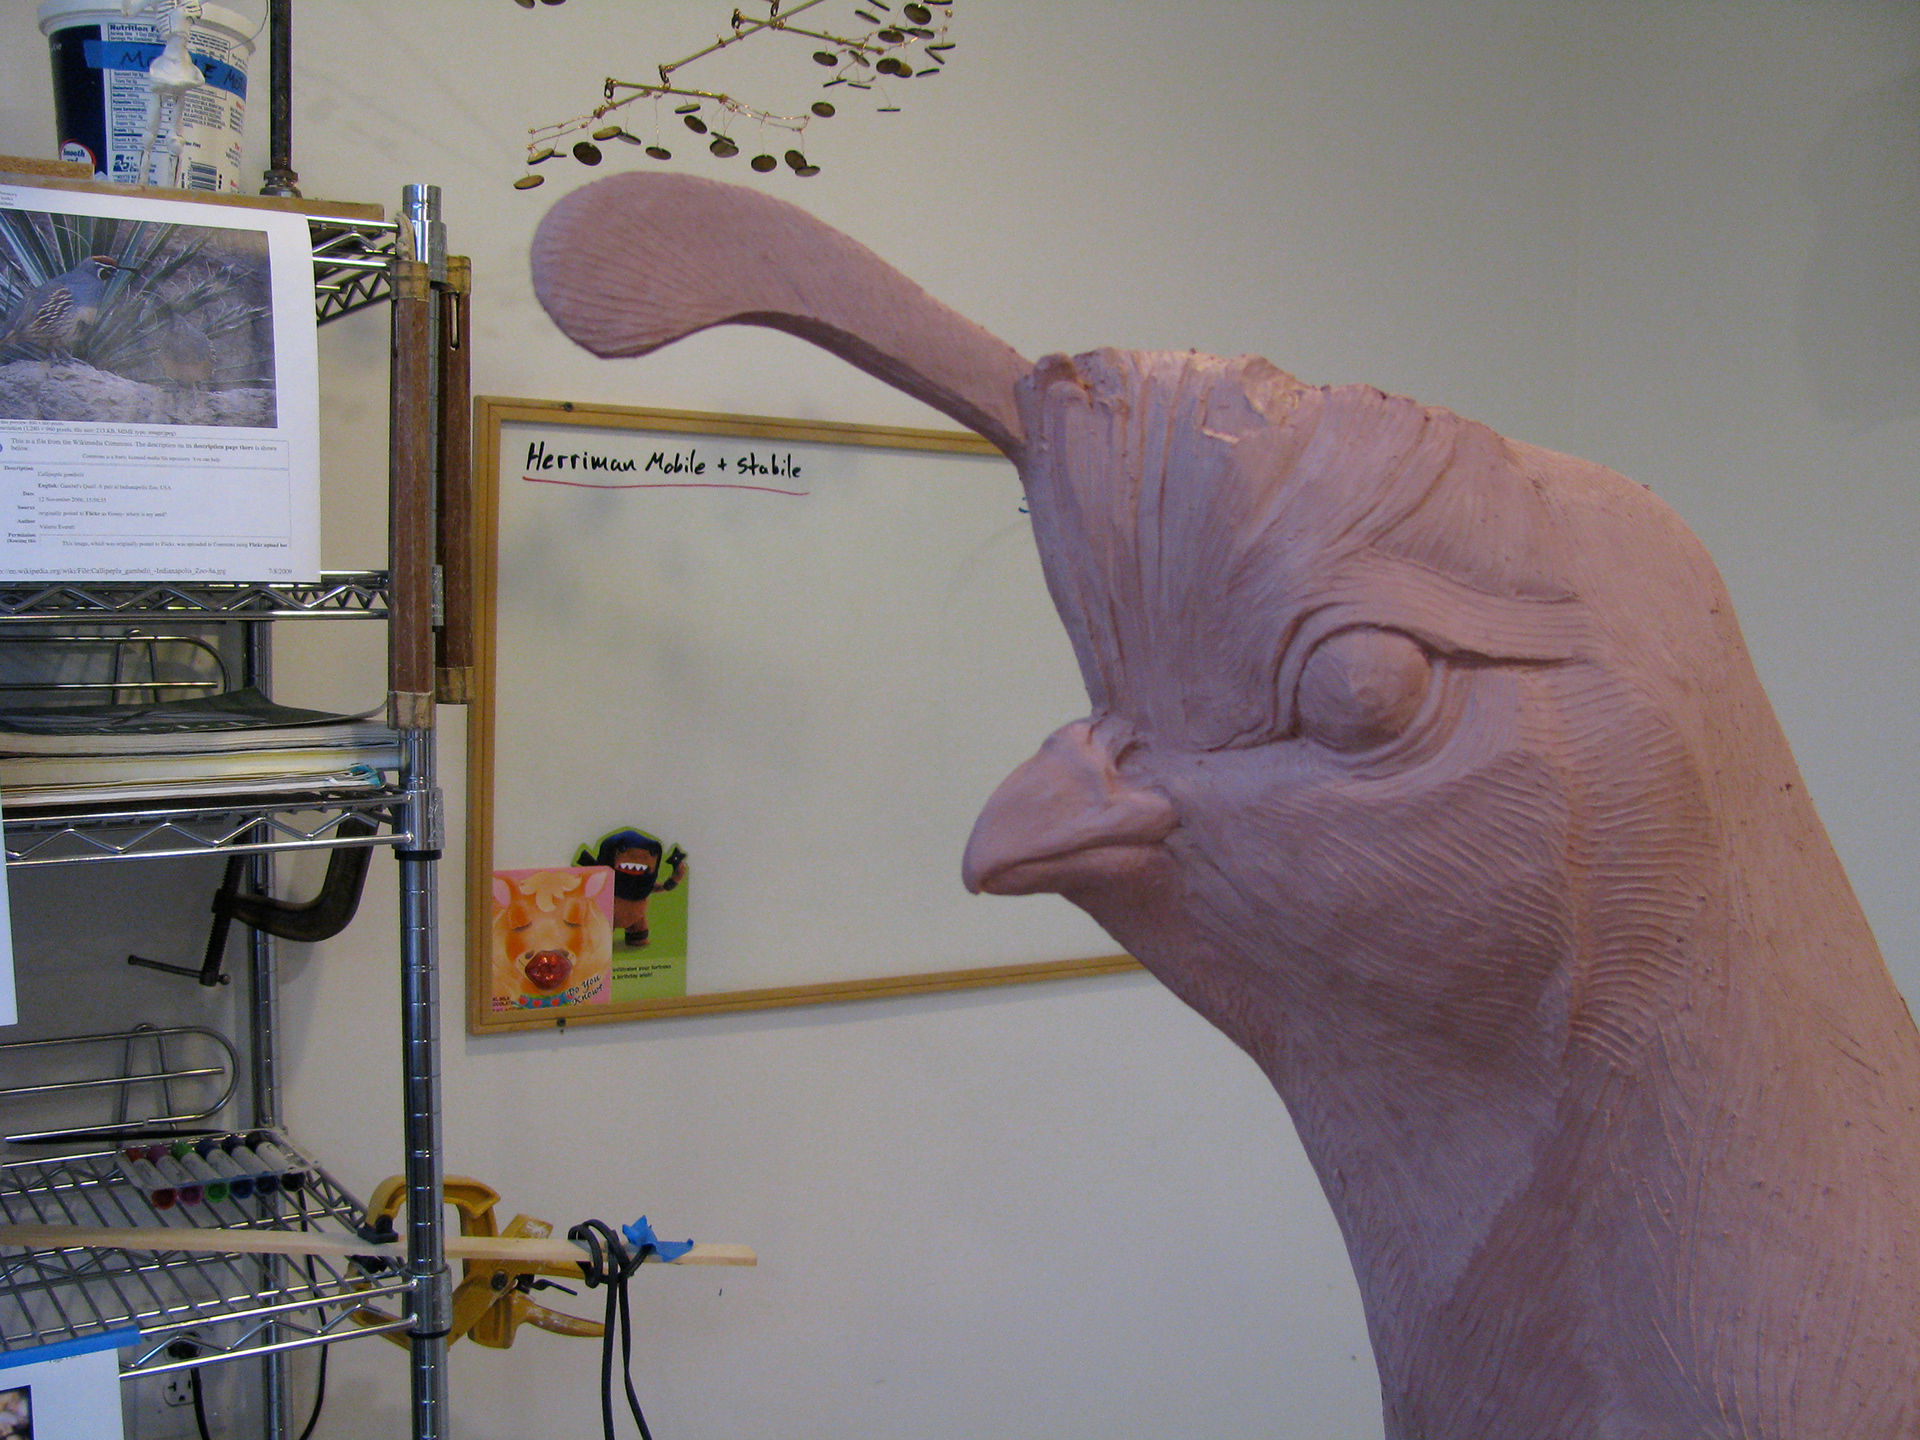
Structure and proportion start to look good for her head.

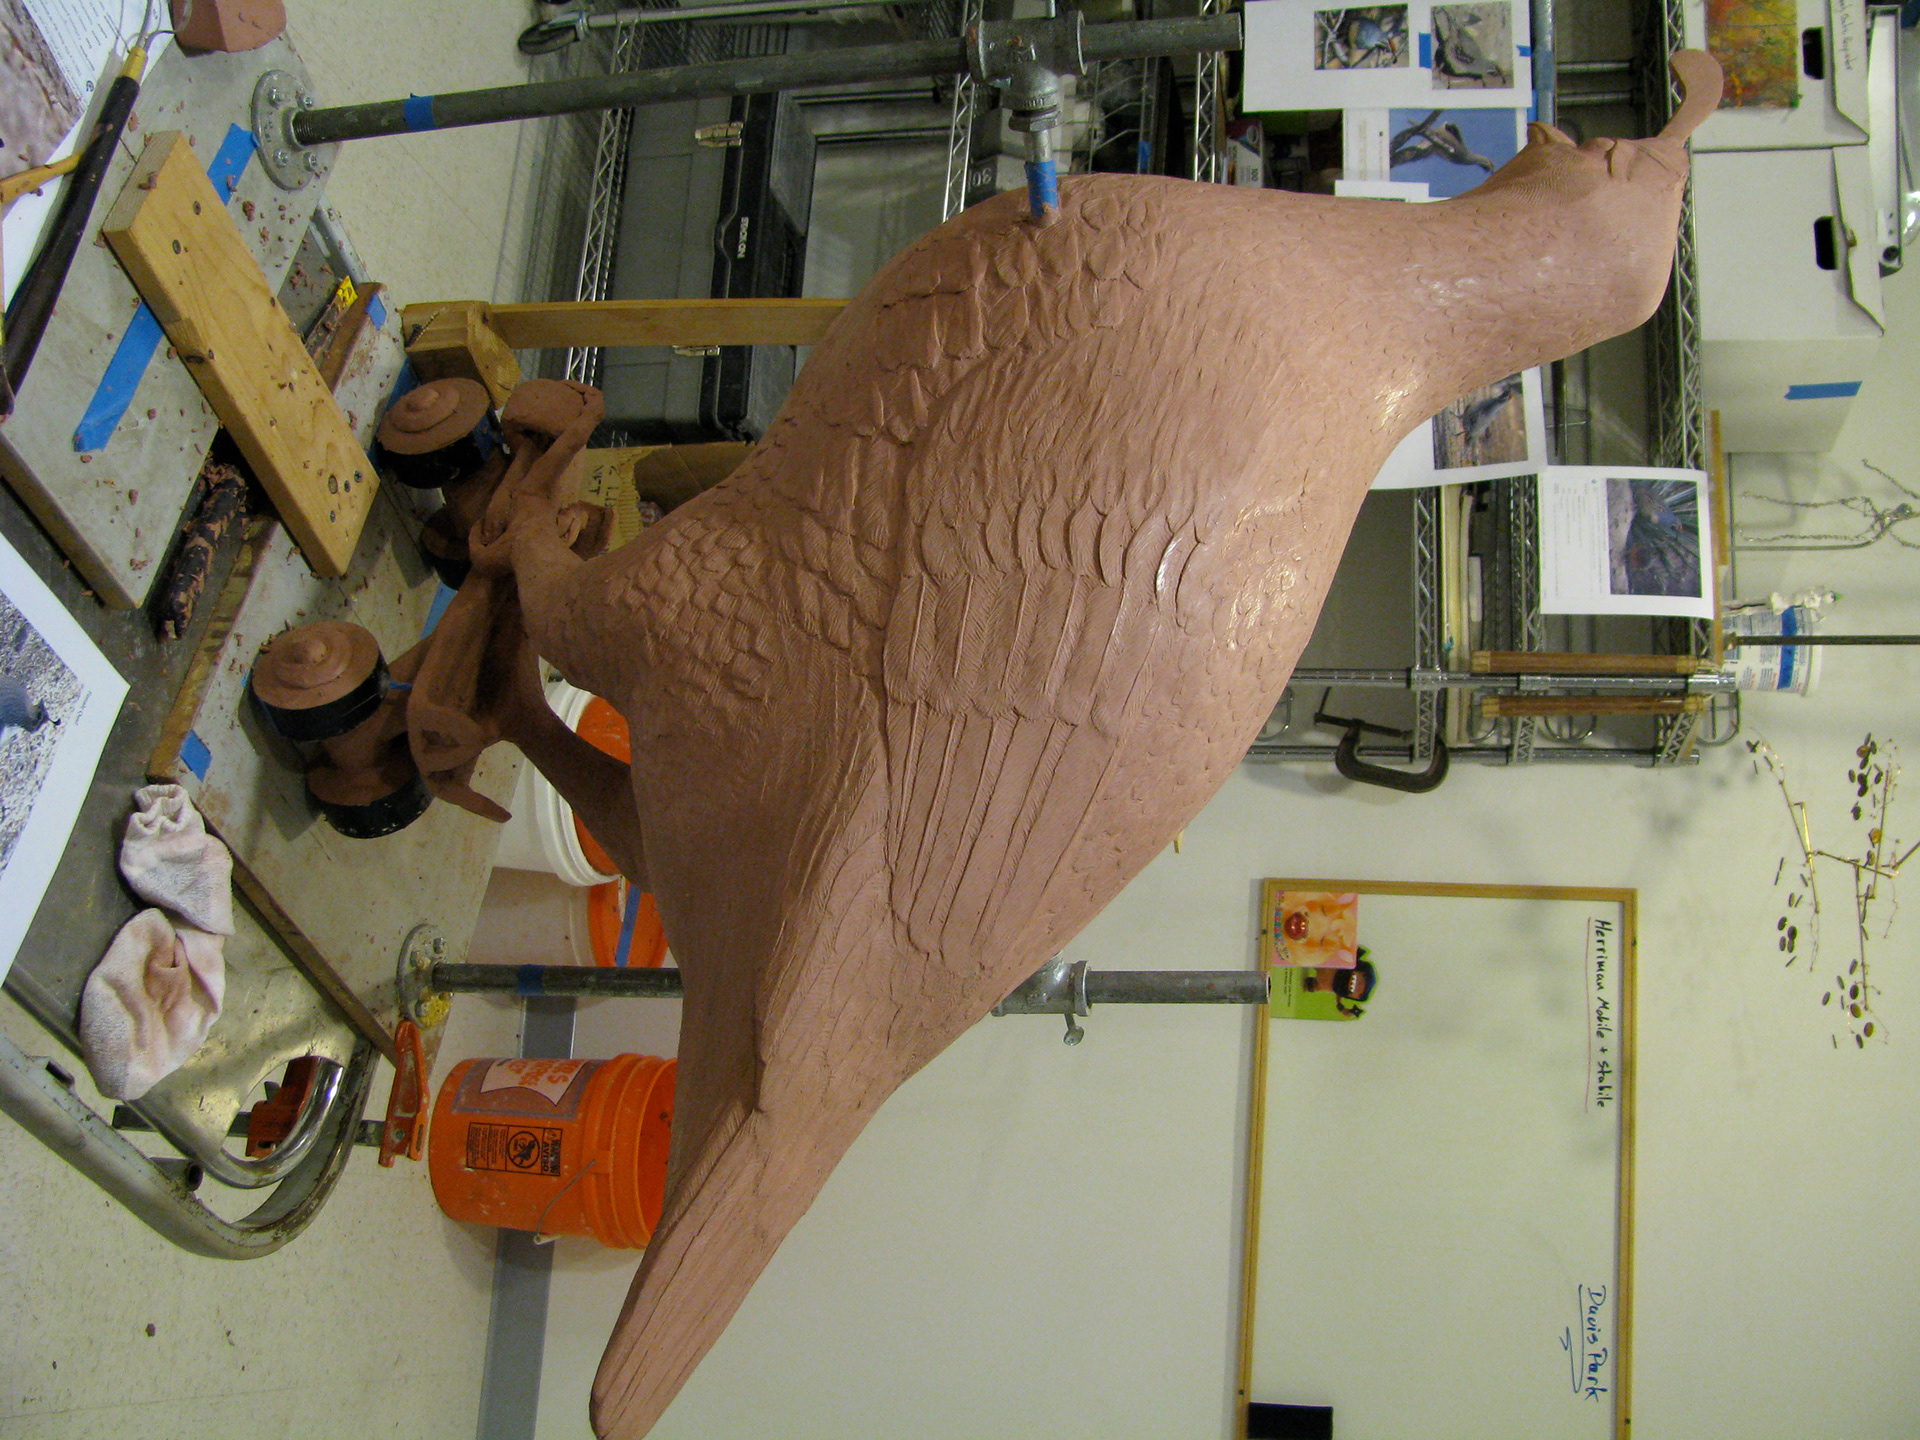
She is crouching a bit, keeping her balance. She has one toe raised on the edge of the skate- I like how big Quail feet are and wanted to show some character with them.
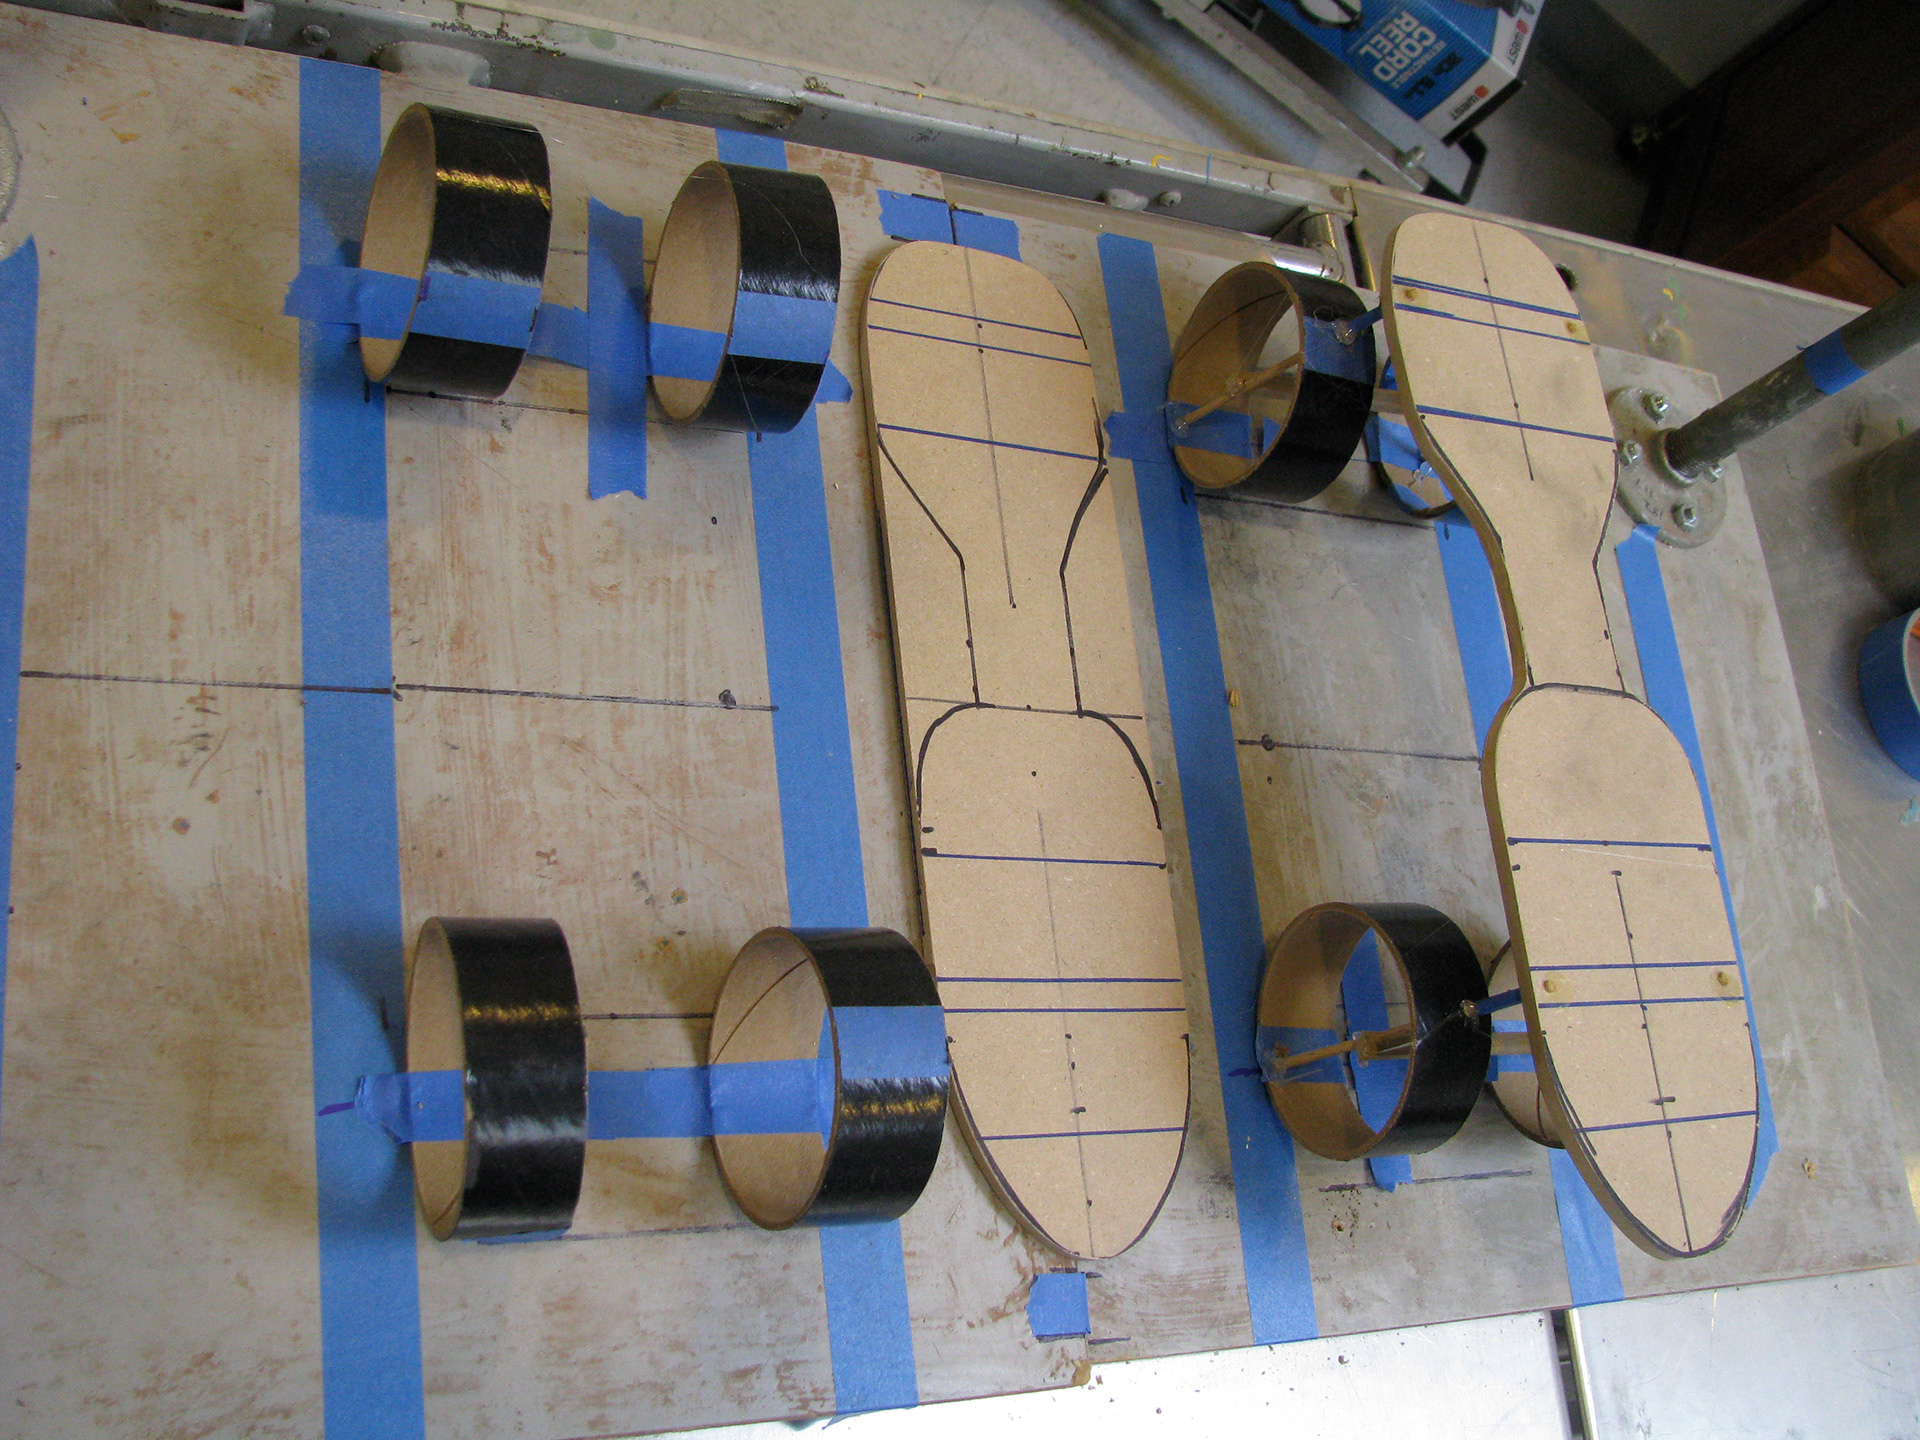
Parts and measurements for the skates.
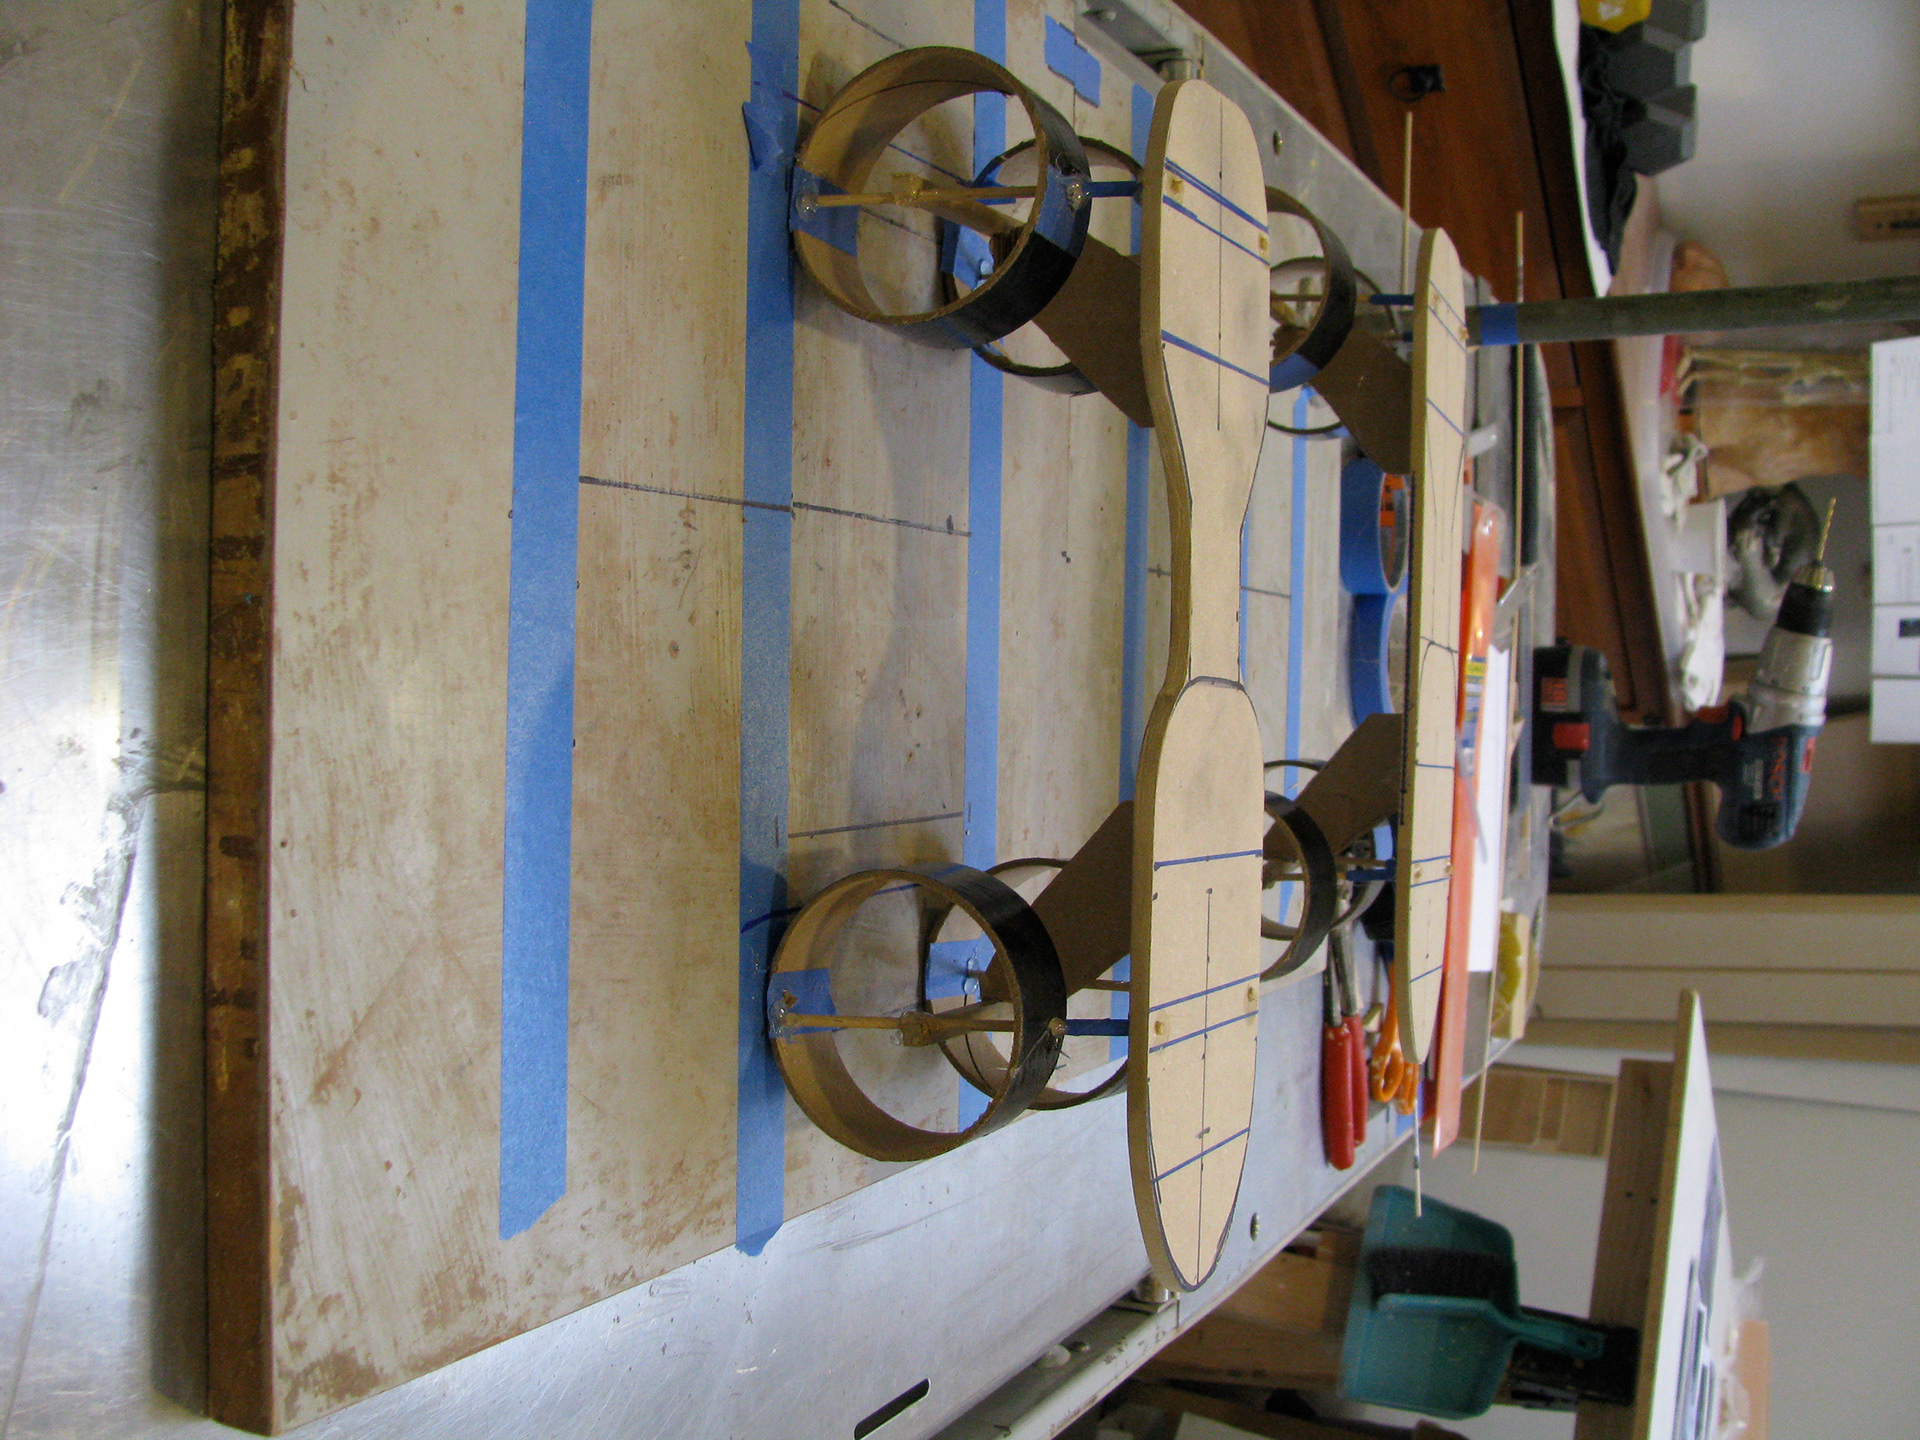
Skate armatures coming together.
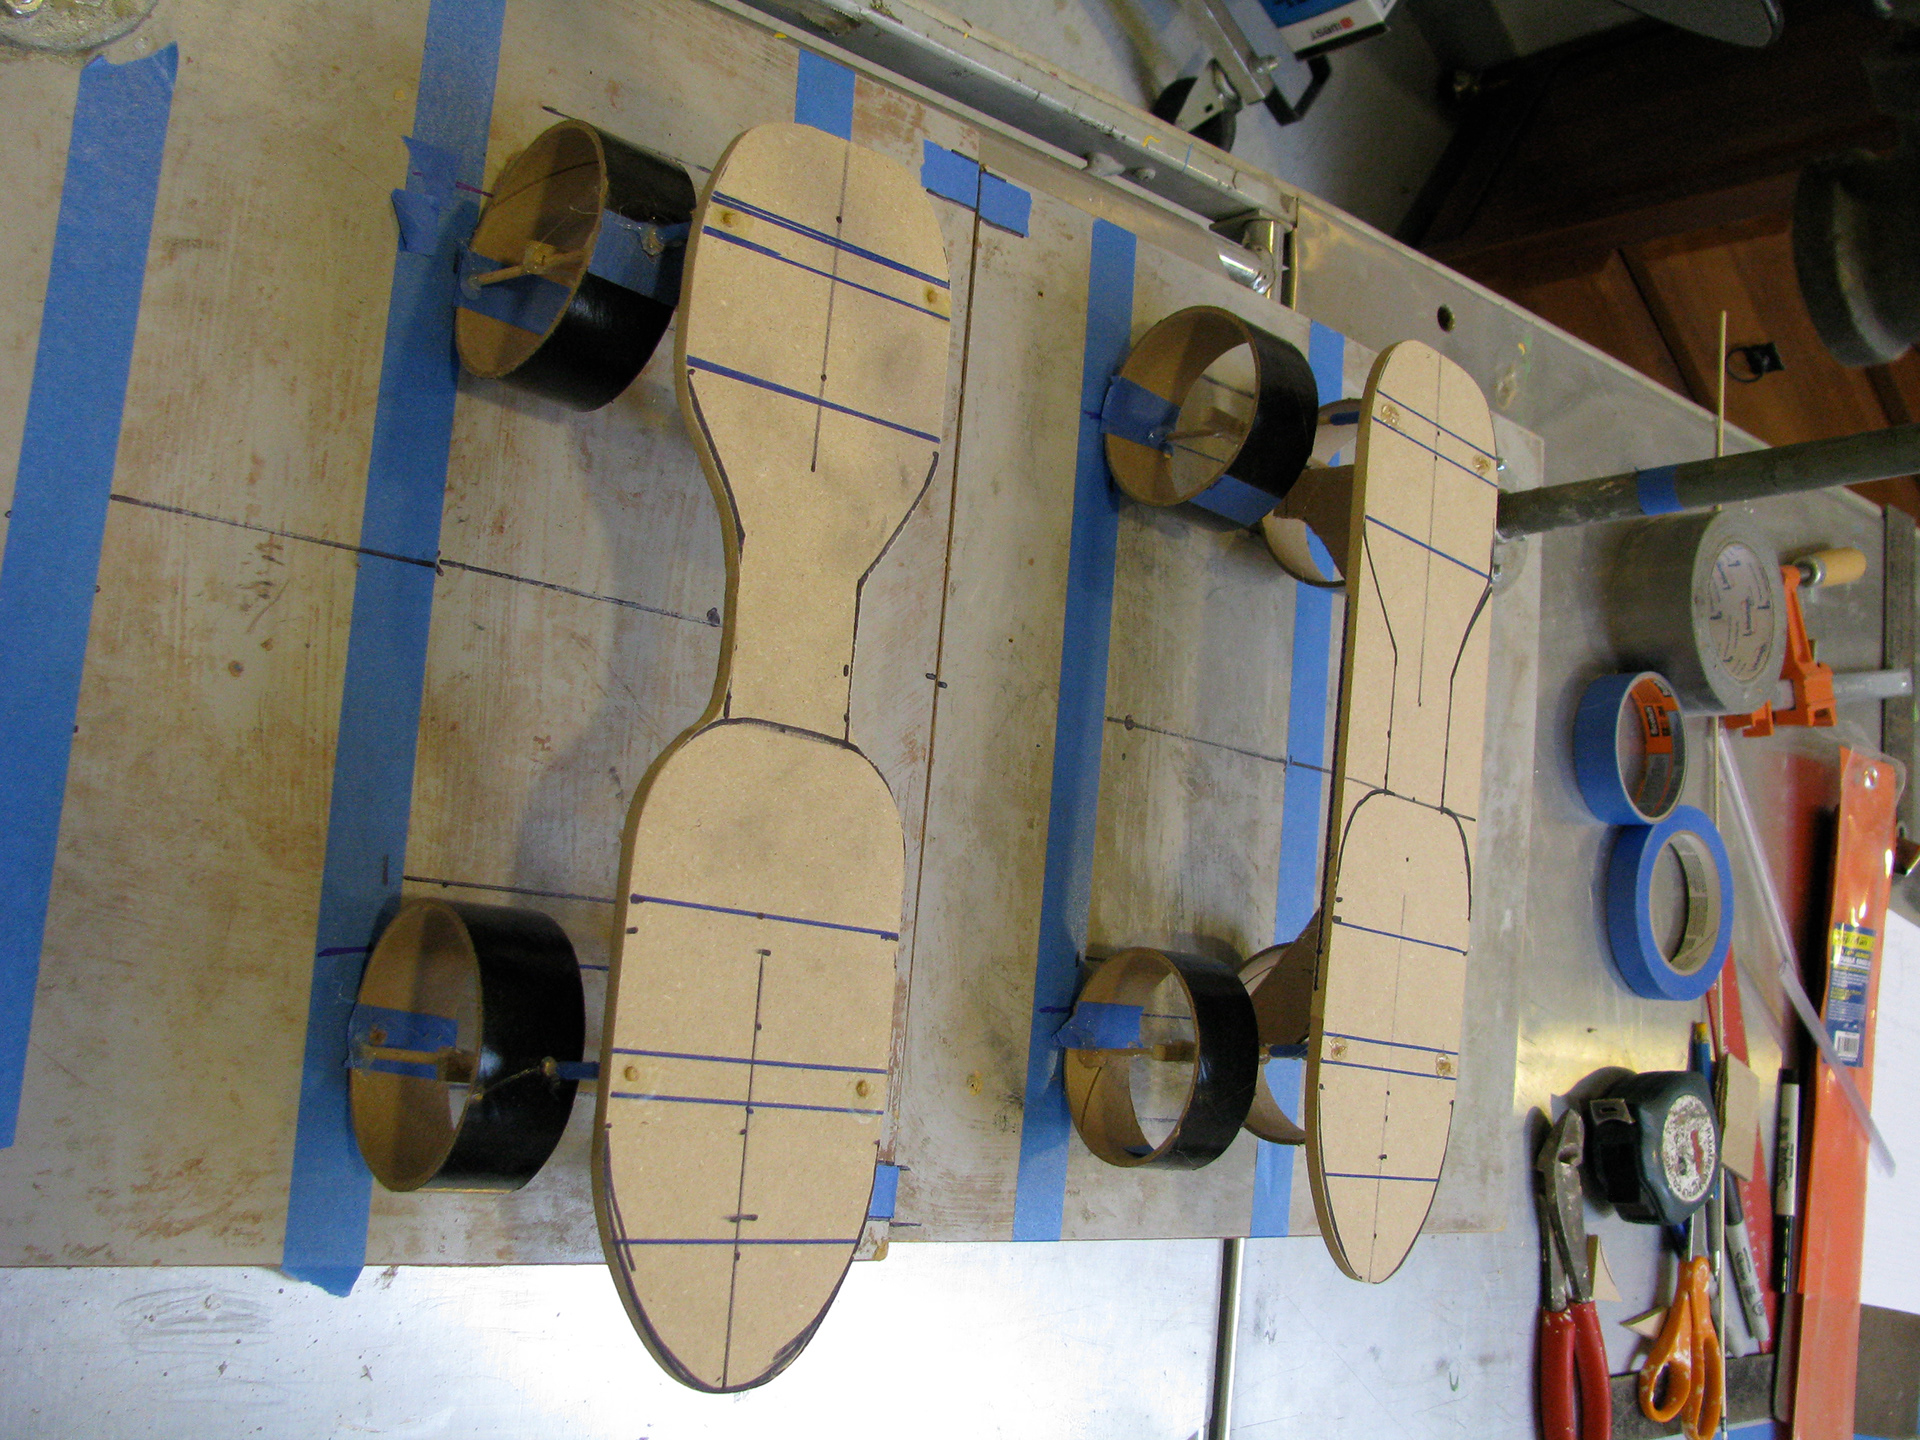
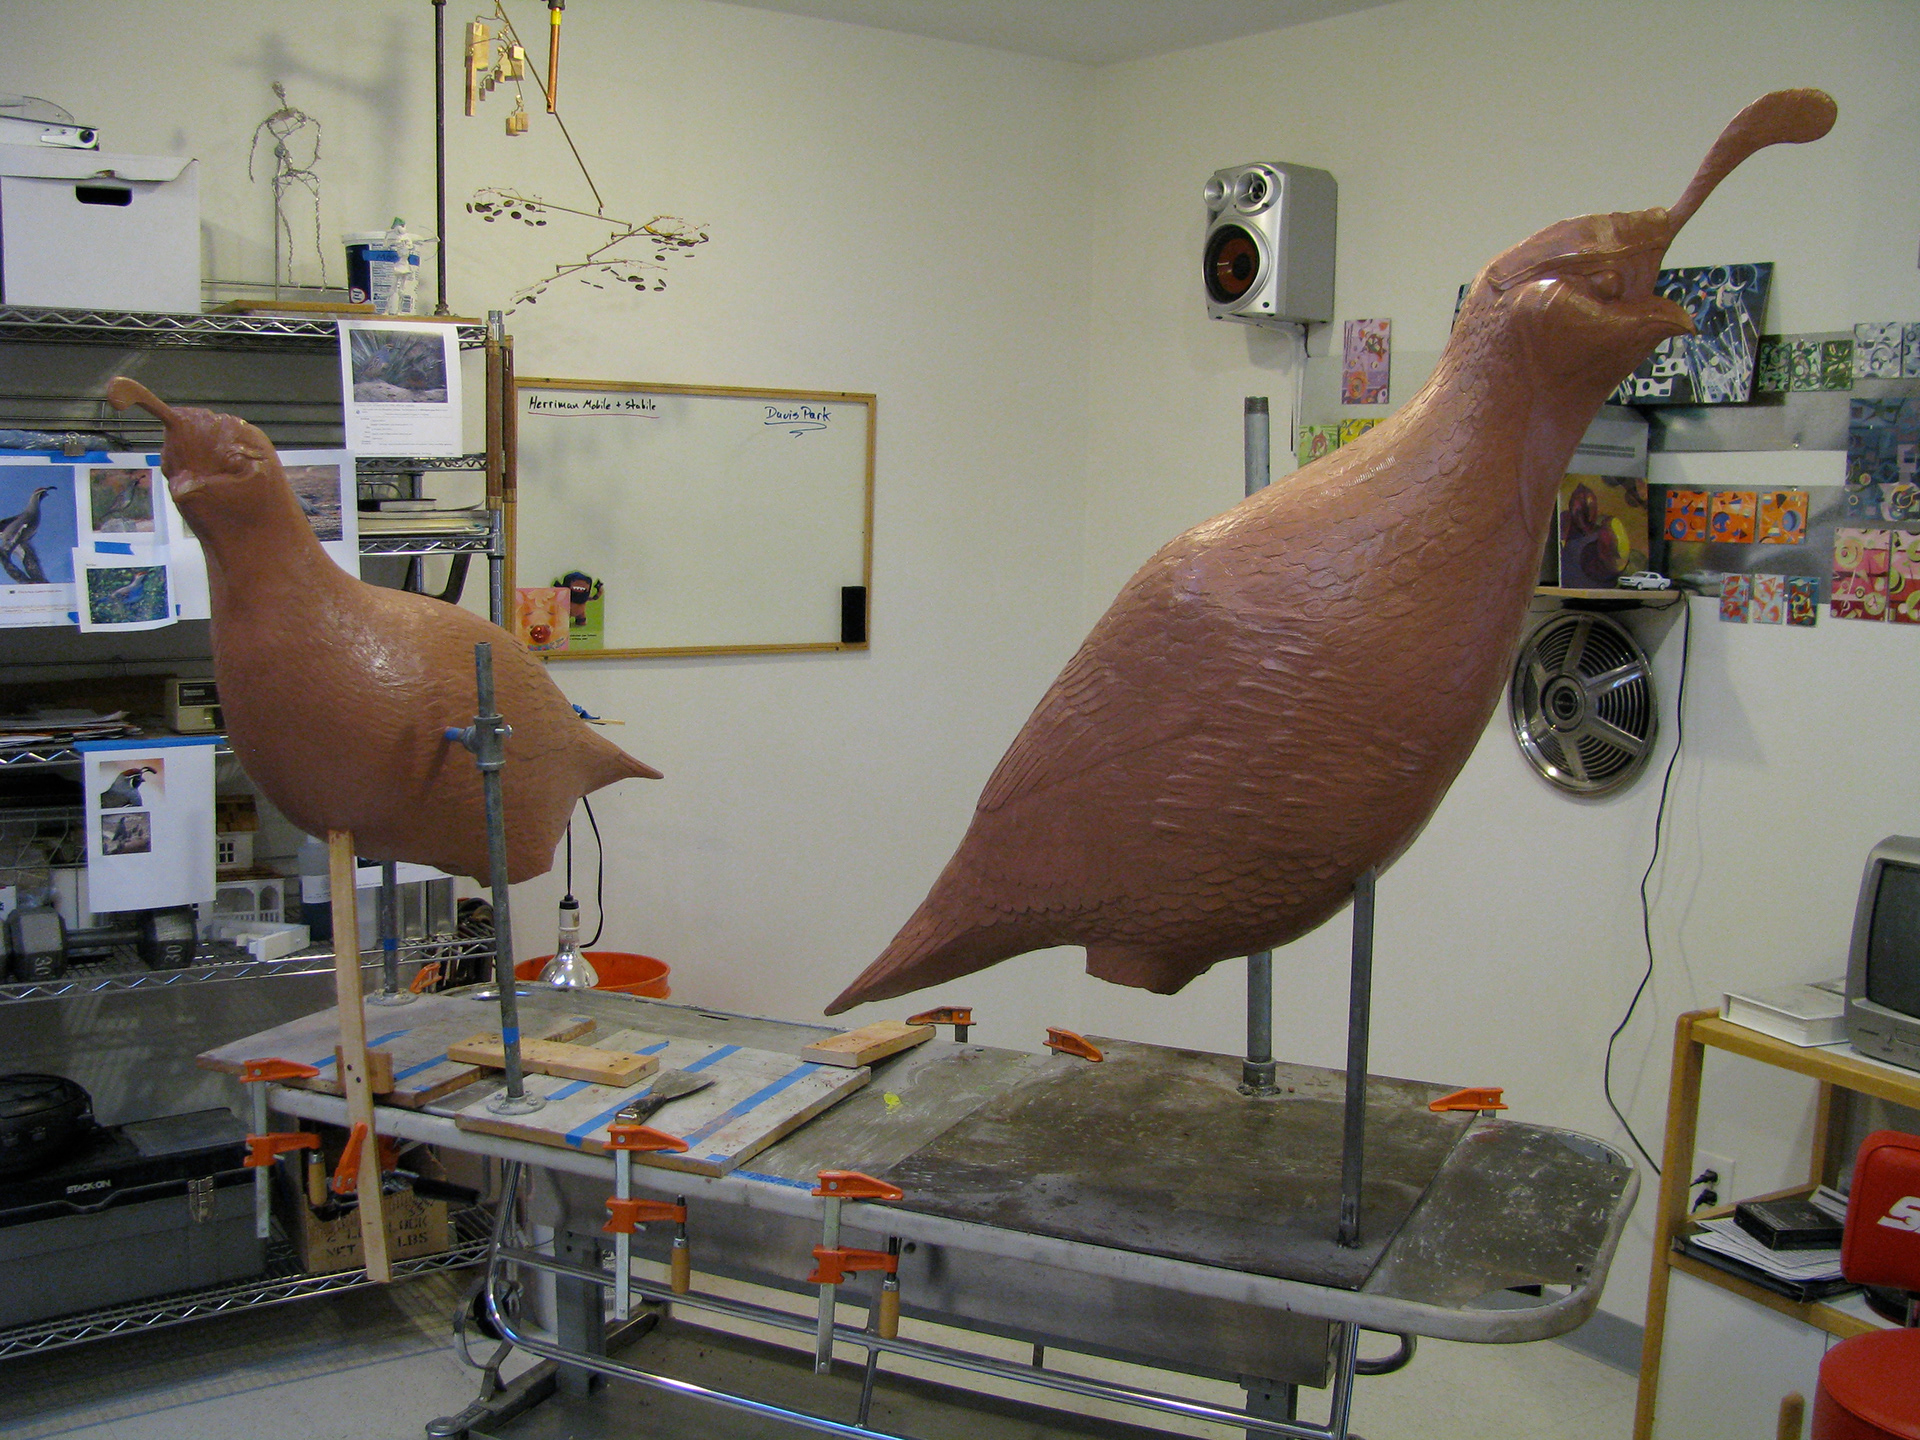
The Hen is formed with a complete skate, and the Buck is formed with the skate deck only- keeping things simple.
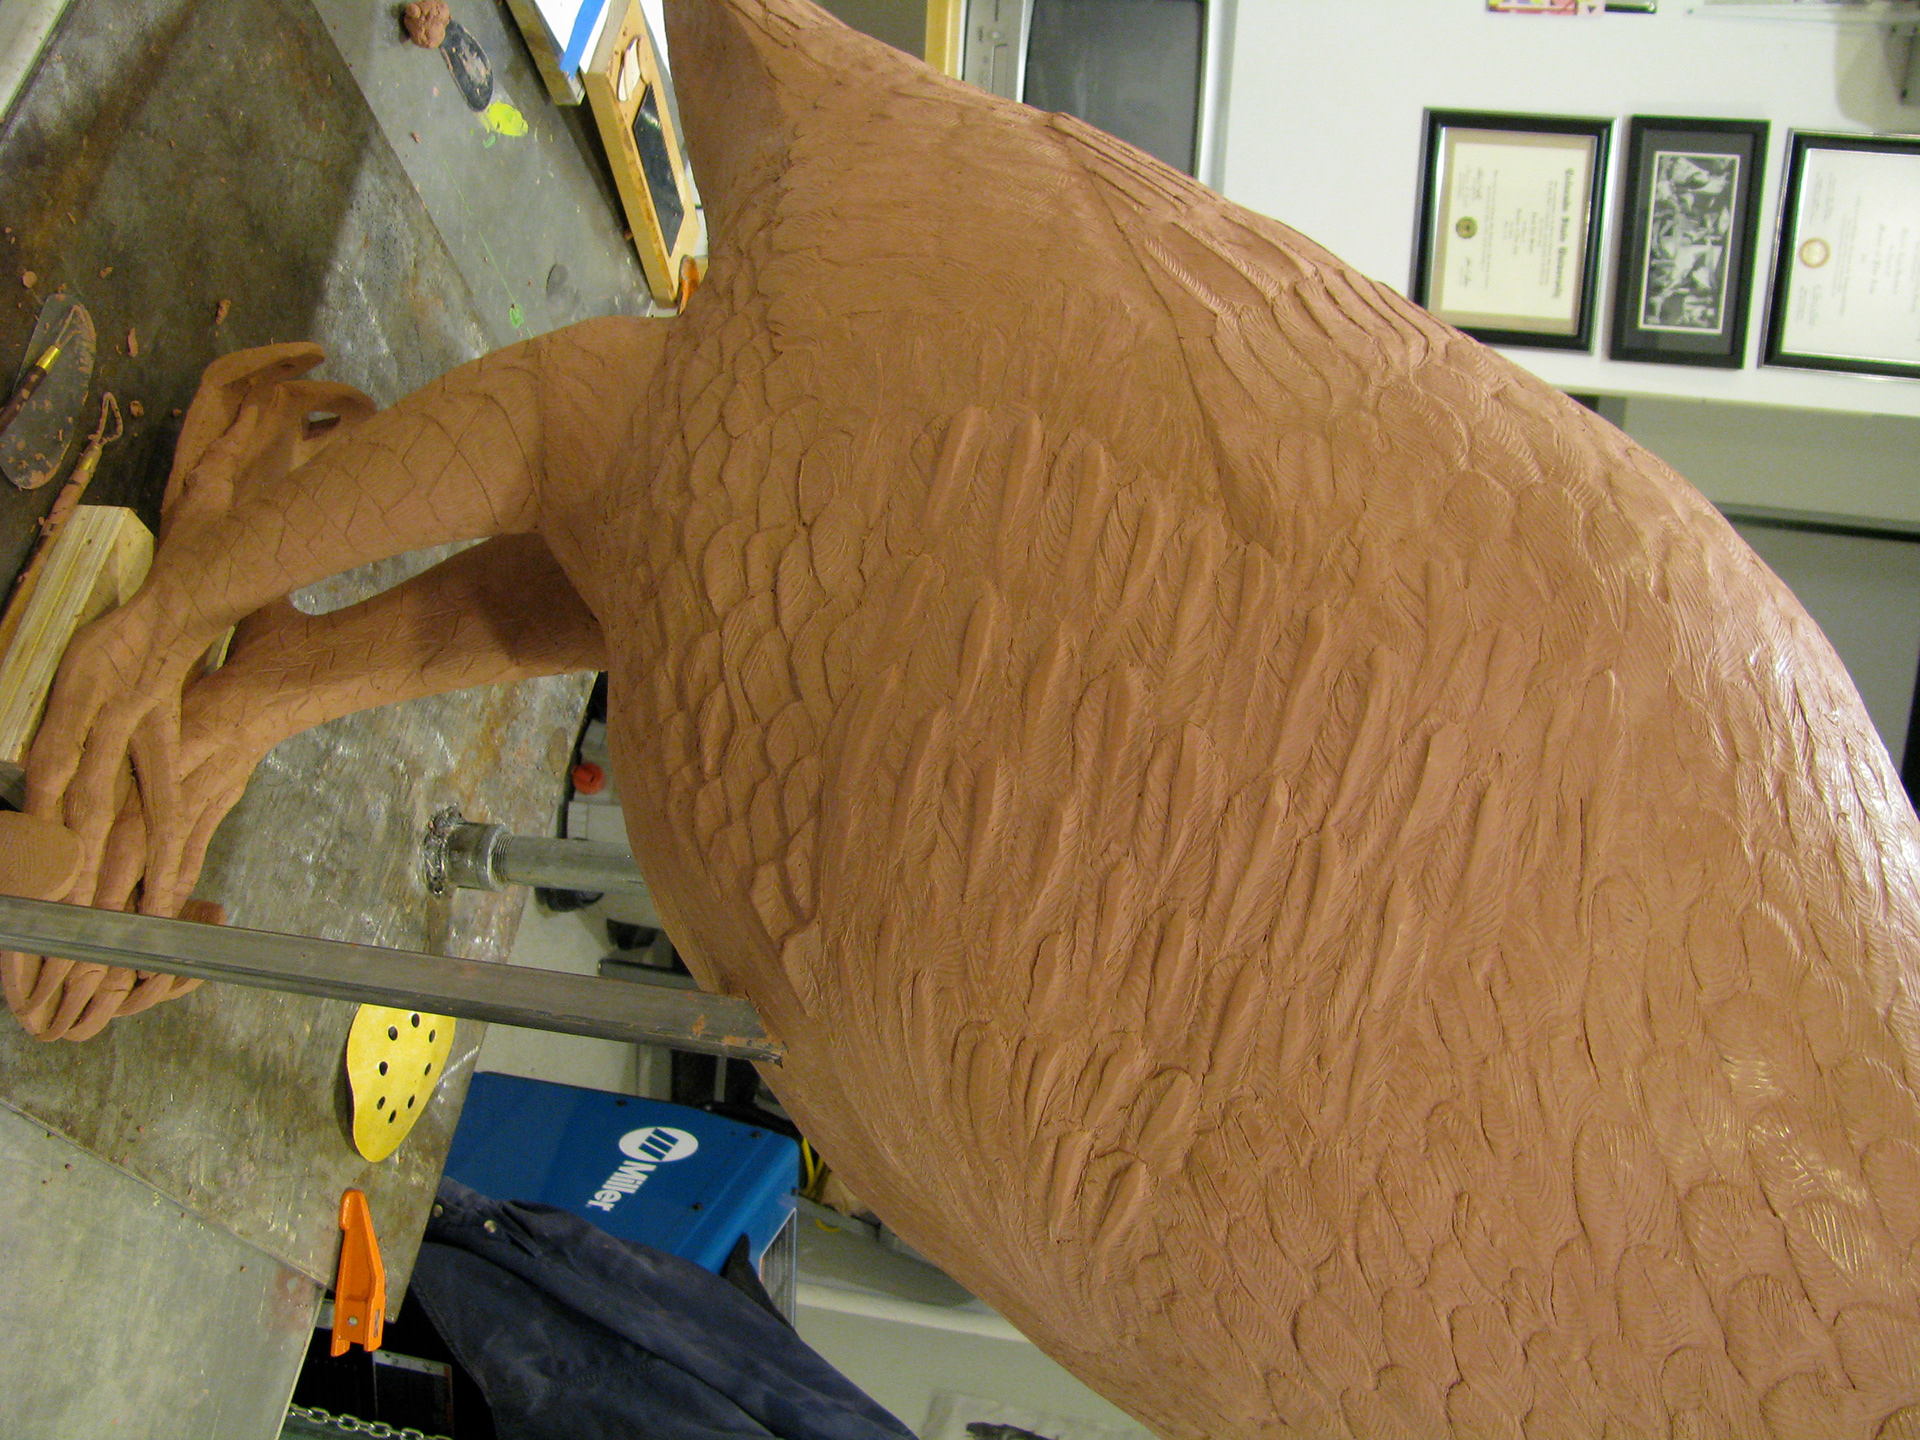
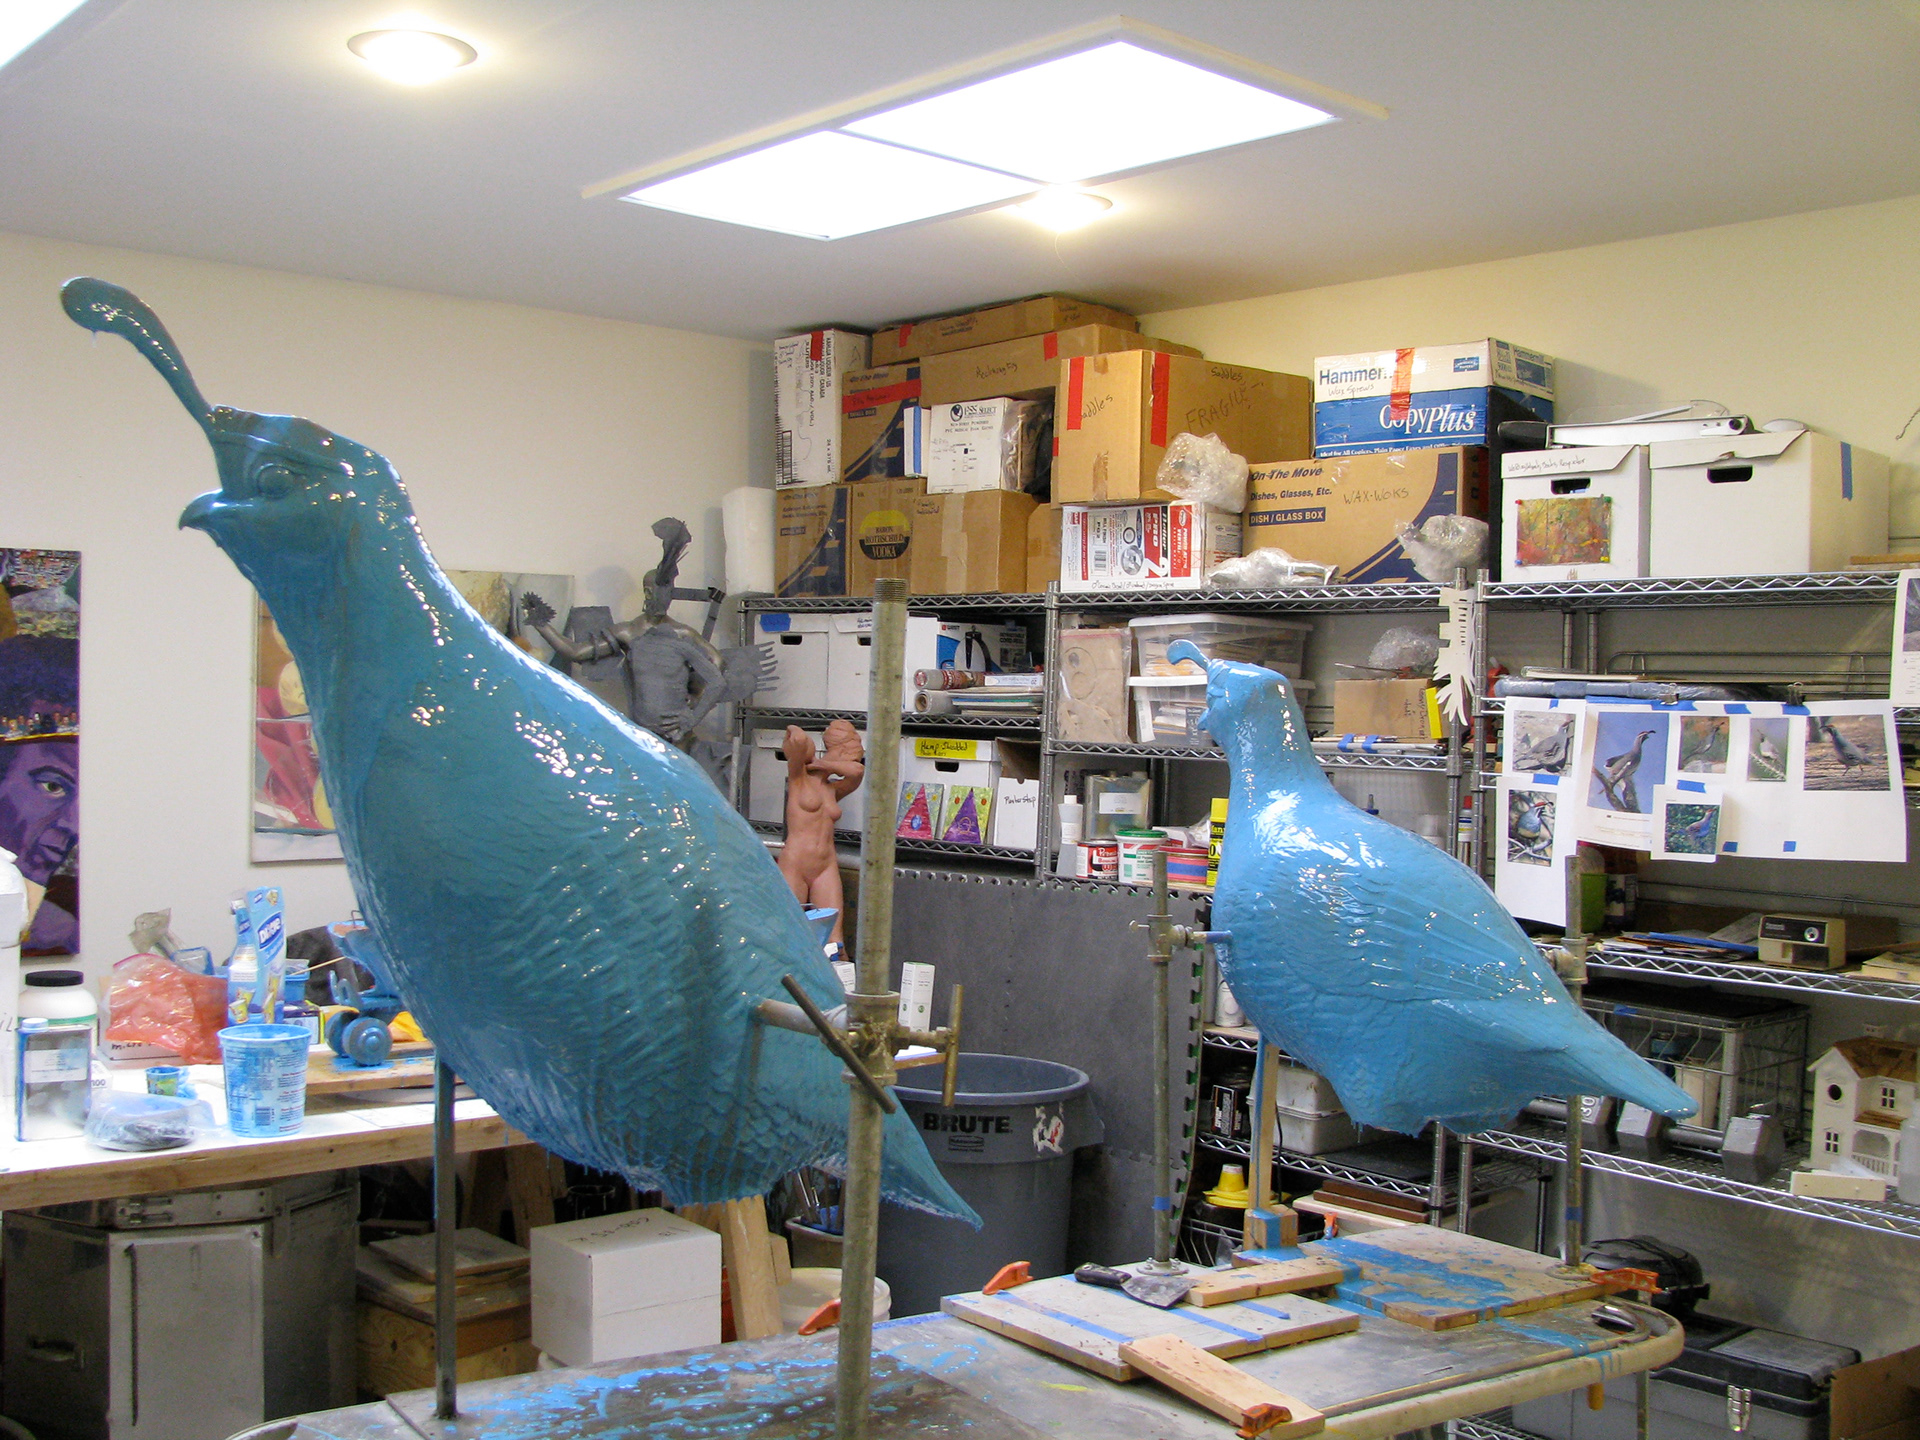
After some back and forth with surface detail, I decided I liked a look that reminded me of Henri Rousseau. His work is often called Neive / Primitive, and this relates to his great attention to surface with little regard / mastery of accurate physiology. Utilizing this approach allows the humor in the work to inform the experience, rather than falling into the trap of accurately illustrating. I sculpted every single feather and all the major texture variations of the various feather groups of a Quail- but the form of the bird is the mind's meaning of a bird, rather than an accurate illustration. In this manner the work remains playful, humorous, and approachable for all ages.
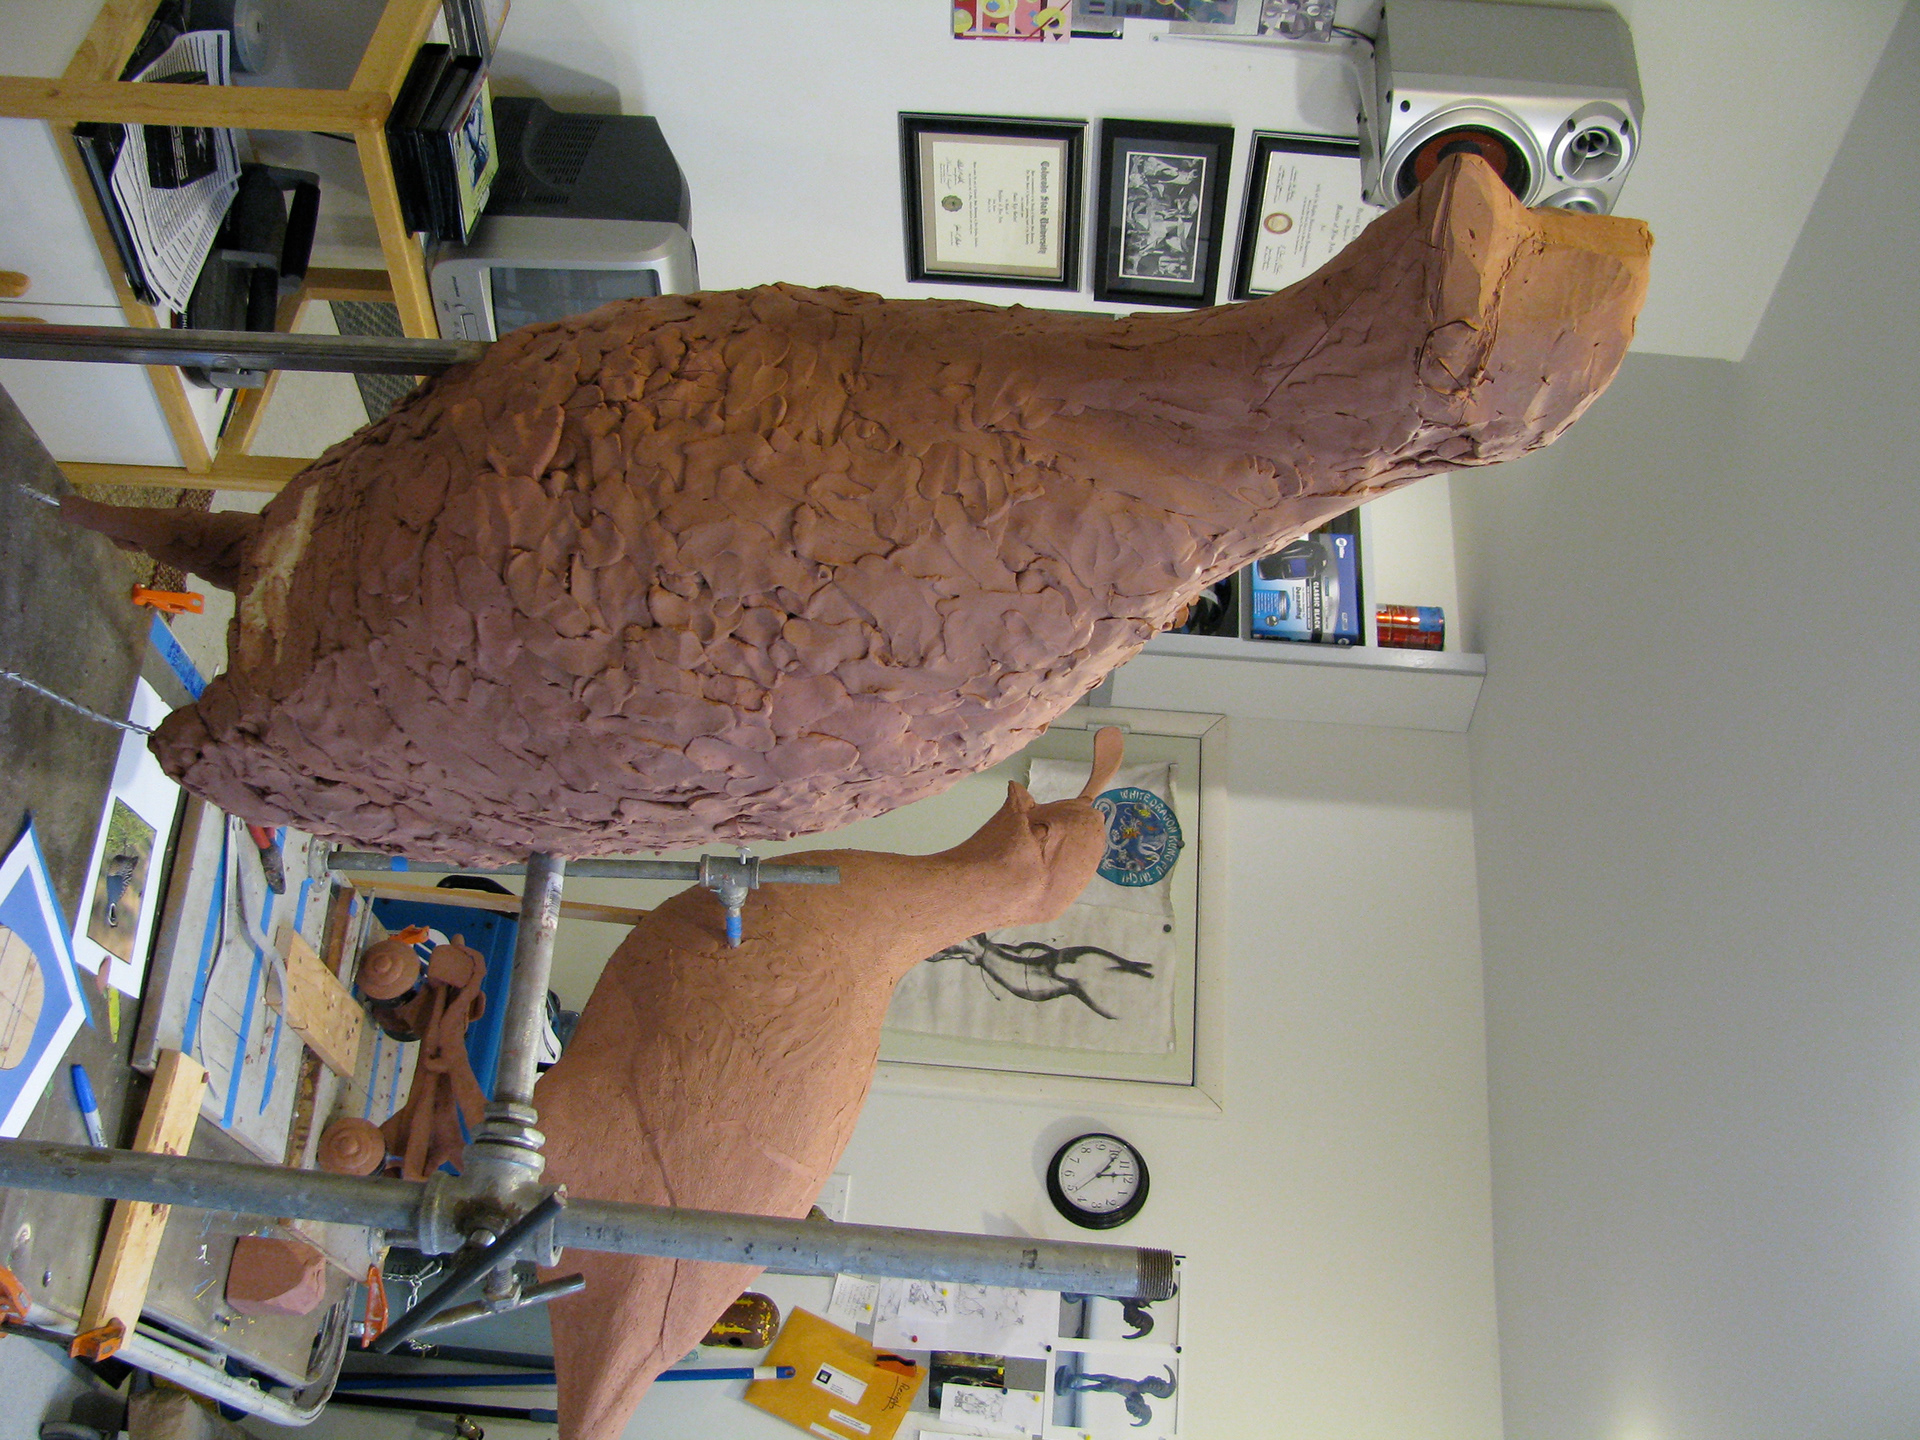
The Buck is much larger than the Hen, and I learned a valuable lesson with him that has helped in my work since: make the foam larger than the final piece and cut it back down to just below size. I stopped way too soon with foam, and he nearly became problematic in weight.
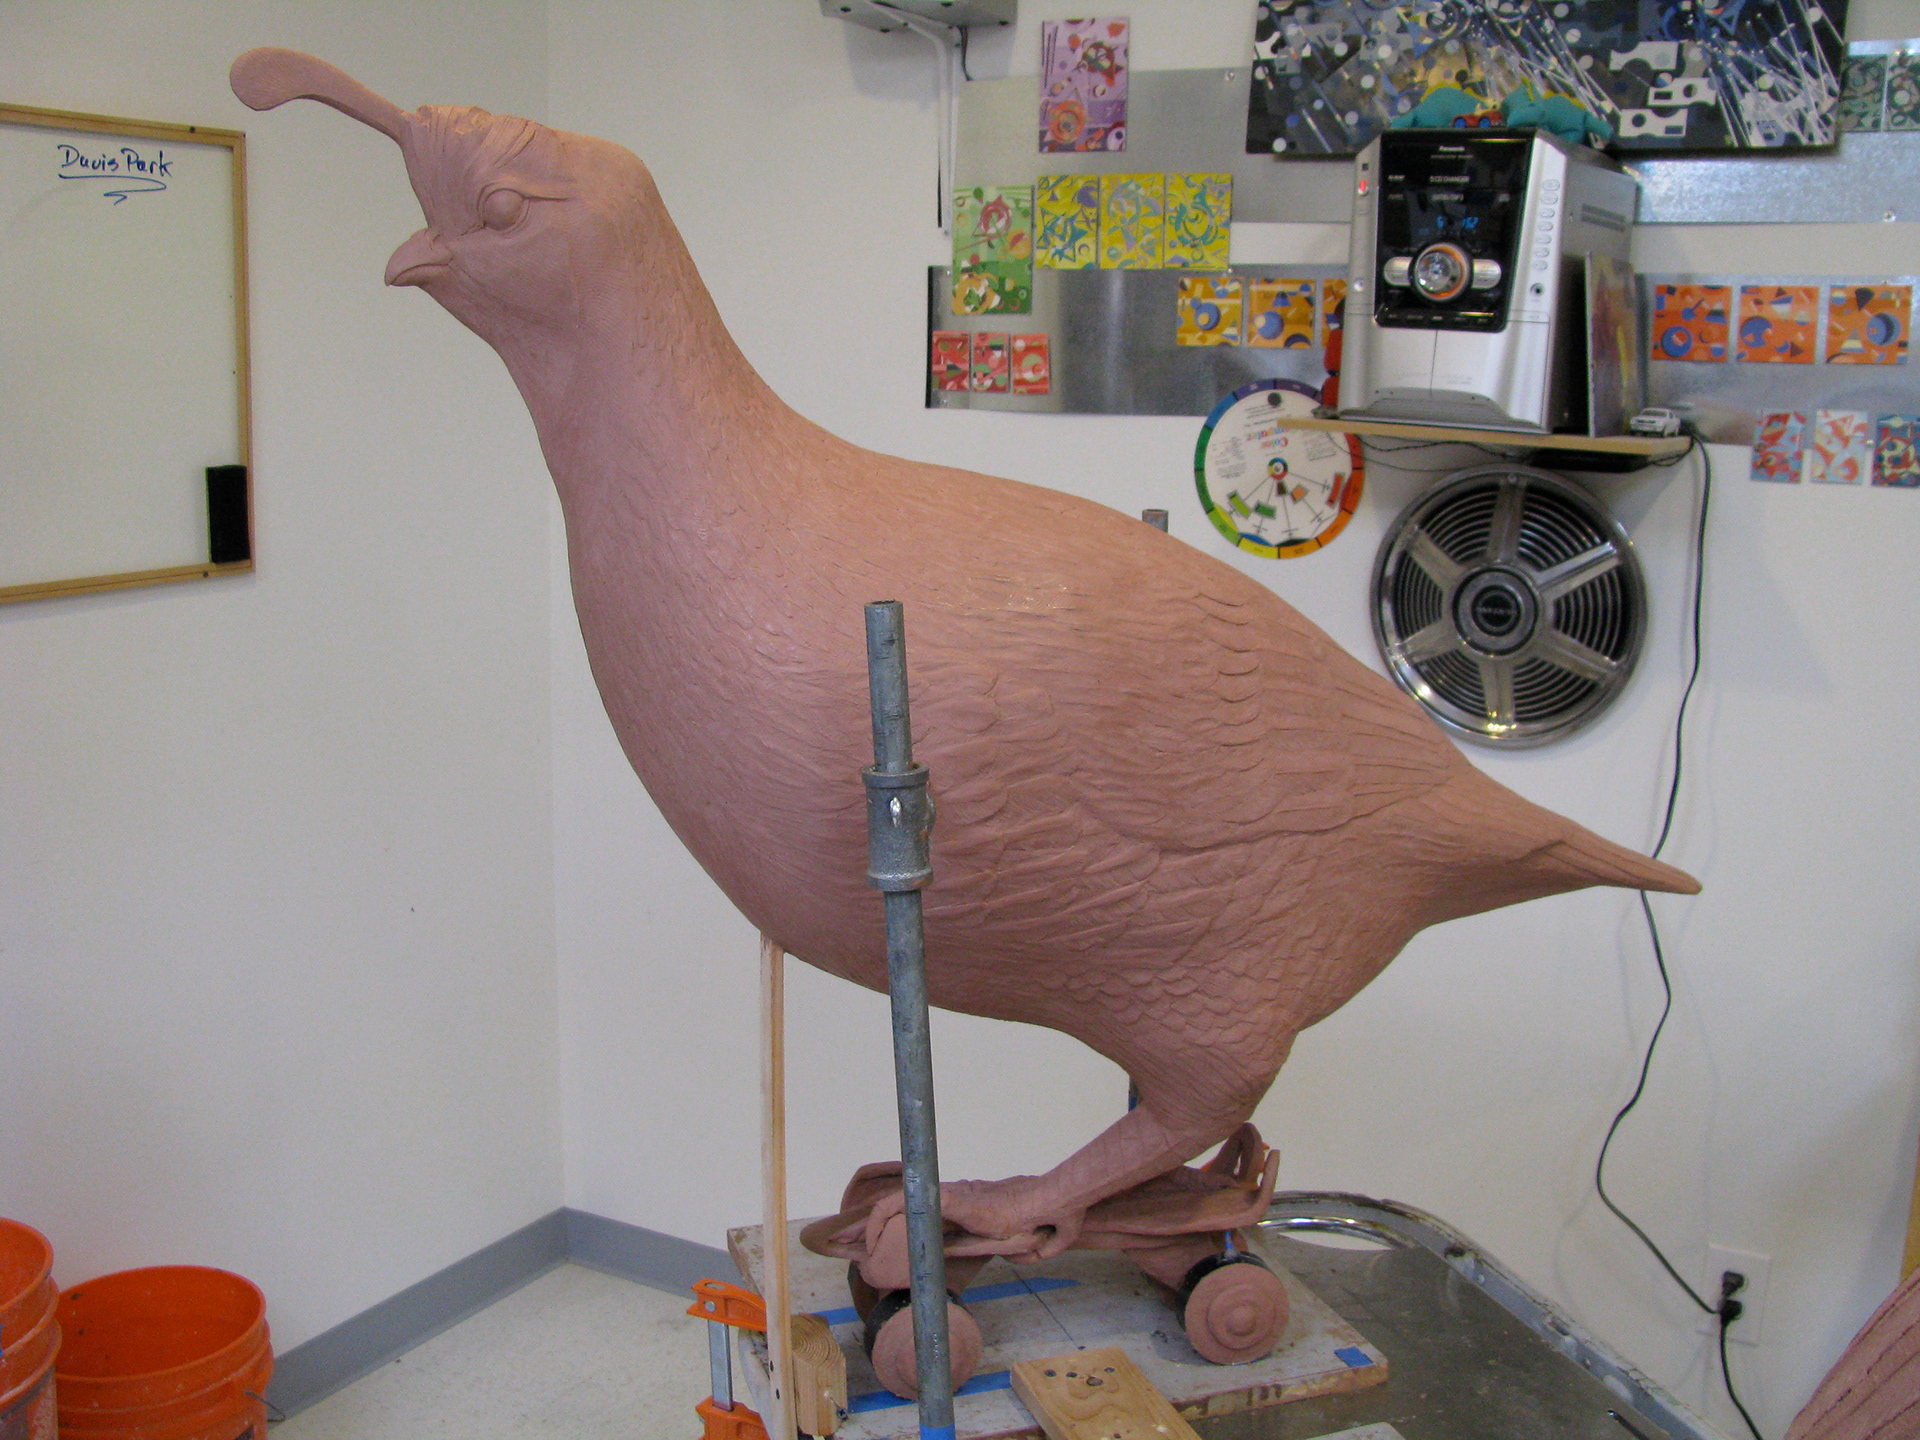
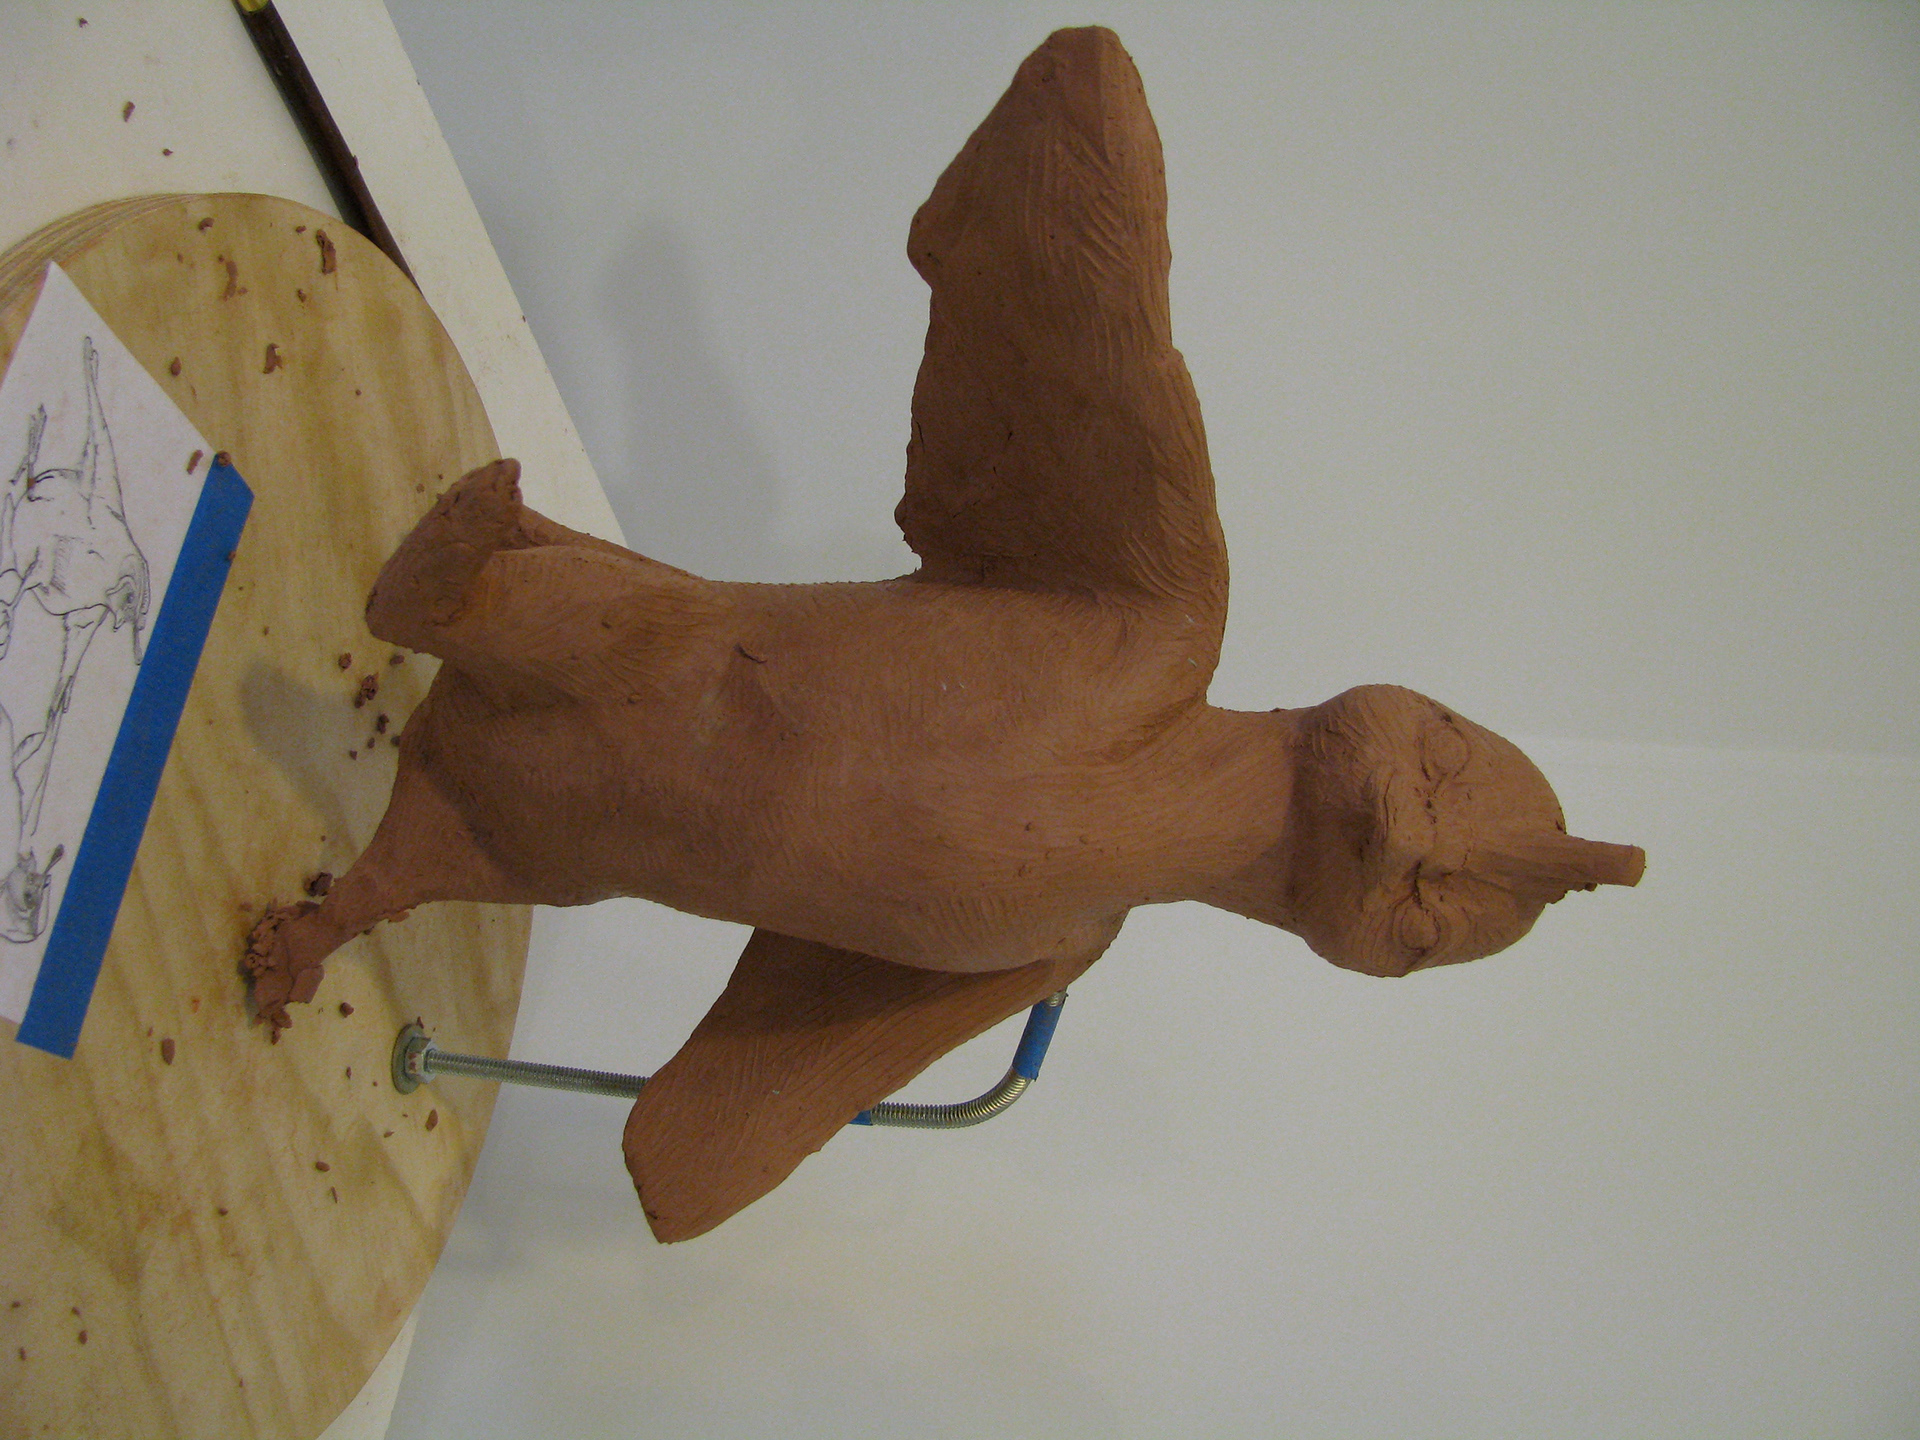
Cartoon phase for the Buck. There is a bit of back and forth when finding the right amount seriousness- something Rousseau didn't have to grapple with...

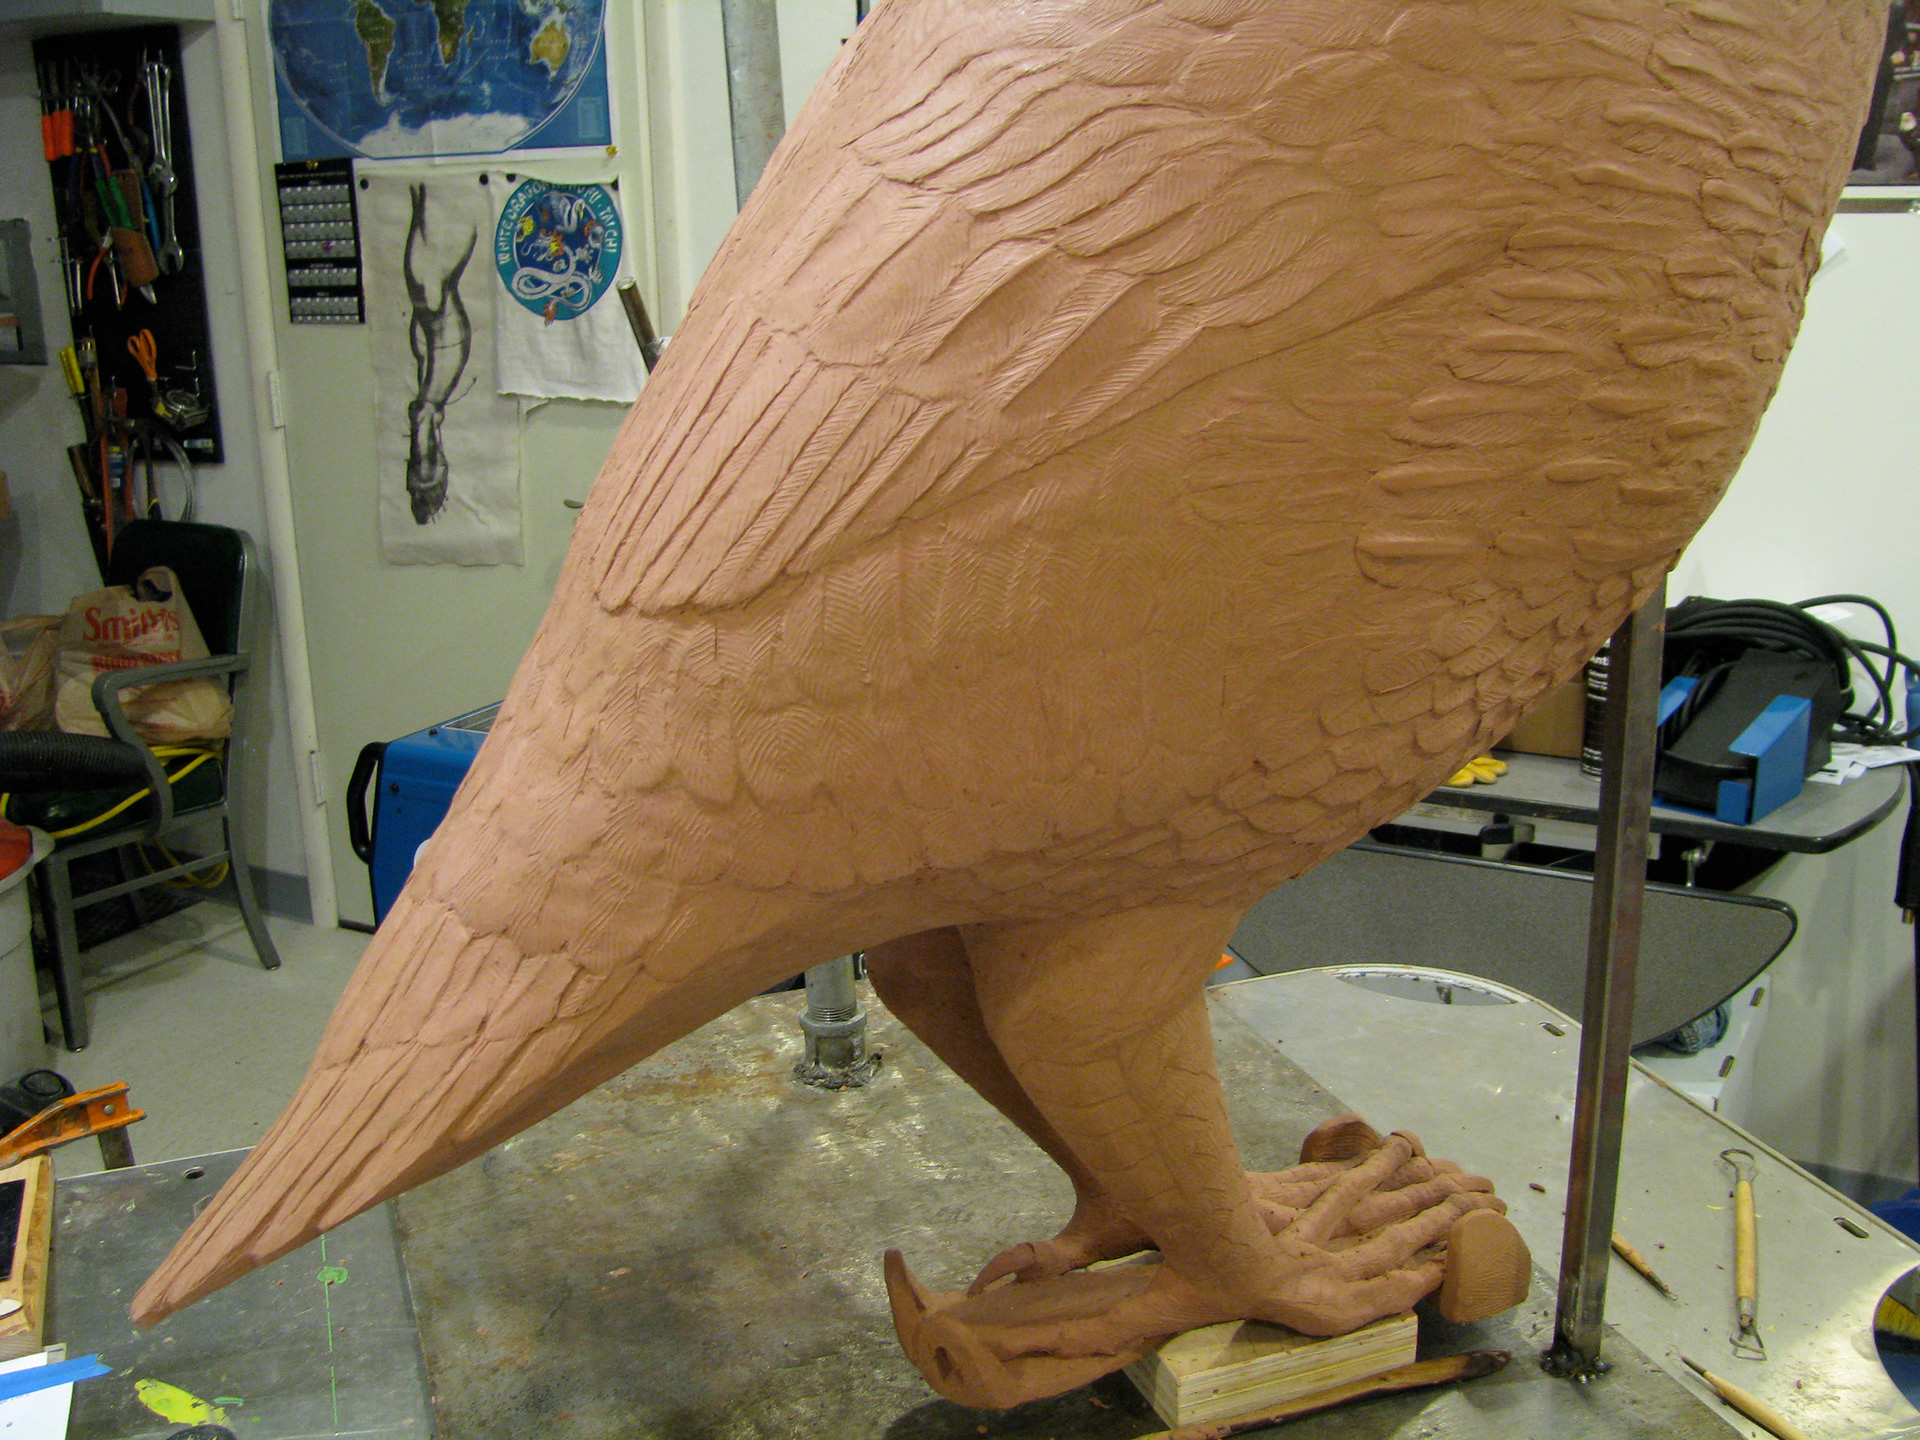
Quail are ground birds, so the side feathers and leggings are tough armor for bee-bopping through chaparral.
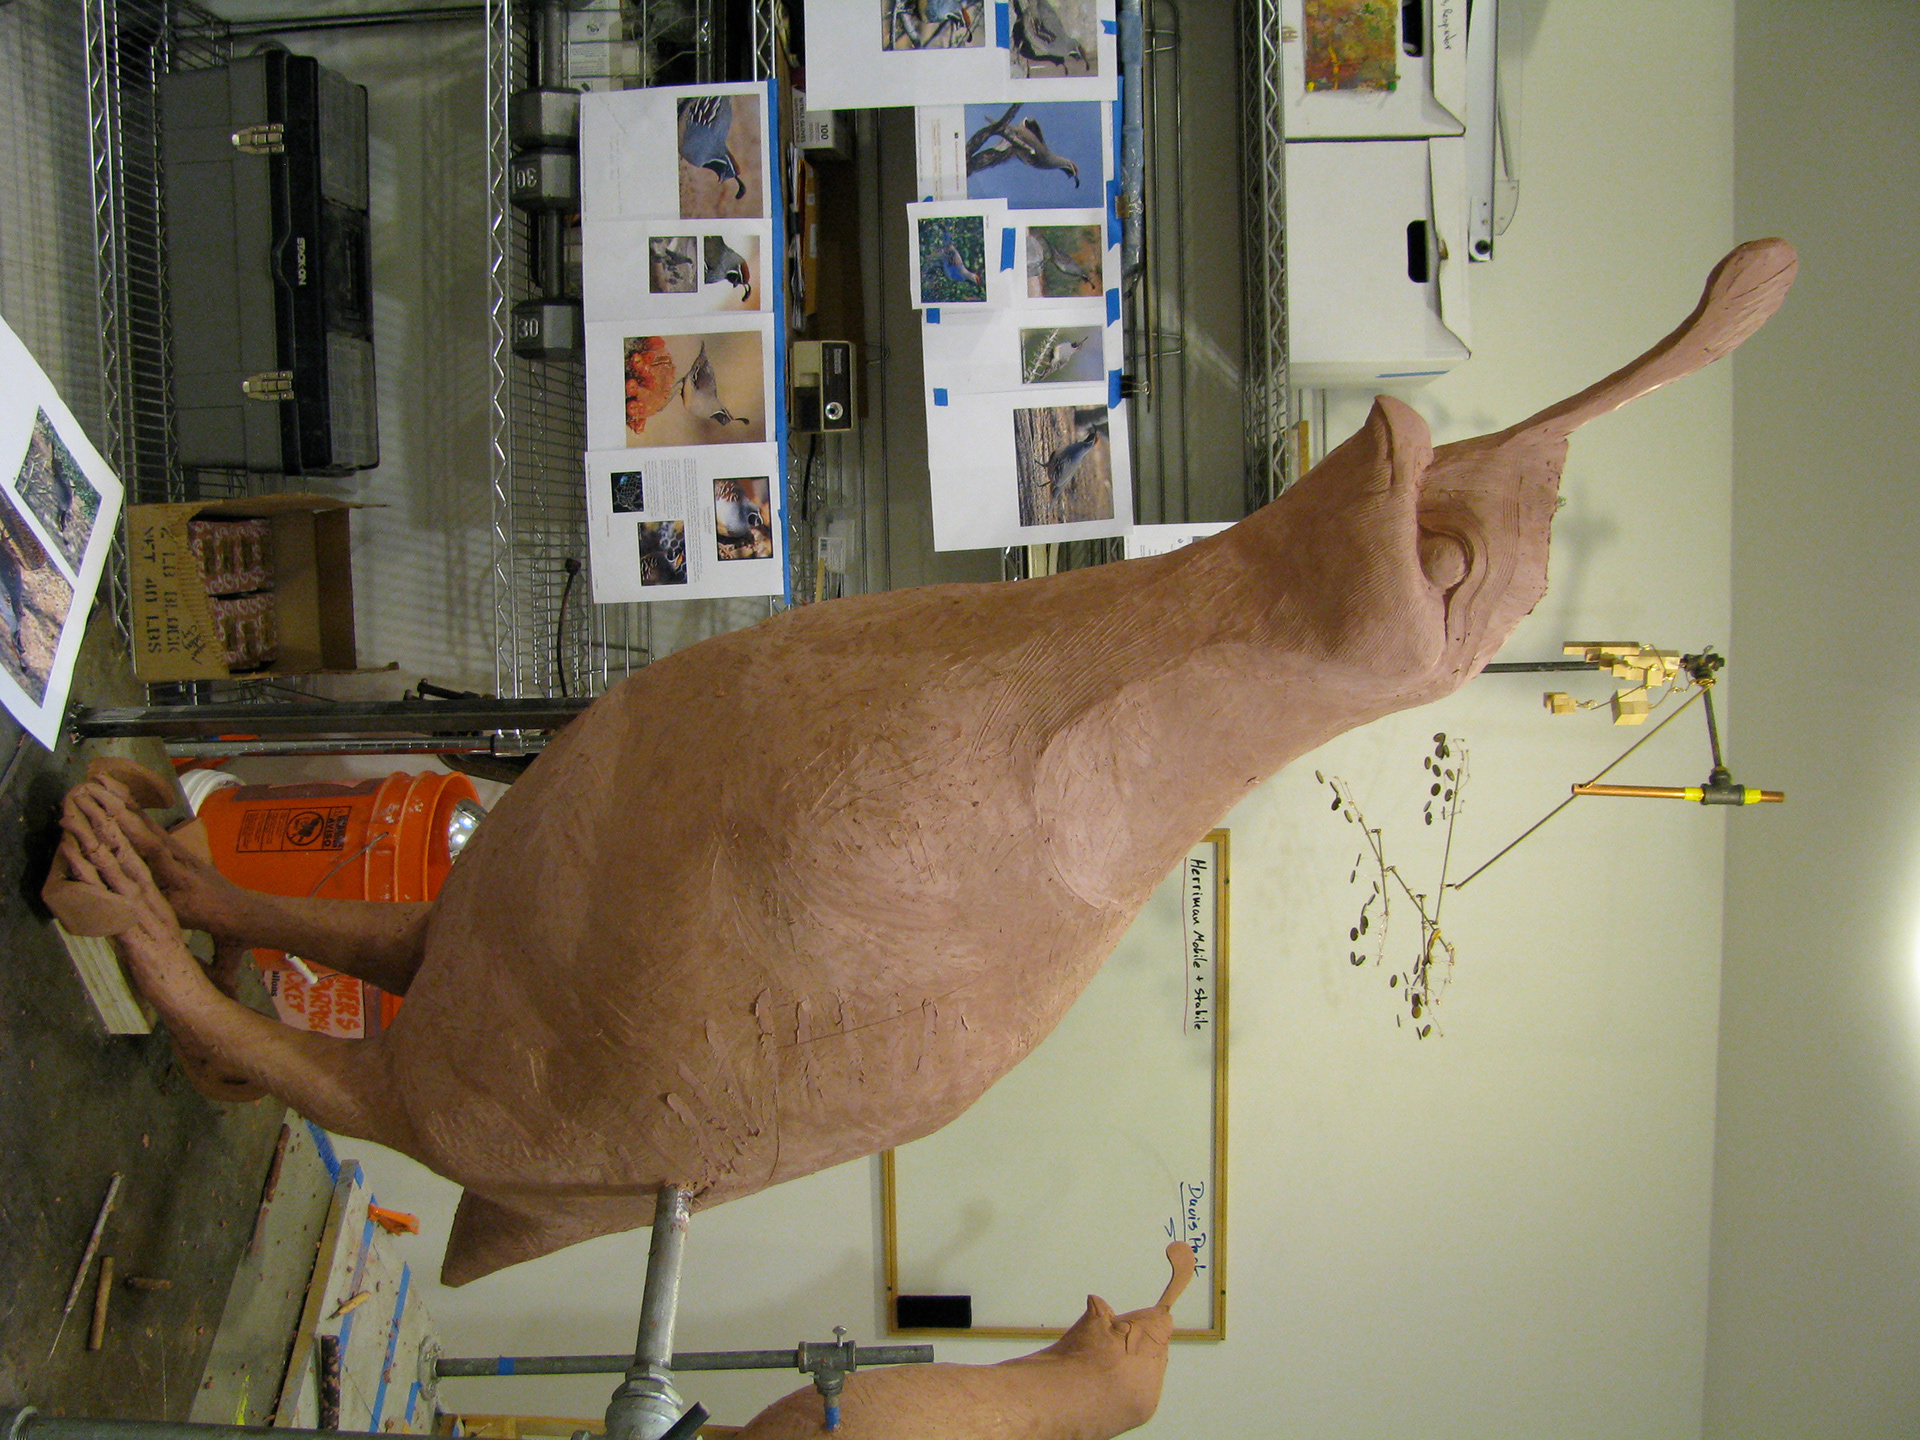
He is really gigantic. The largest volume I had ever formed. It took many books on tape to form out all those feathers.
Lots of back and forth with the Hen and Buck faces, as I worked things out for the bronze stage when I'll need to offset patina with polished areas and textural variations.
Having a bird this big have a happy disposition is key to keeping him approachable for little kids- and having it meet my odd standard of unreal reality. It took some back and forth.
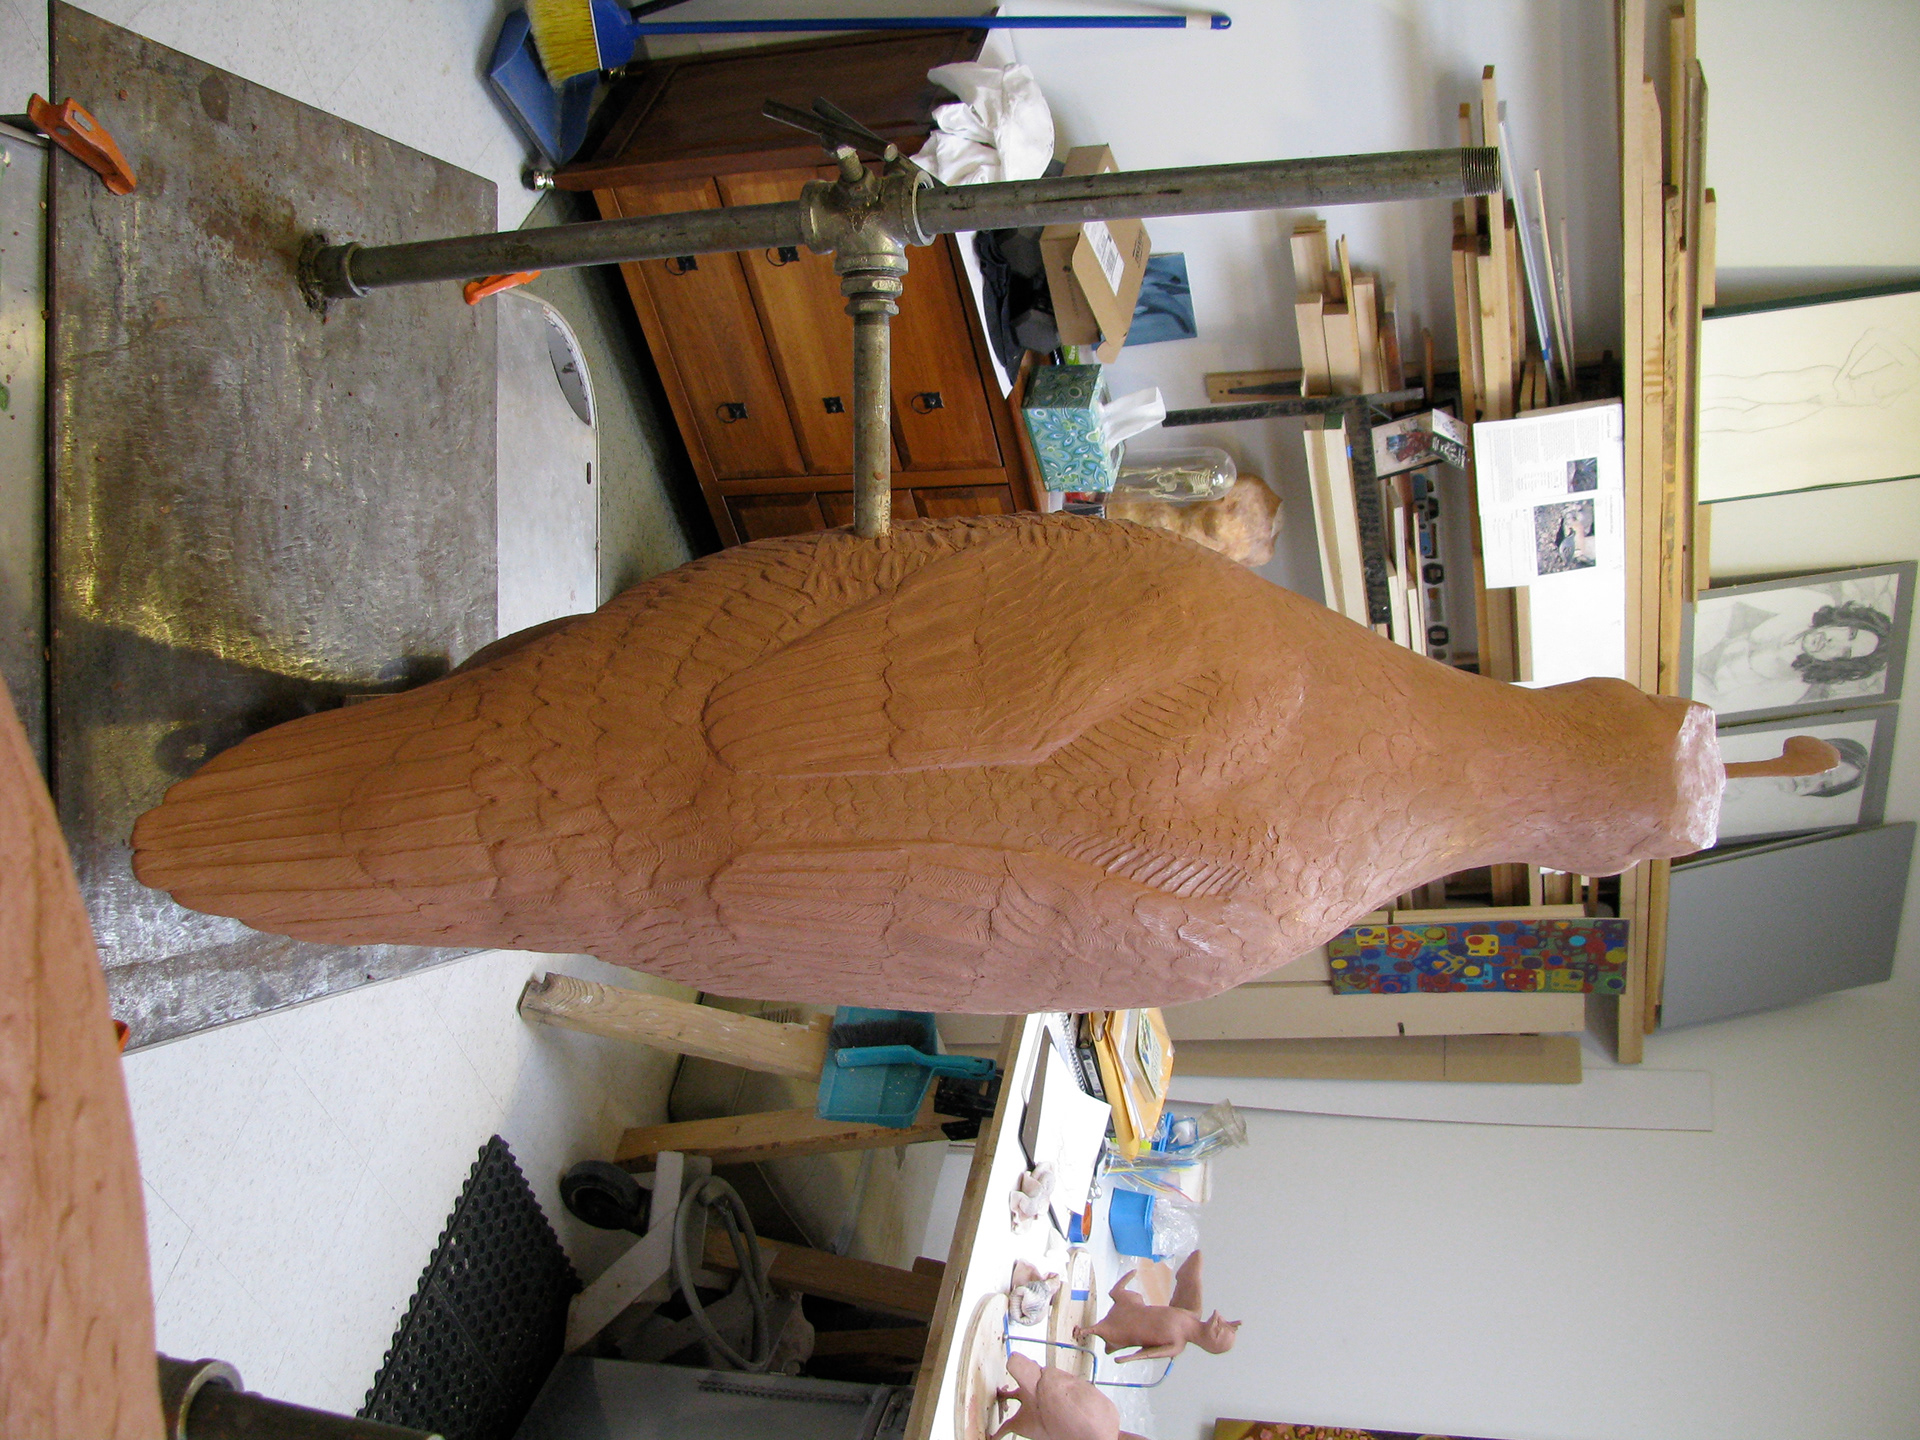
I thought I had things done, realized I needed to strip out all the chaparral feathers, boom out his chest volume, adjust his legs v. belly, and remake all of the feathers in a different manner for more snap with patina.
Moved the wing again, and am building out and erasing and building new layers of feathers between the tail and wing.
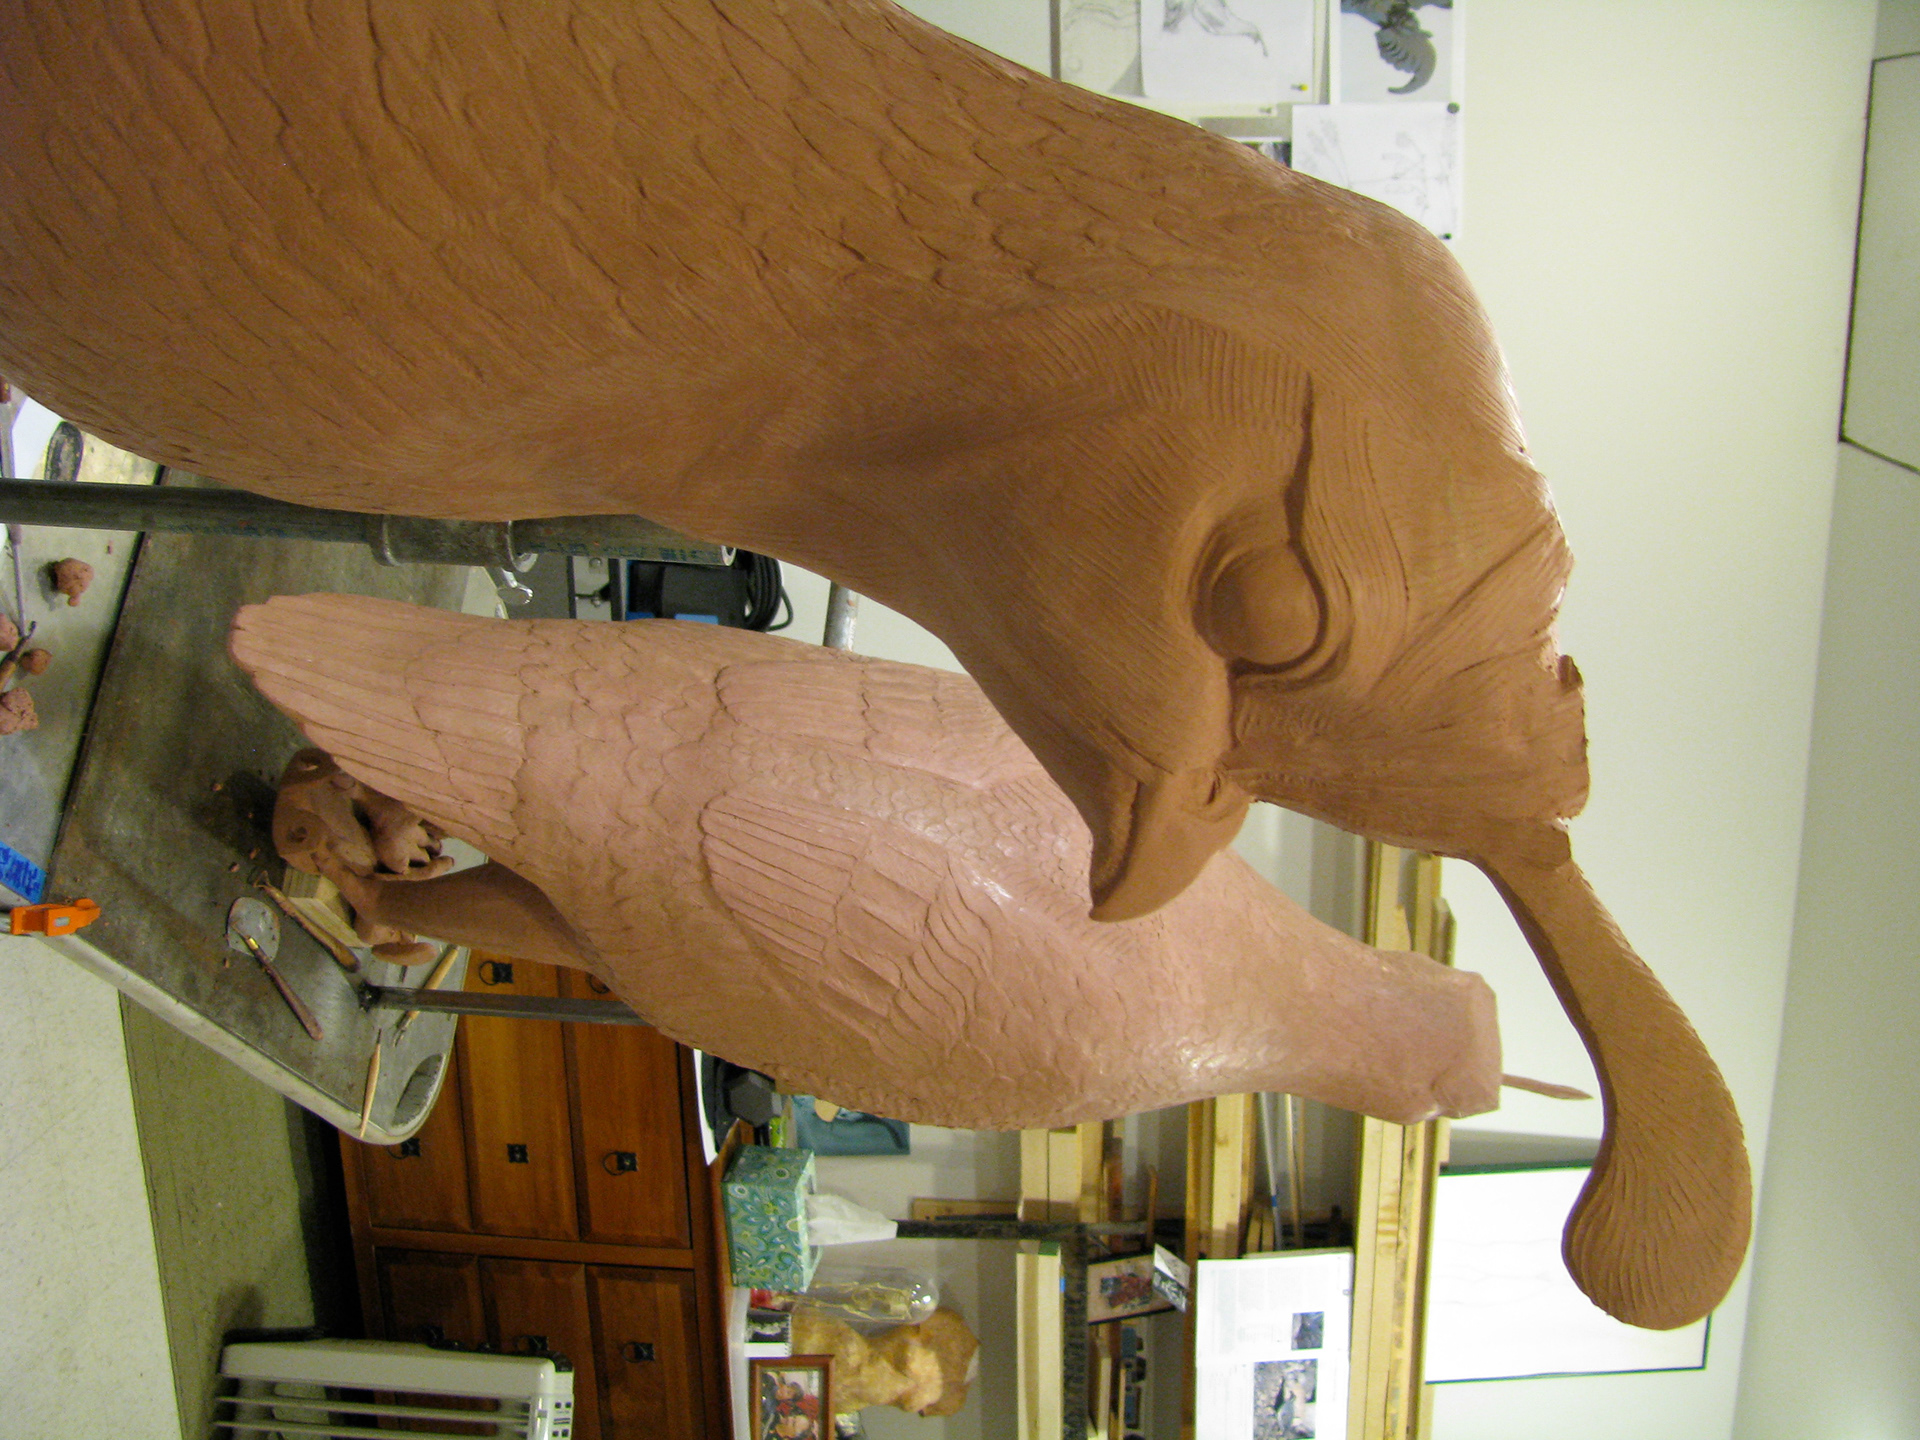
The Hen is offering direction for tweaking the Buck's back feathers.
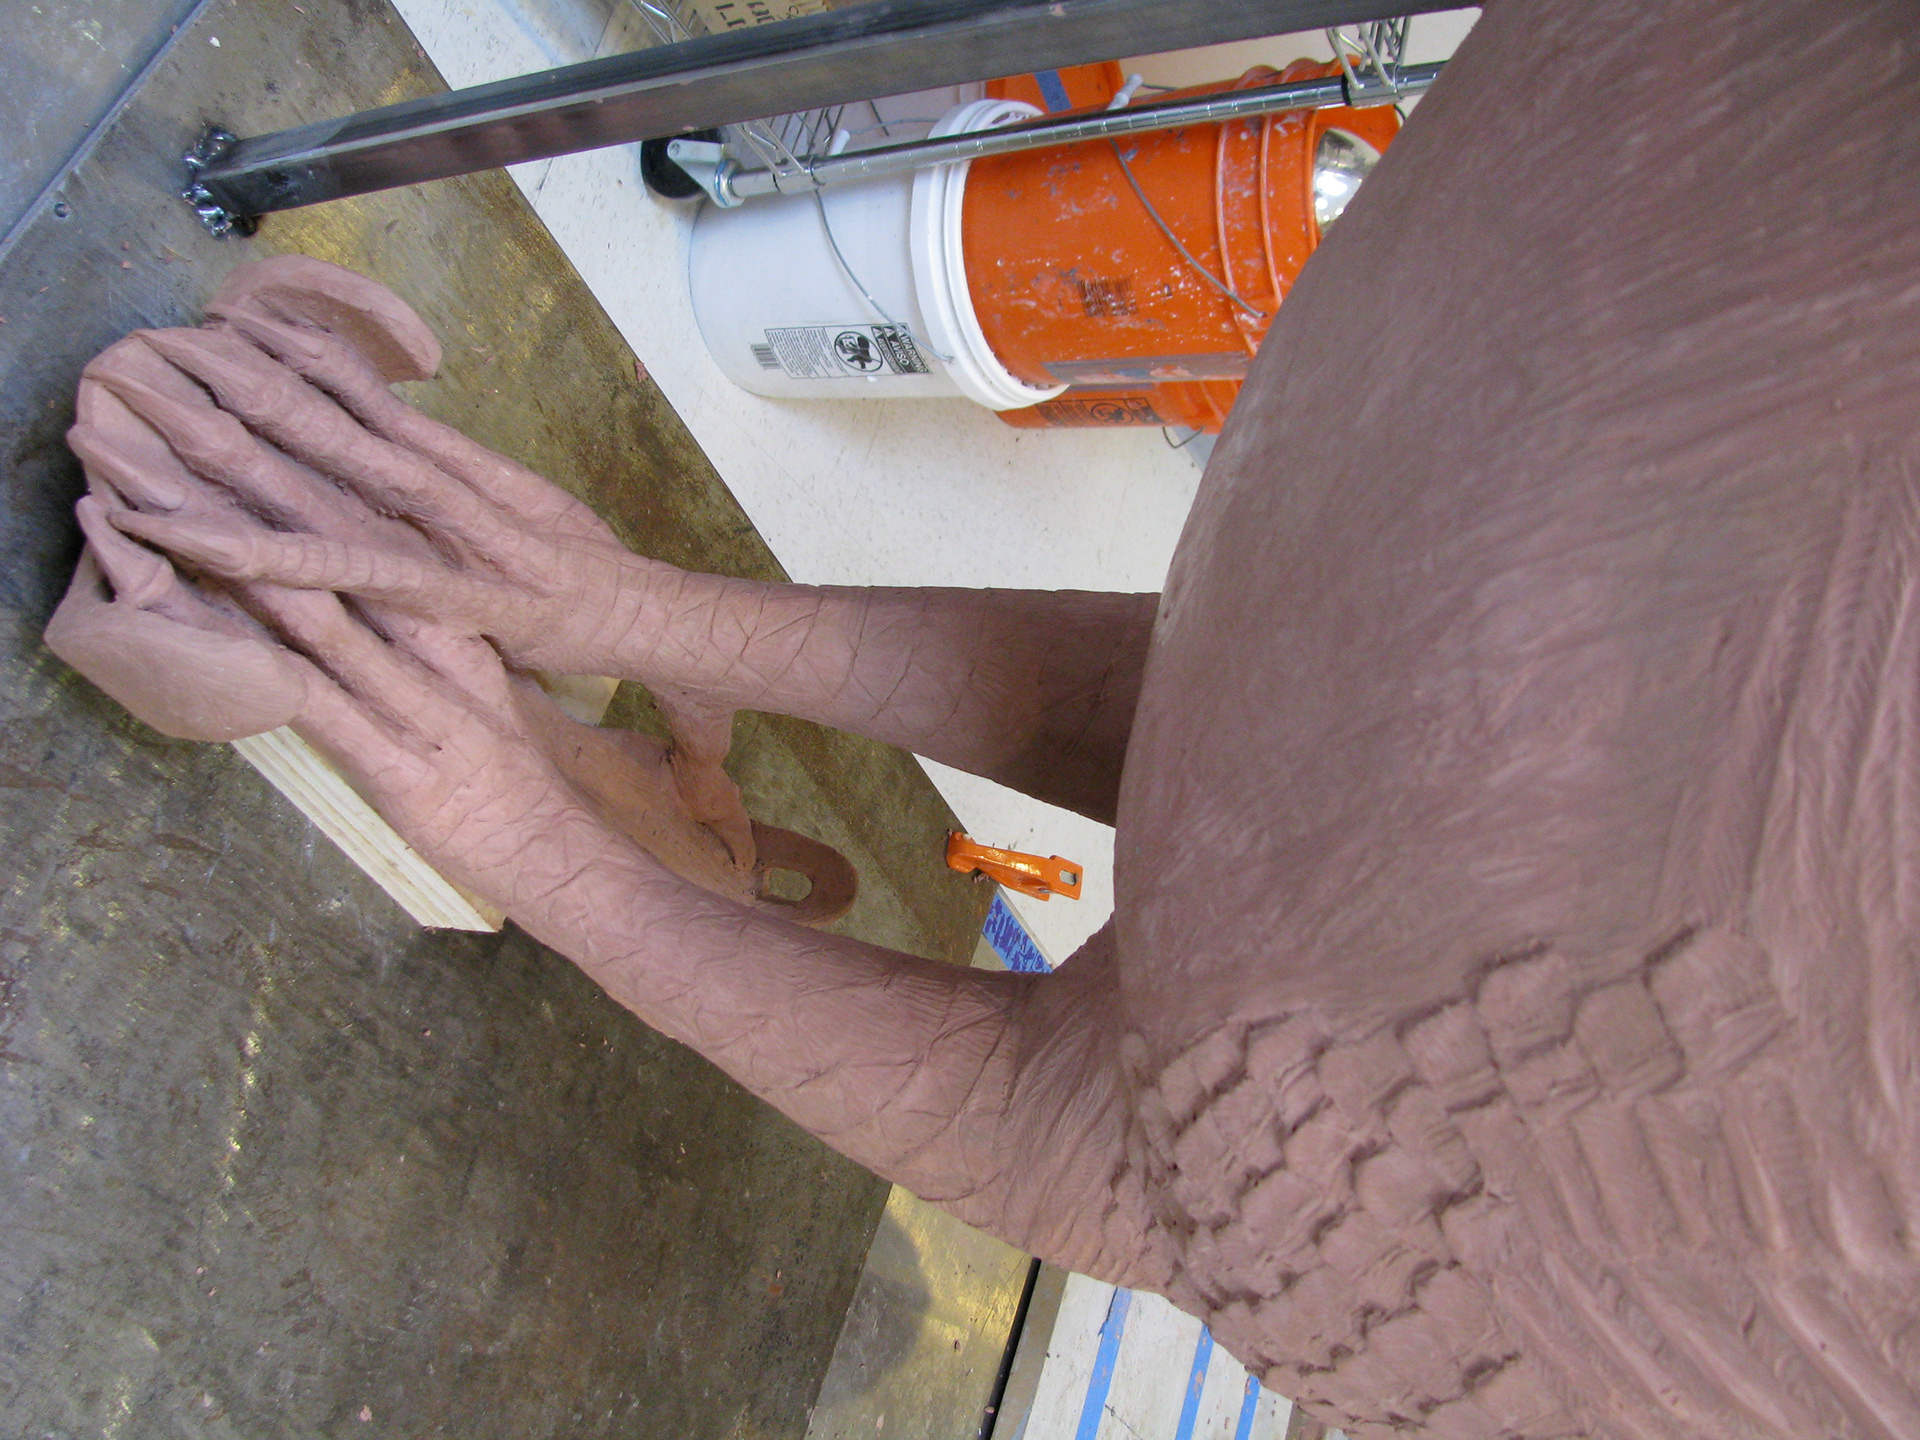
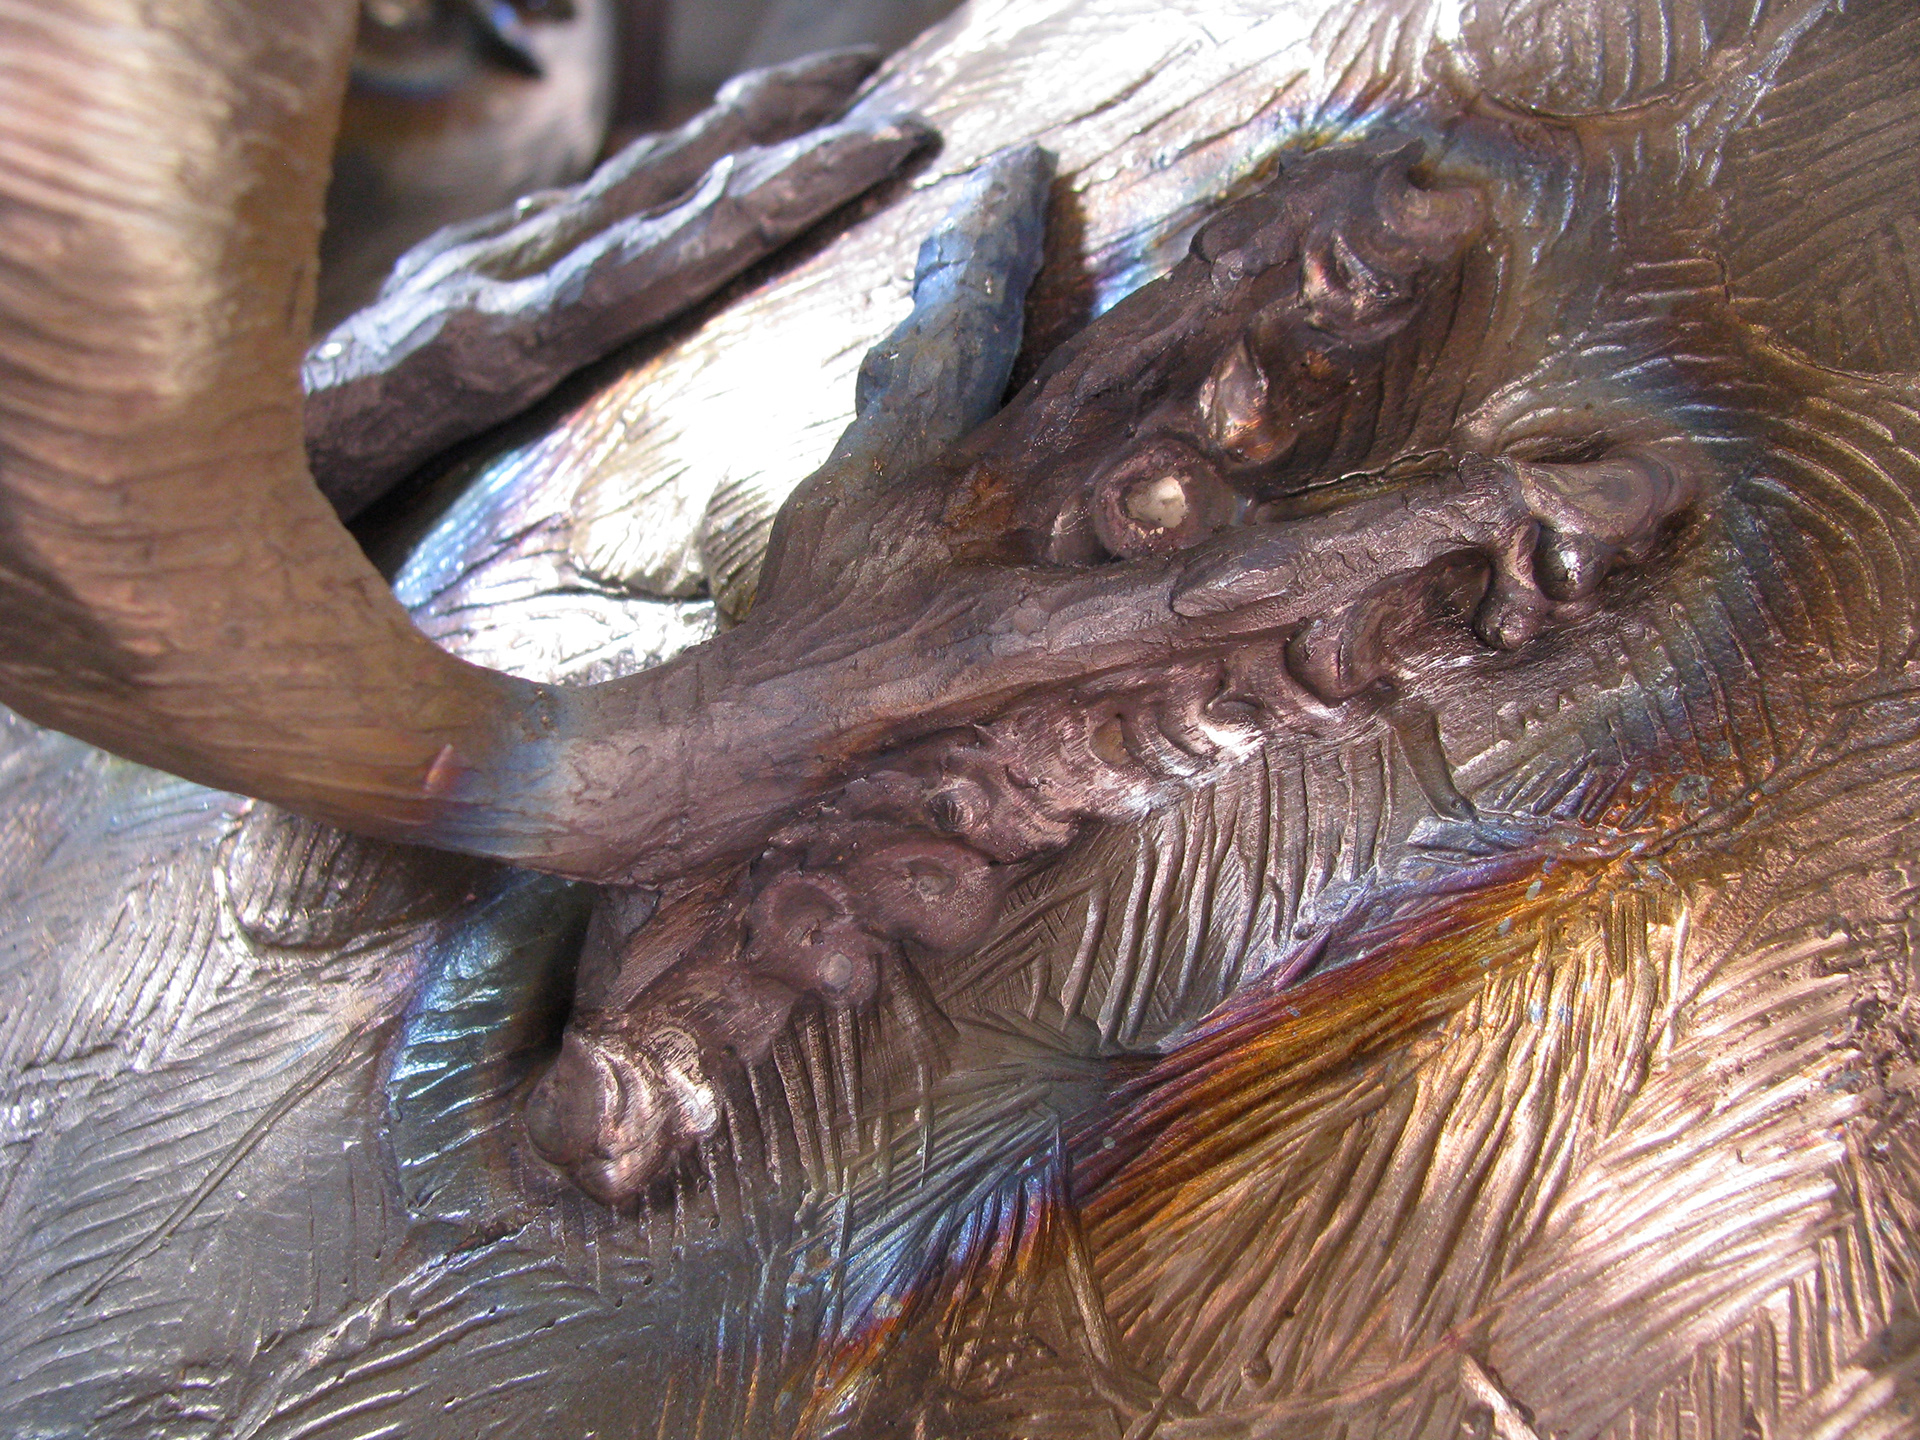
The Bucks big dinosaur toes alligator skin.
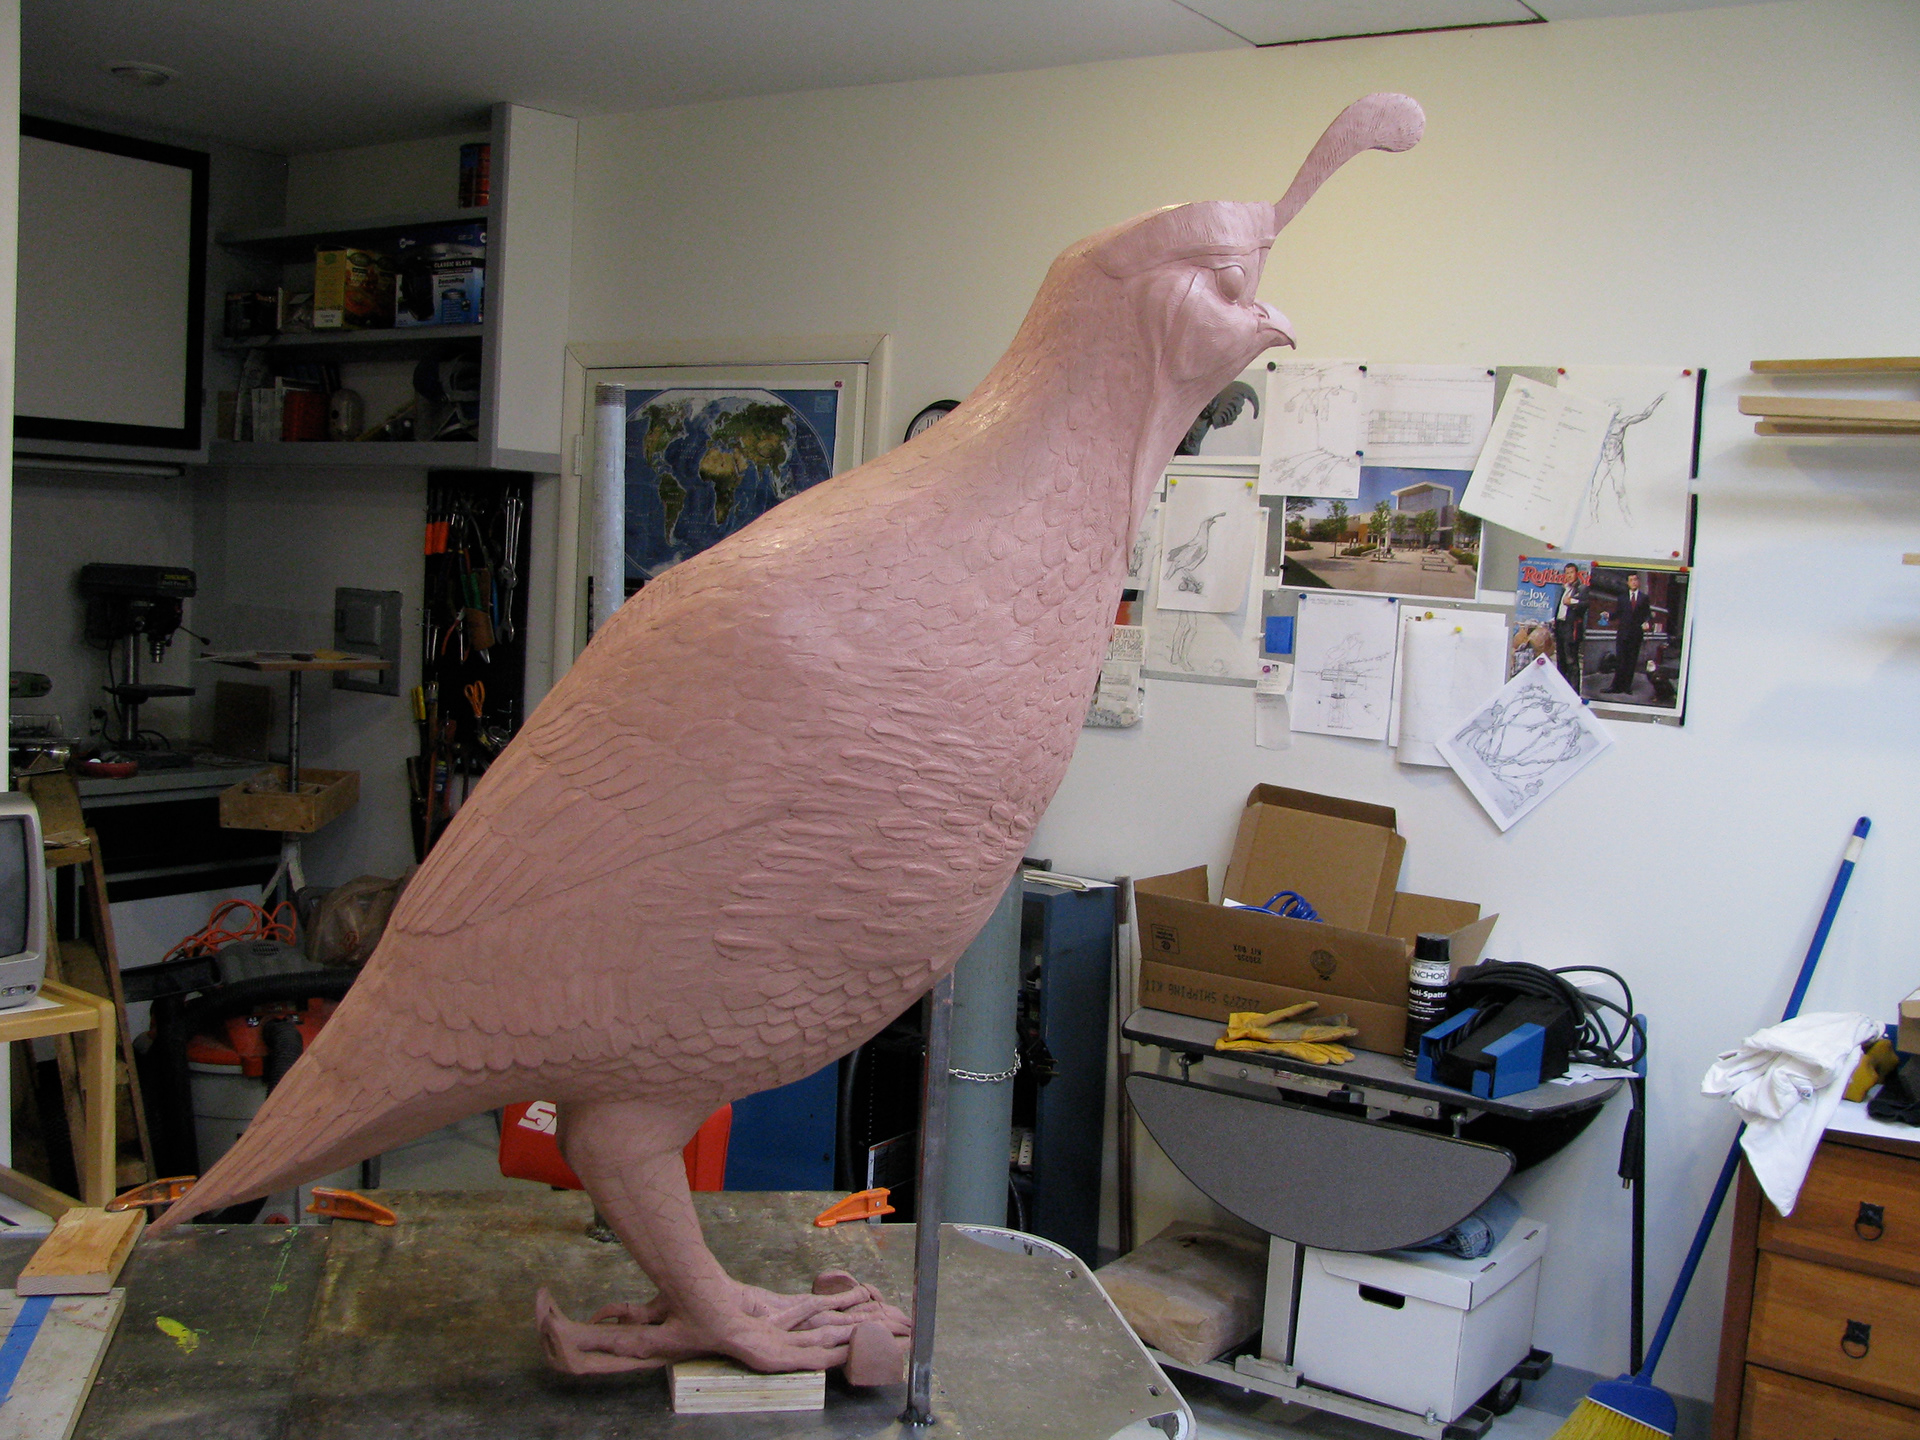
Buck is telling me he is finished.
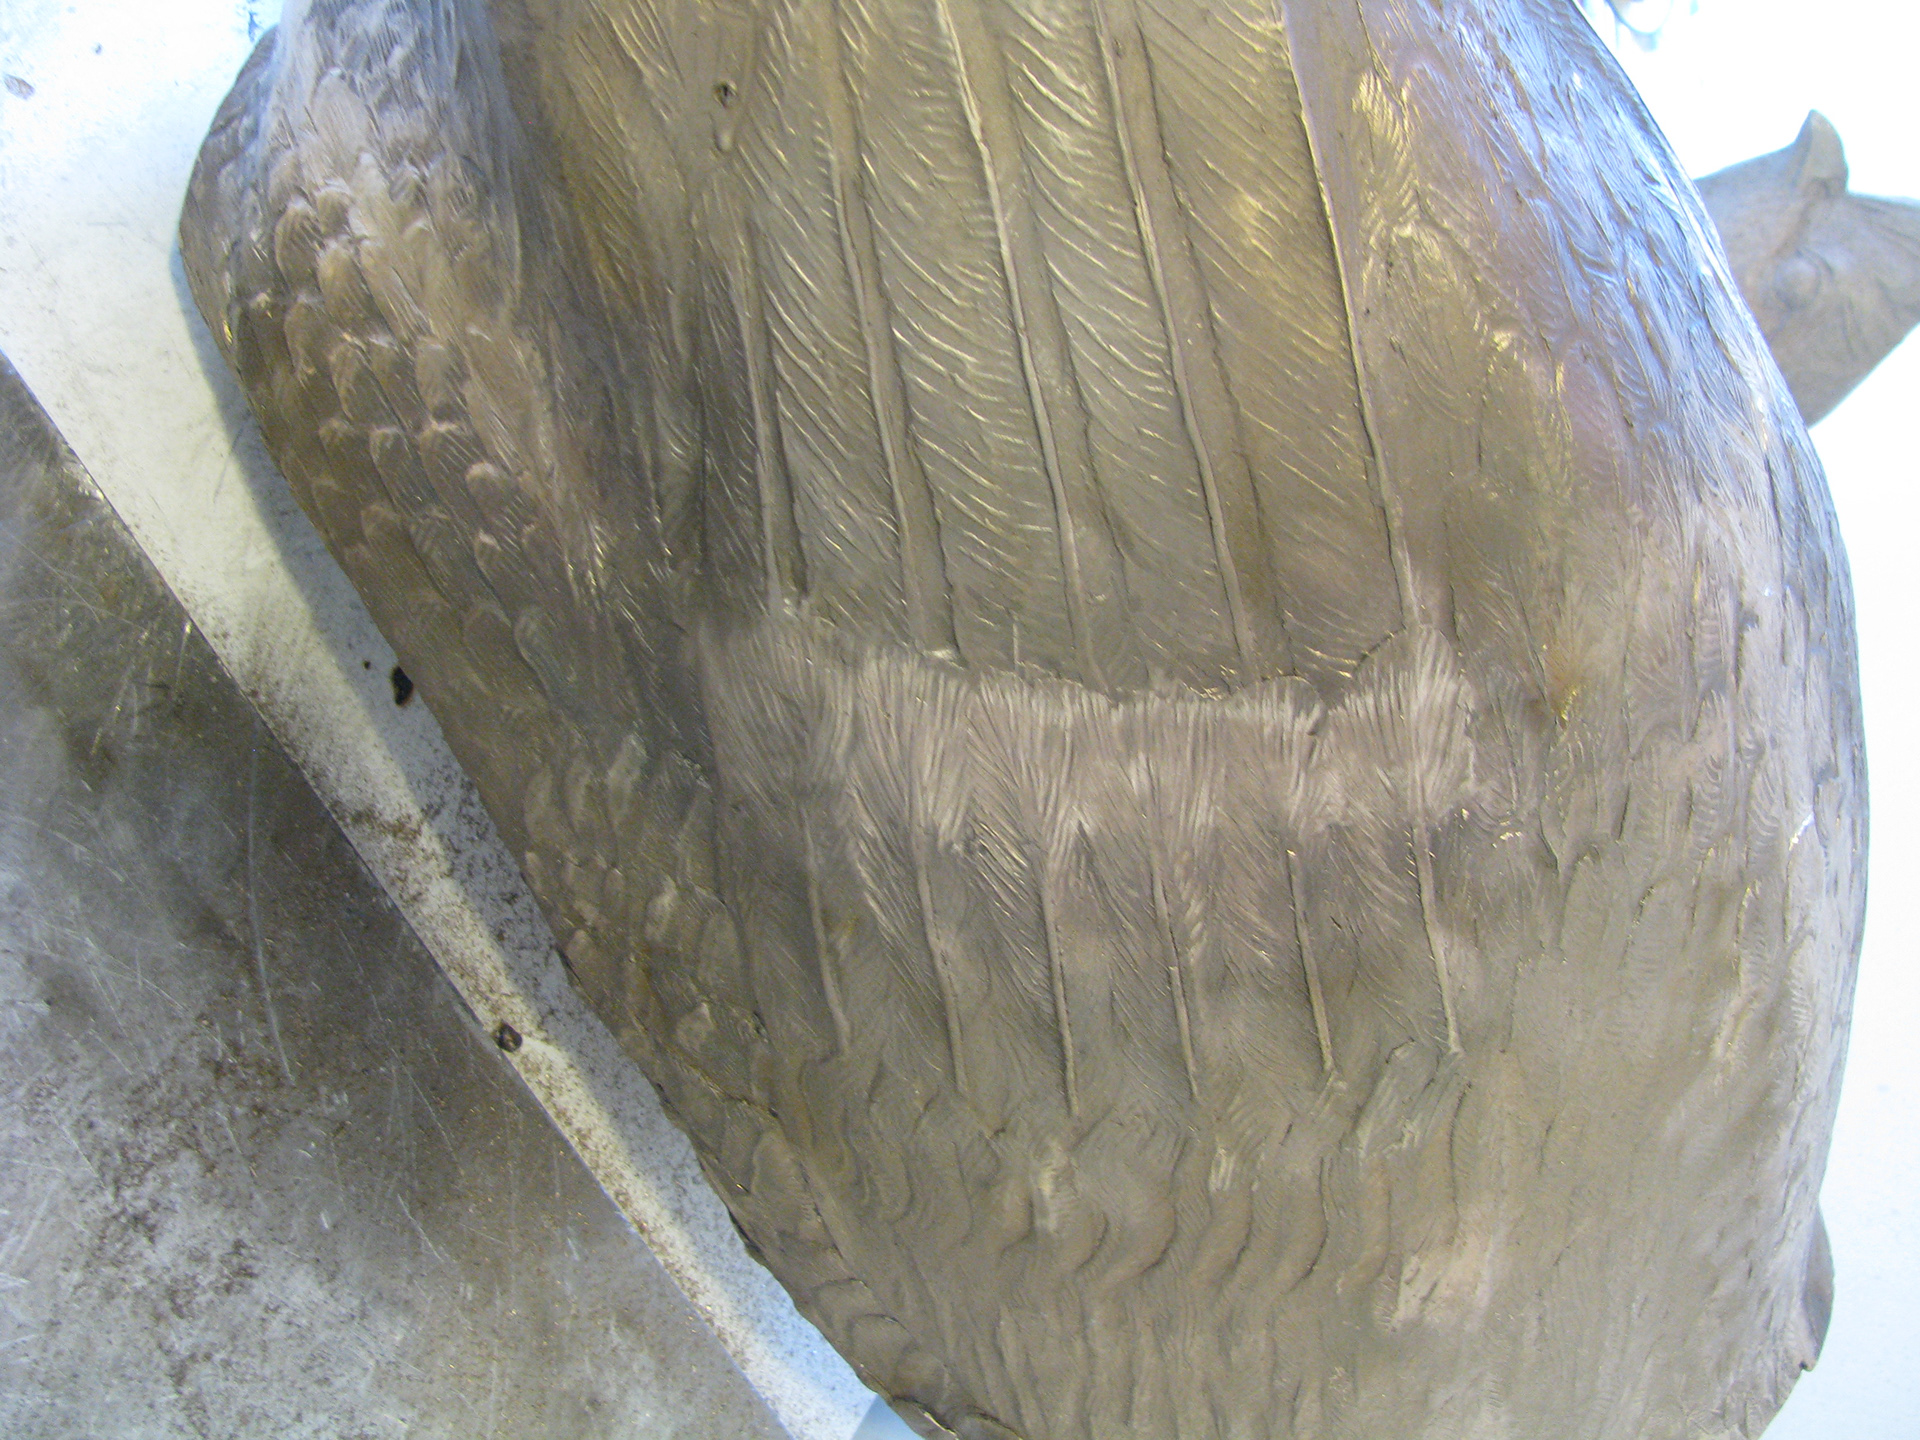
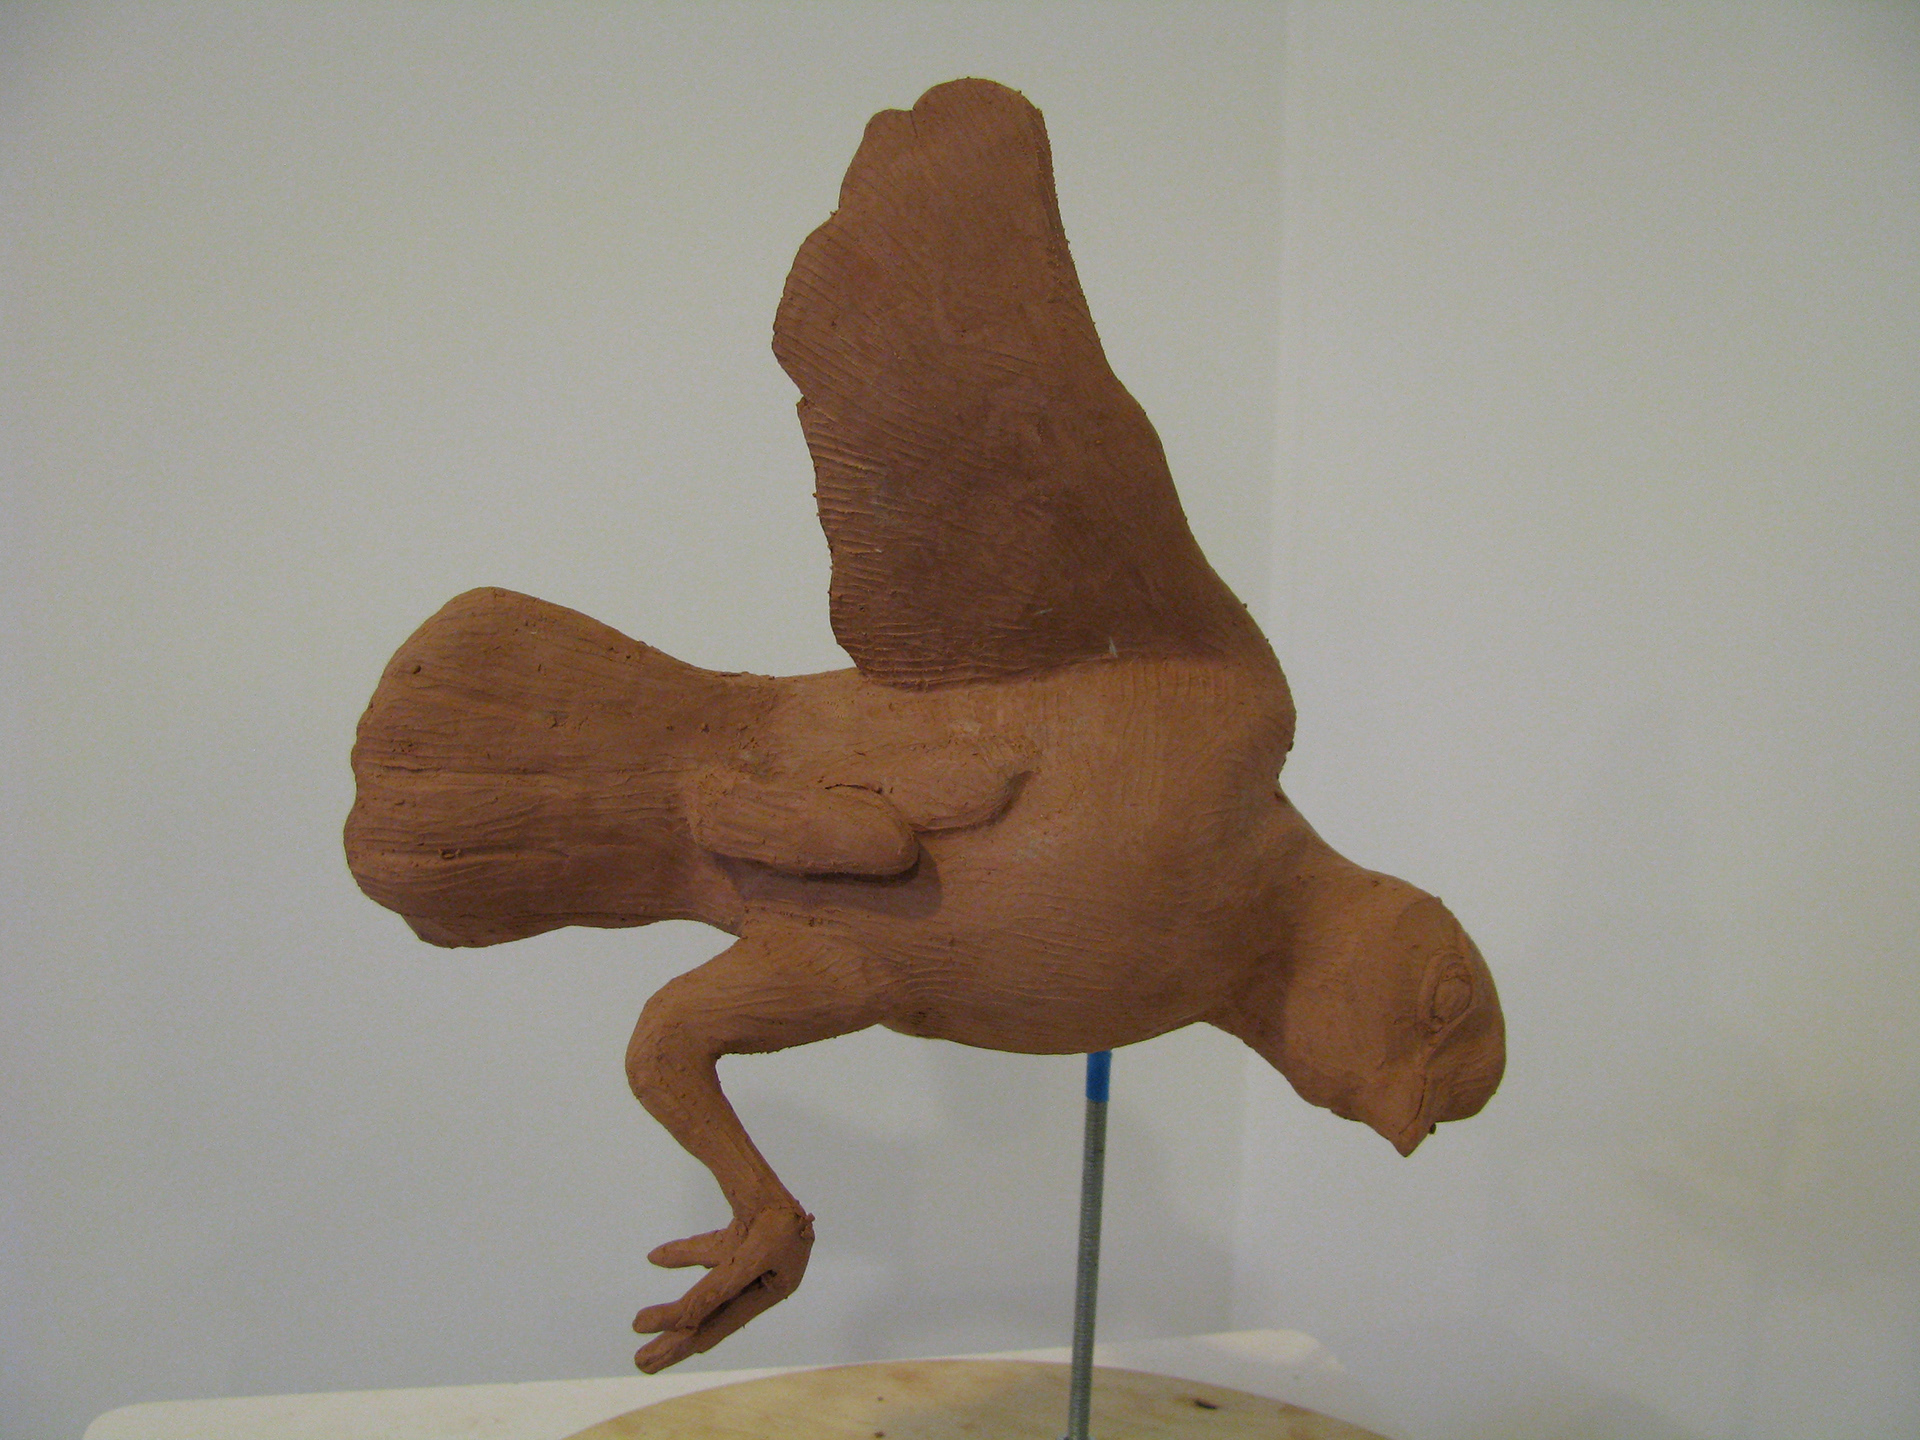
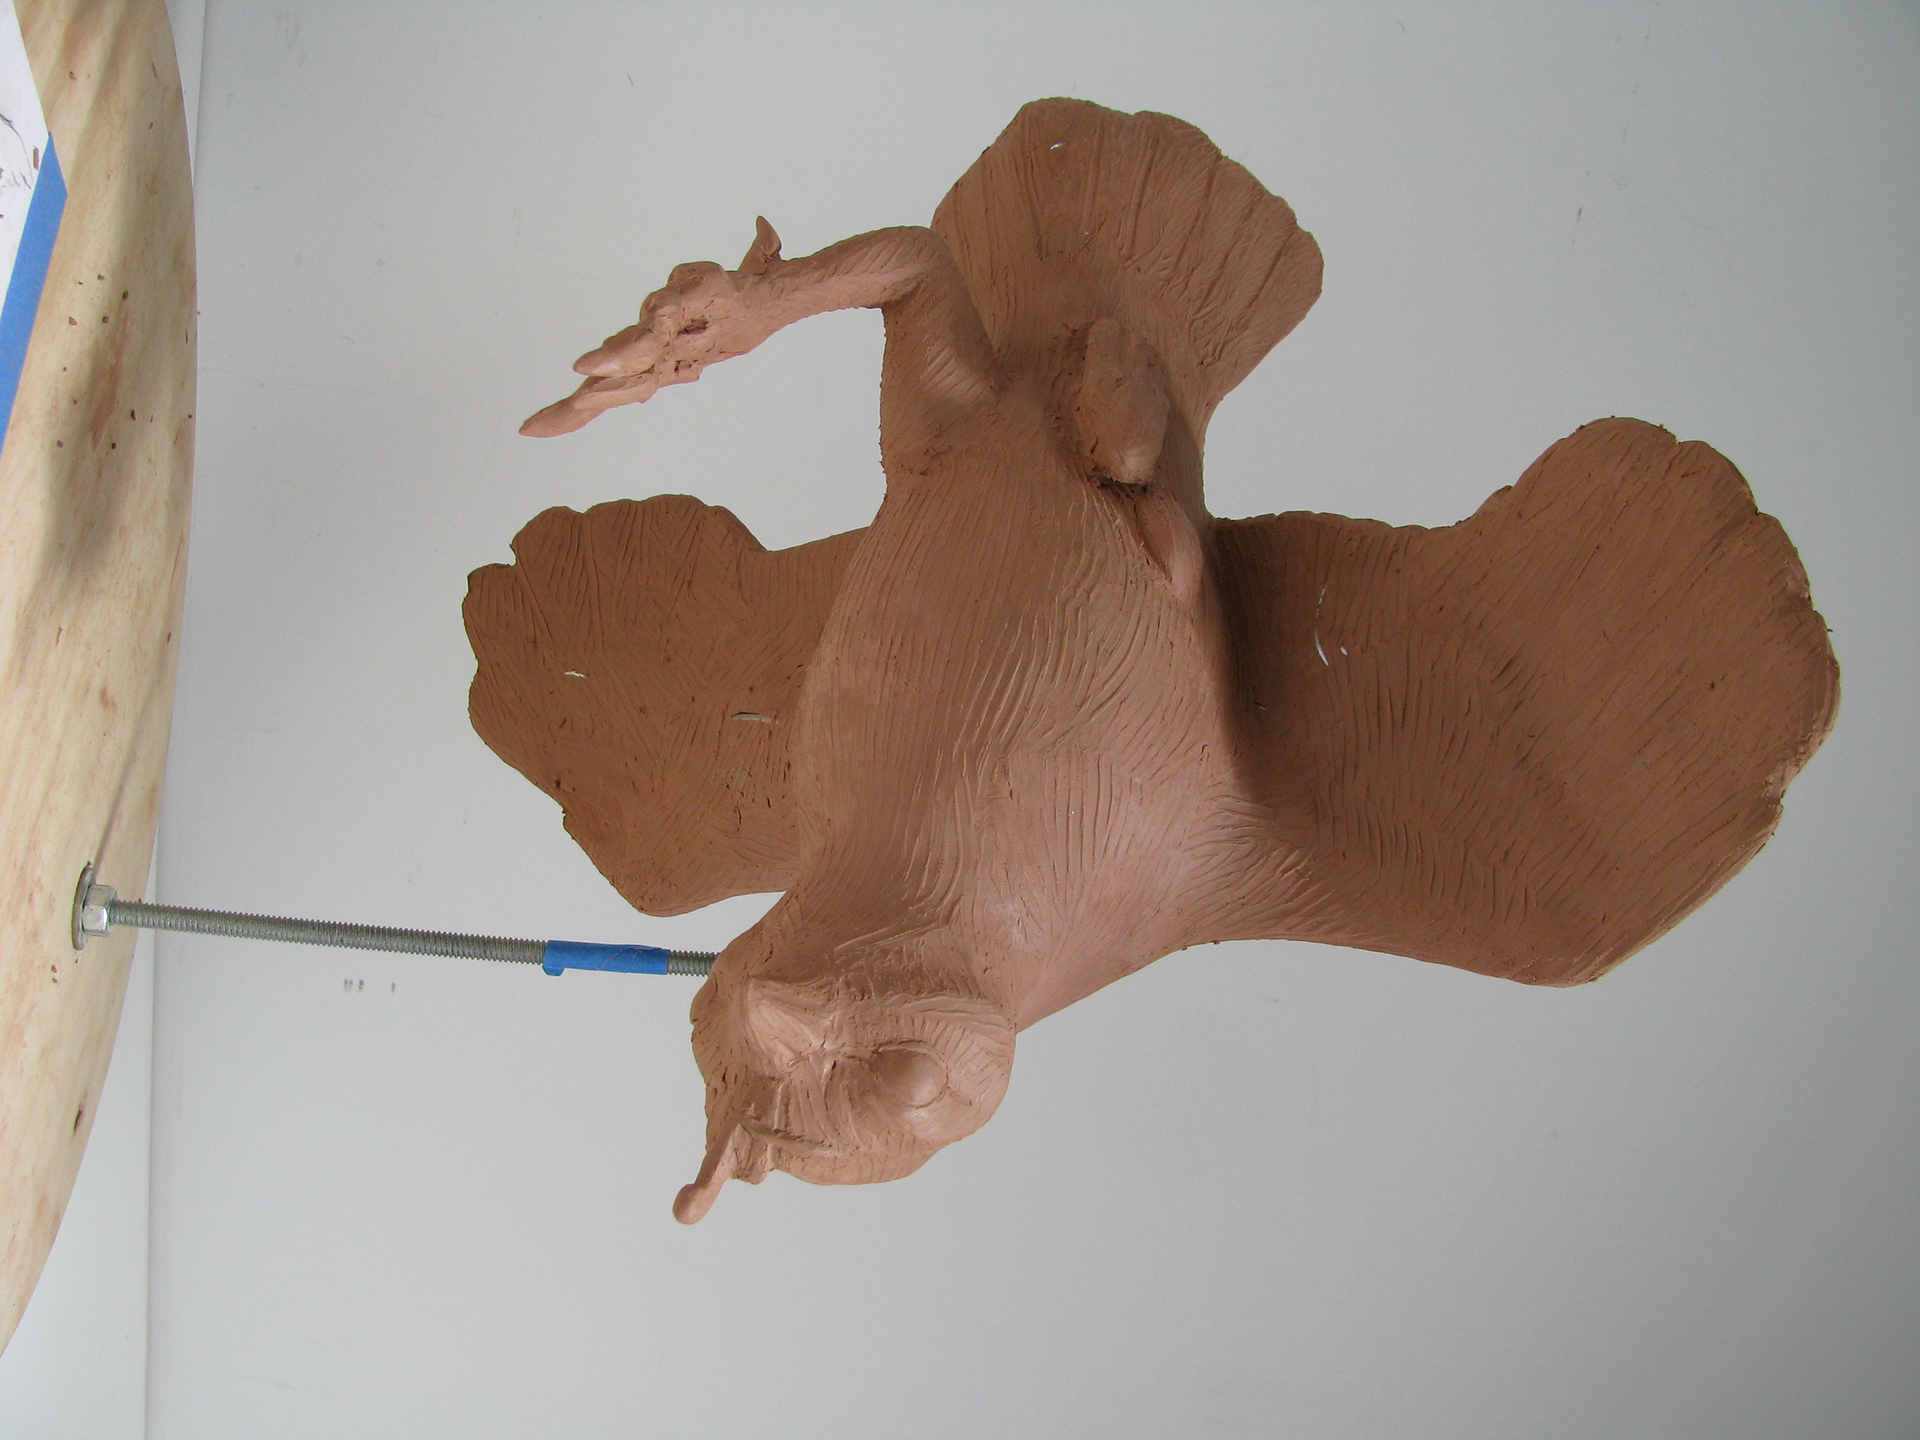
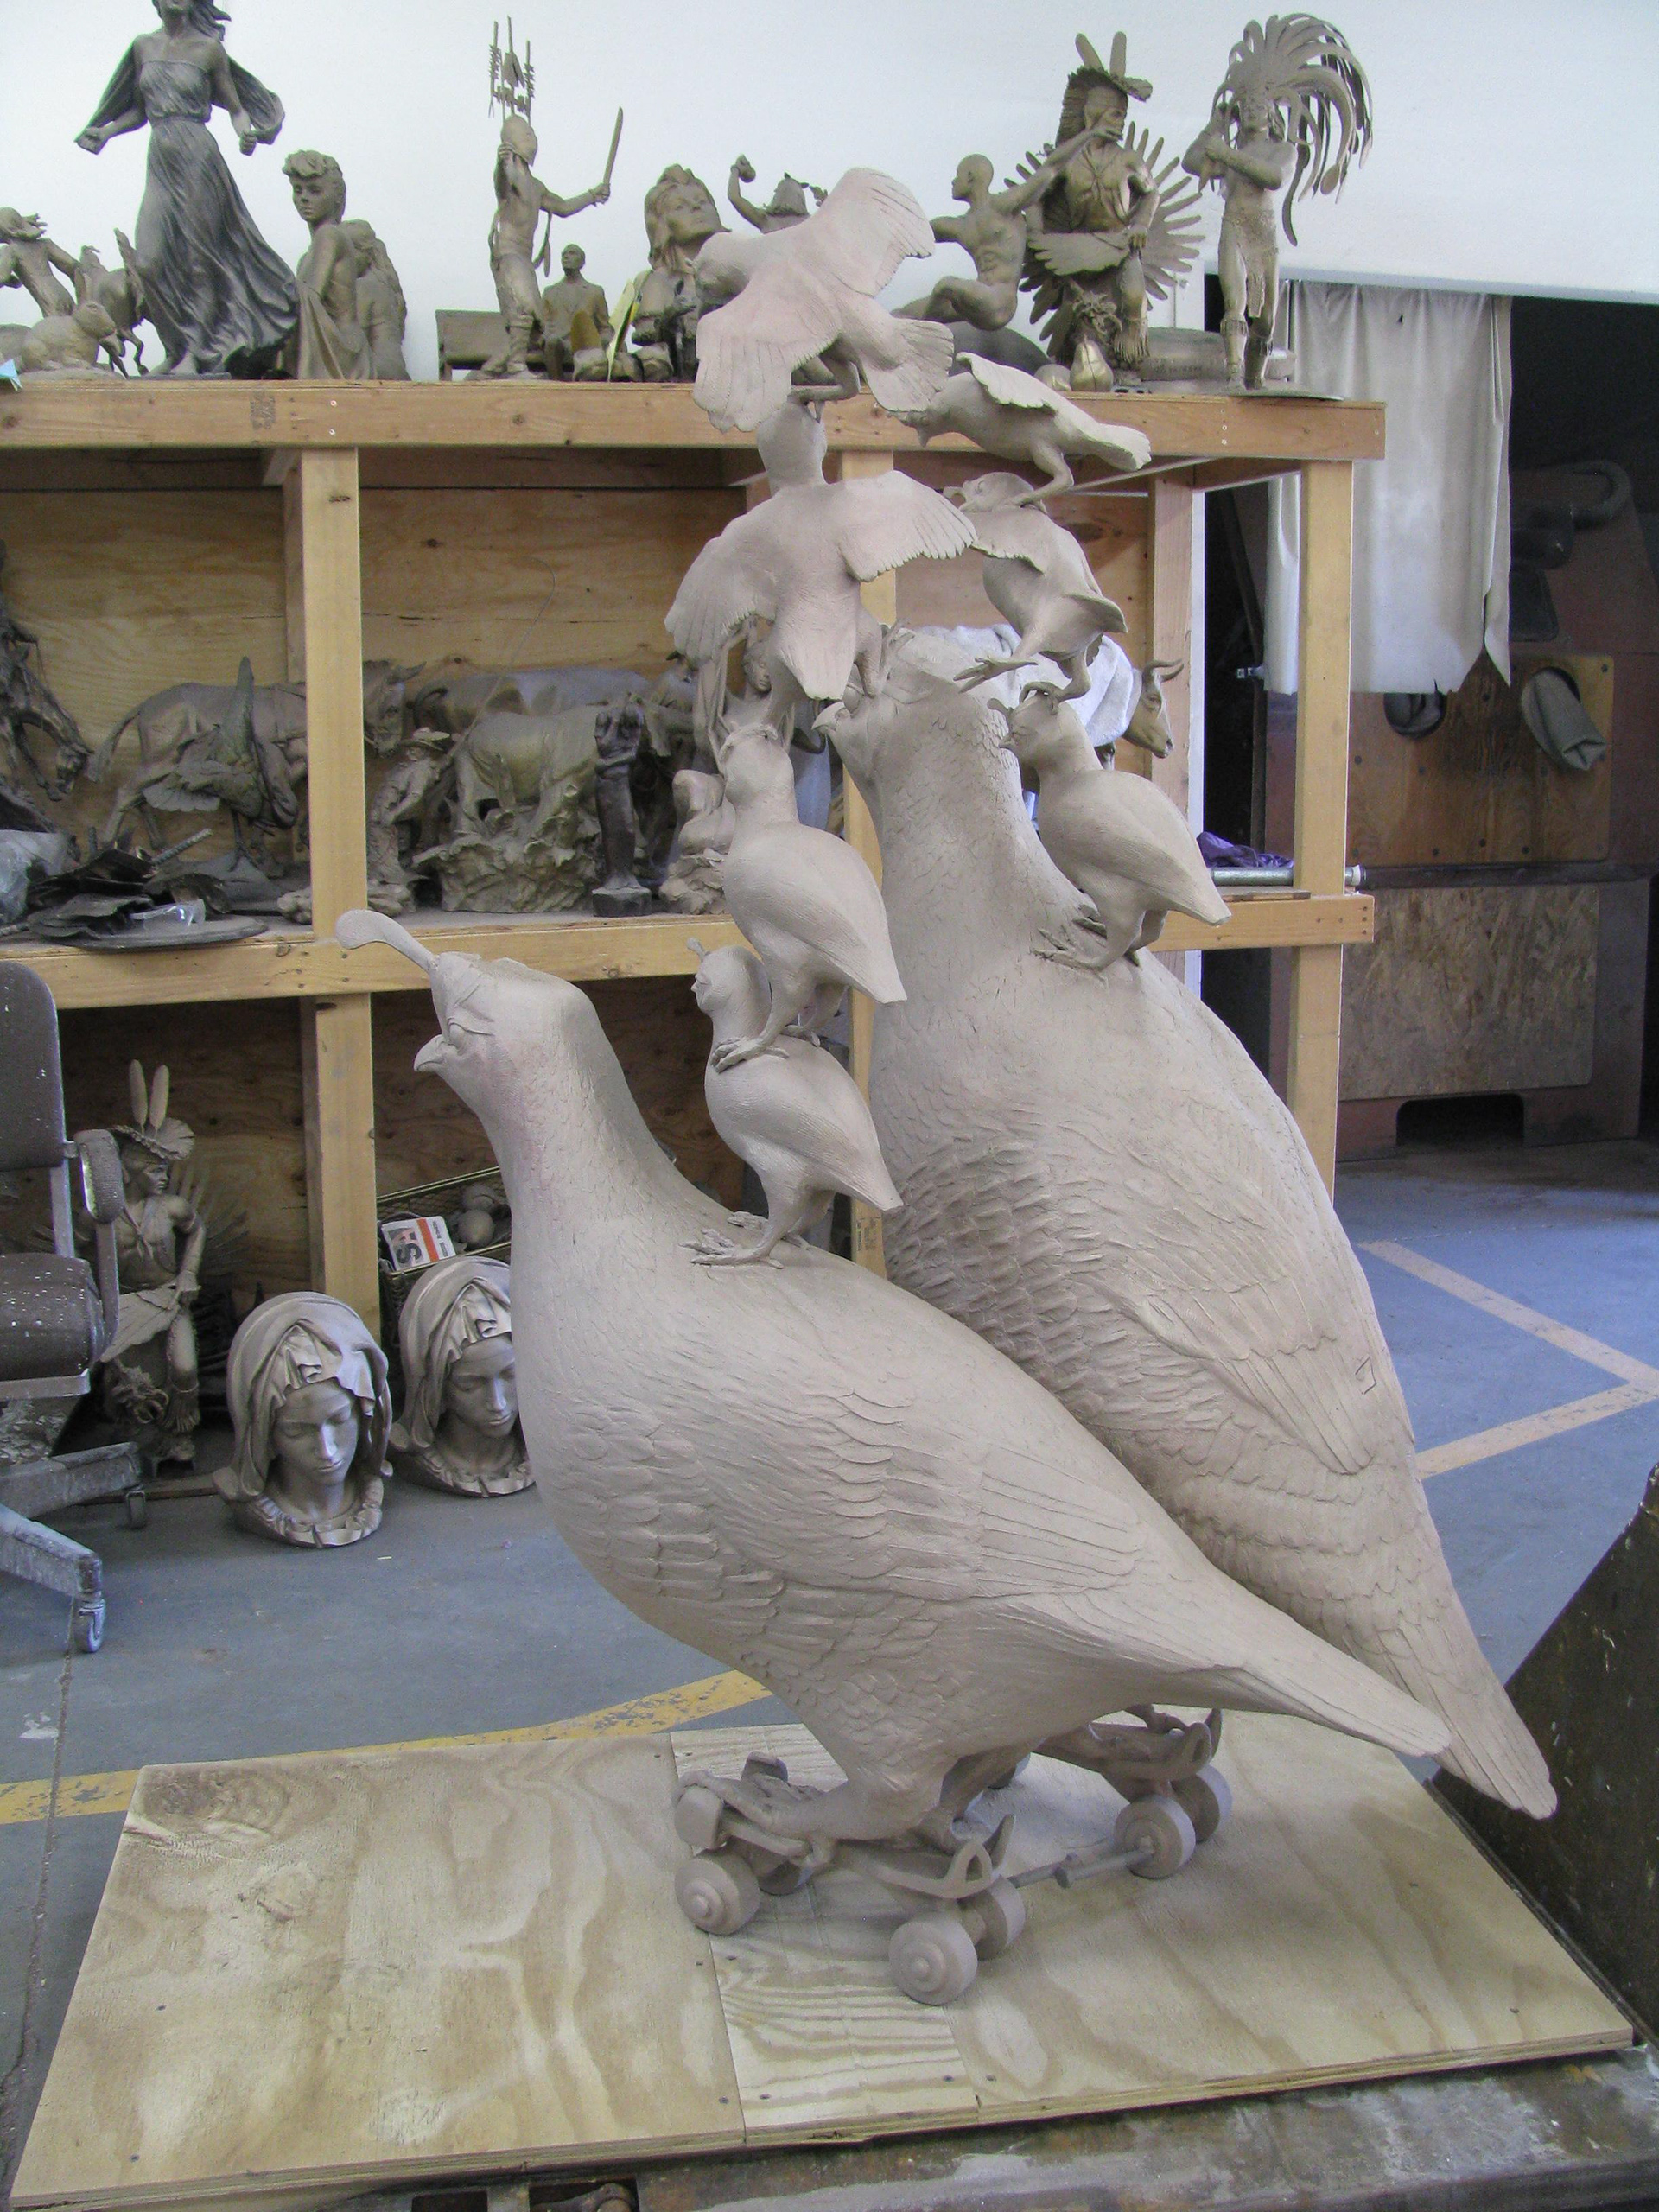
Here you can see the Naive Rousseau-like anatomy of the bird. Way down the road when the metal work is all finished out, the humor of it, and the crazy detailing, and the massive scale, will have the addition of patina / color. I was pretty sure it would all come together as I wanted it to- trying to keep my anatomical sculptor in a box was tough when I looked at those little funny wings all flat and folded and saying "I'm a wing!". Realizing what I was doing could get a bit schizophrenic.
The Hen benefited from the Buck's retrofit of feathers, and had some re-feathering of her own.
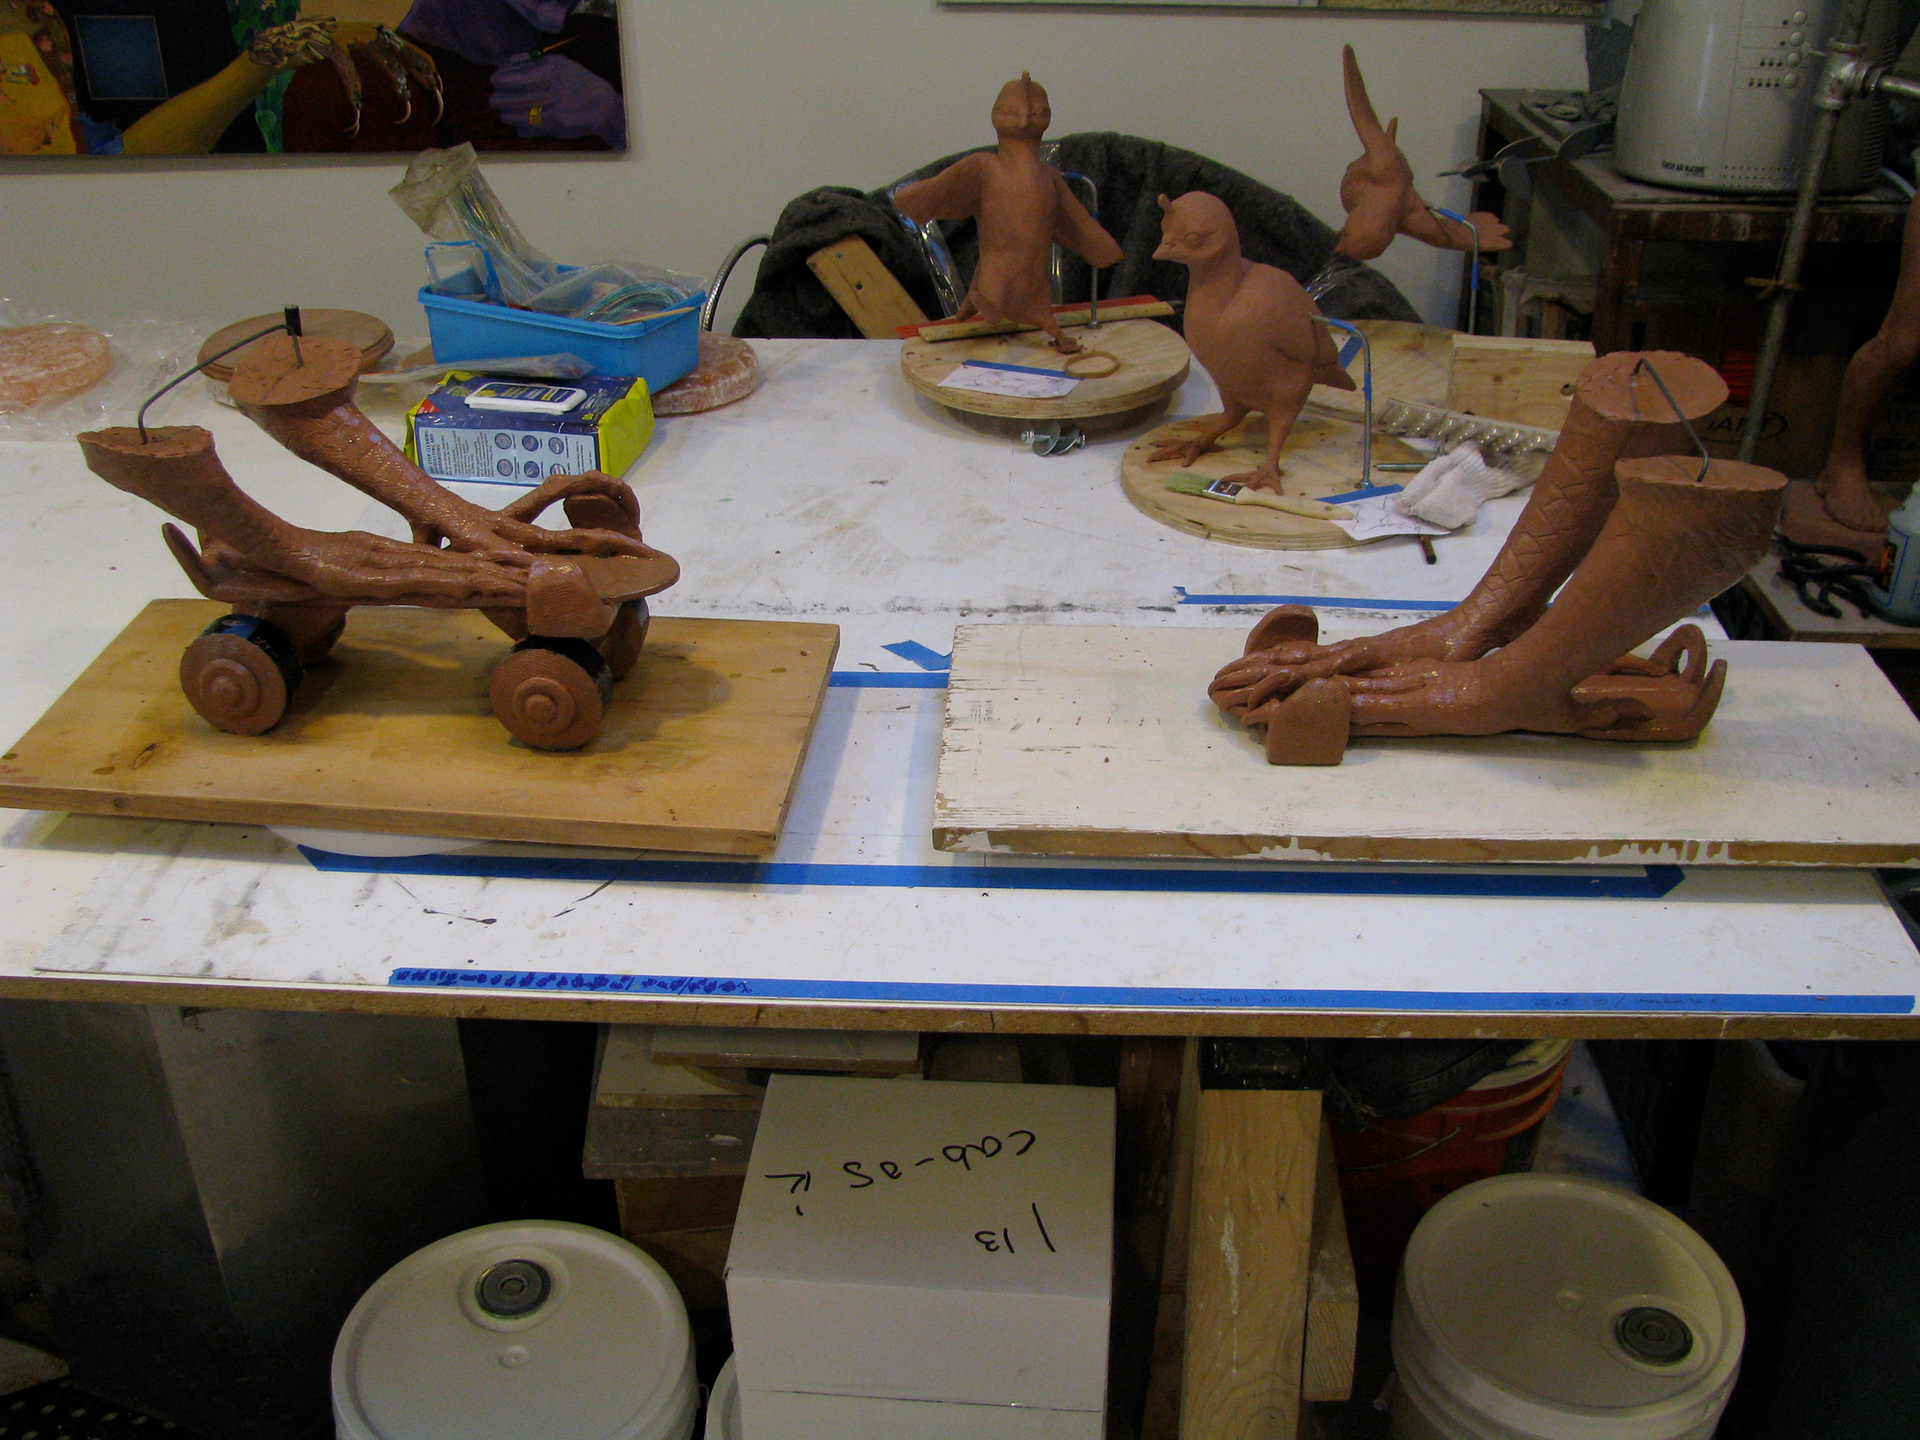
The chicks are still on the back-burner, and will be for quite awhile. On the front burner, I have cut off the Hen & Buck's feet for their own separate molds.
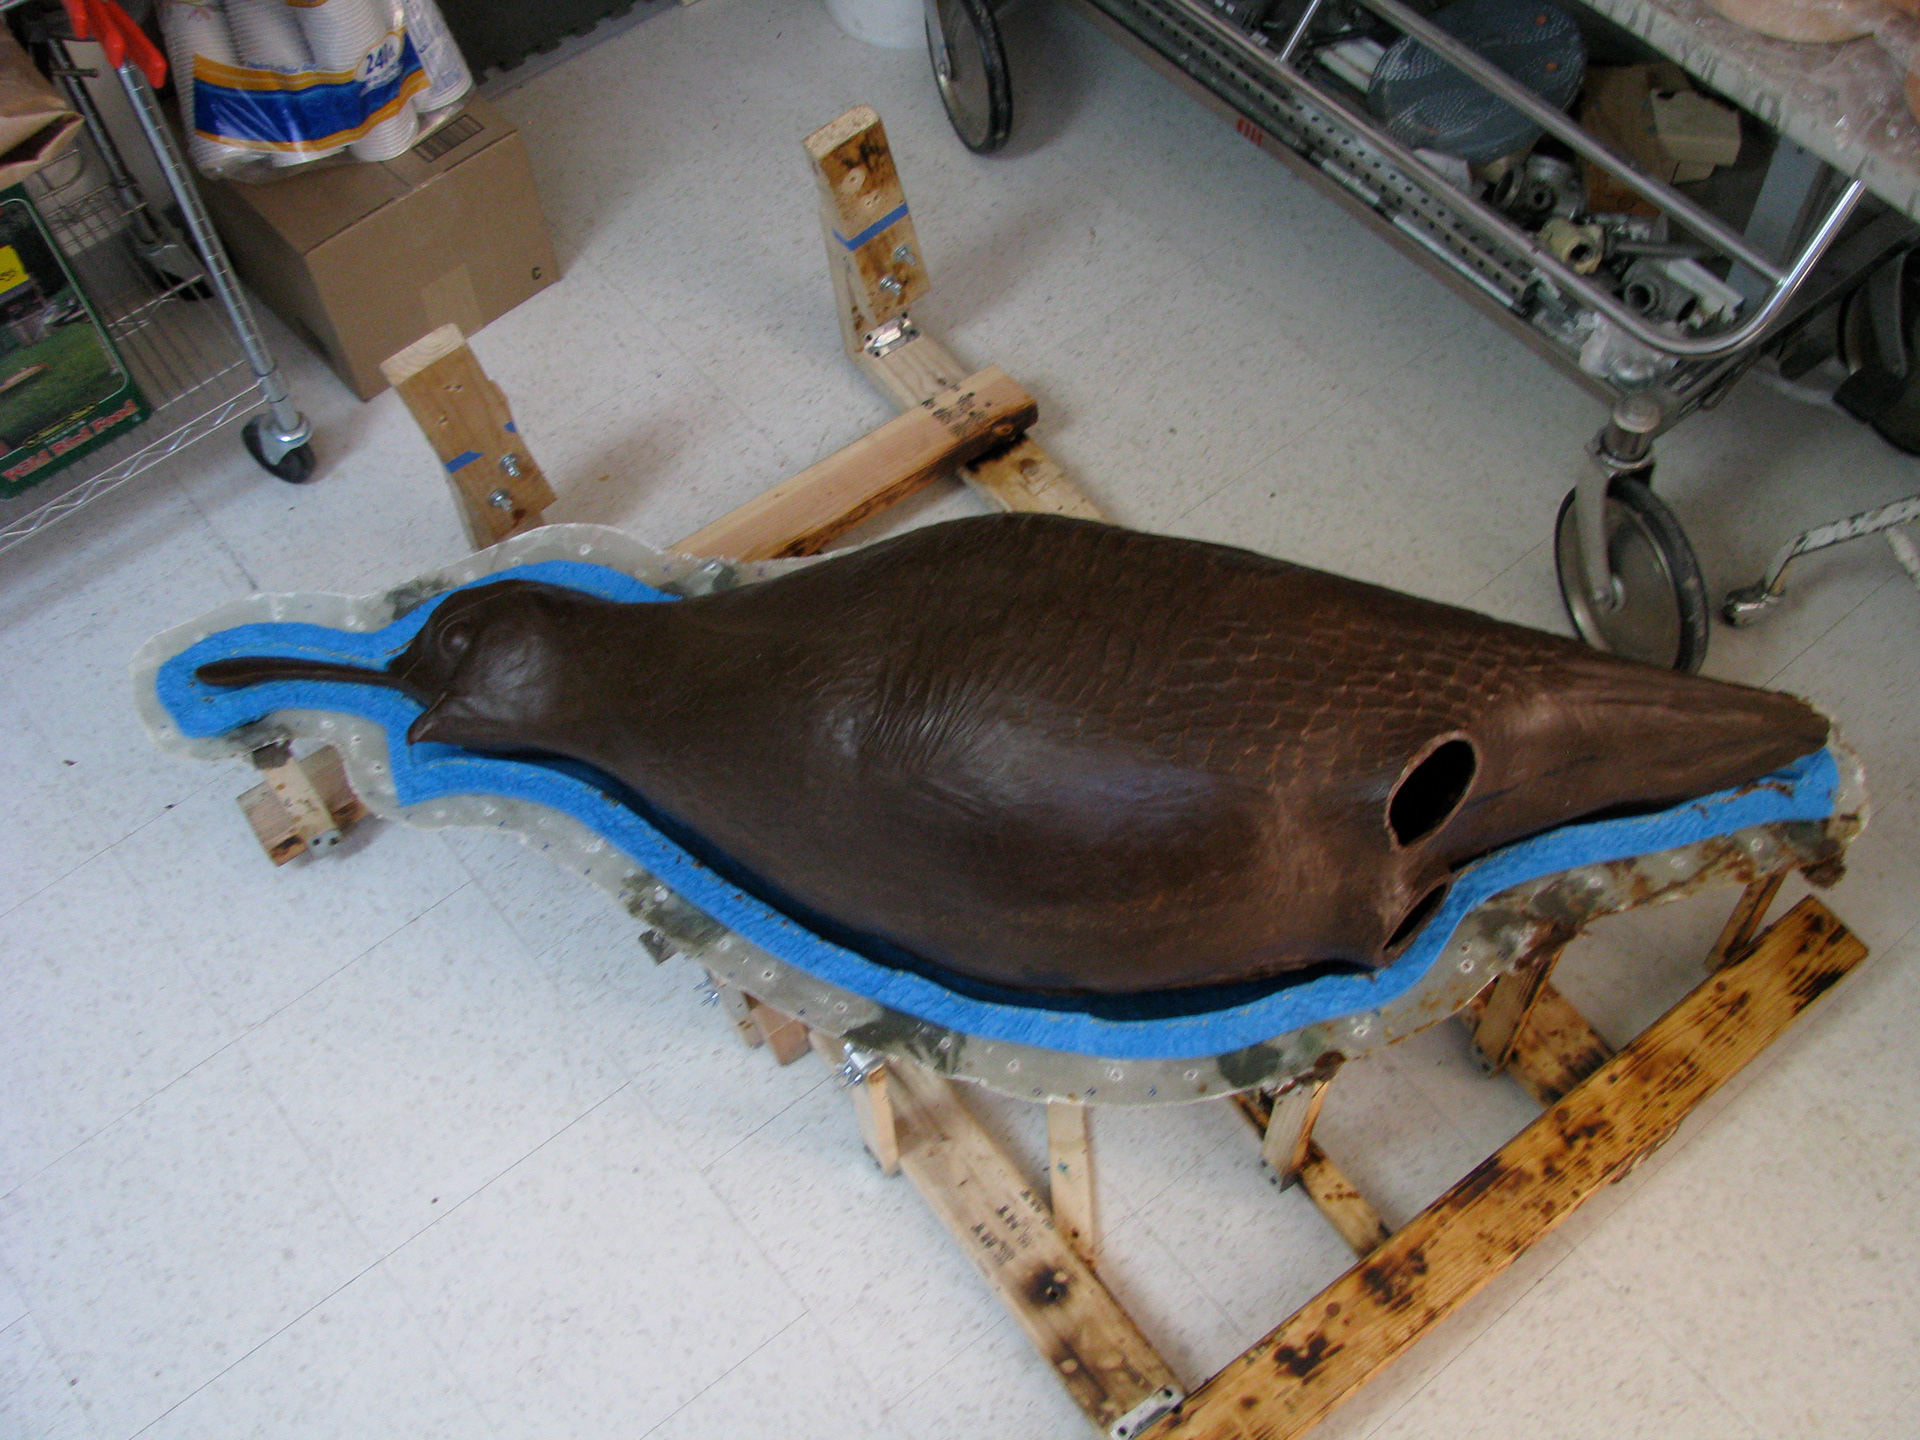
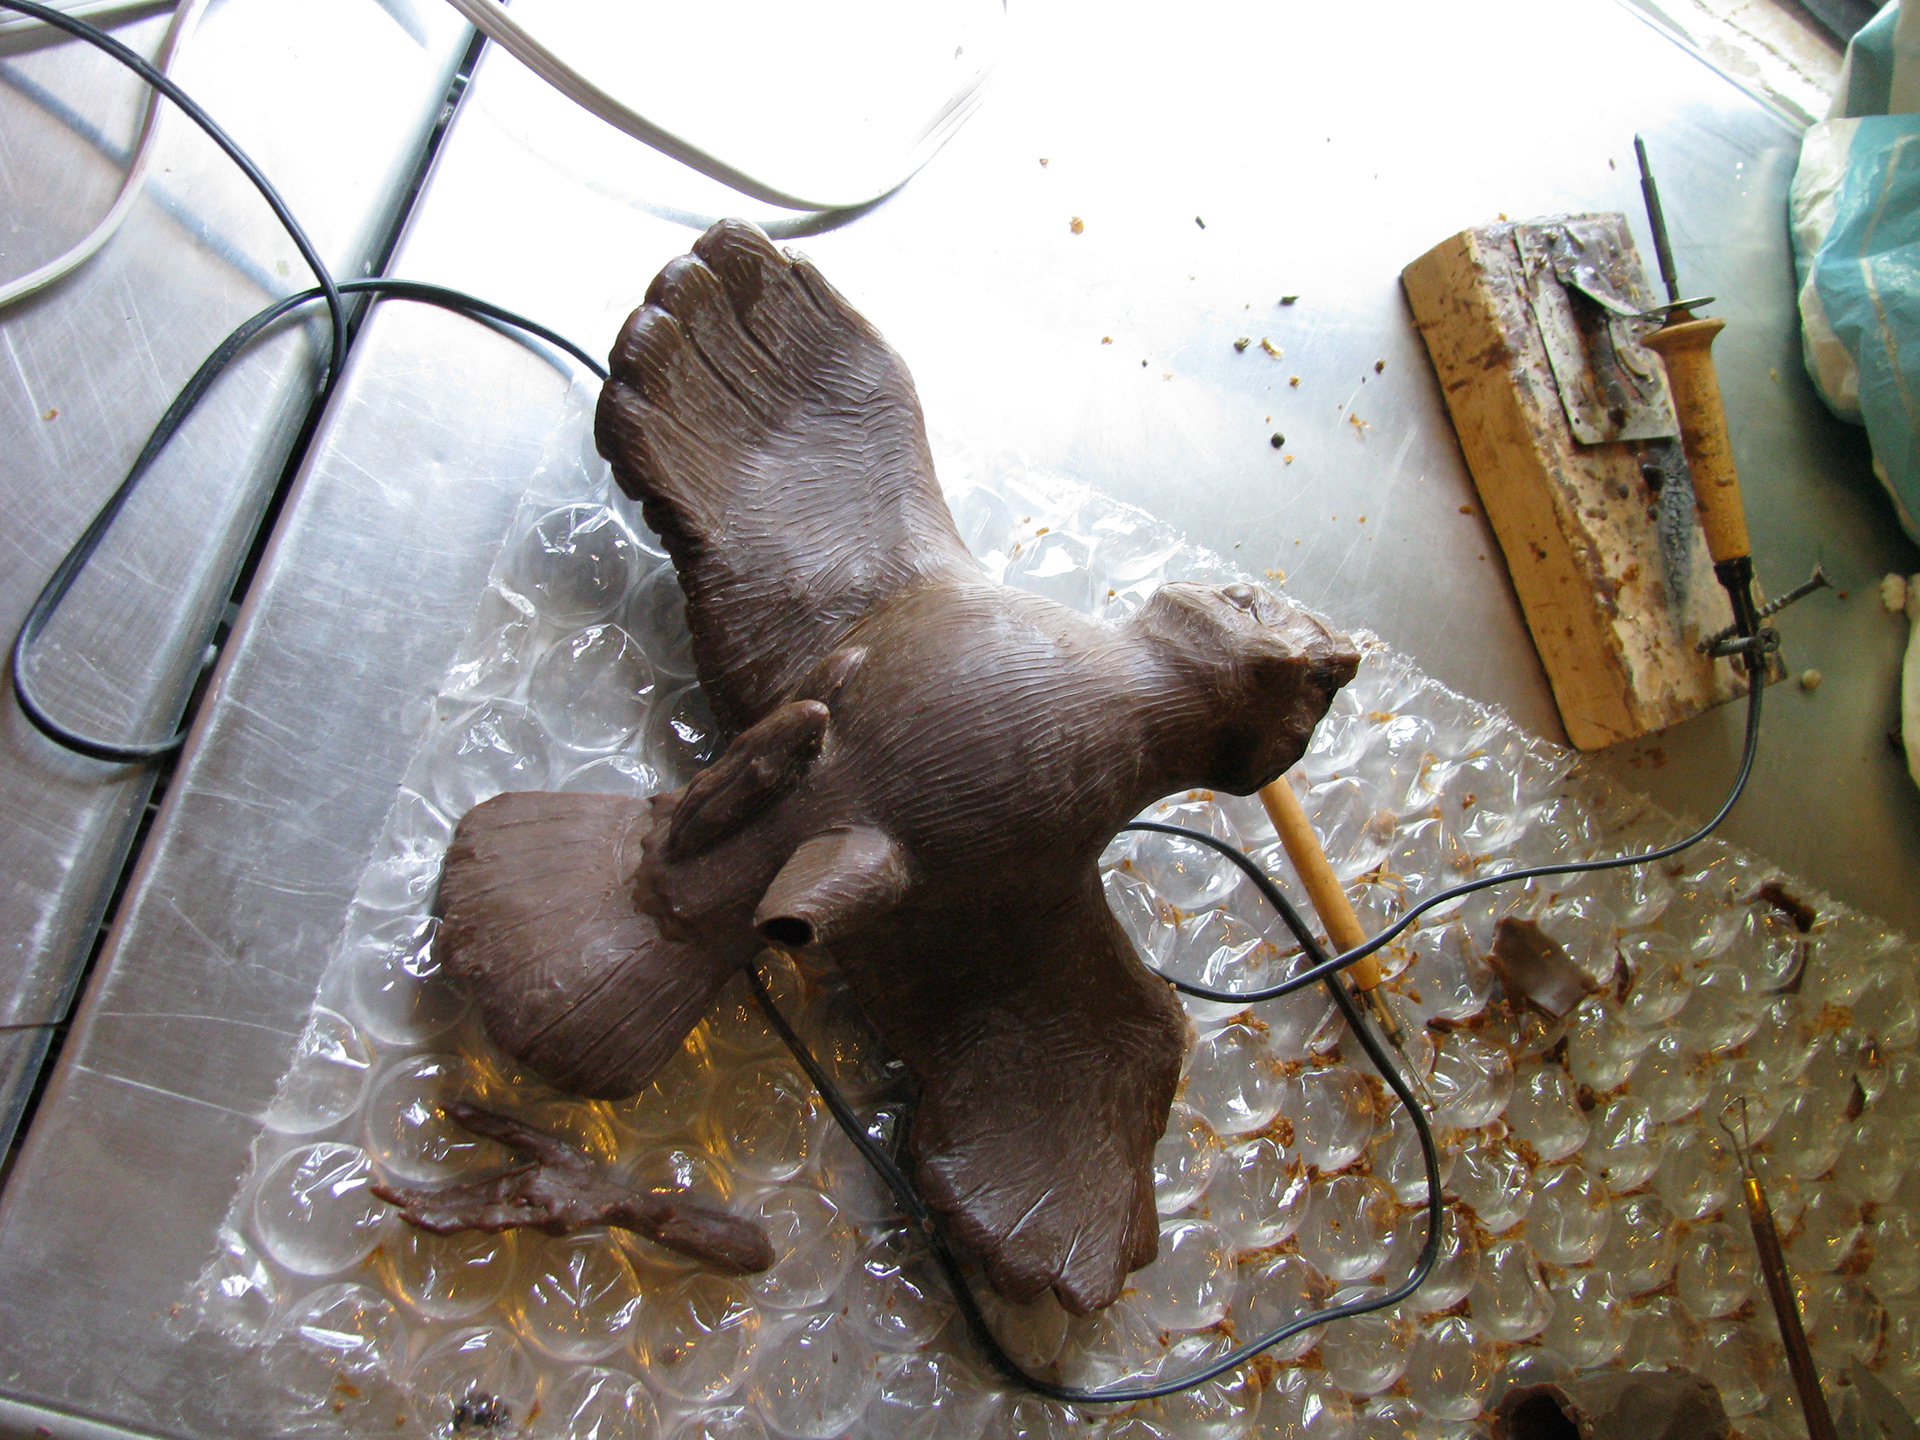
Feet removed and sprayed with clear-coat for a clean silicon mold.
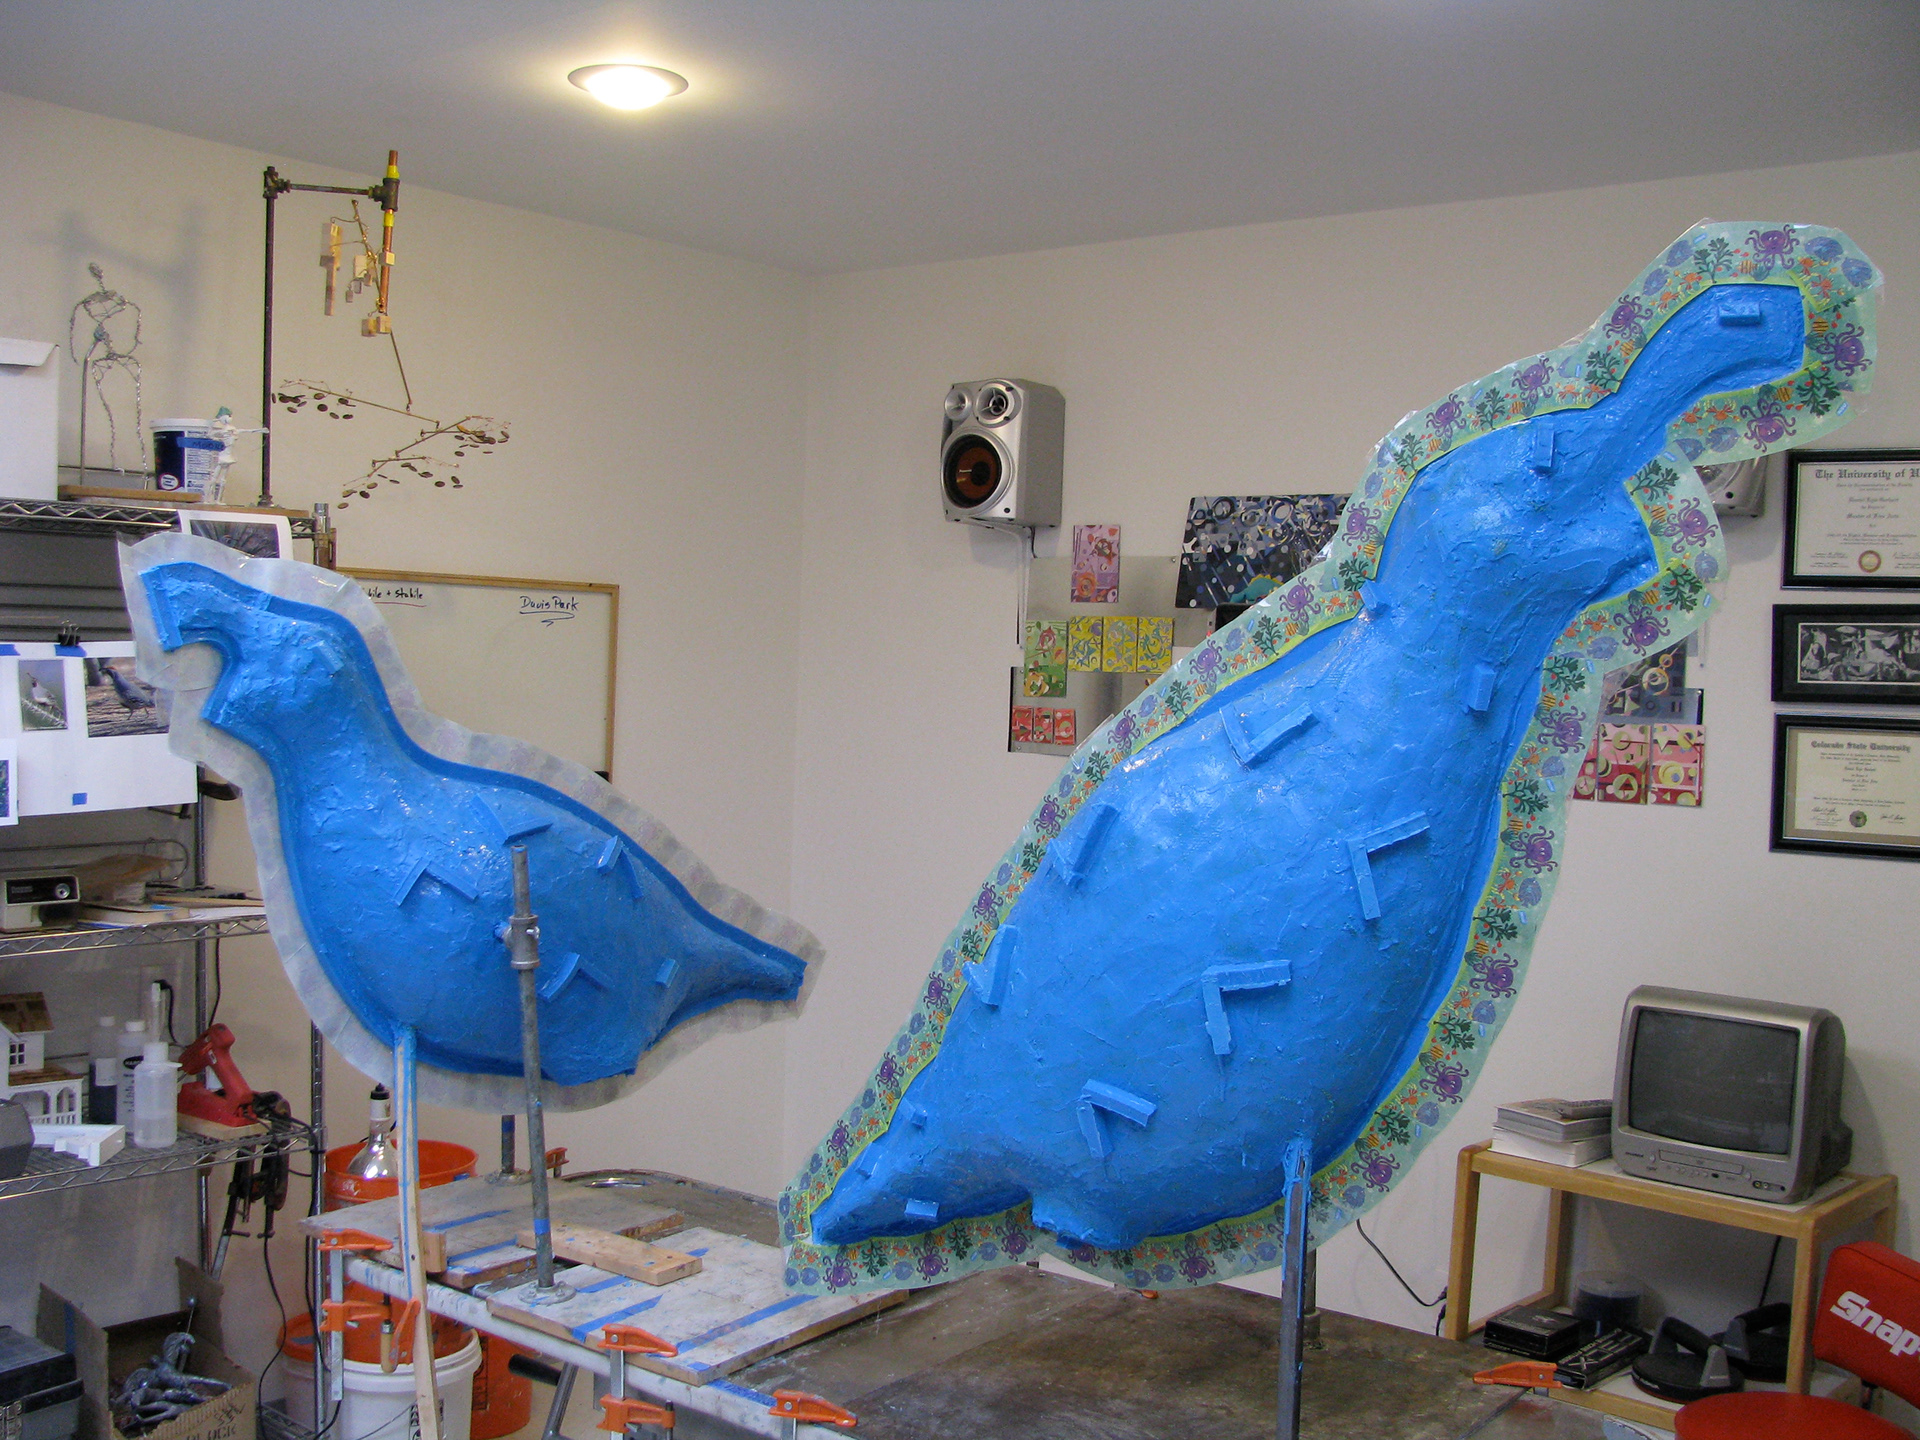
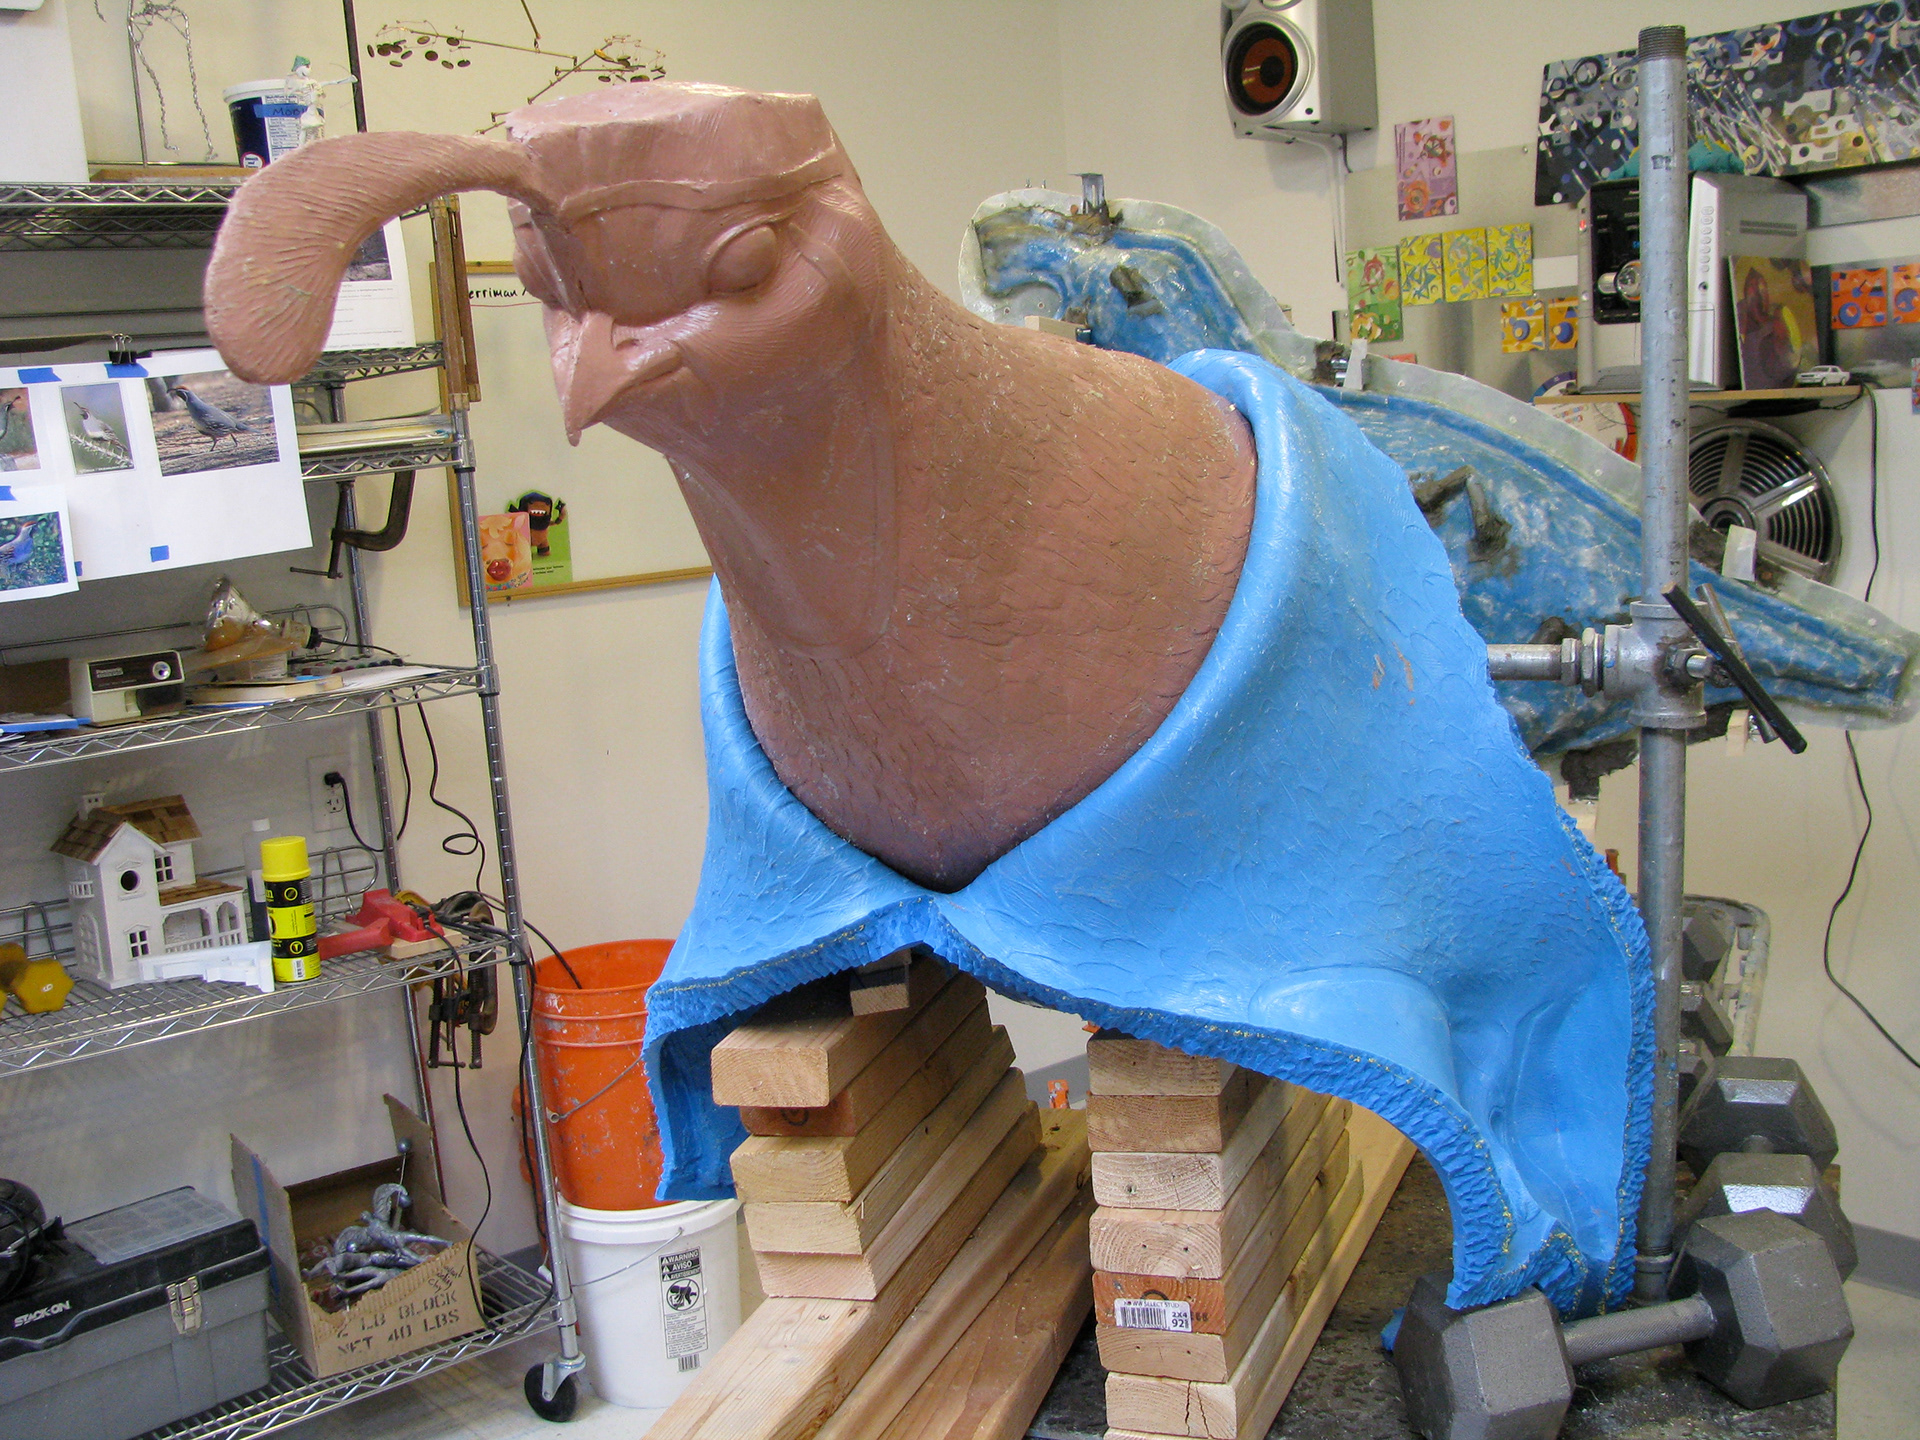
Things start getting smurfy with the impression coat of Silicon rubber.
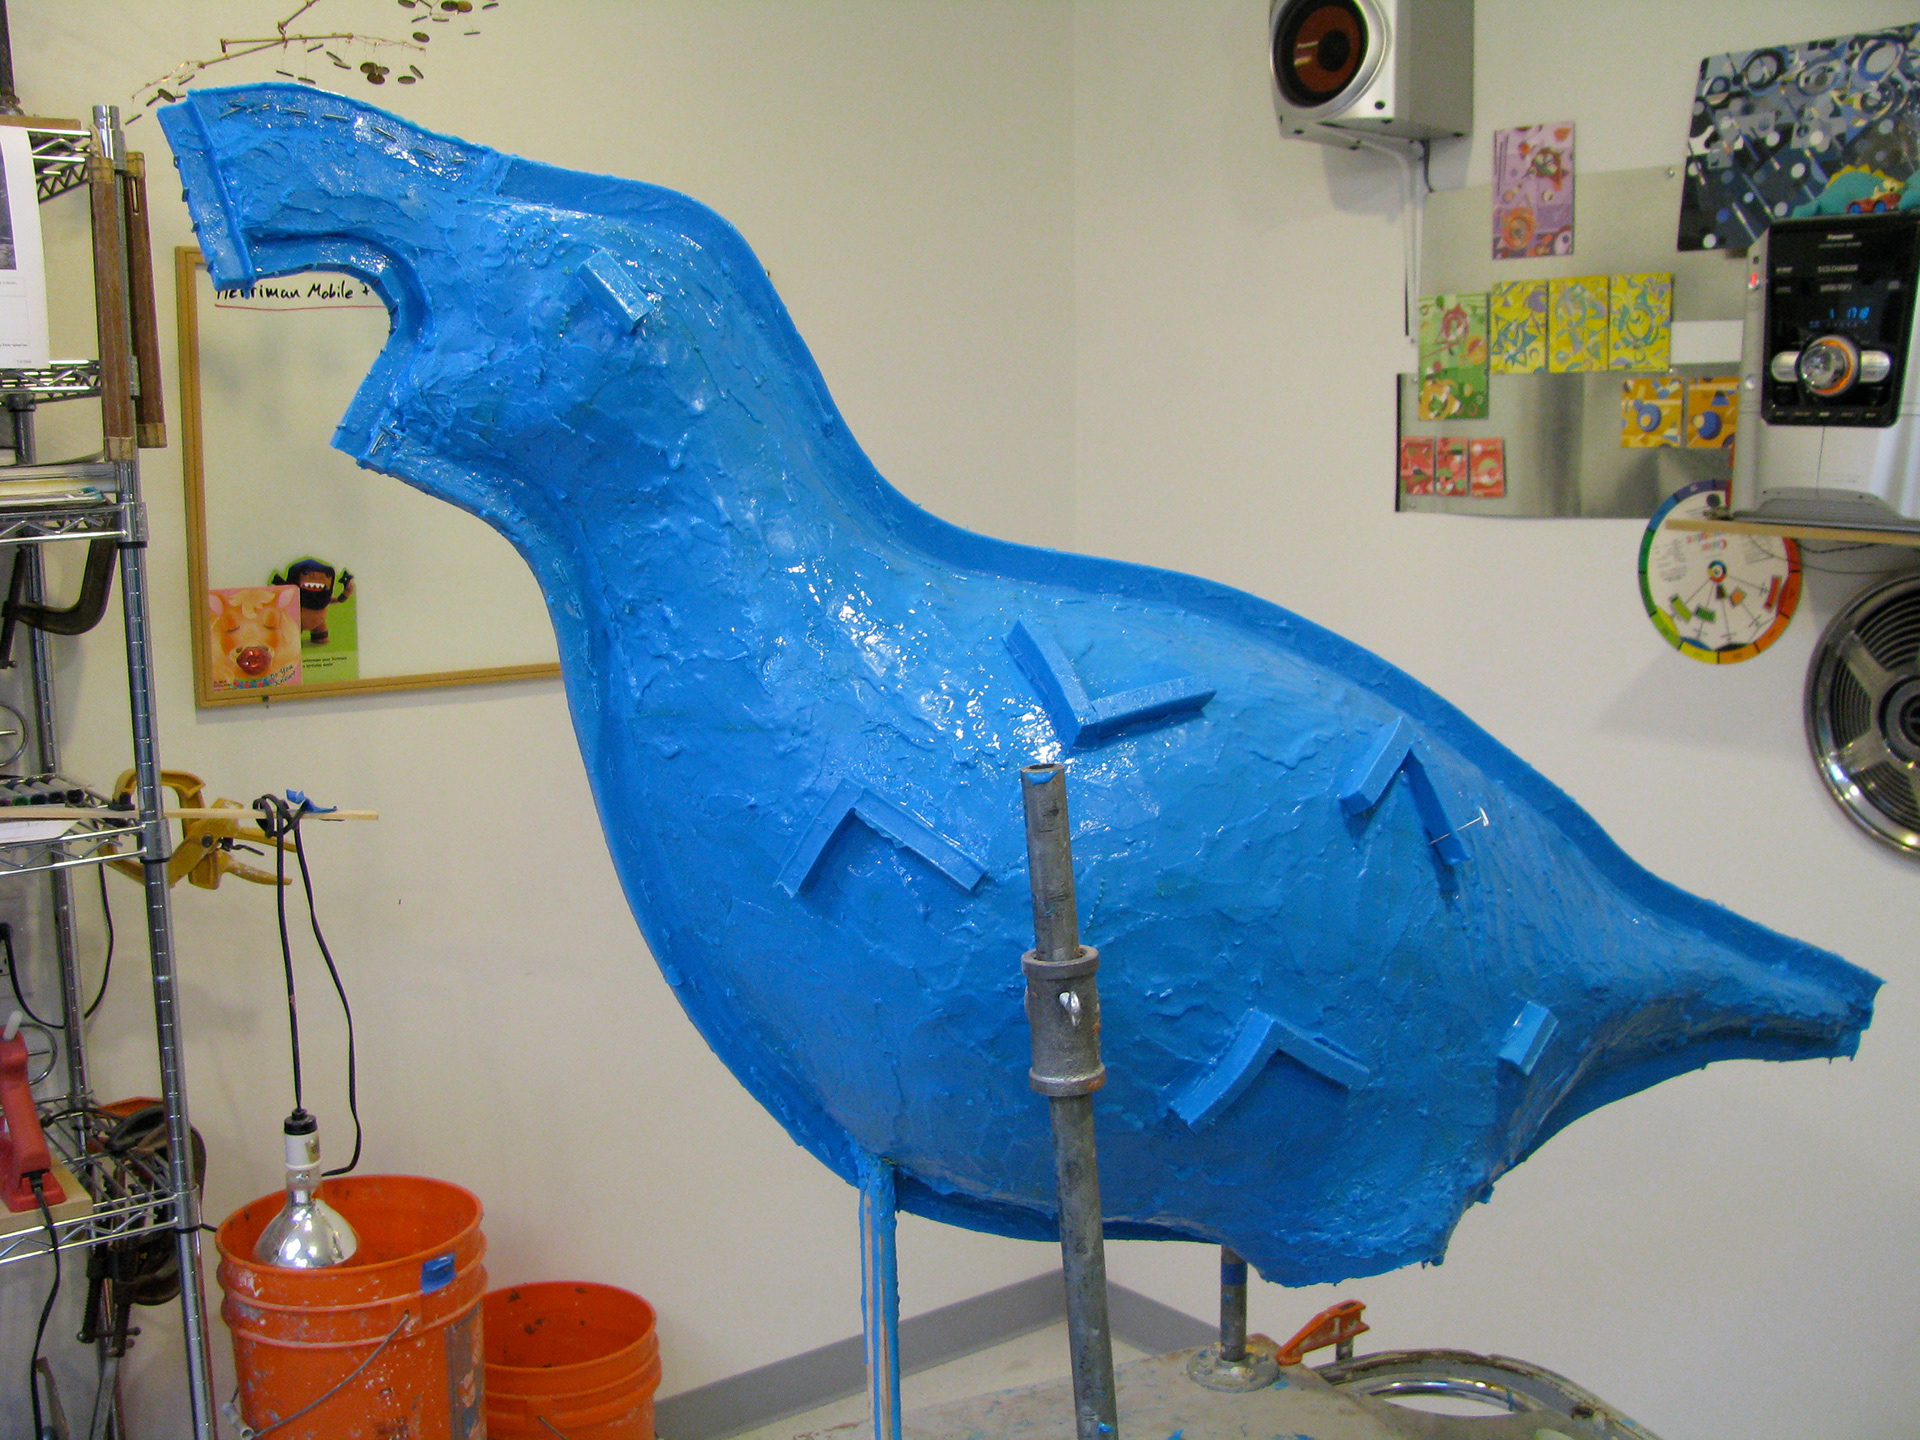
Much farther along the silicon mold process. Many layers, then a separation line, then key wedges to grab into the fiberglass mold.
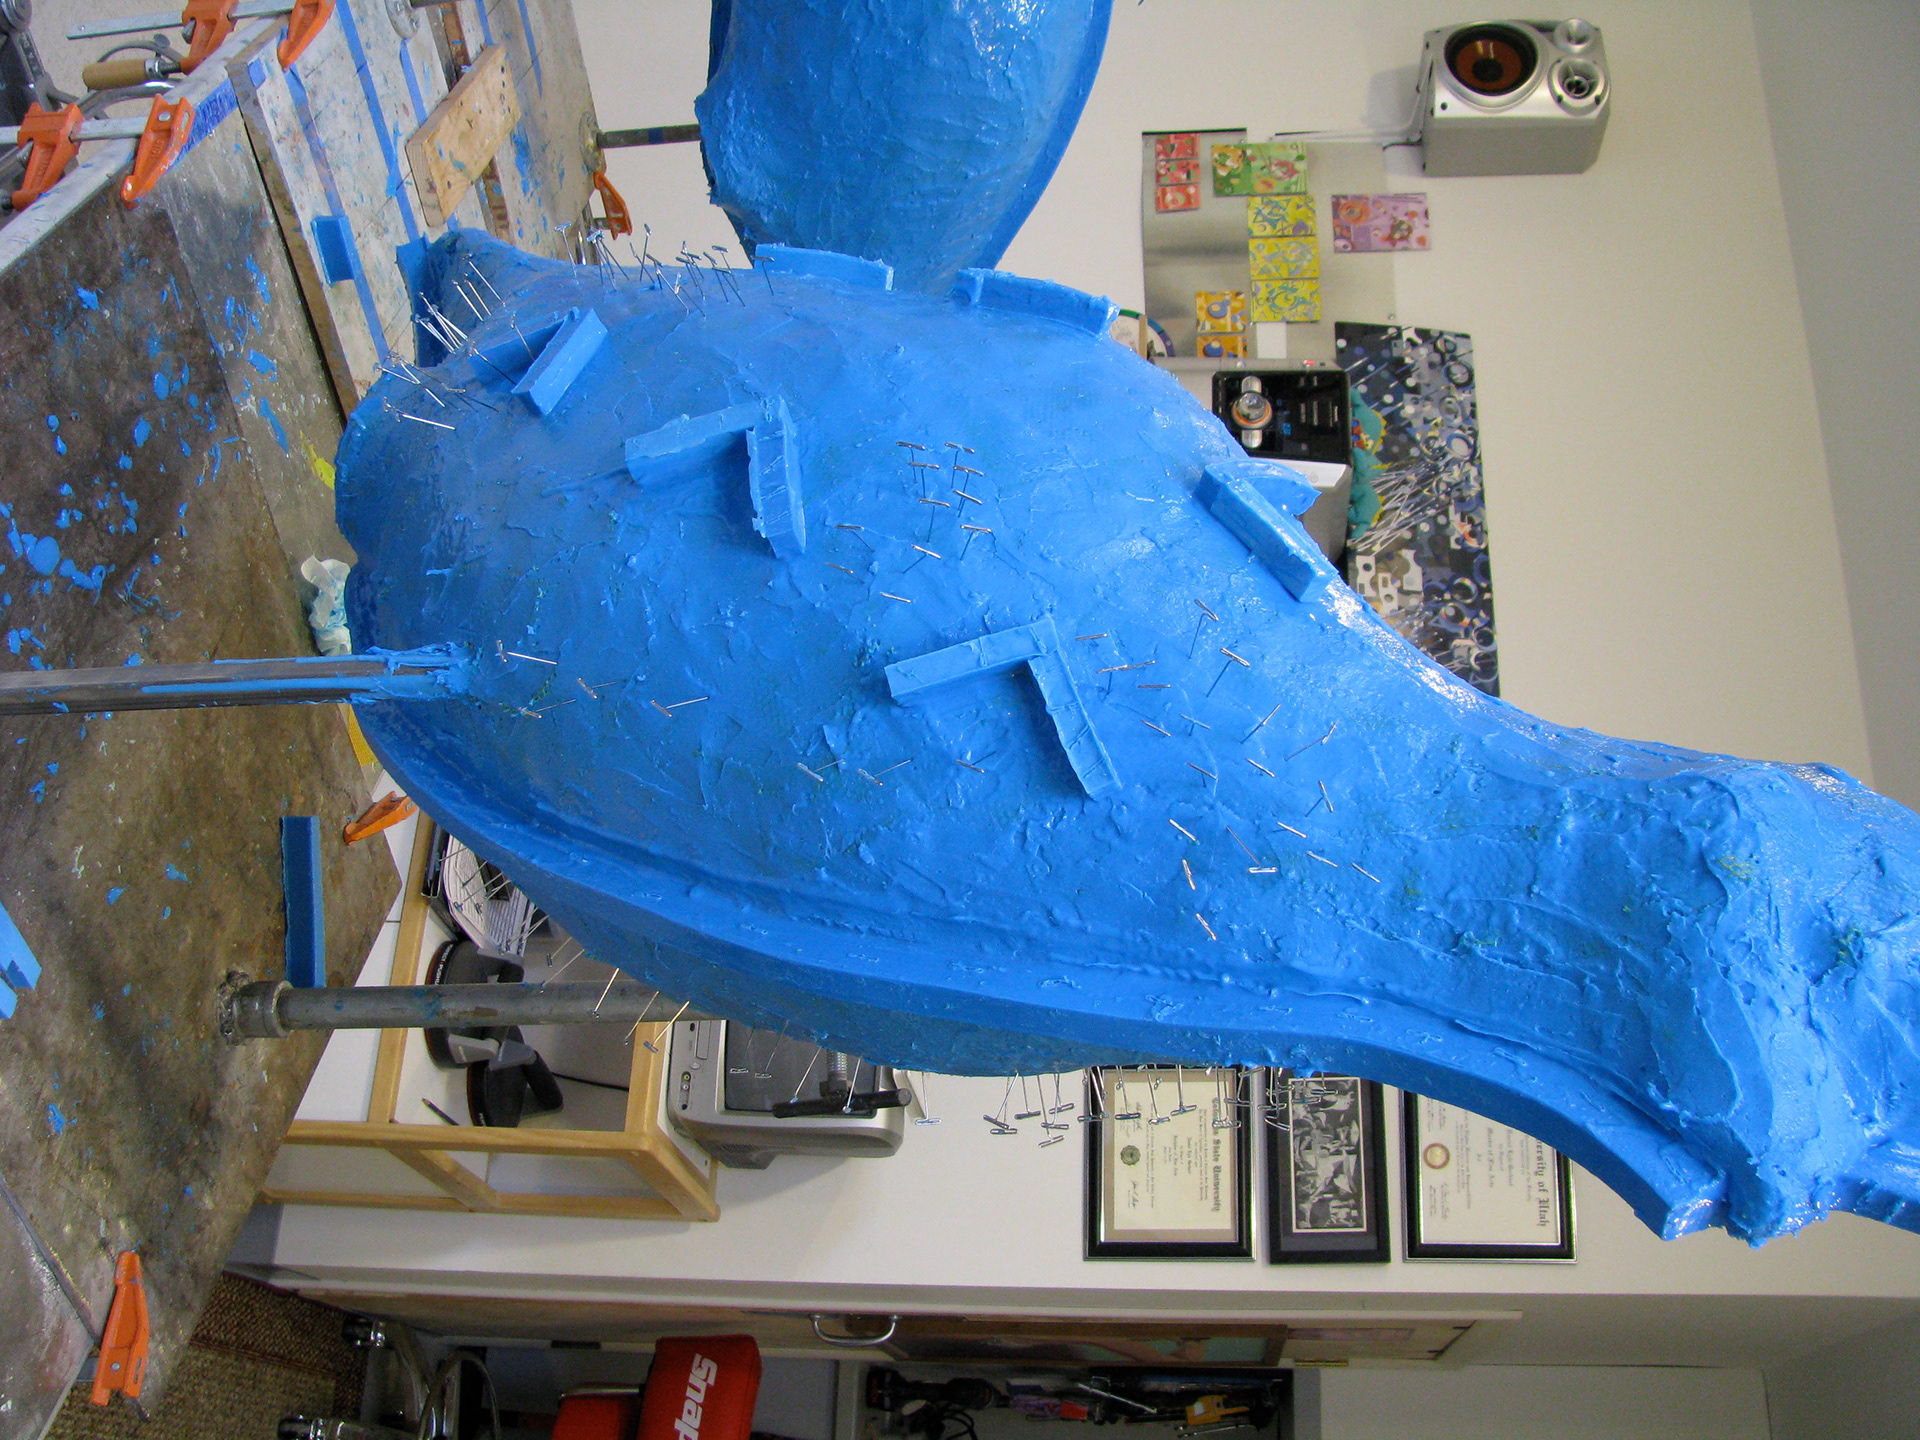
The pins stuck the seam lines and keys to the bird while the "glue layer" of silicon cured out.
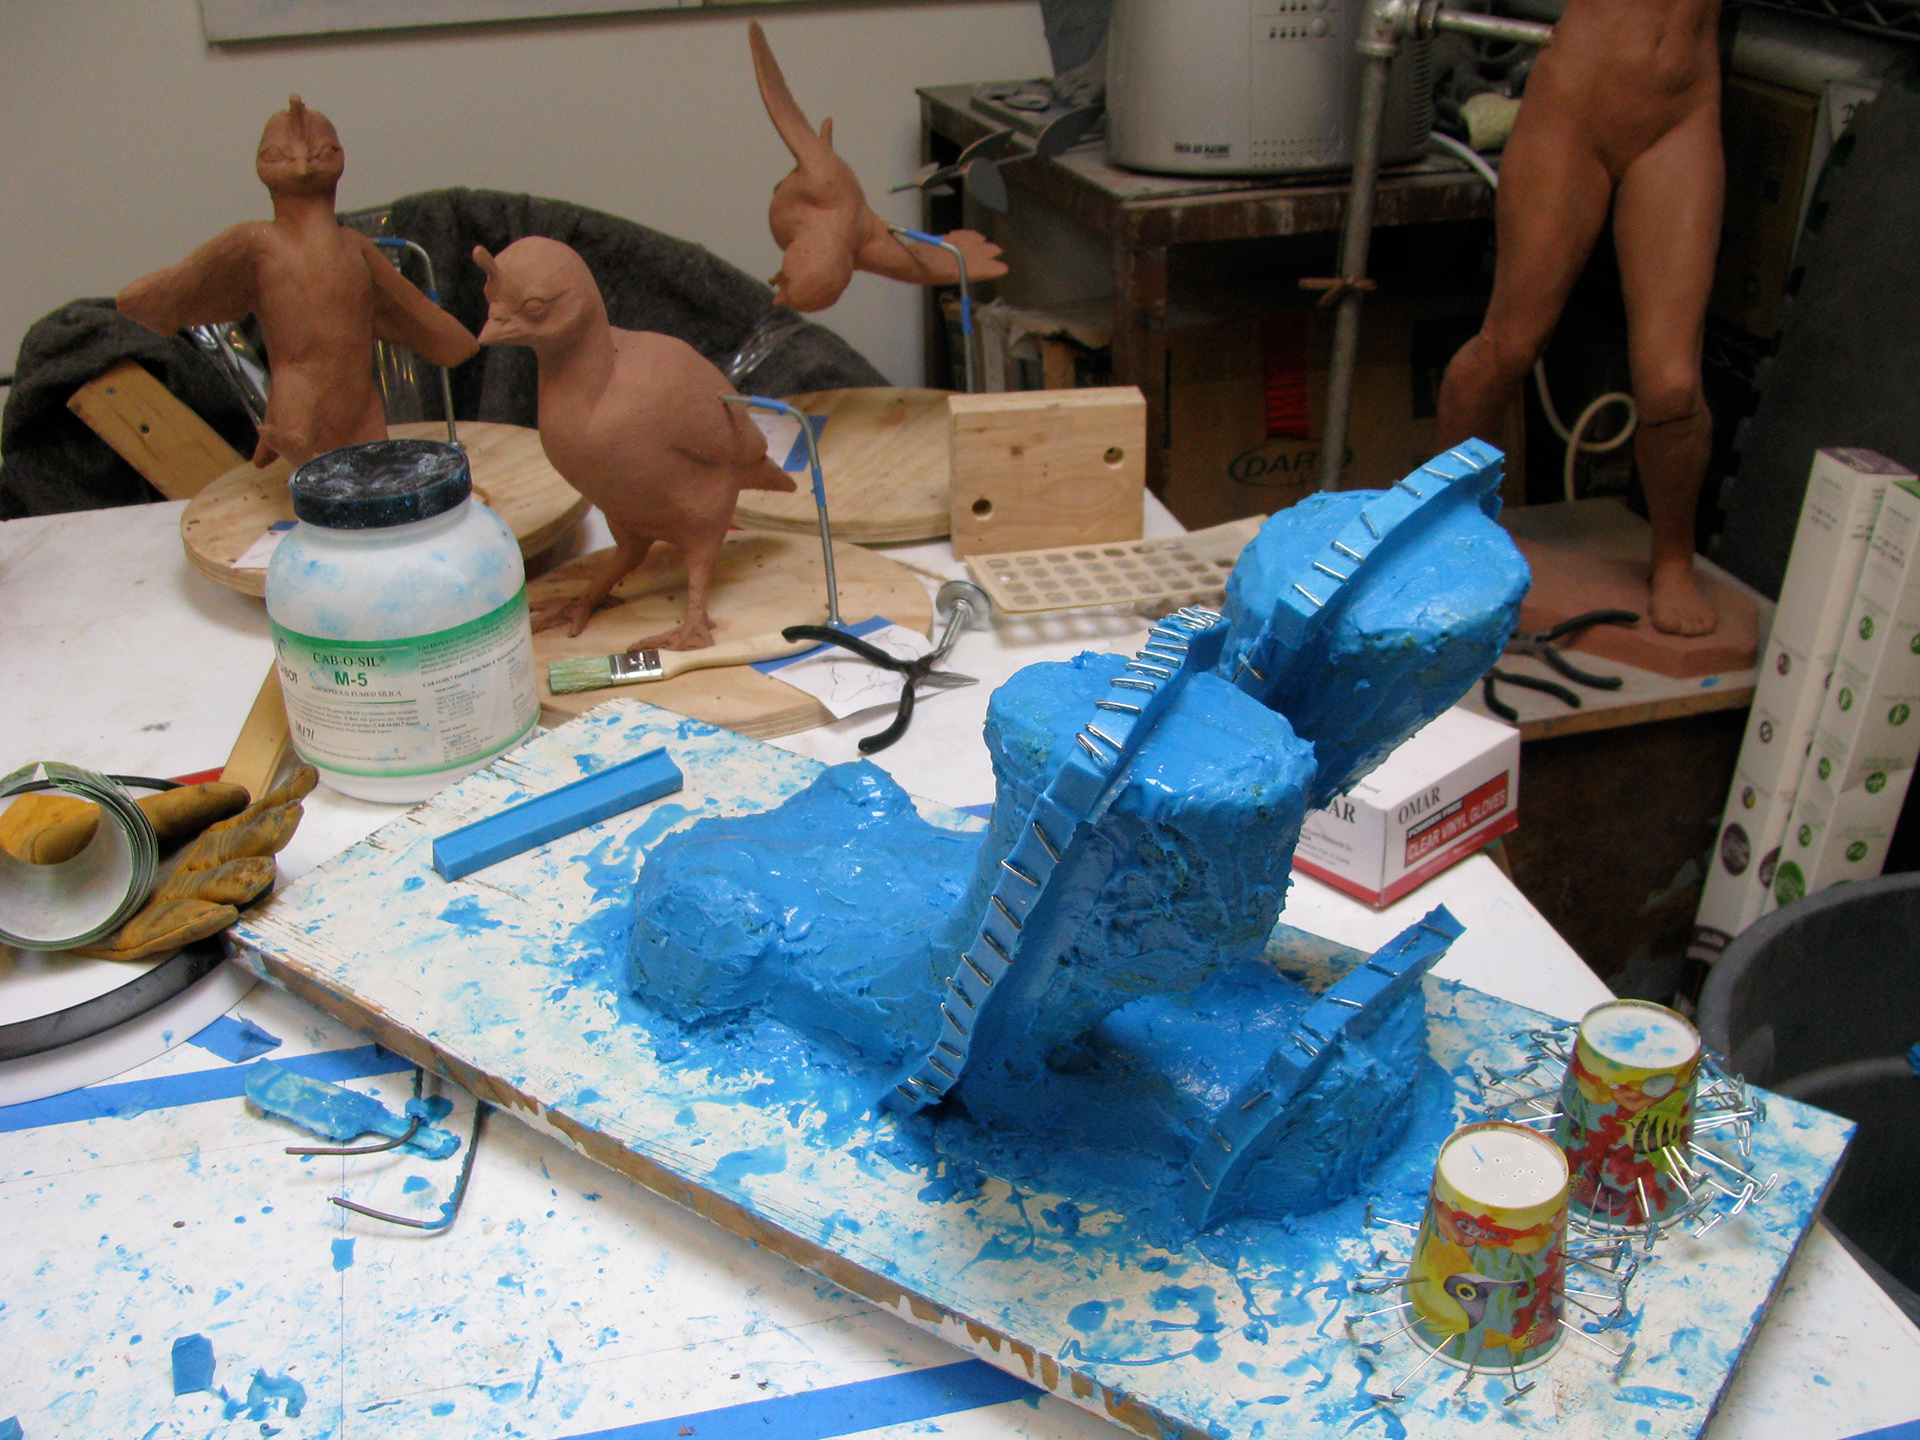
Skates & feet. A bit of a struggle here with so many undercuts.
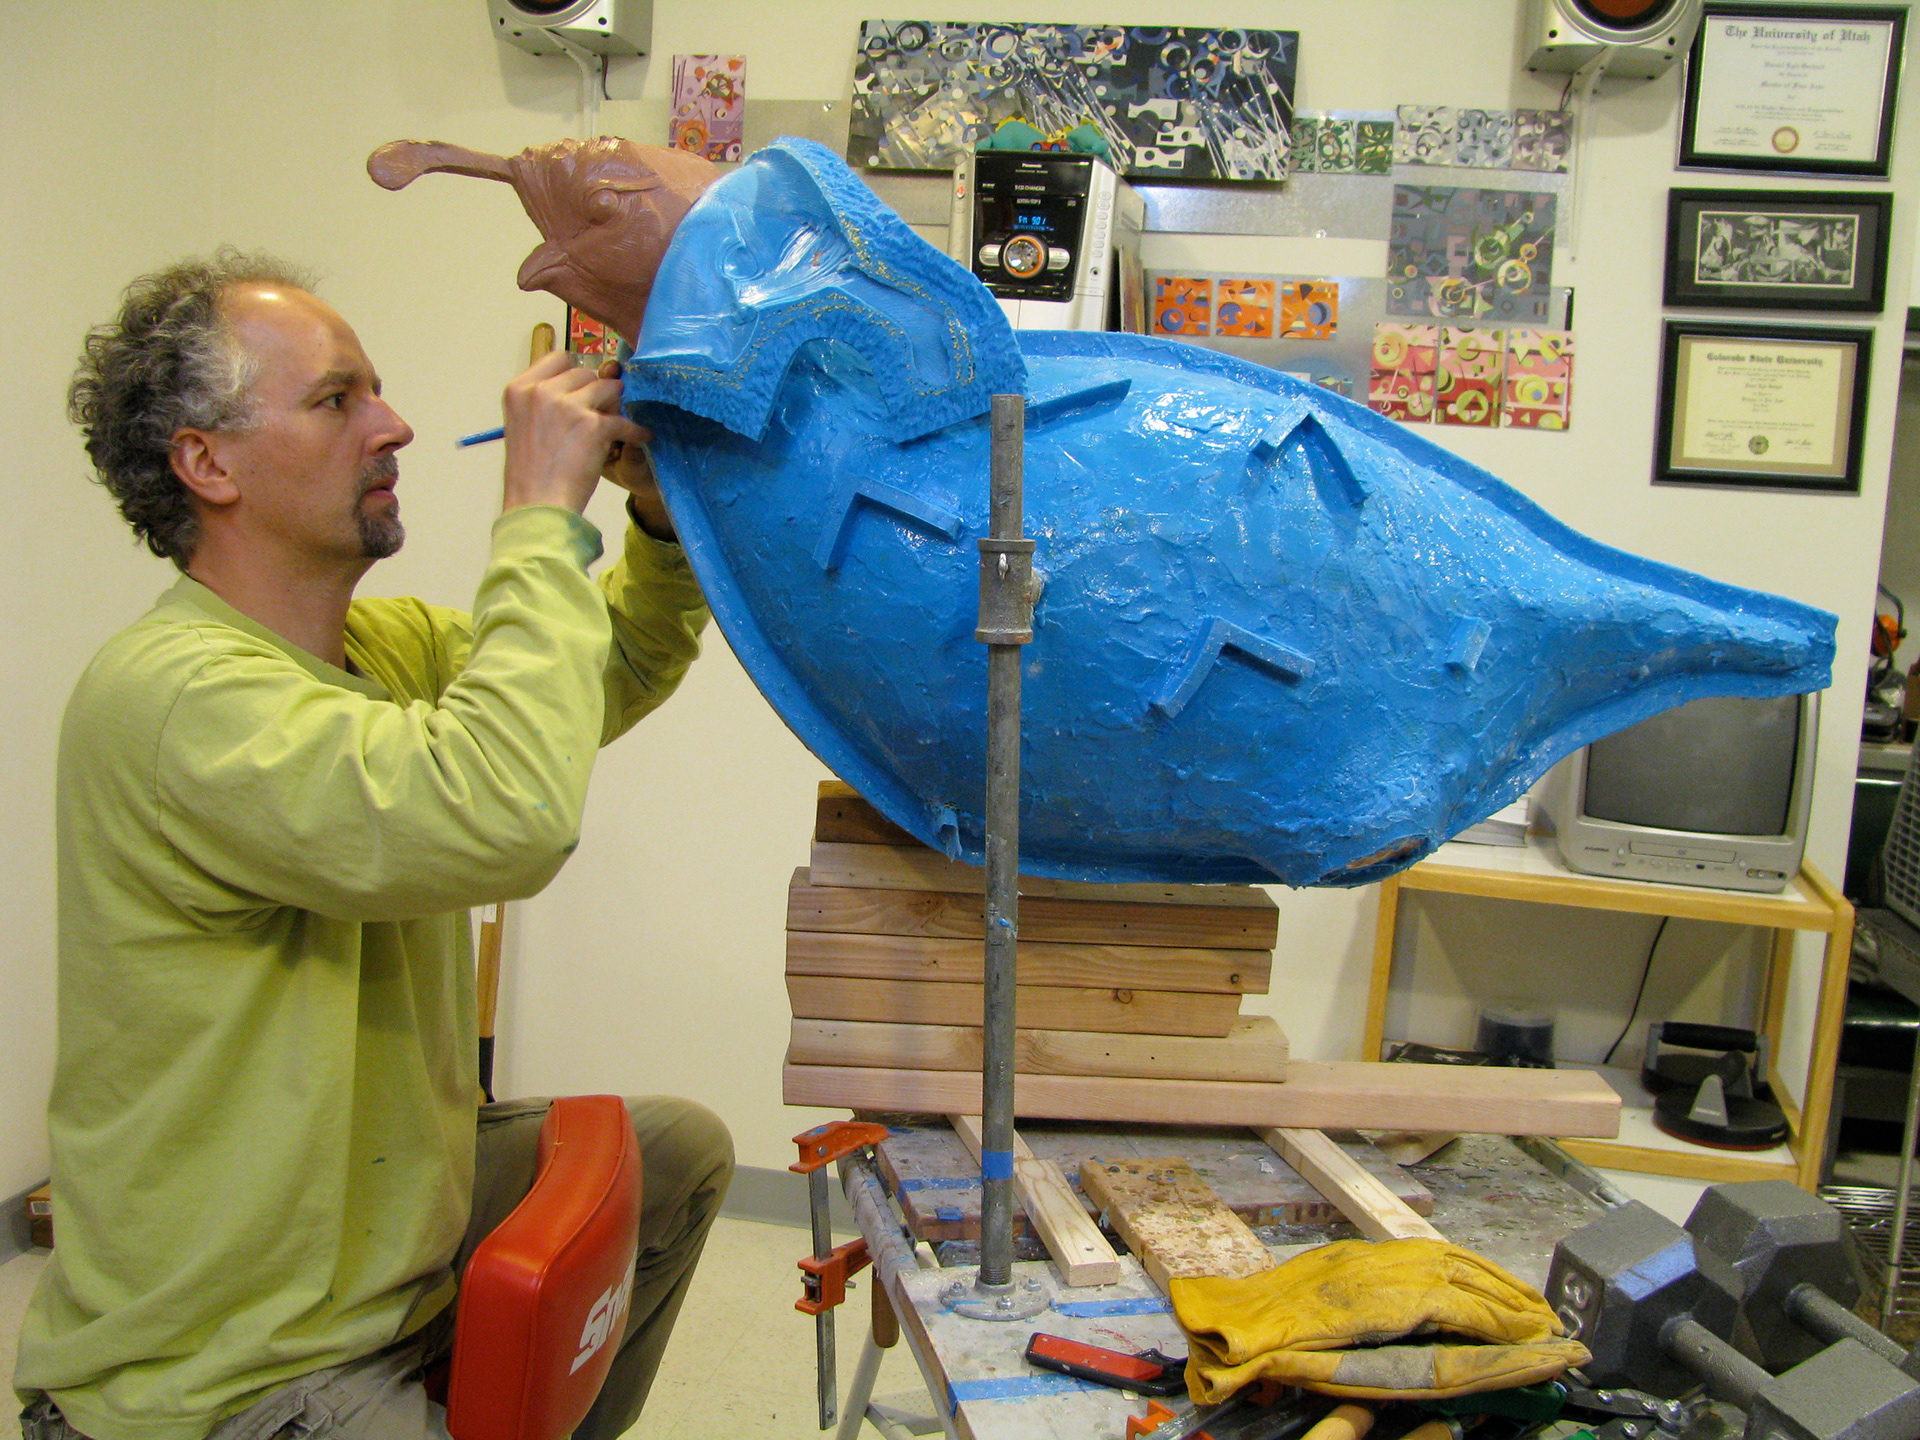
Once the silicon mold is finished, I use waxed dixie cups, packing tape, and pins to create the mold separation for the fiberglass mold.
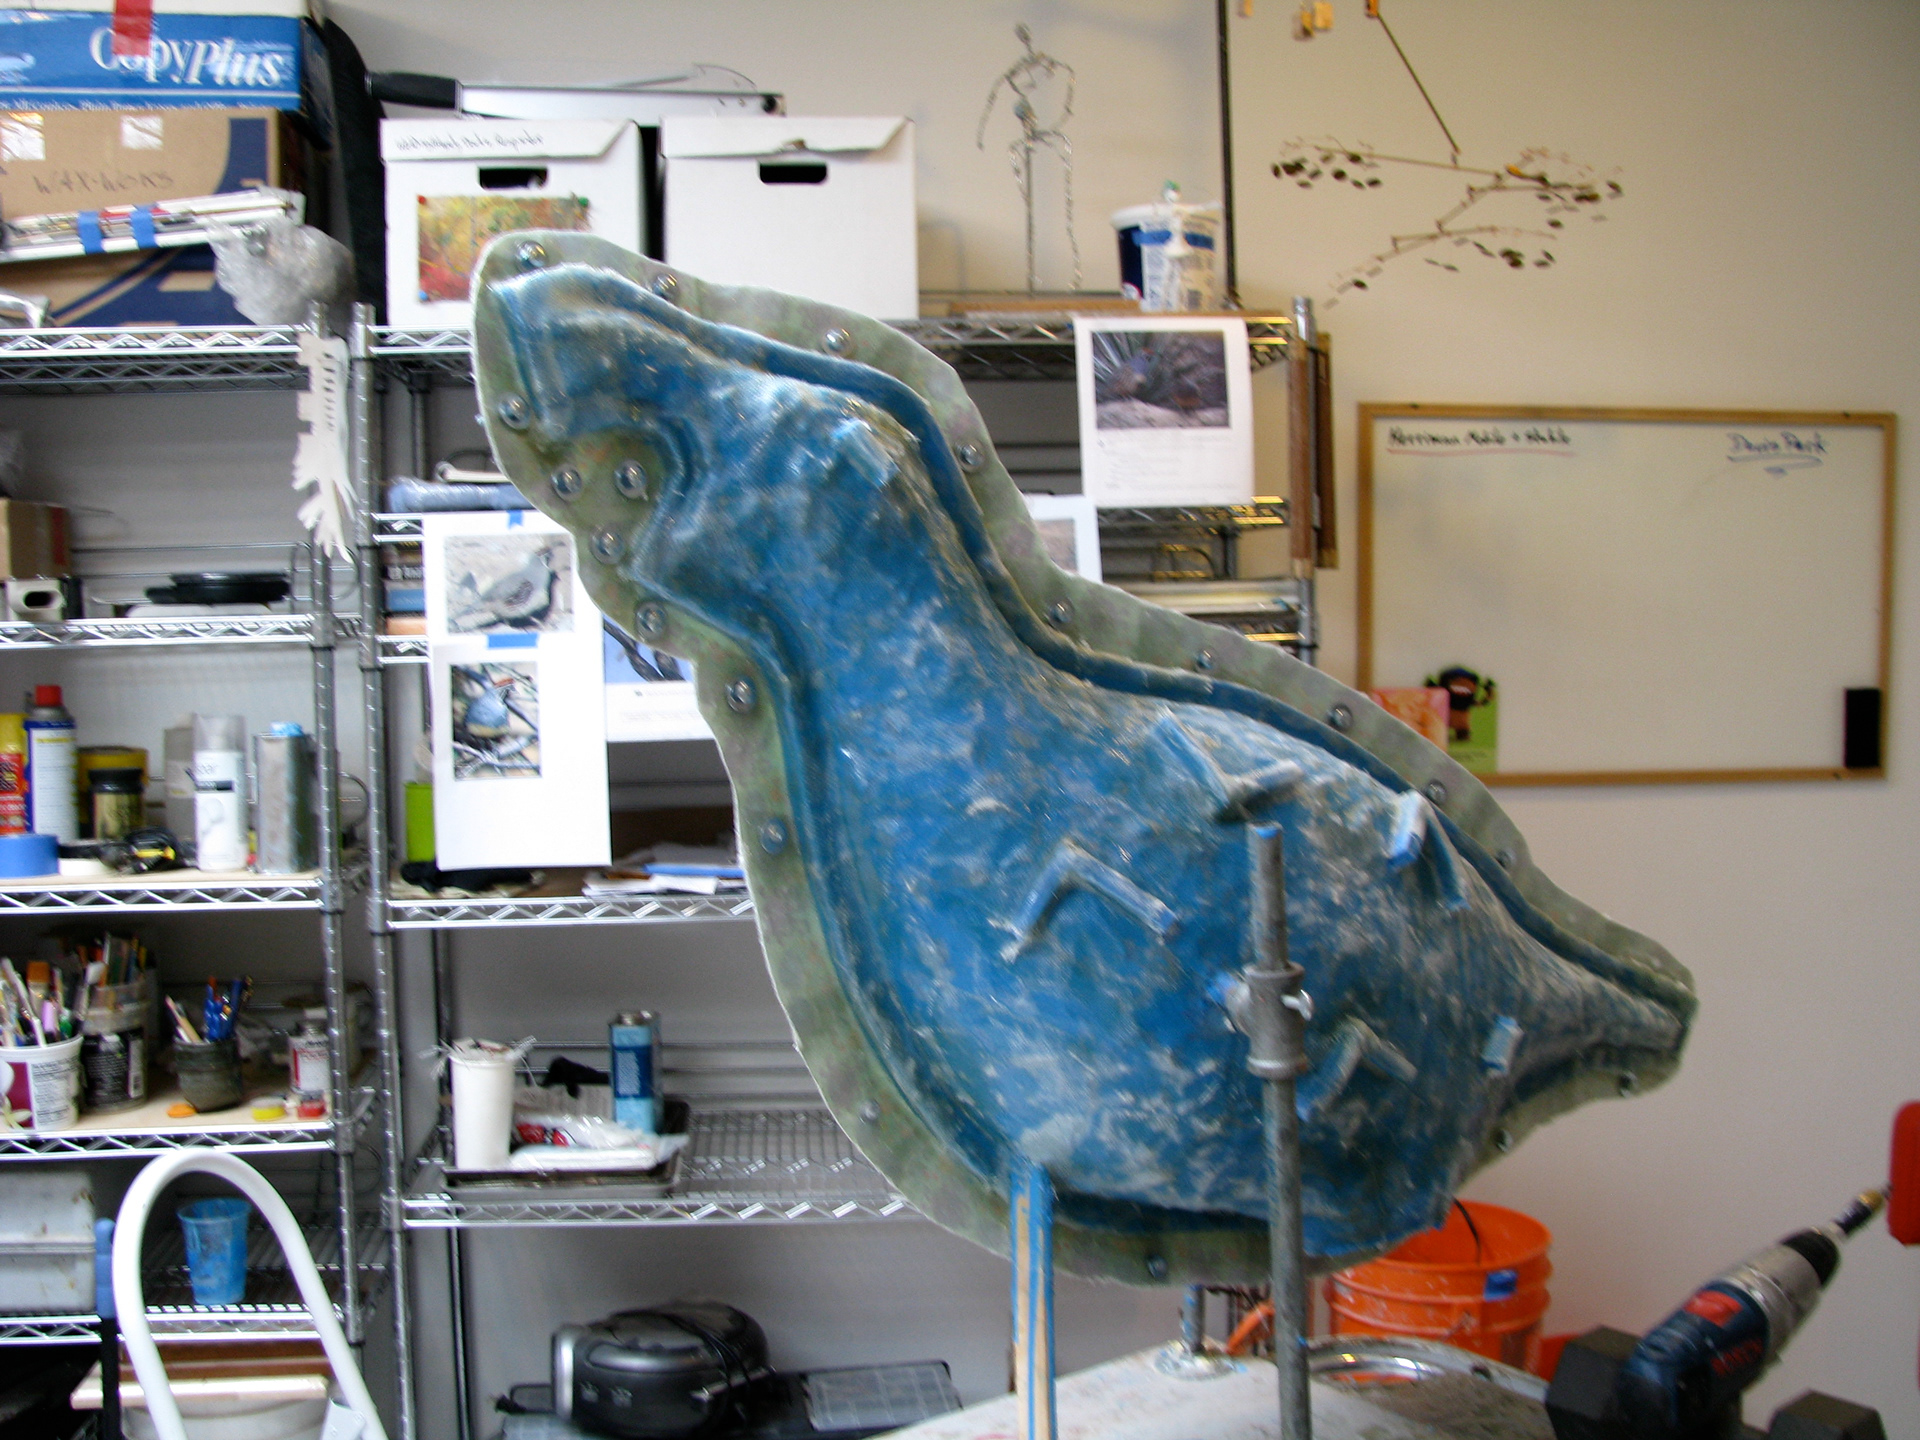
Fiberglass mold finished, sanded, and trimmed.
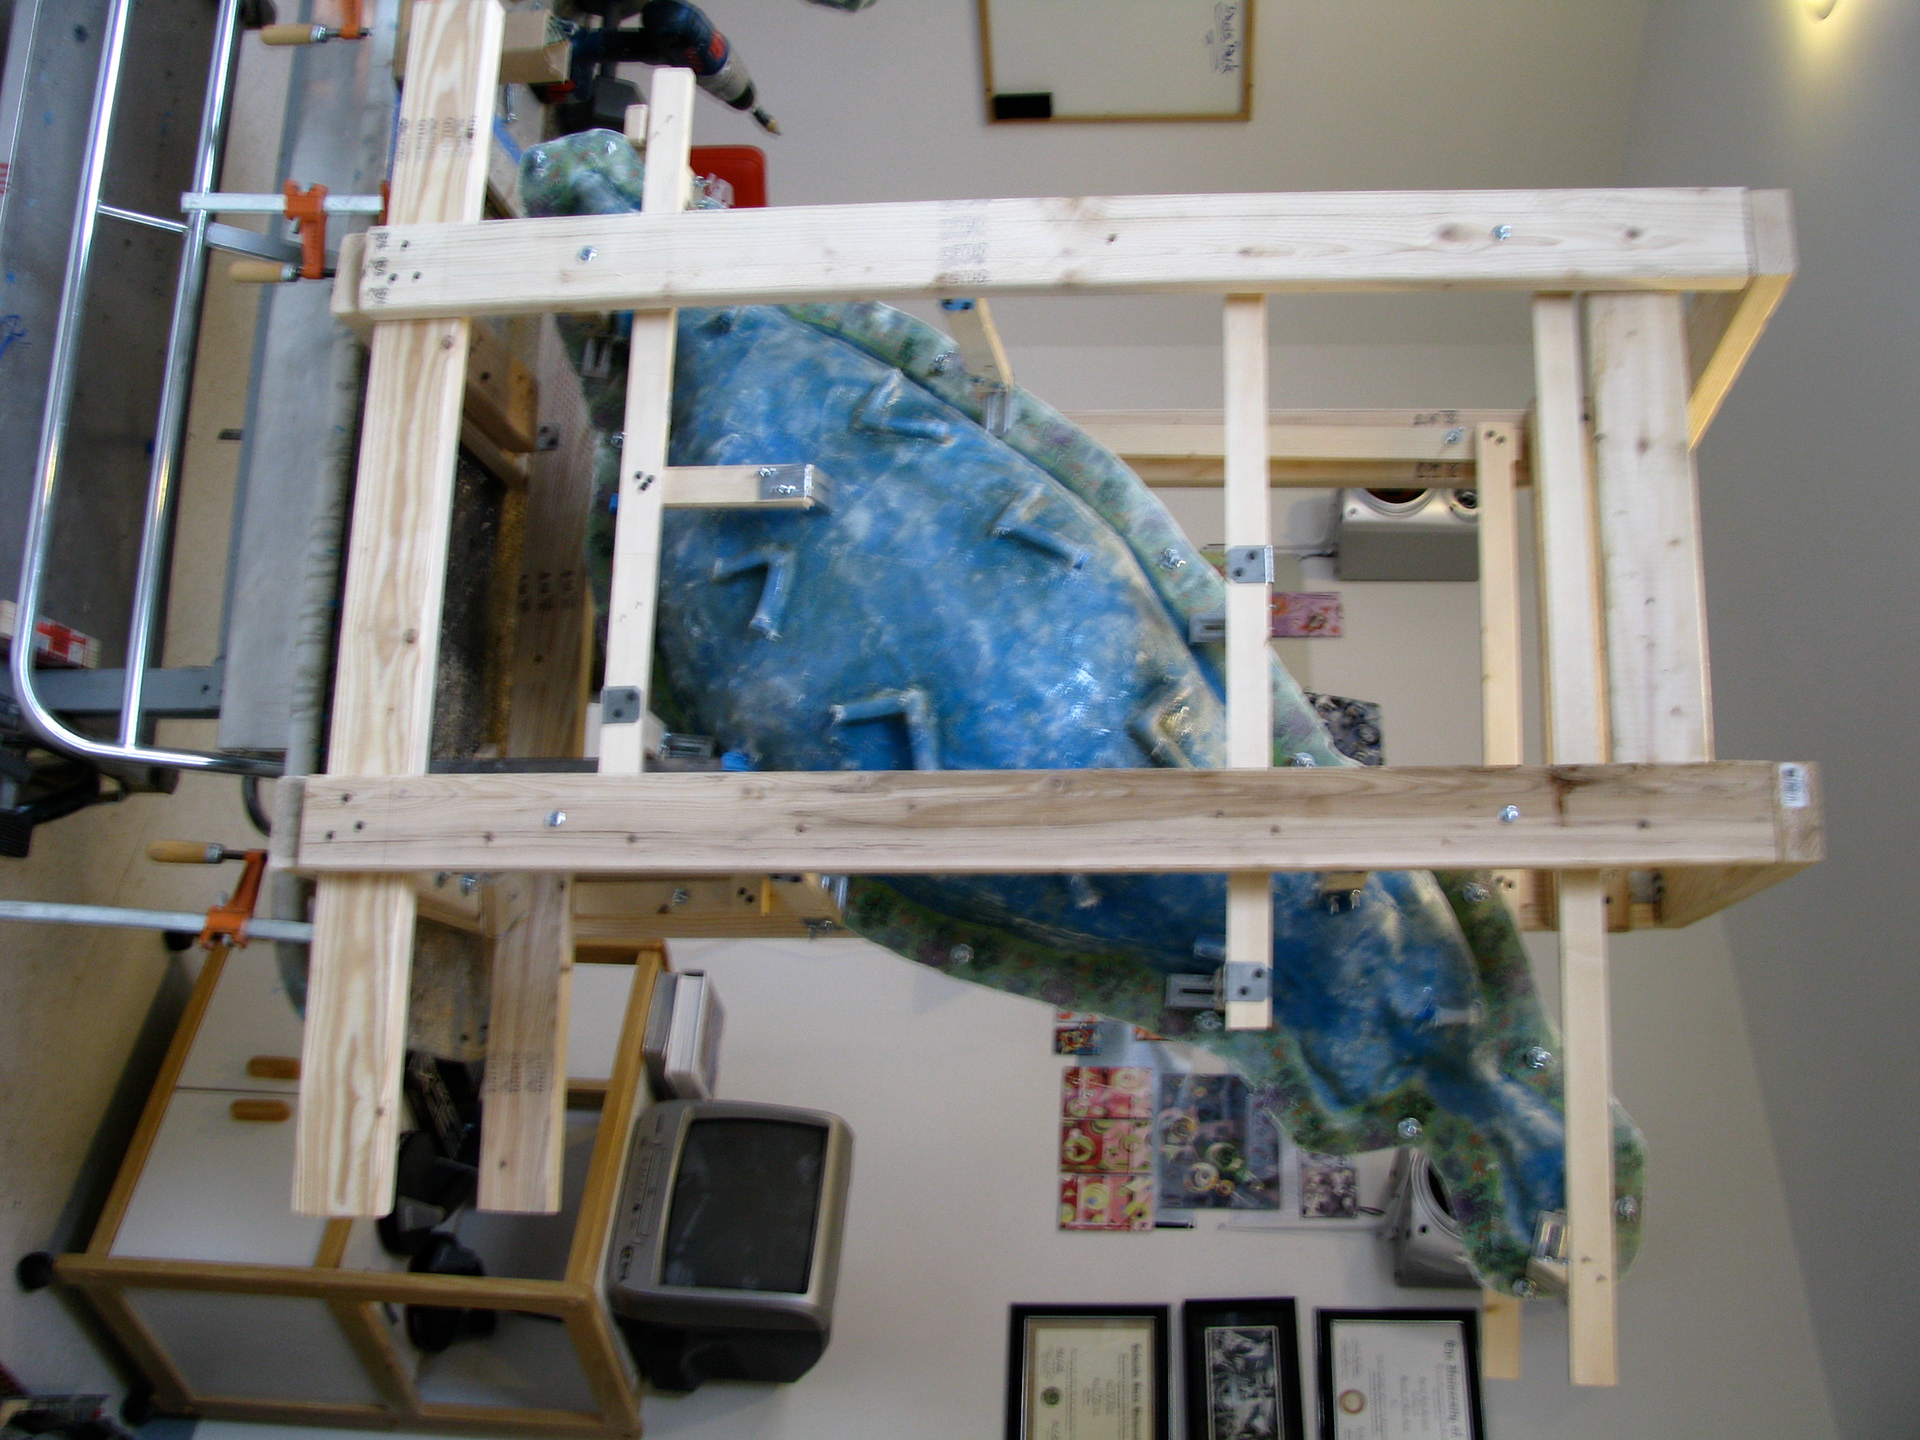
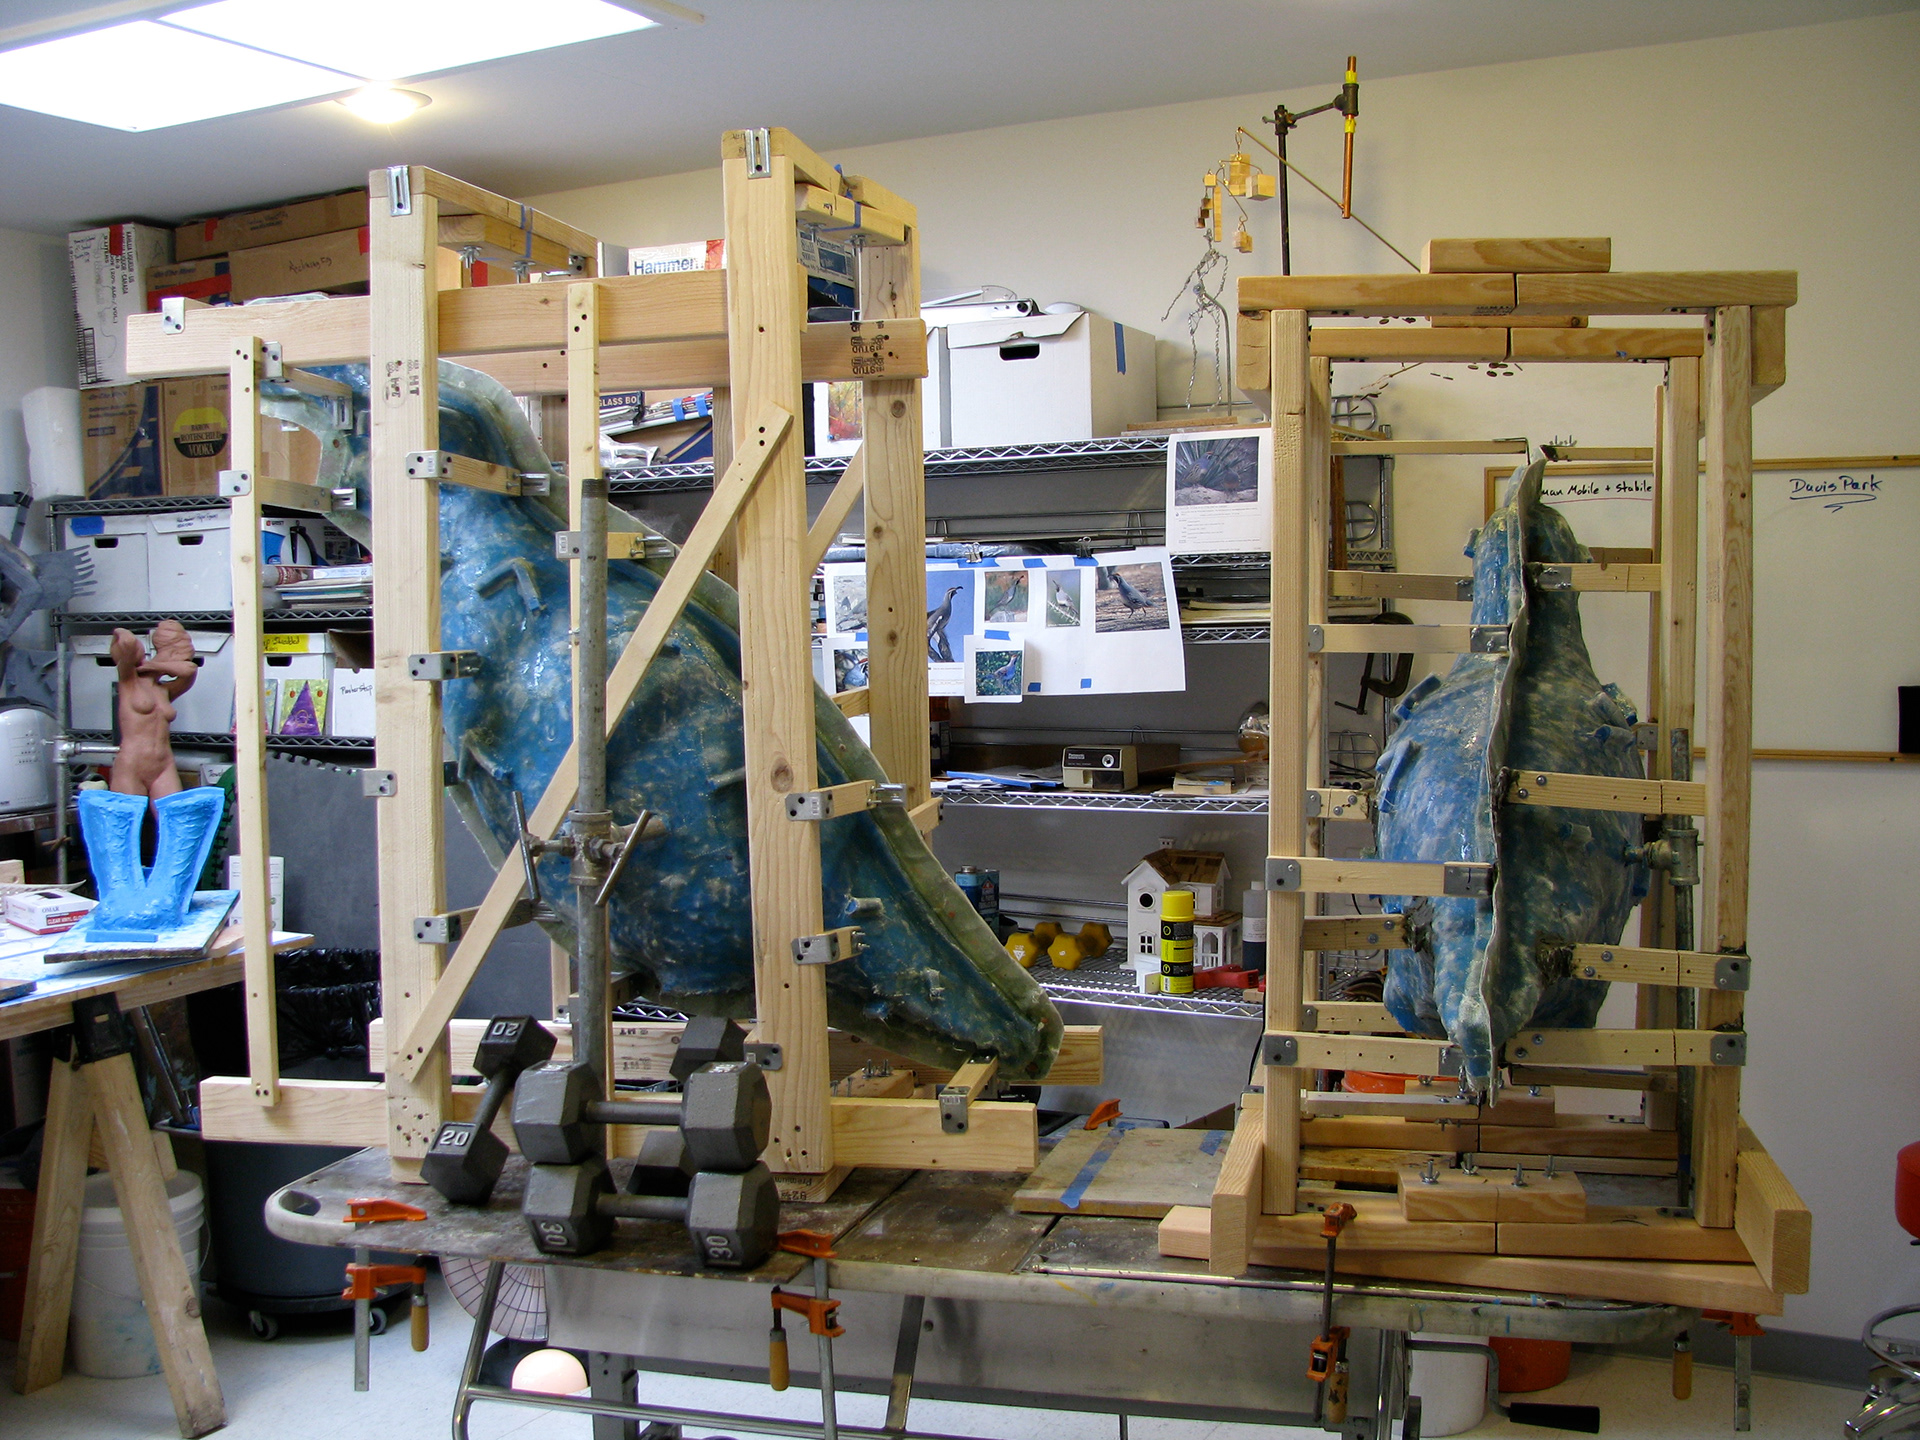
Rather than making a thick and heavy fiberglass mold, I created a structural supporting frame of wood. This ensures that nothing flexes or fails when slurrying wax into the mold- and protects the form while the molten wax is rolled around in the mold.
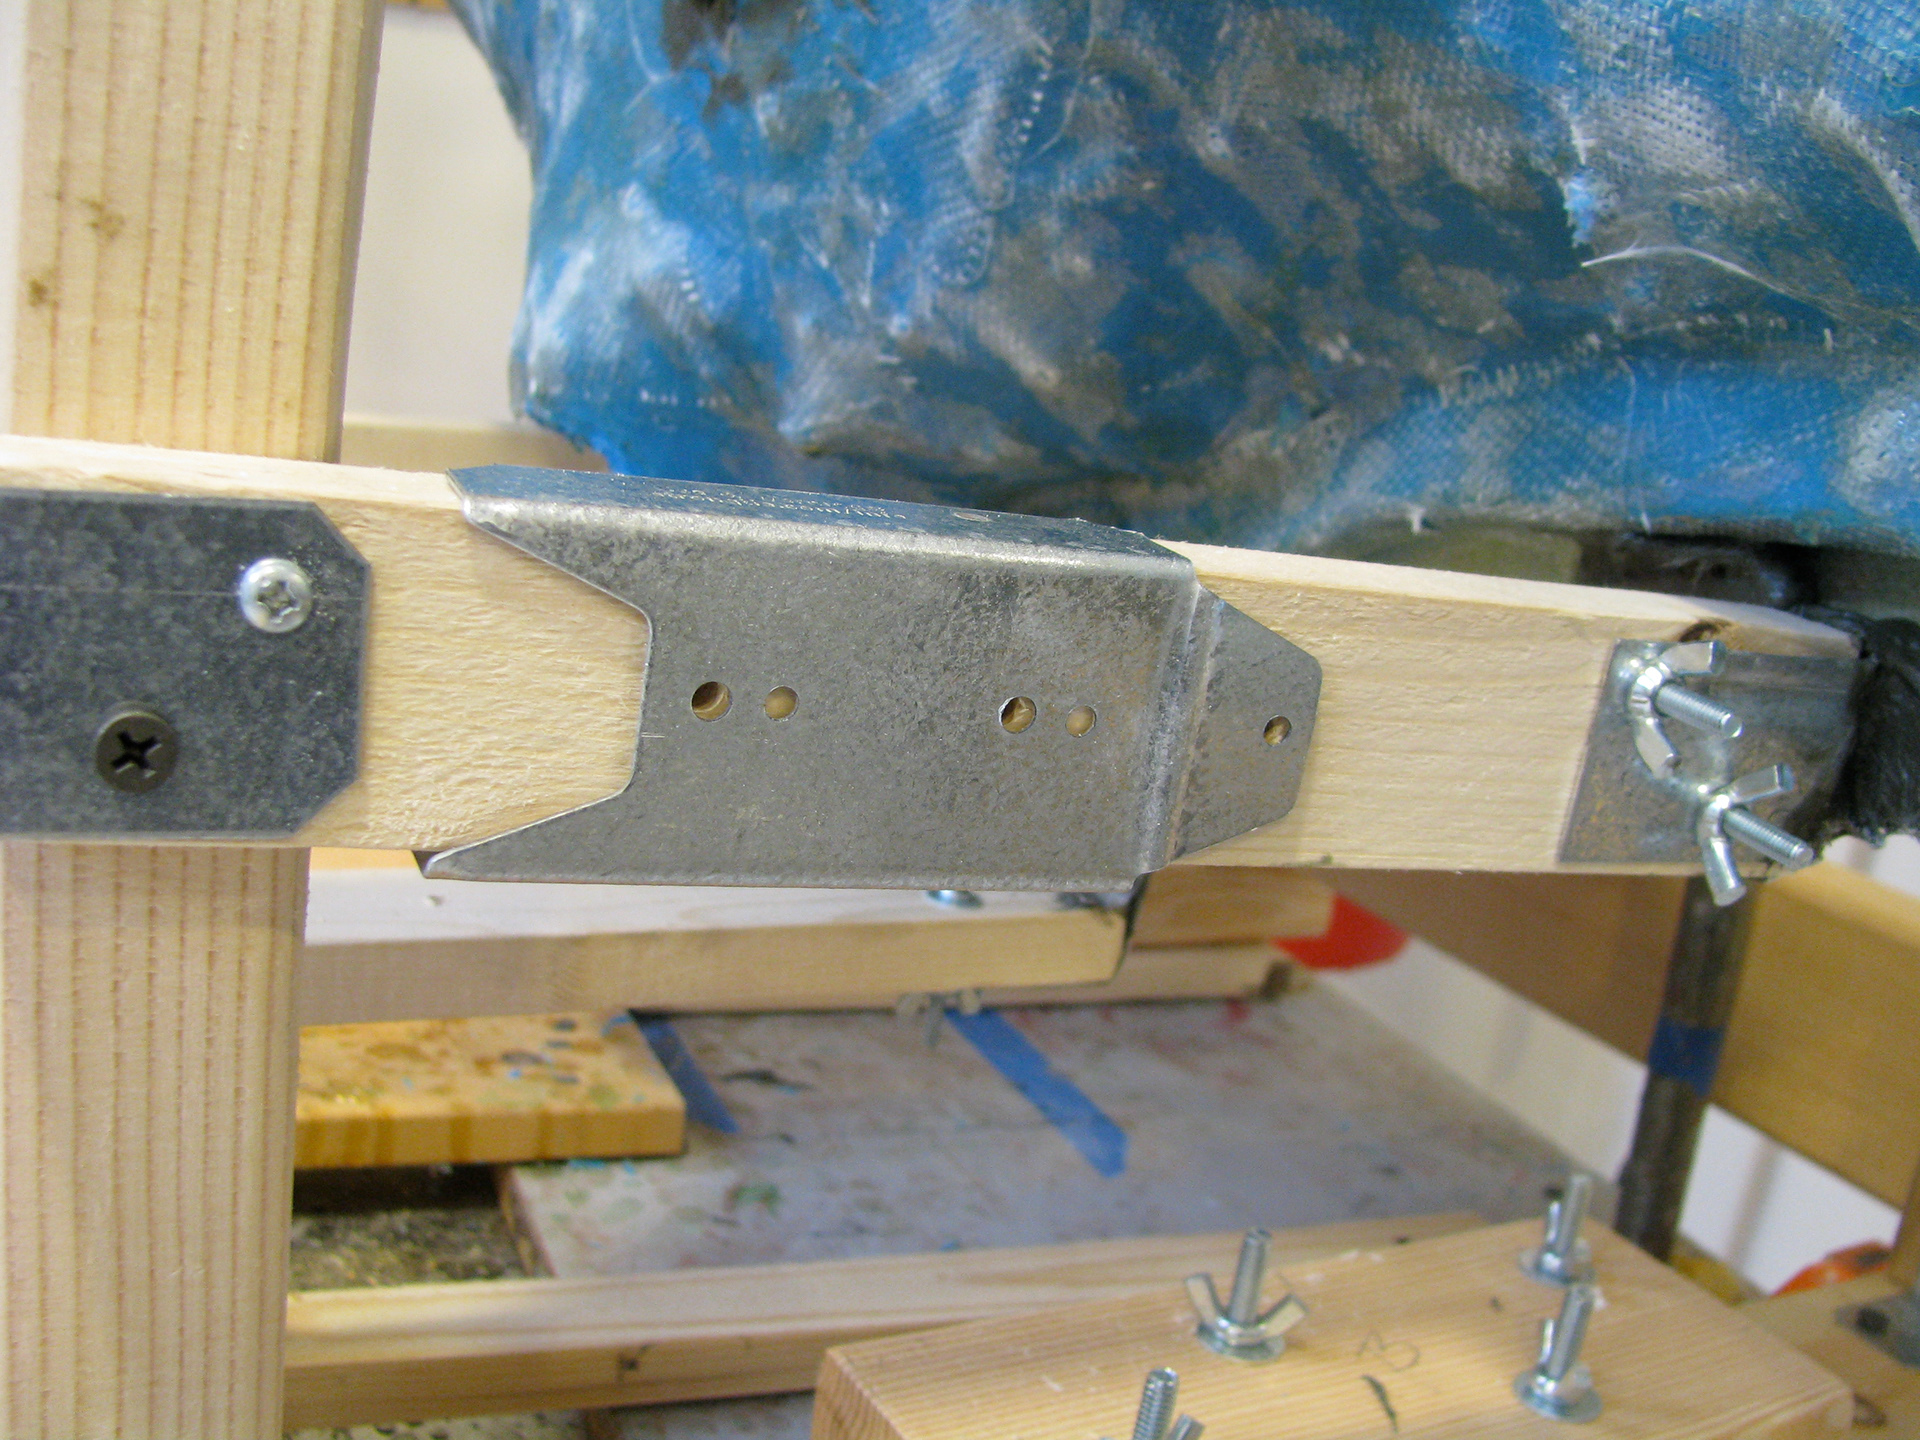
Metal brackets are fiberglassed onto the mold, holding small wooden arms that connect to the larger wooden structure.
Could have used more cross bracing, but it all worked just fine.
A mix of bondo and cloth. I found the bondo snapped away if stressed by itself.
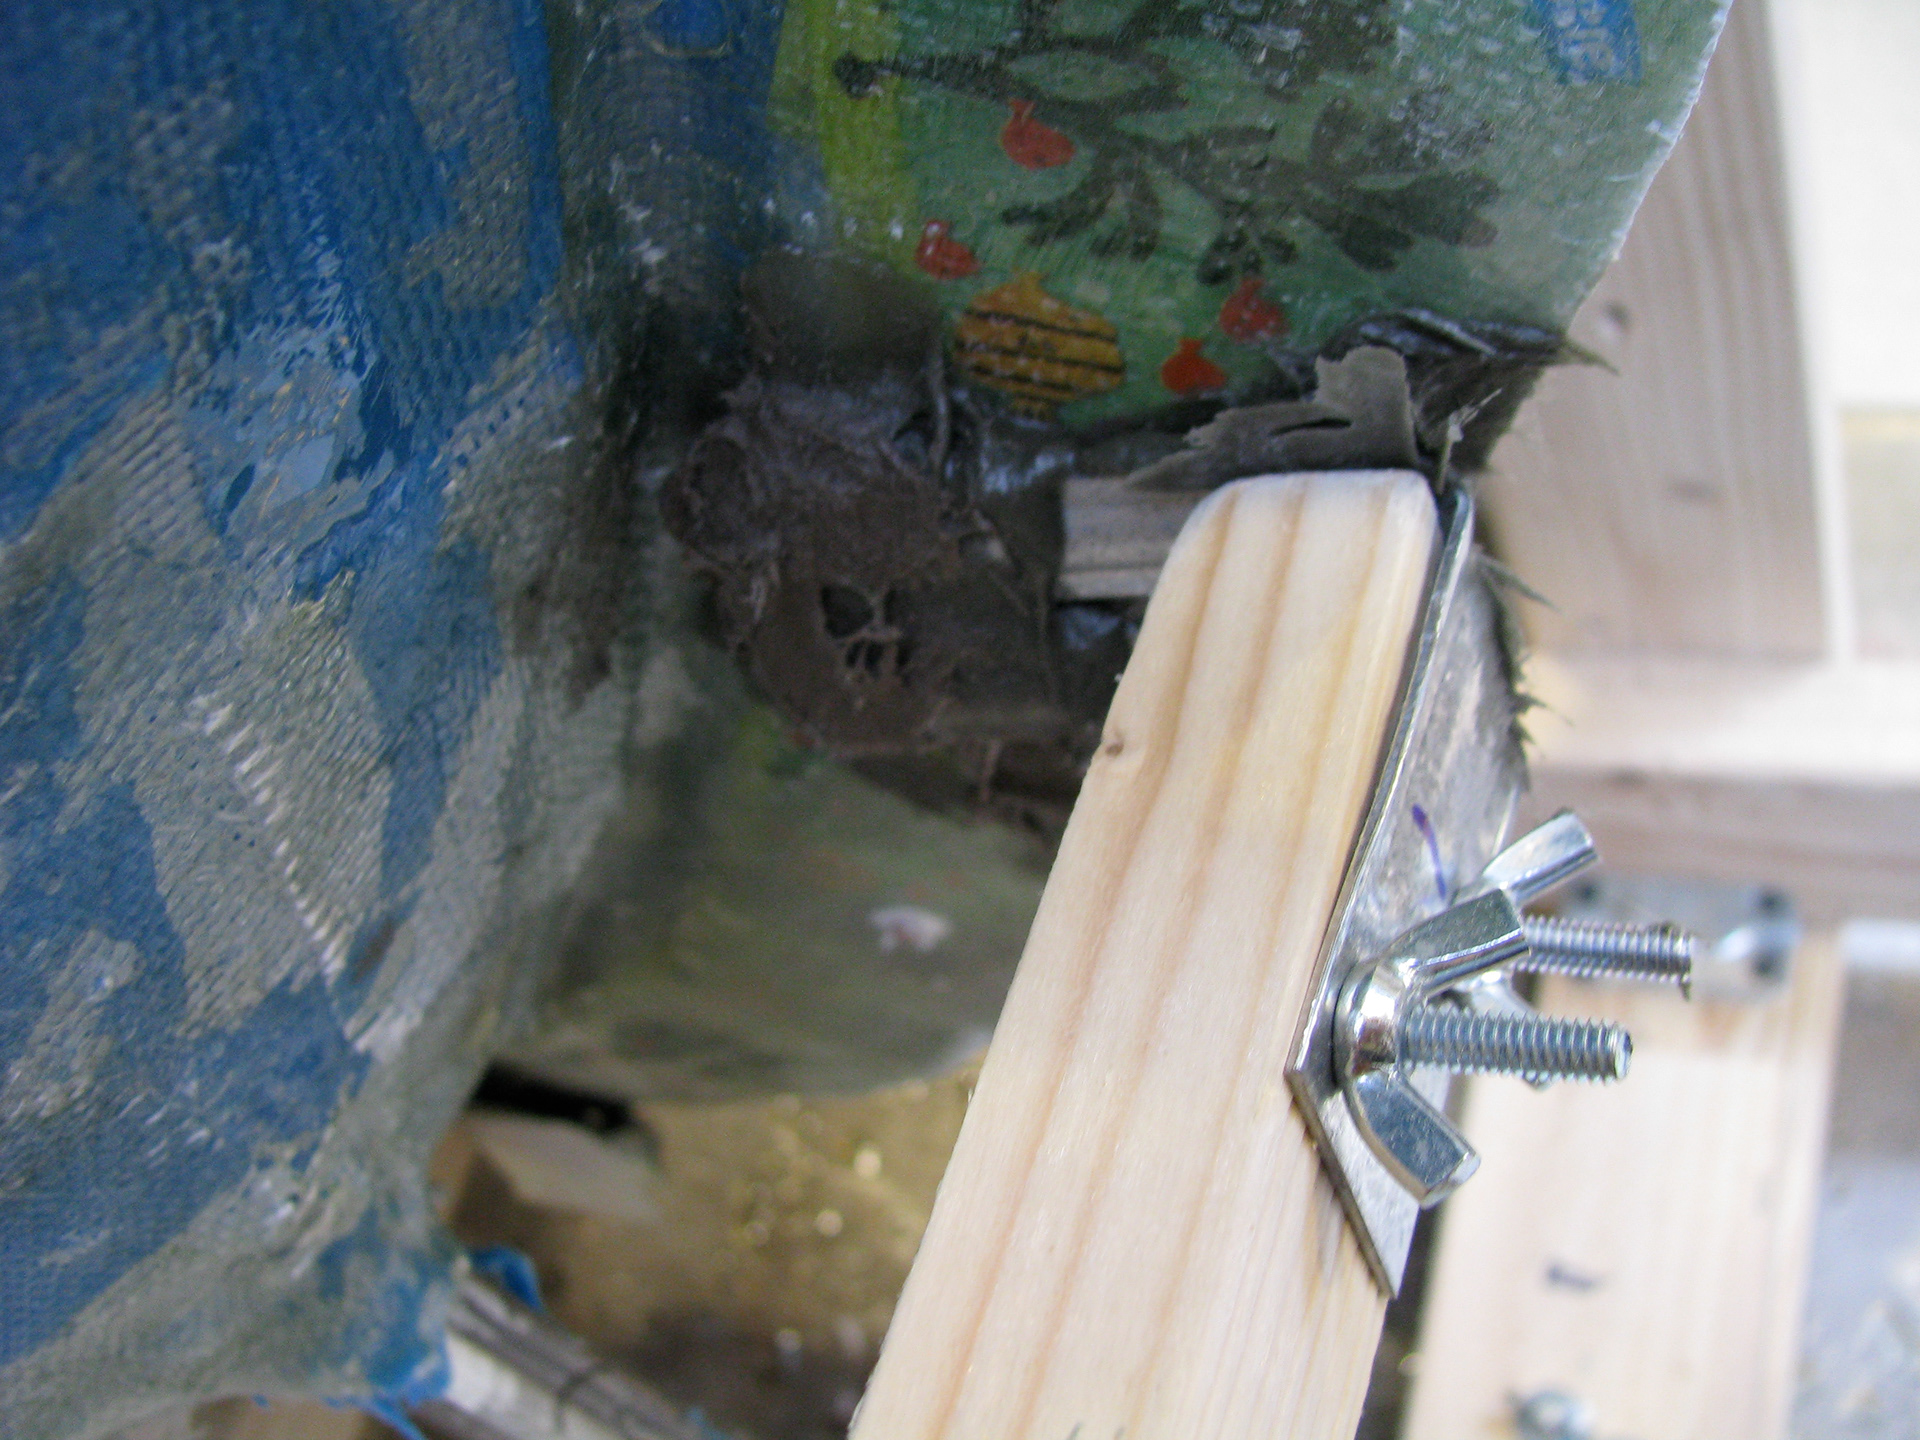
Cutting the connecting arm near the box and adding a sleeve wound up working much better than the wingnuts further in toward the sculpture.
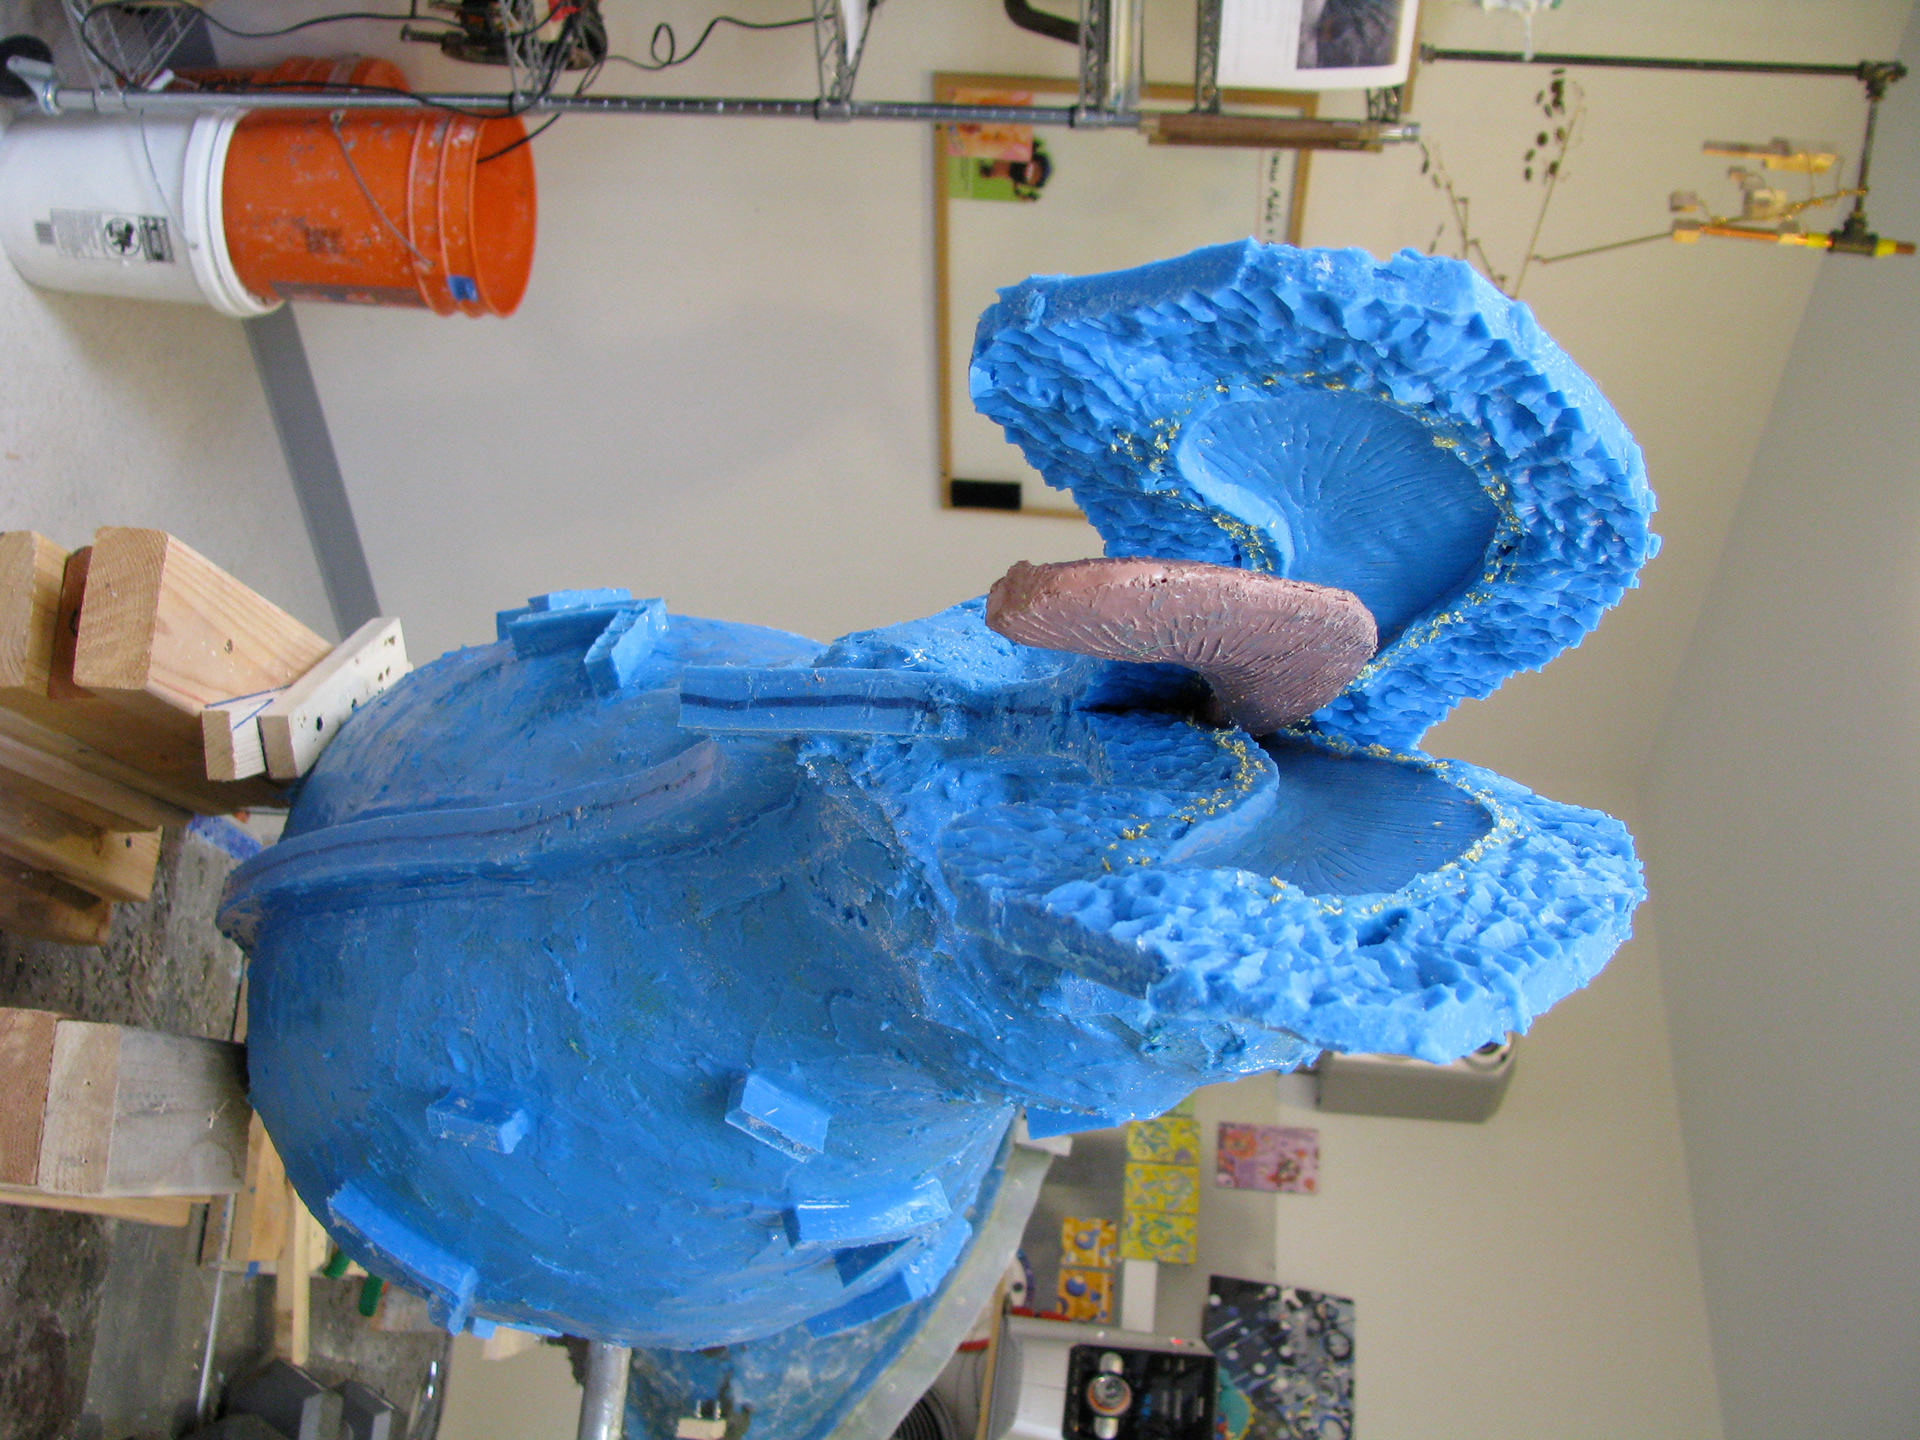
The wooden forms were taken off, the fiberglass molds popped away- and it is time to cut in through the silicon seam line making interlocking cuts so the molten wax cannot squirt out during the wax phase.
Zillions of exacto cuts and just the right amount of pressure allows the silicon mold to slowly come apart.
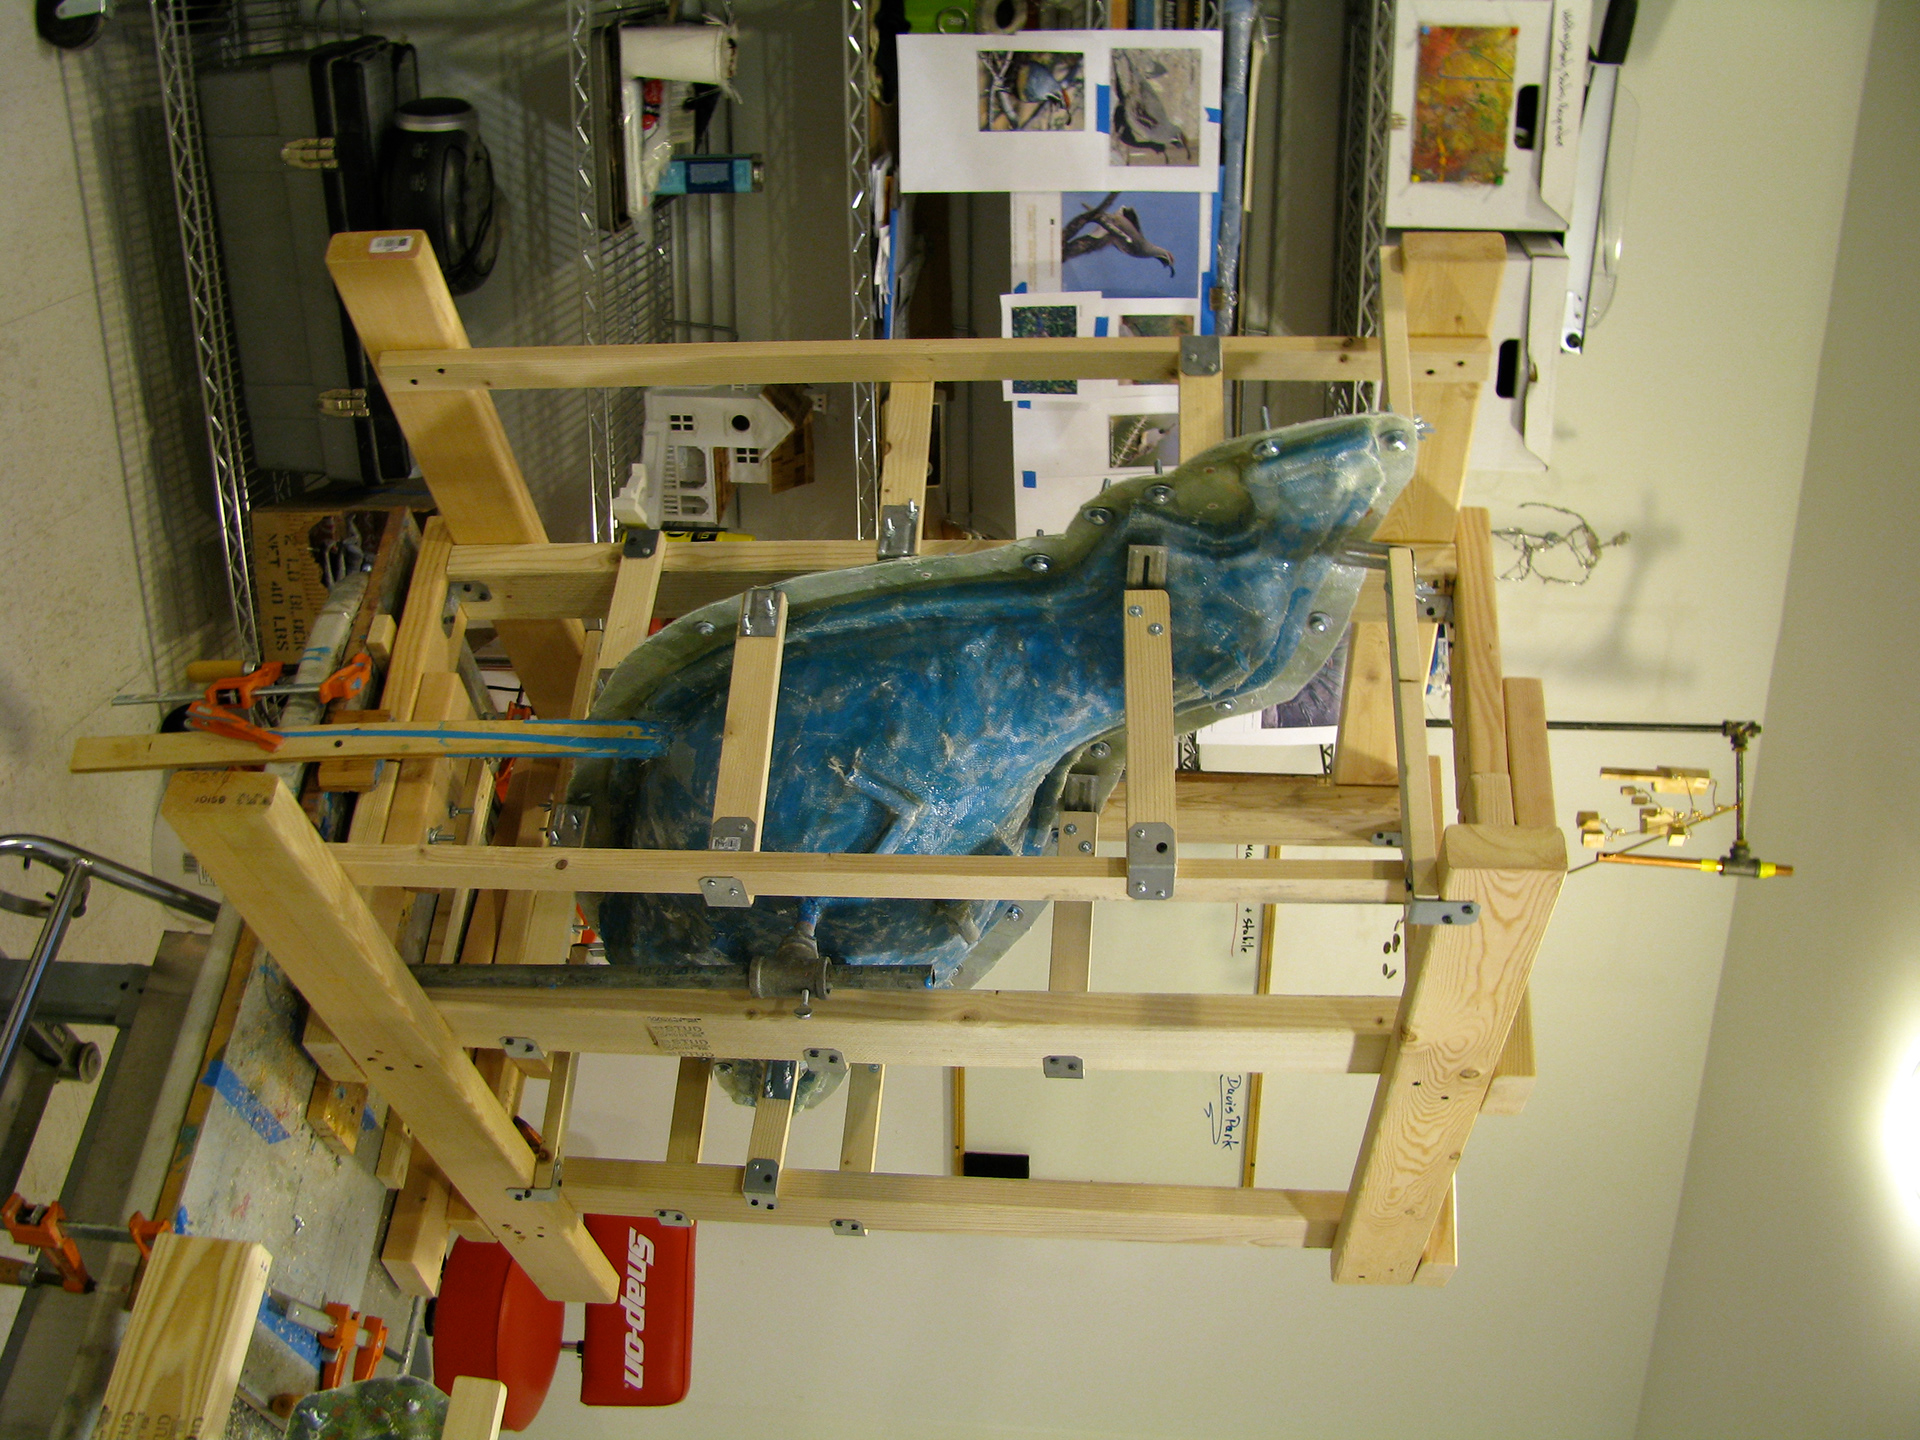
The weight of the bird and the mold was overpowering the armature, so twin towers of 2x4 were screwed together to help hold her up.
Slowest Christmas present unwrapping ever.
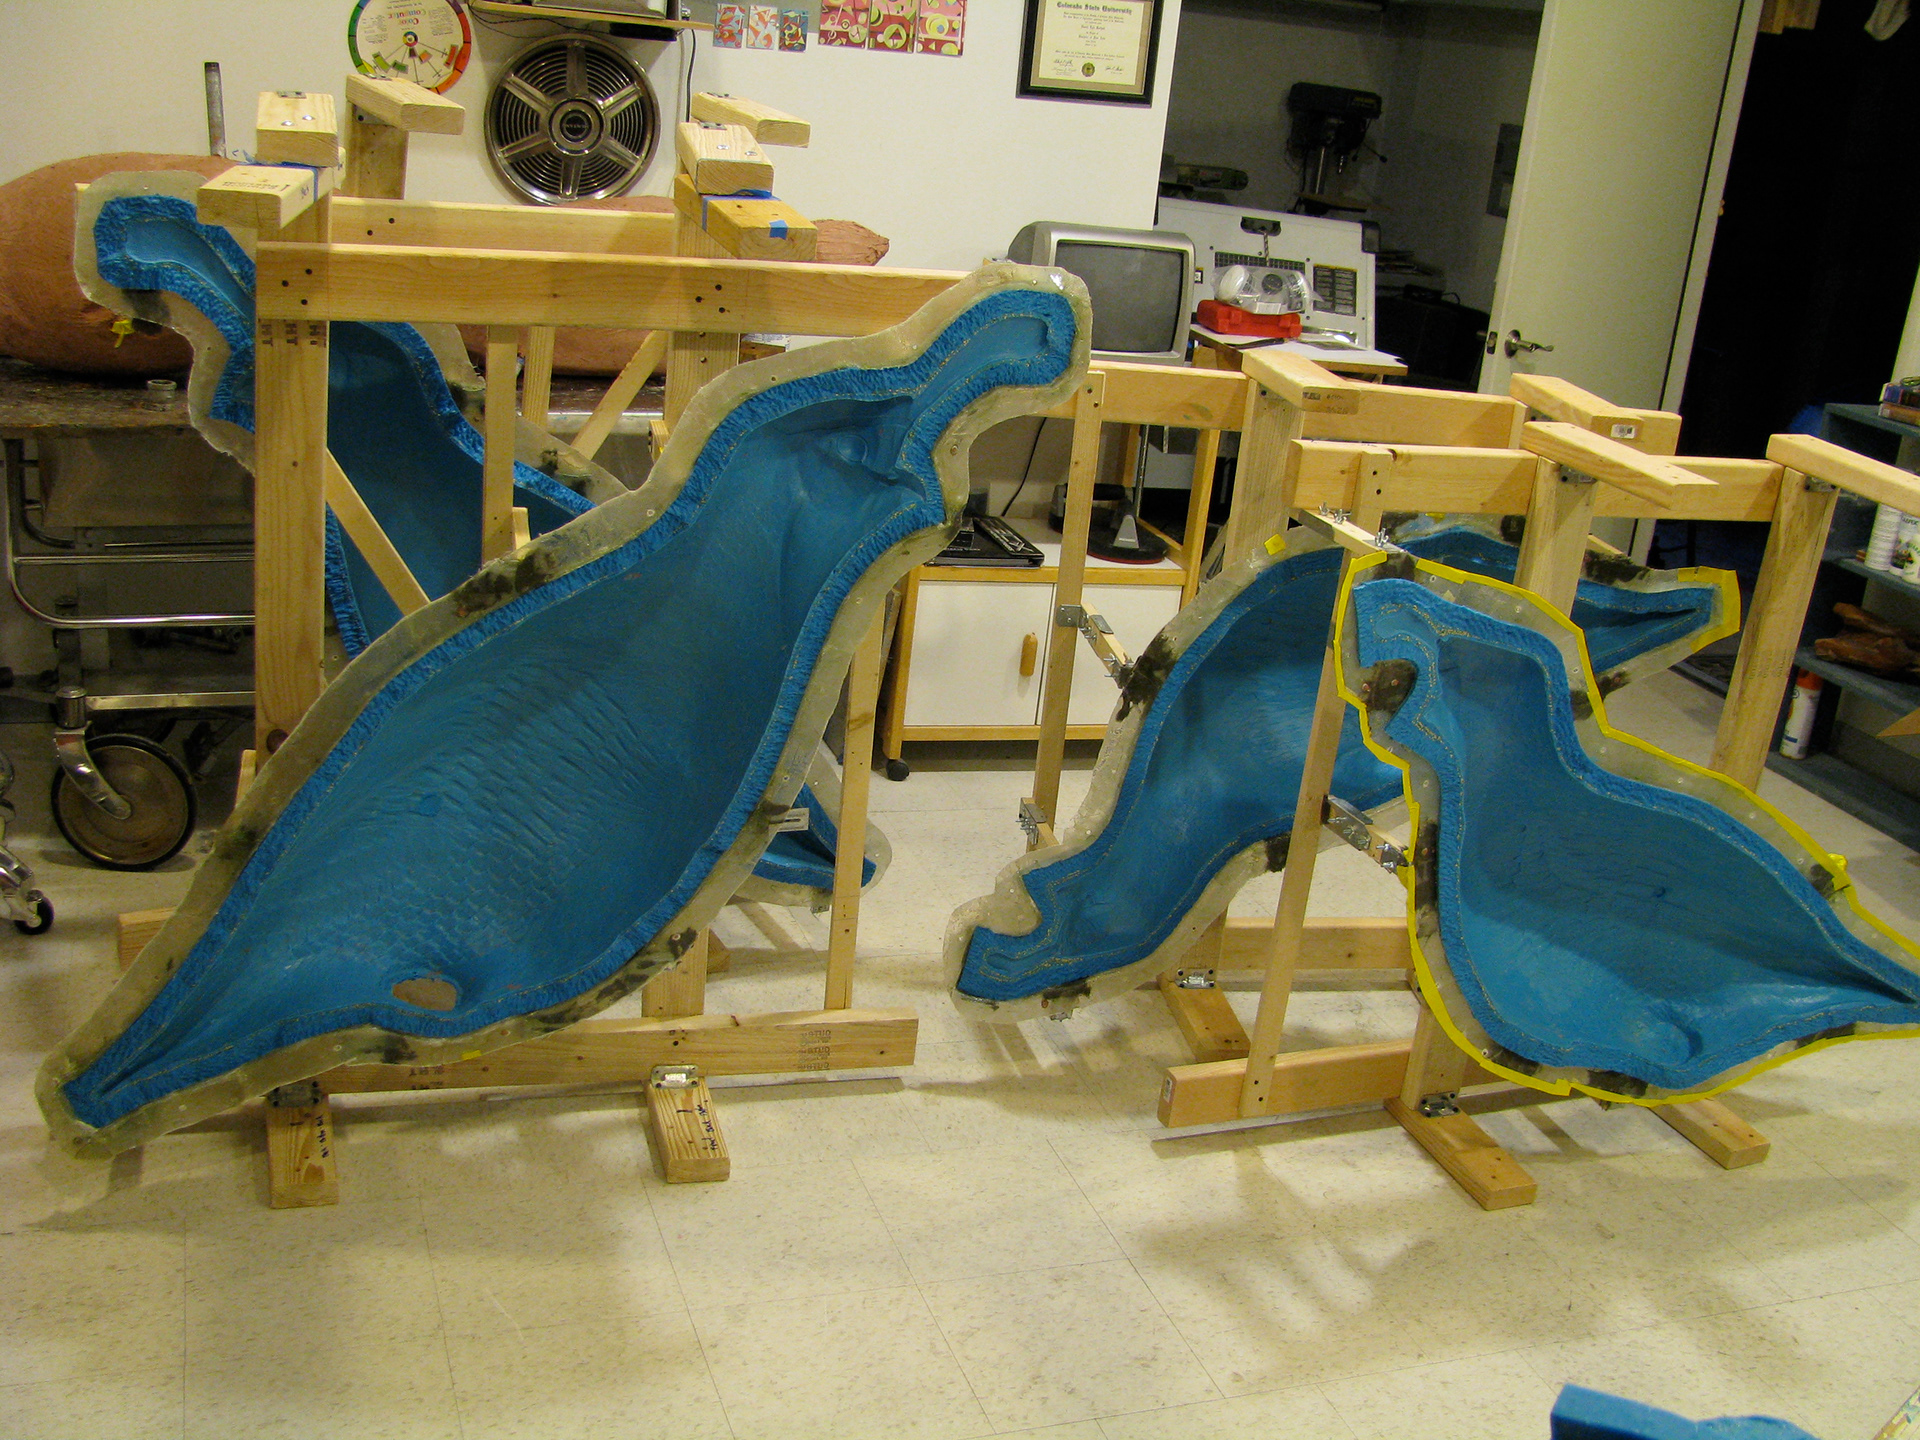
Silicon molds inside fiberglass molds inside wooden supports.

Fiberglass molds and wooden superstructure.
Perfect wax pull! I really worried myself sick about it- as the sculpture only exists as the potential of the mold.
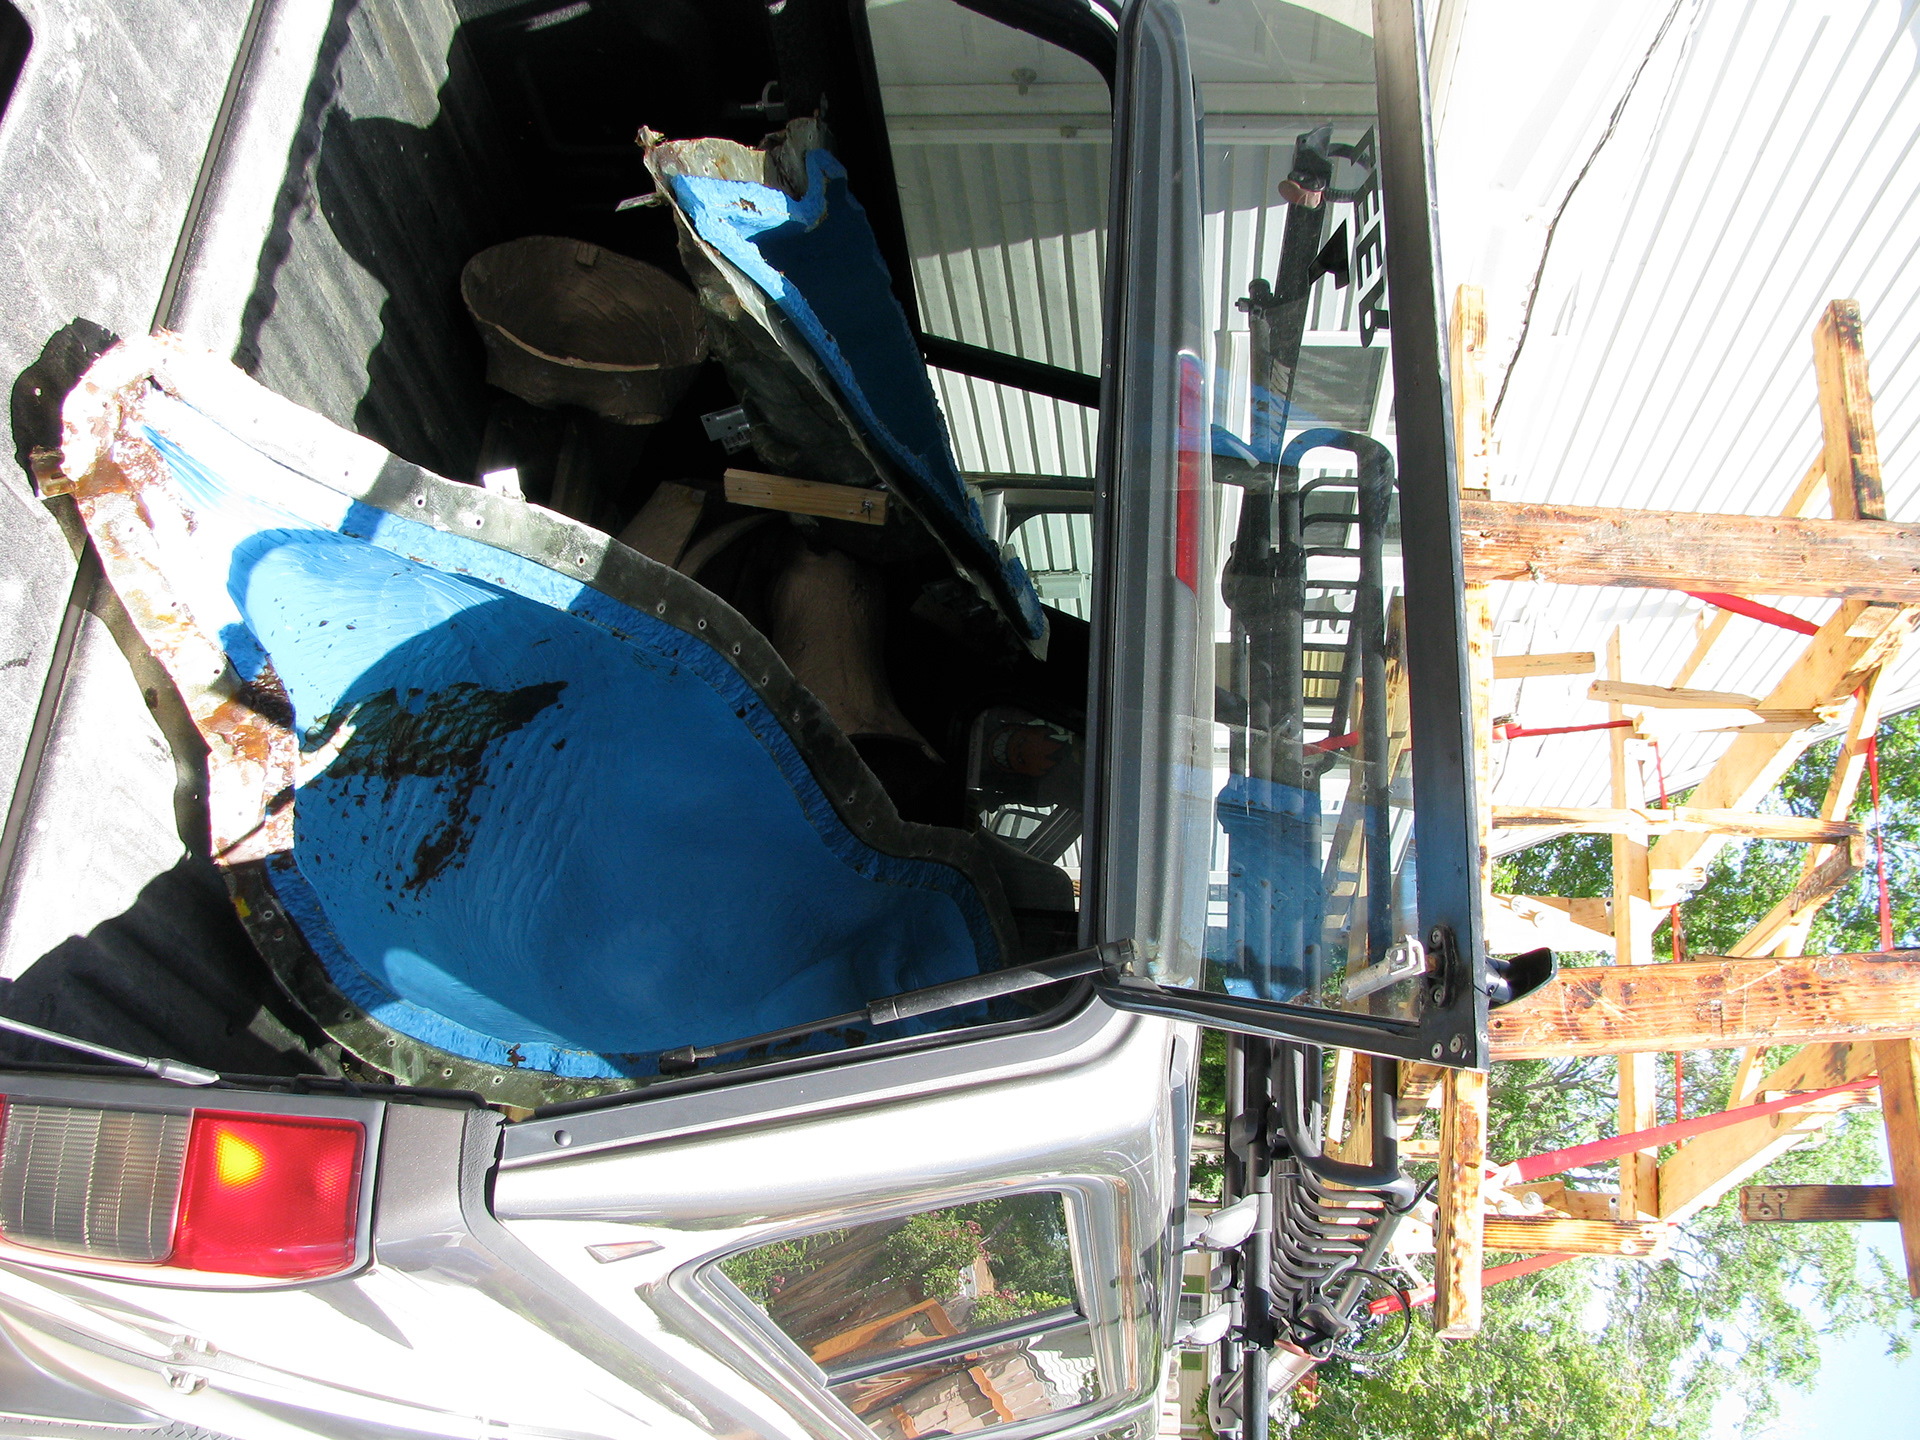
Truck full of molds and bronze parts, fresh from Adonis foundry.
At the foundry the perfect wax is cut into pieces and wax gates & sprews are attached to deliver the bronze, these forms are slurried with ceramic shell, the wax is melted out, the ceramic is kiln-fired, bronze is heated and poured into the molds, the ceramic shell is then shattered away, the gates/sprews are cut off, the remaining shell is sandblasted off, and the parts are all ready to be welded back together and the weld lines resculpted (chased) then a final sandblast and patina (chemical coloration).
In the back ground is an aspect of the other major commission I am forming simultaneously- Salt In Suspension, for the new Herriman library.
One Buck head miscast entirely and the foundry cast another, and some edges of other parts of the Buck shrank back- this created quite a challenge when welding him all back together. I called him "Frankenquail".
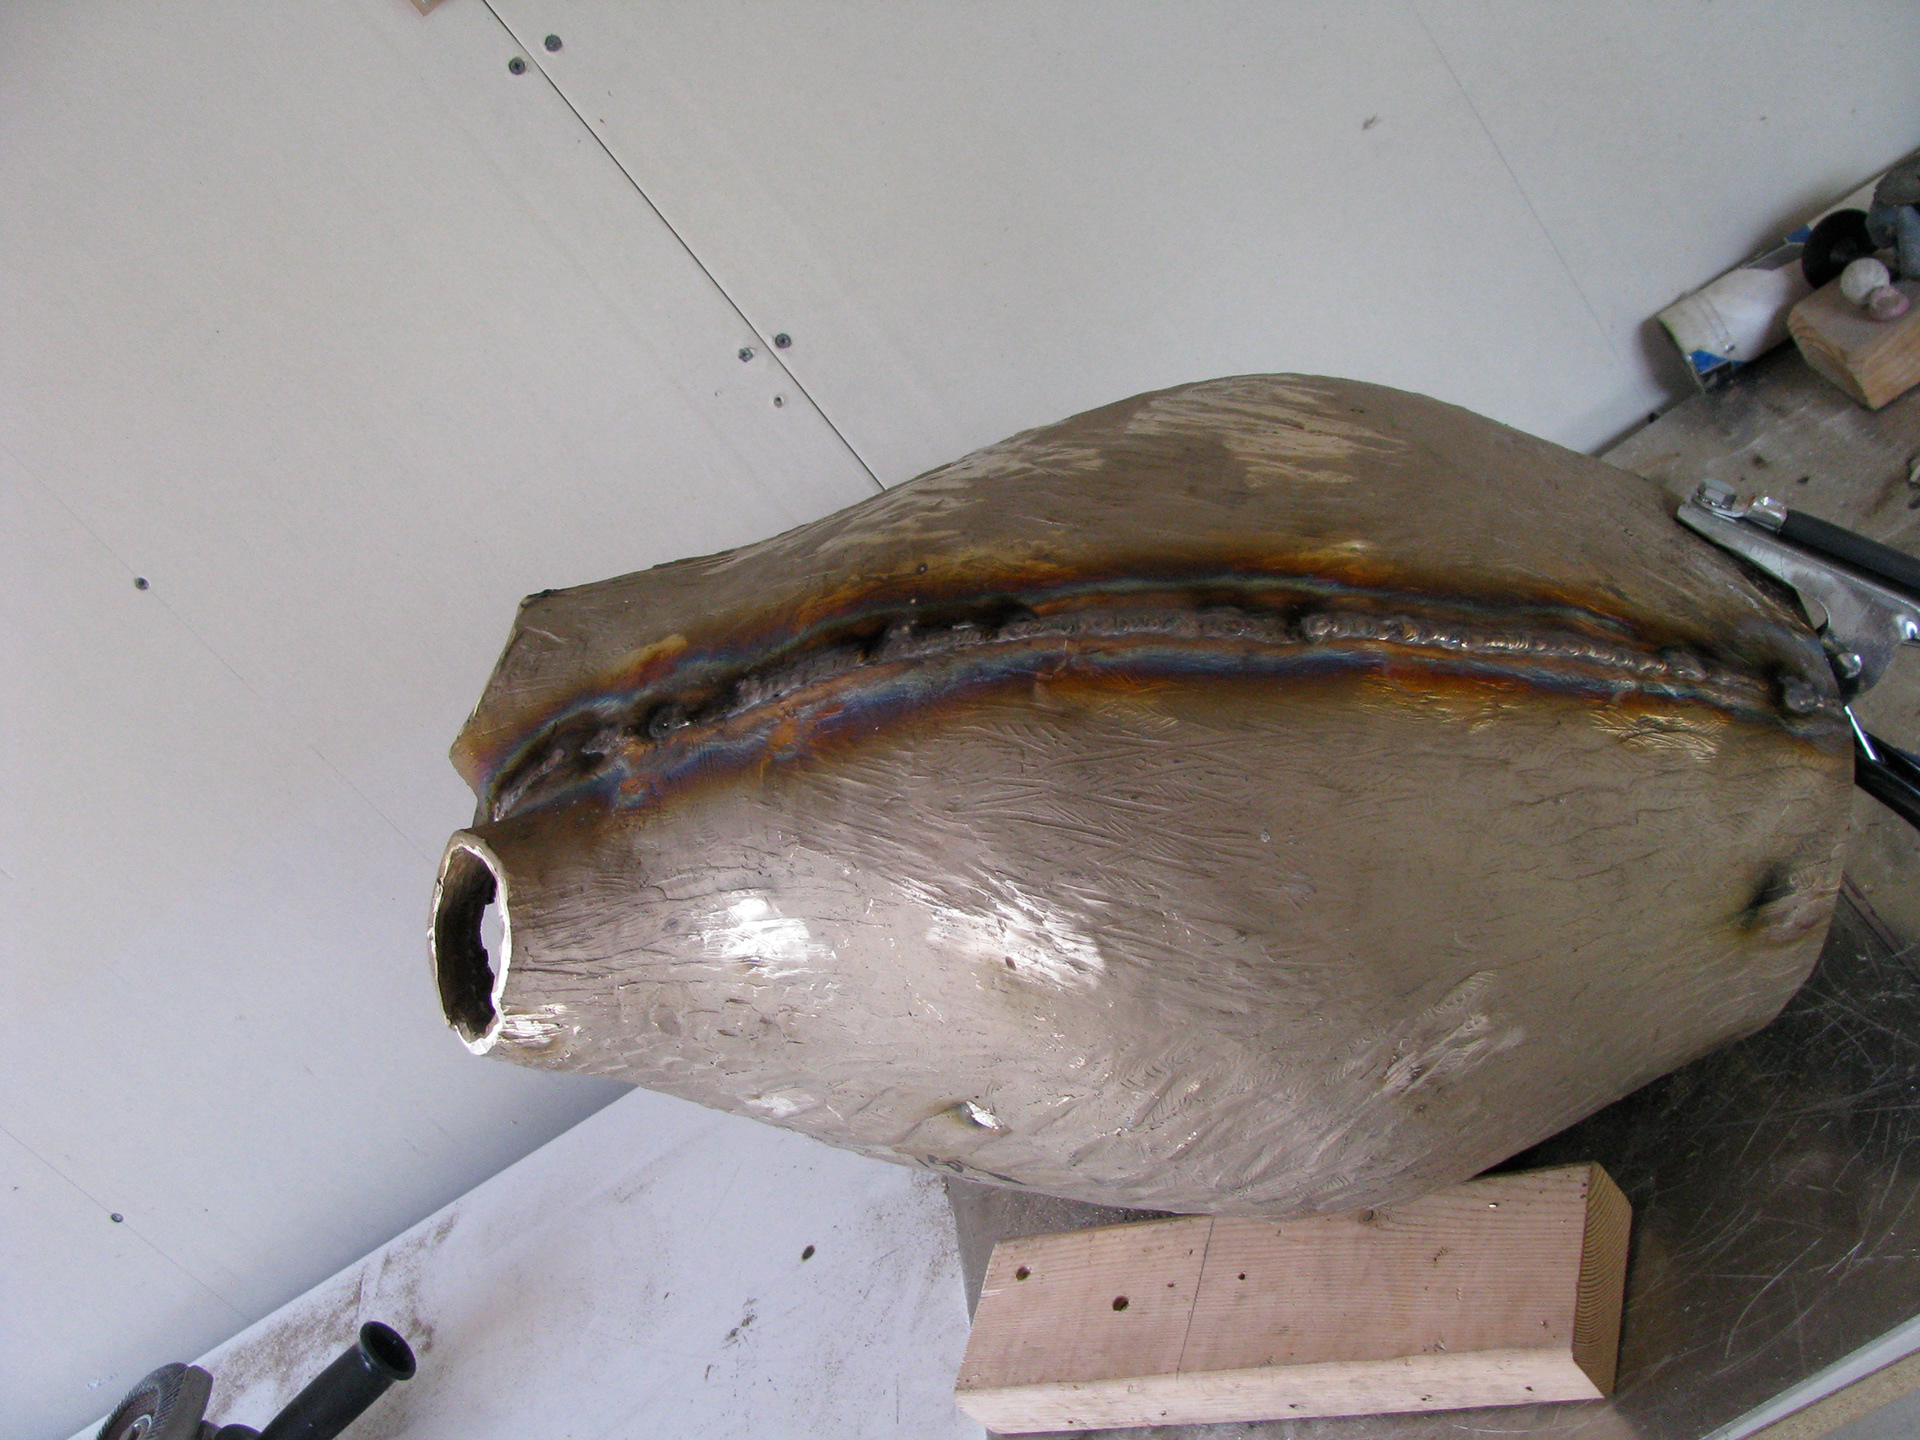
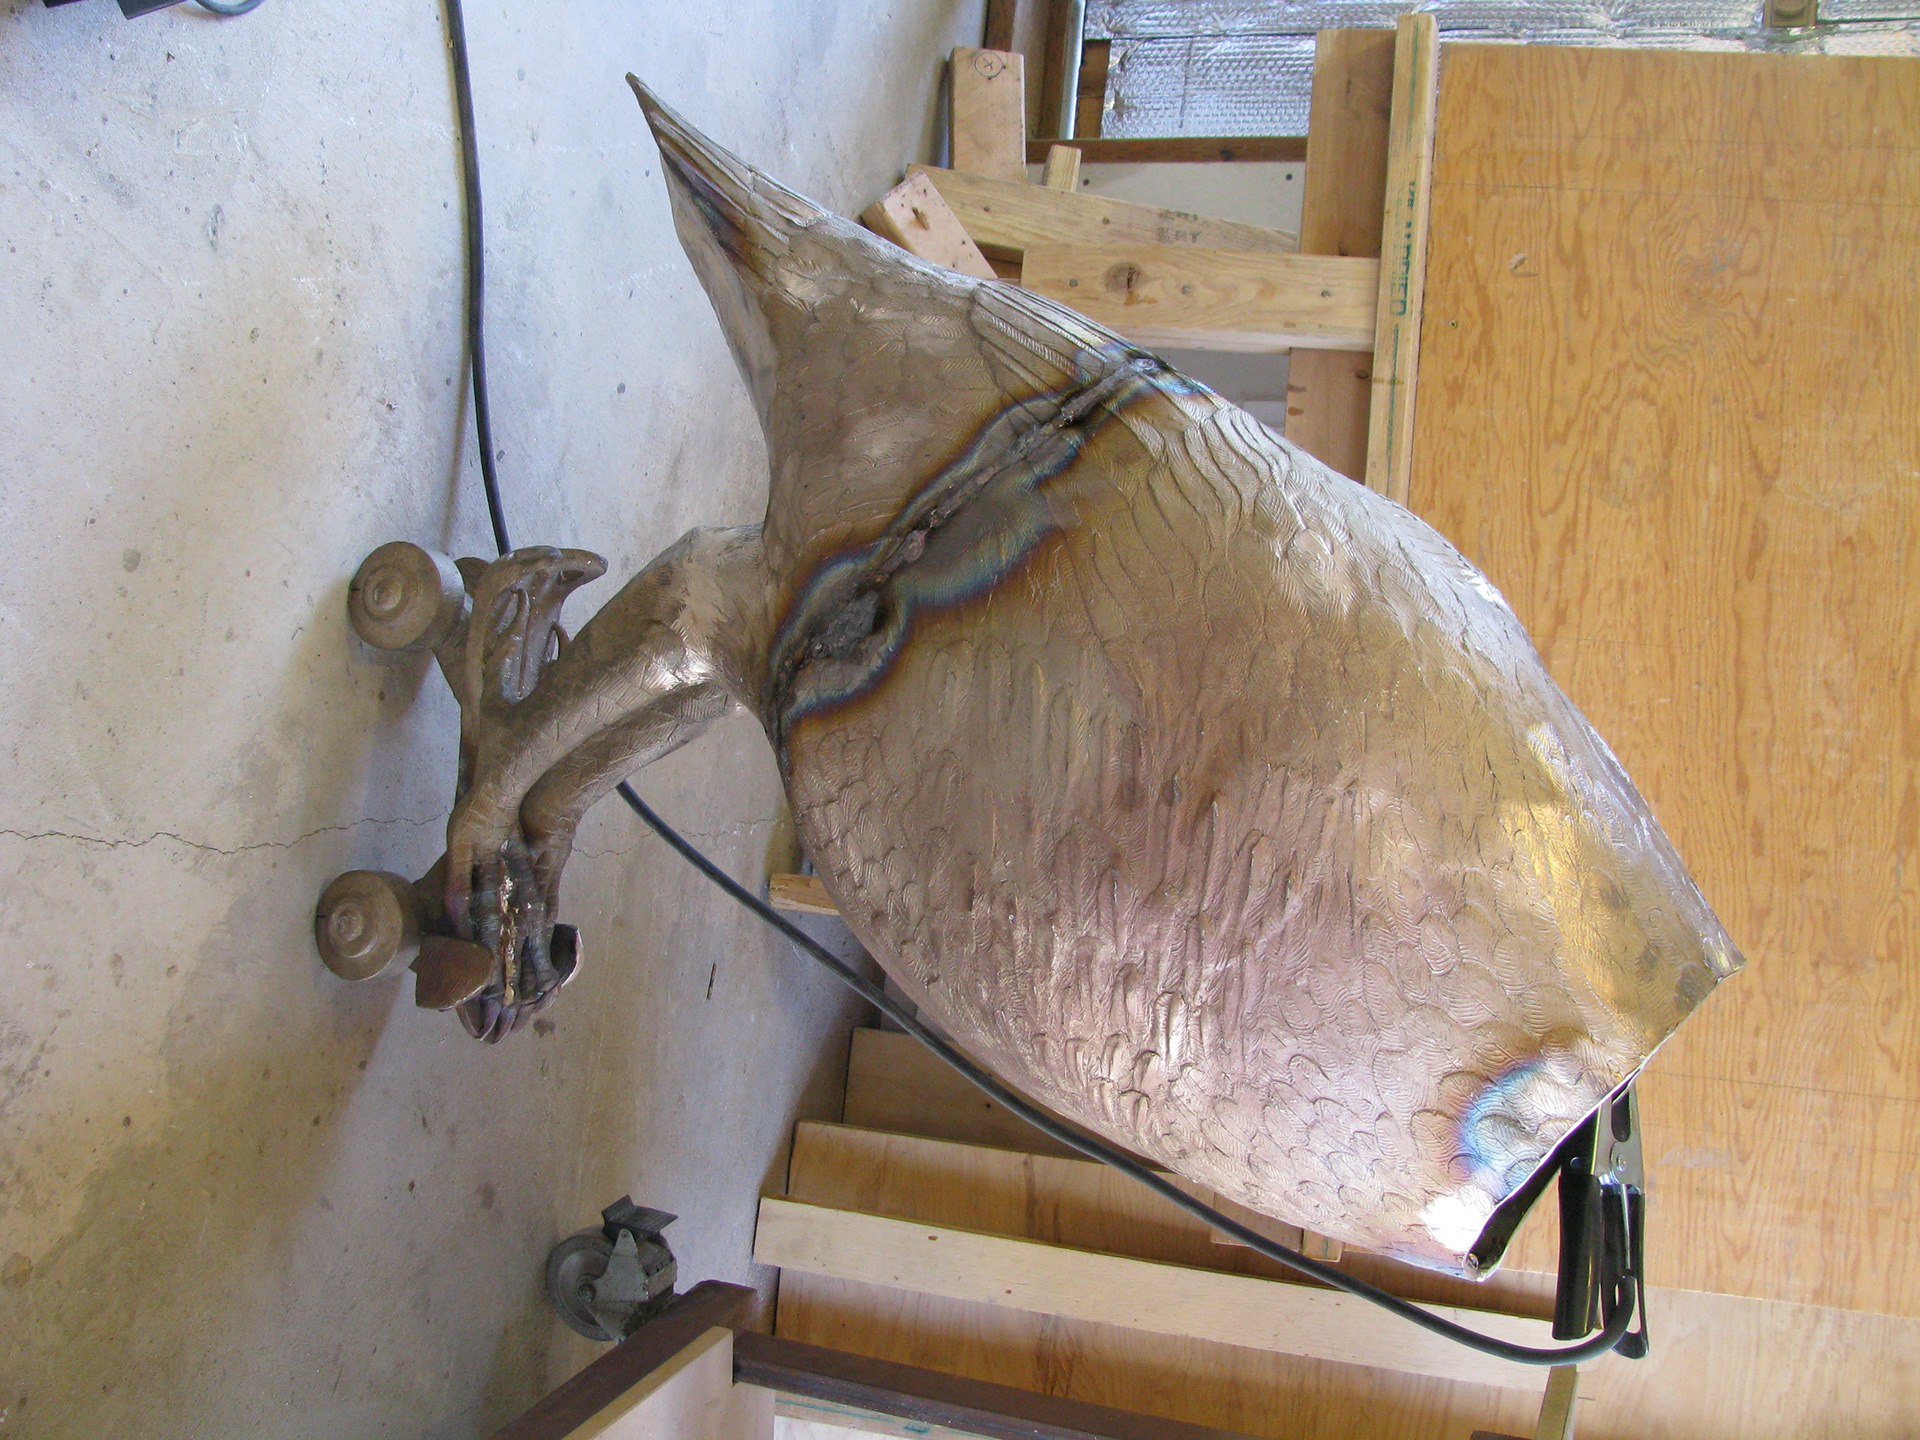
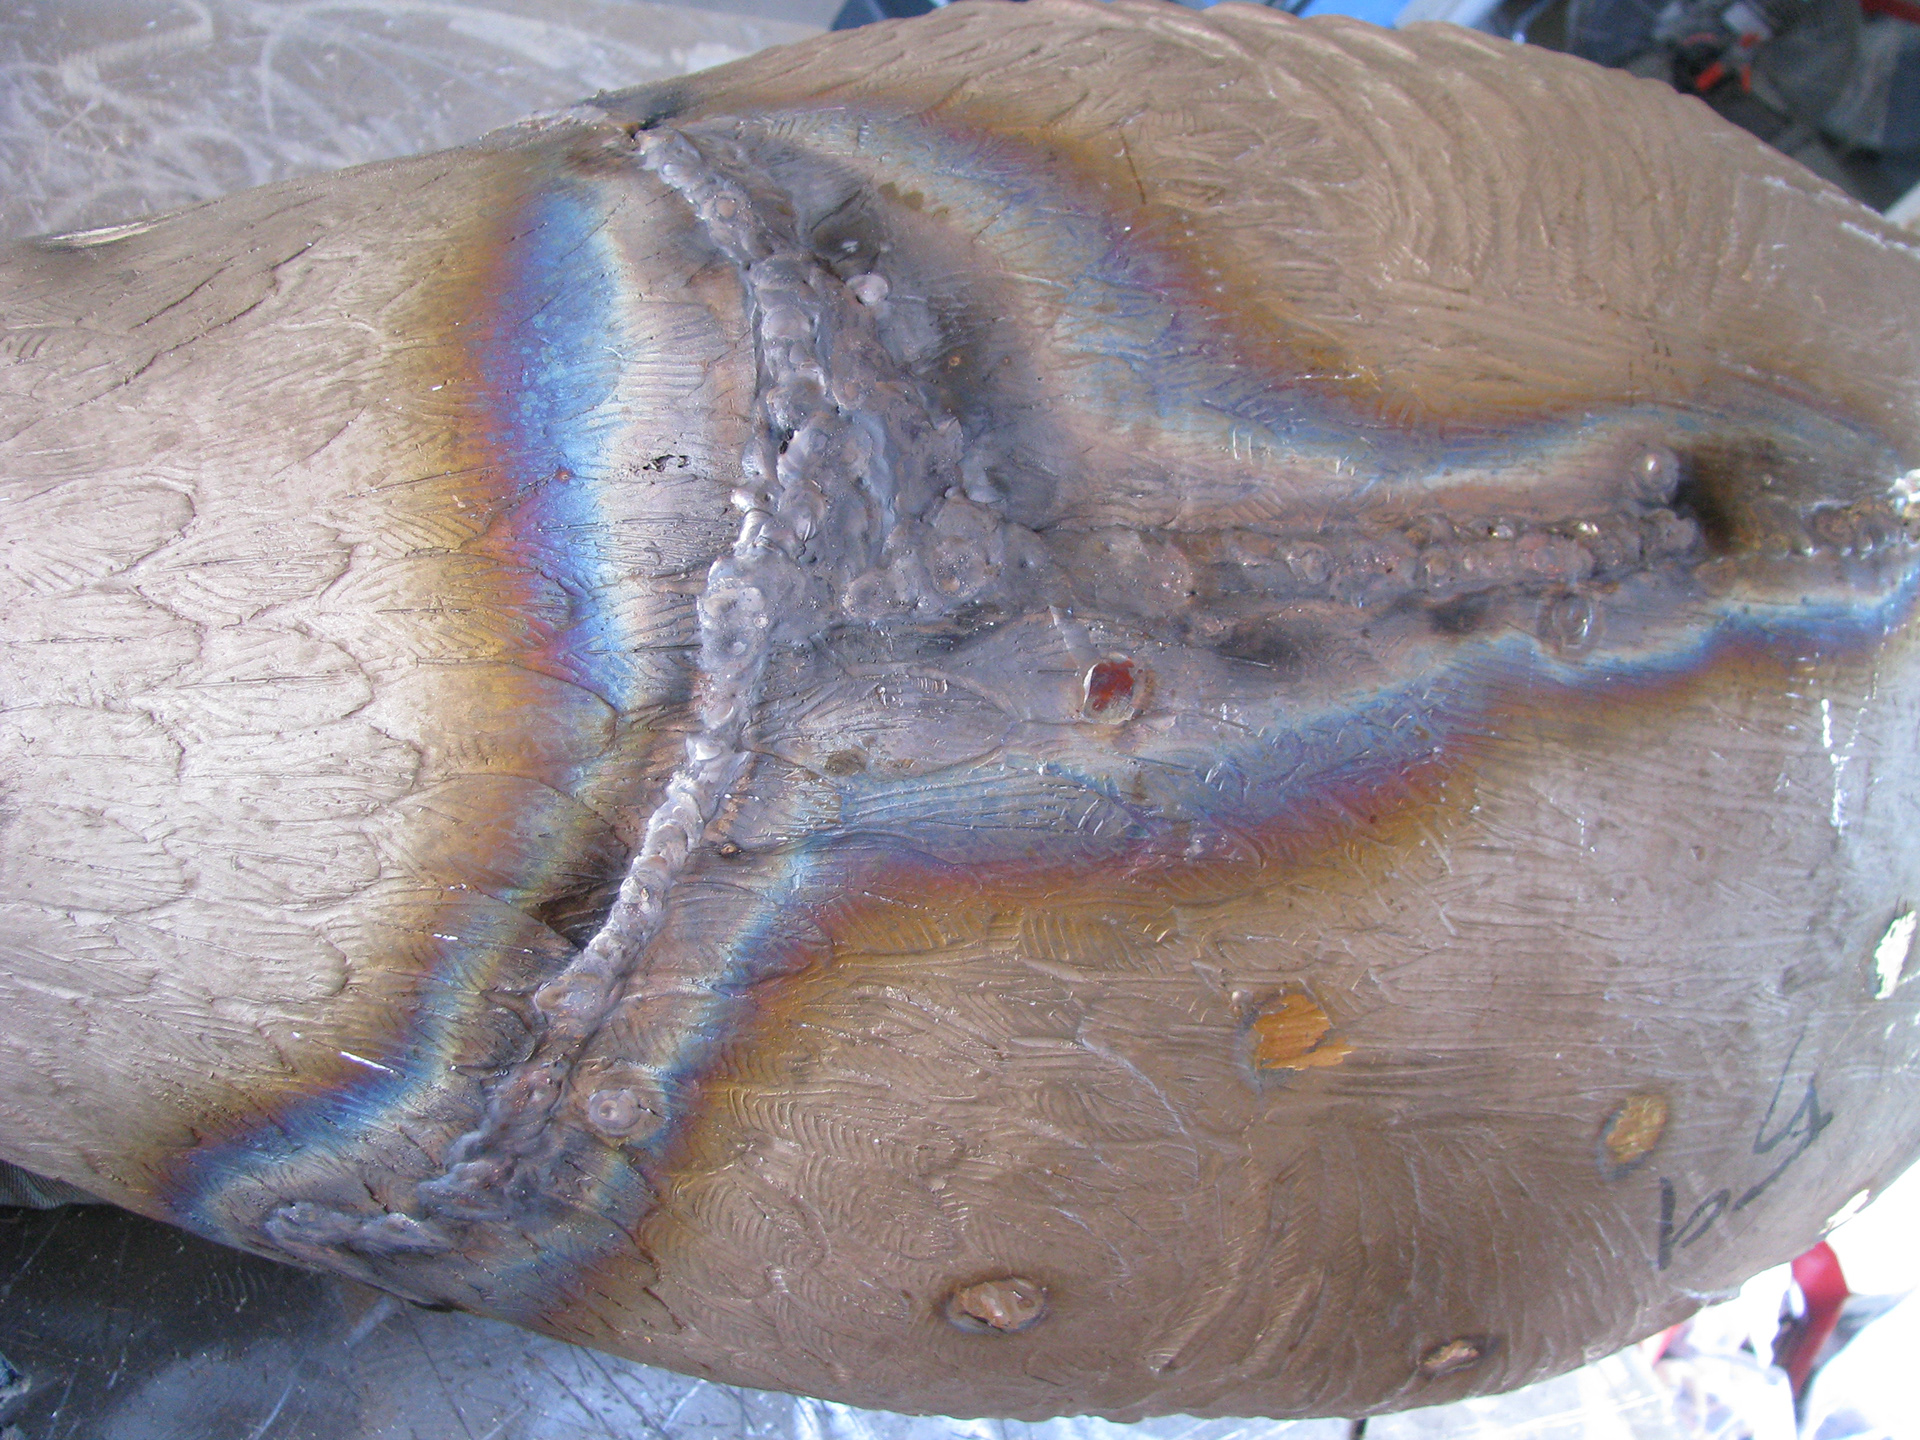
The Hen zips together nicely. This was the first weld for my new TIG, and I was still dialing in the gas flow- so there is a light carbon trail along sections of the weld line.
Her major volumes fit easily enough!
The welding skills seem to have stuck with me. Not like when I worked in a foundry, but it will do.
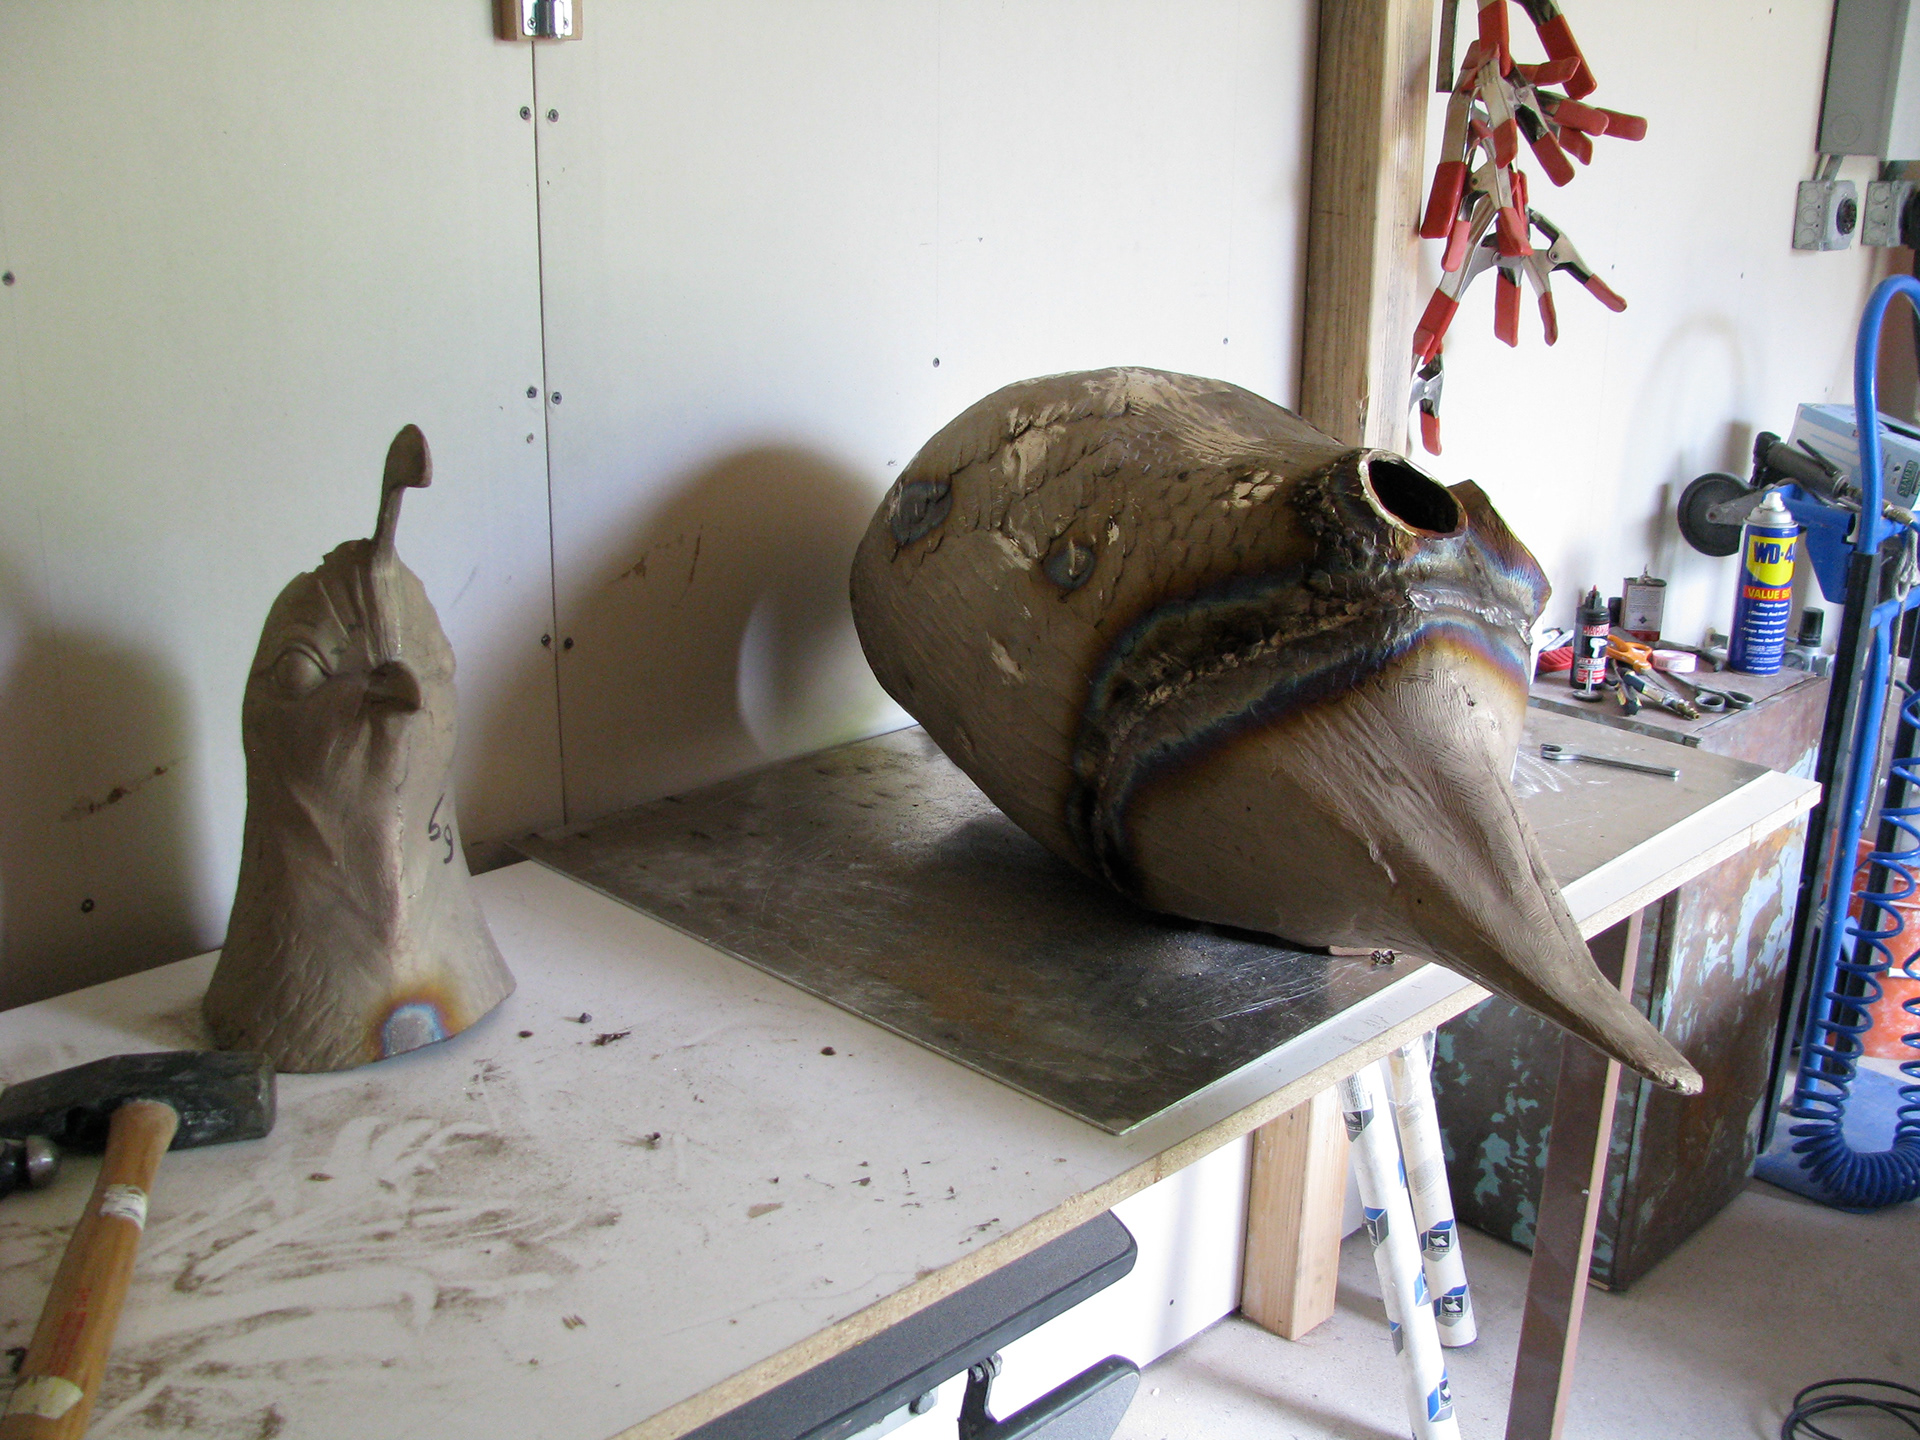
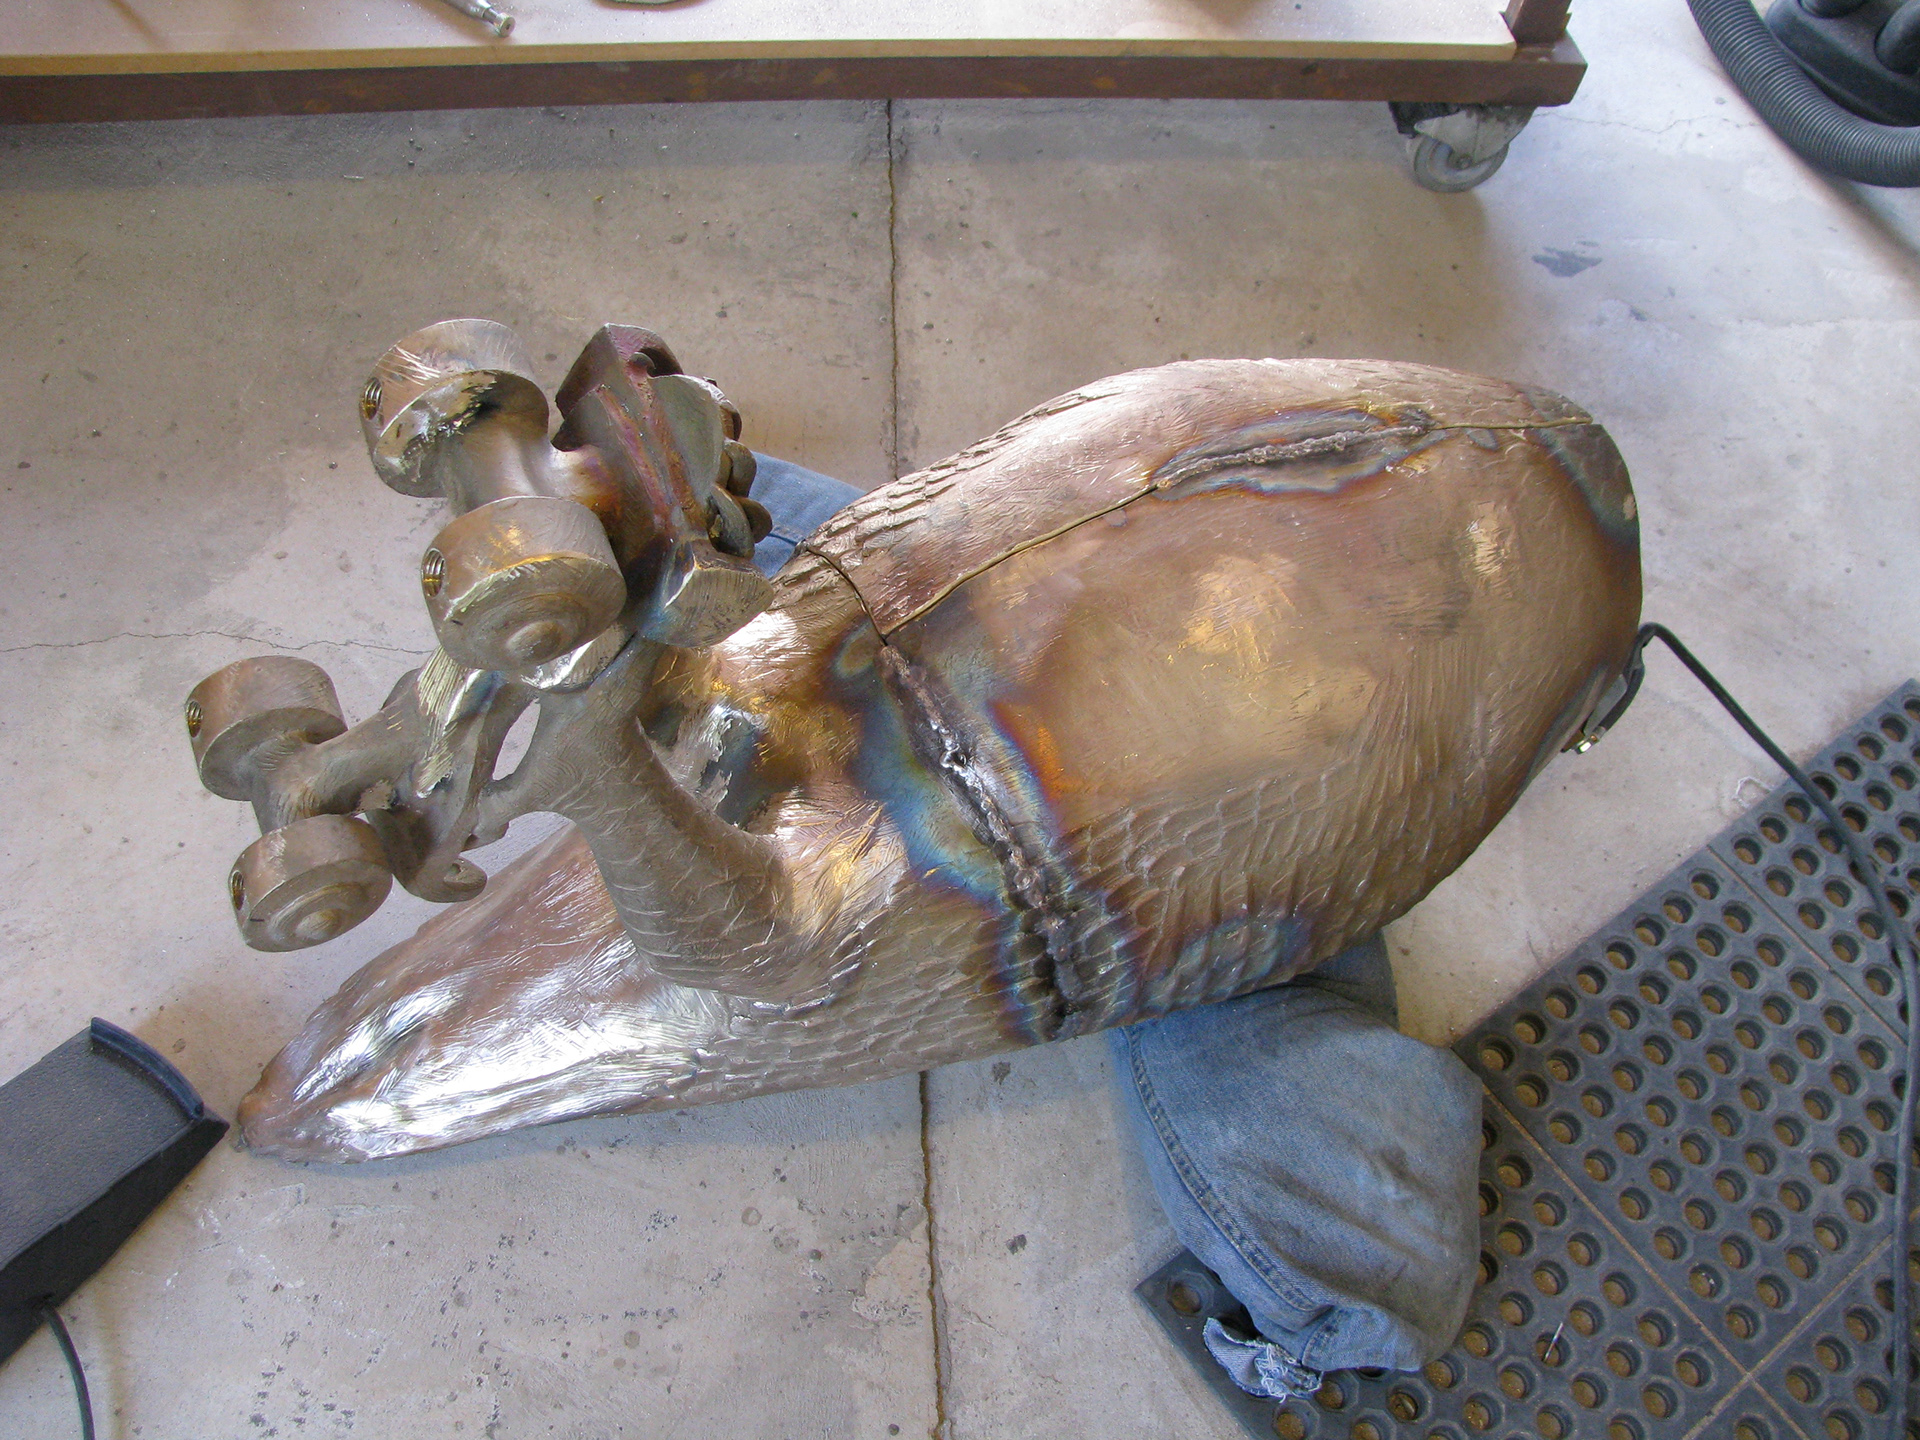
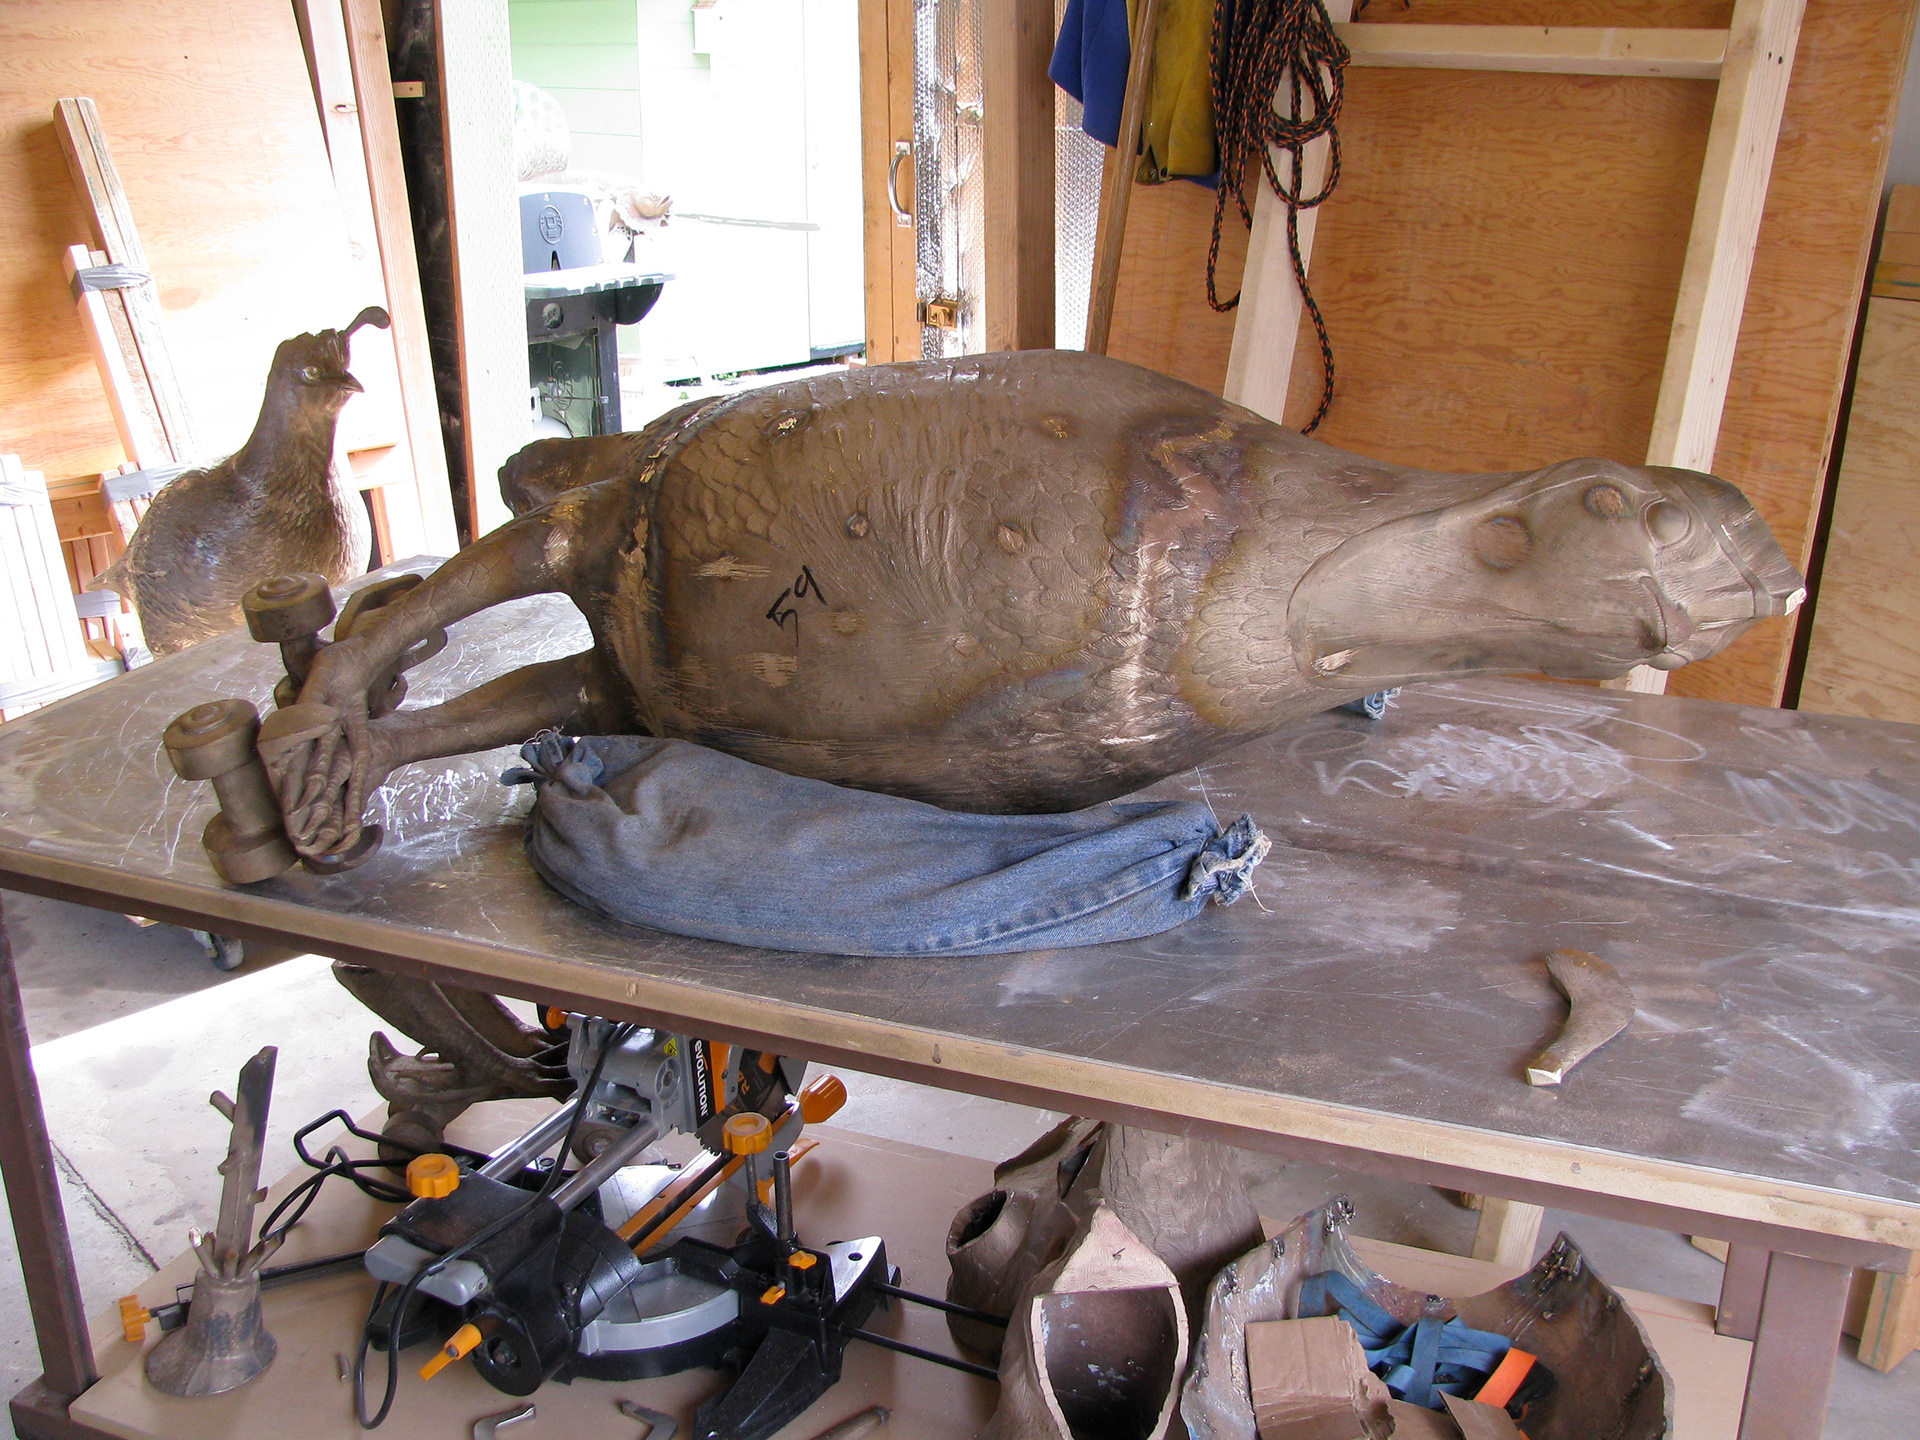
The hen rests in her sandbag nest, as the weld lines are chased away.
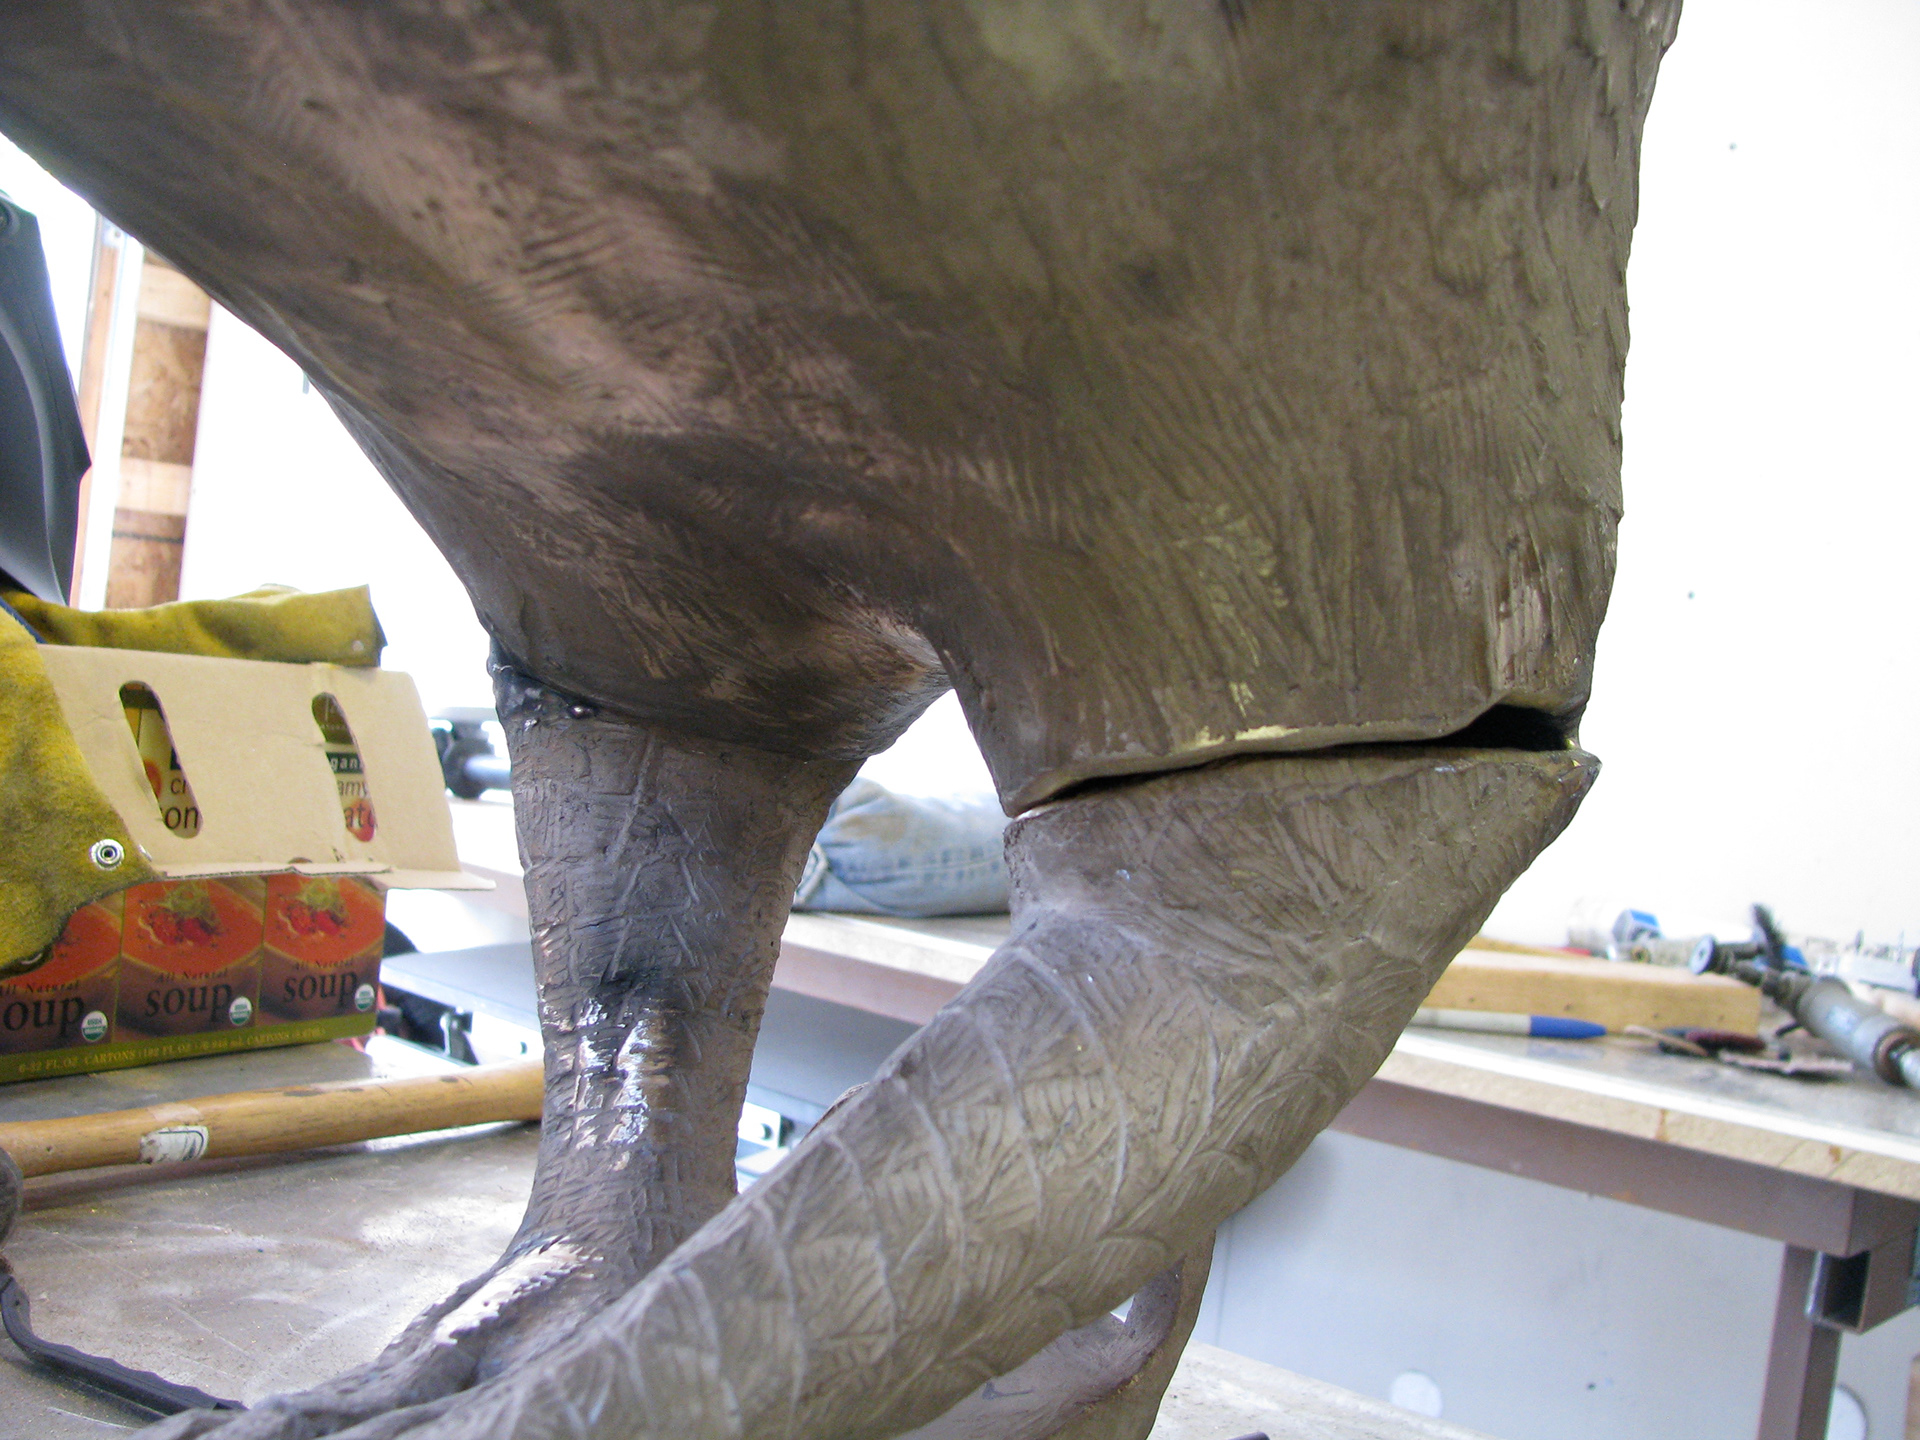
She gets restless, so I match up her legs and prep them for welding.

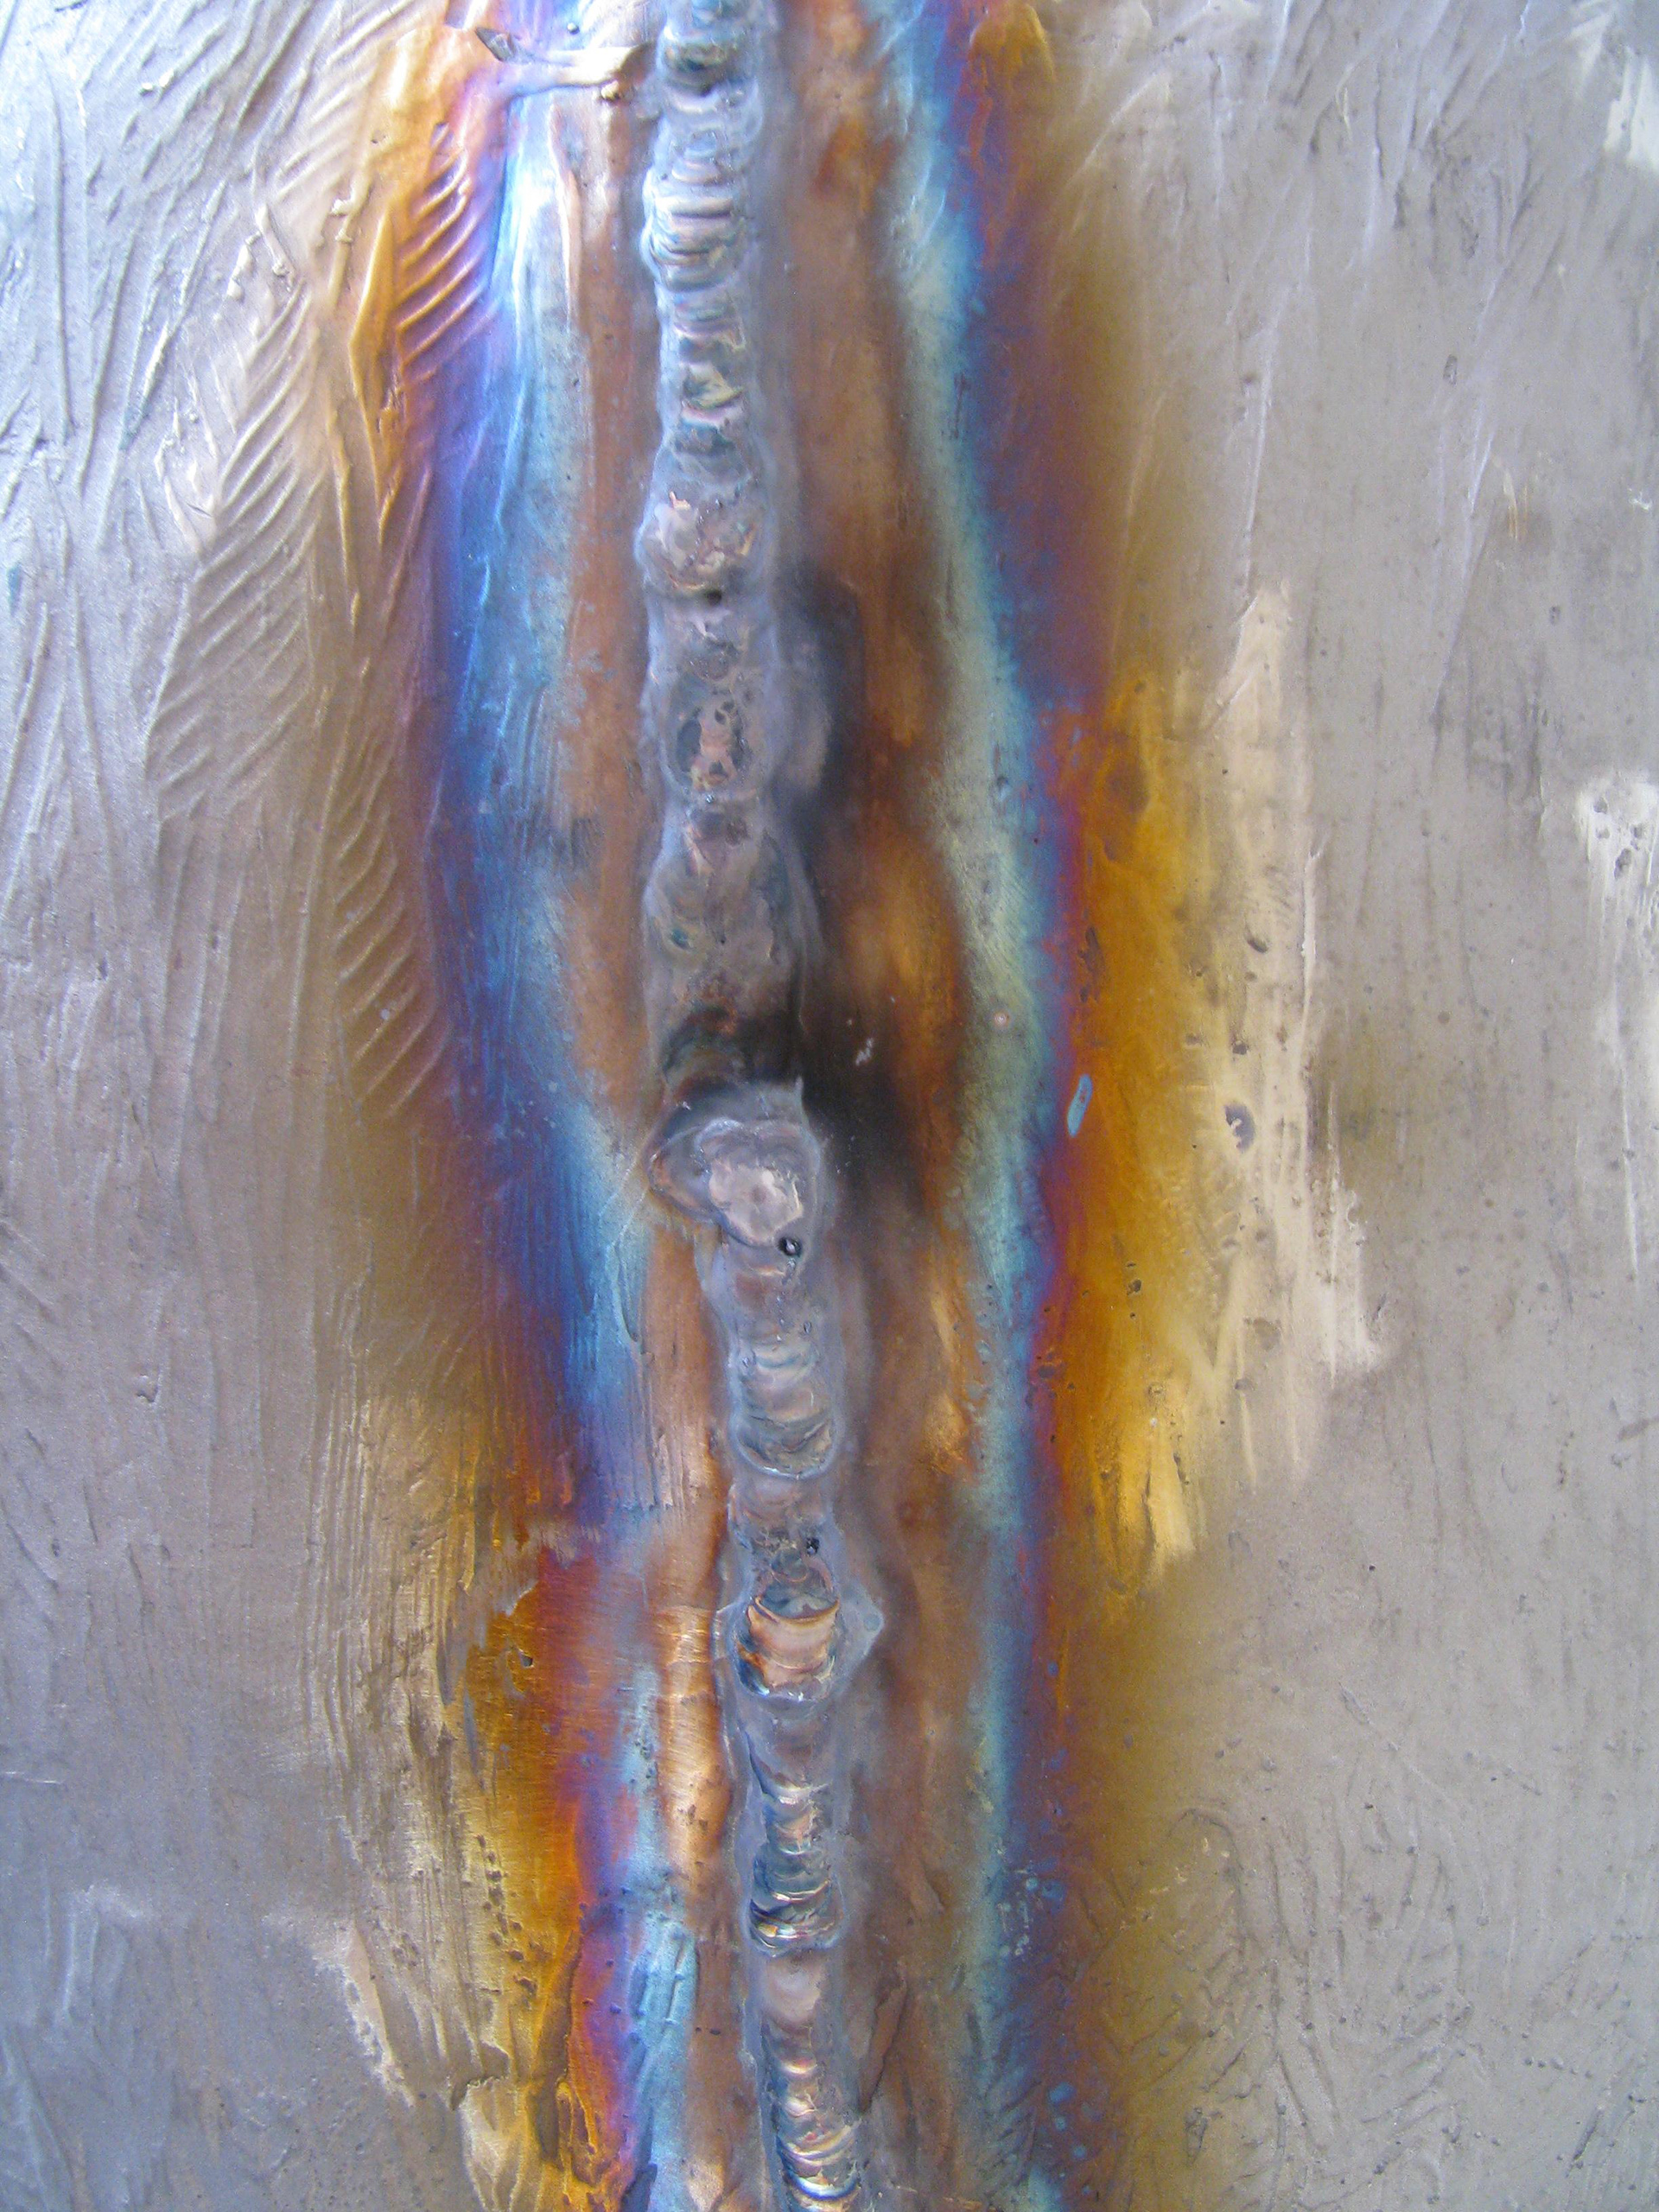
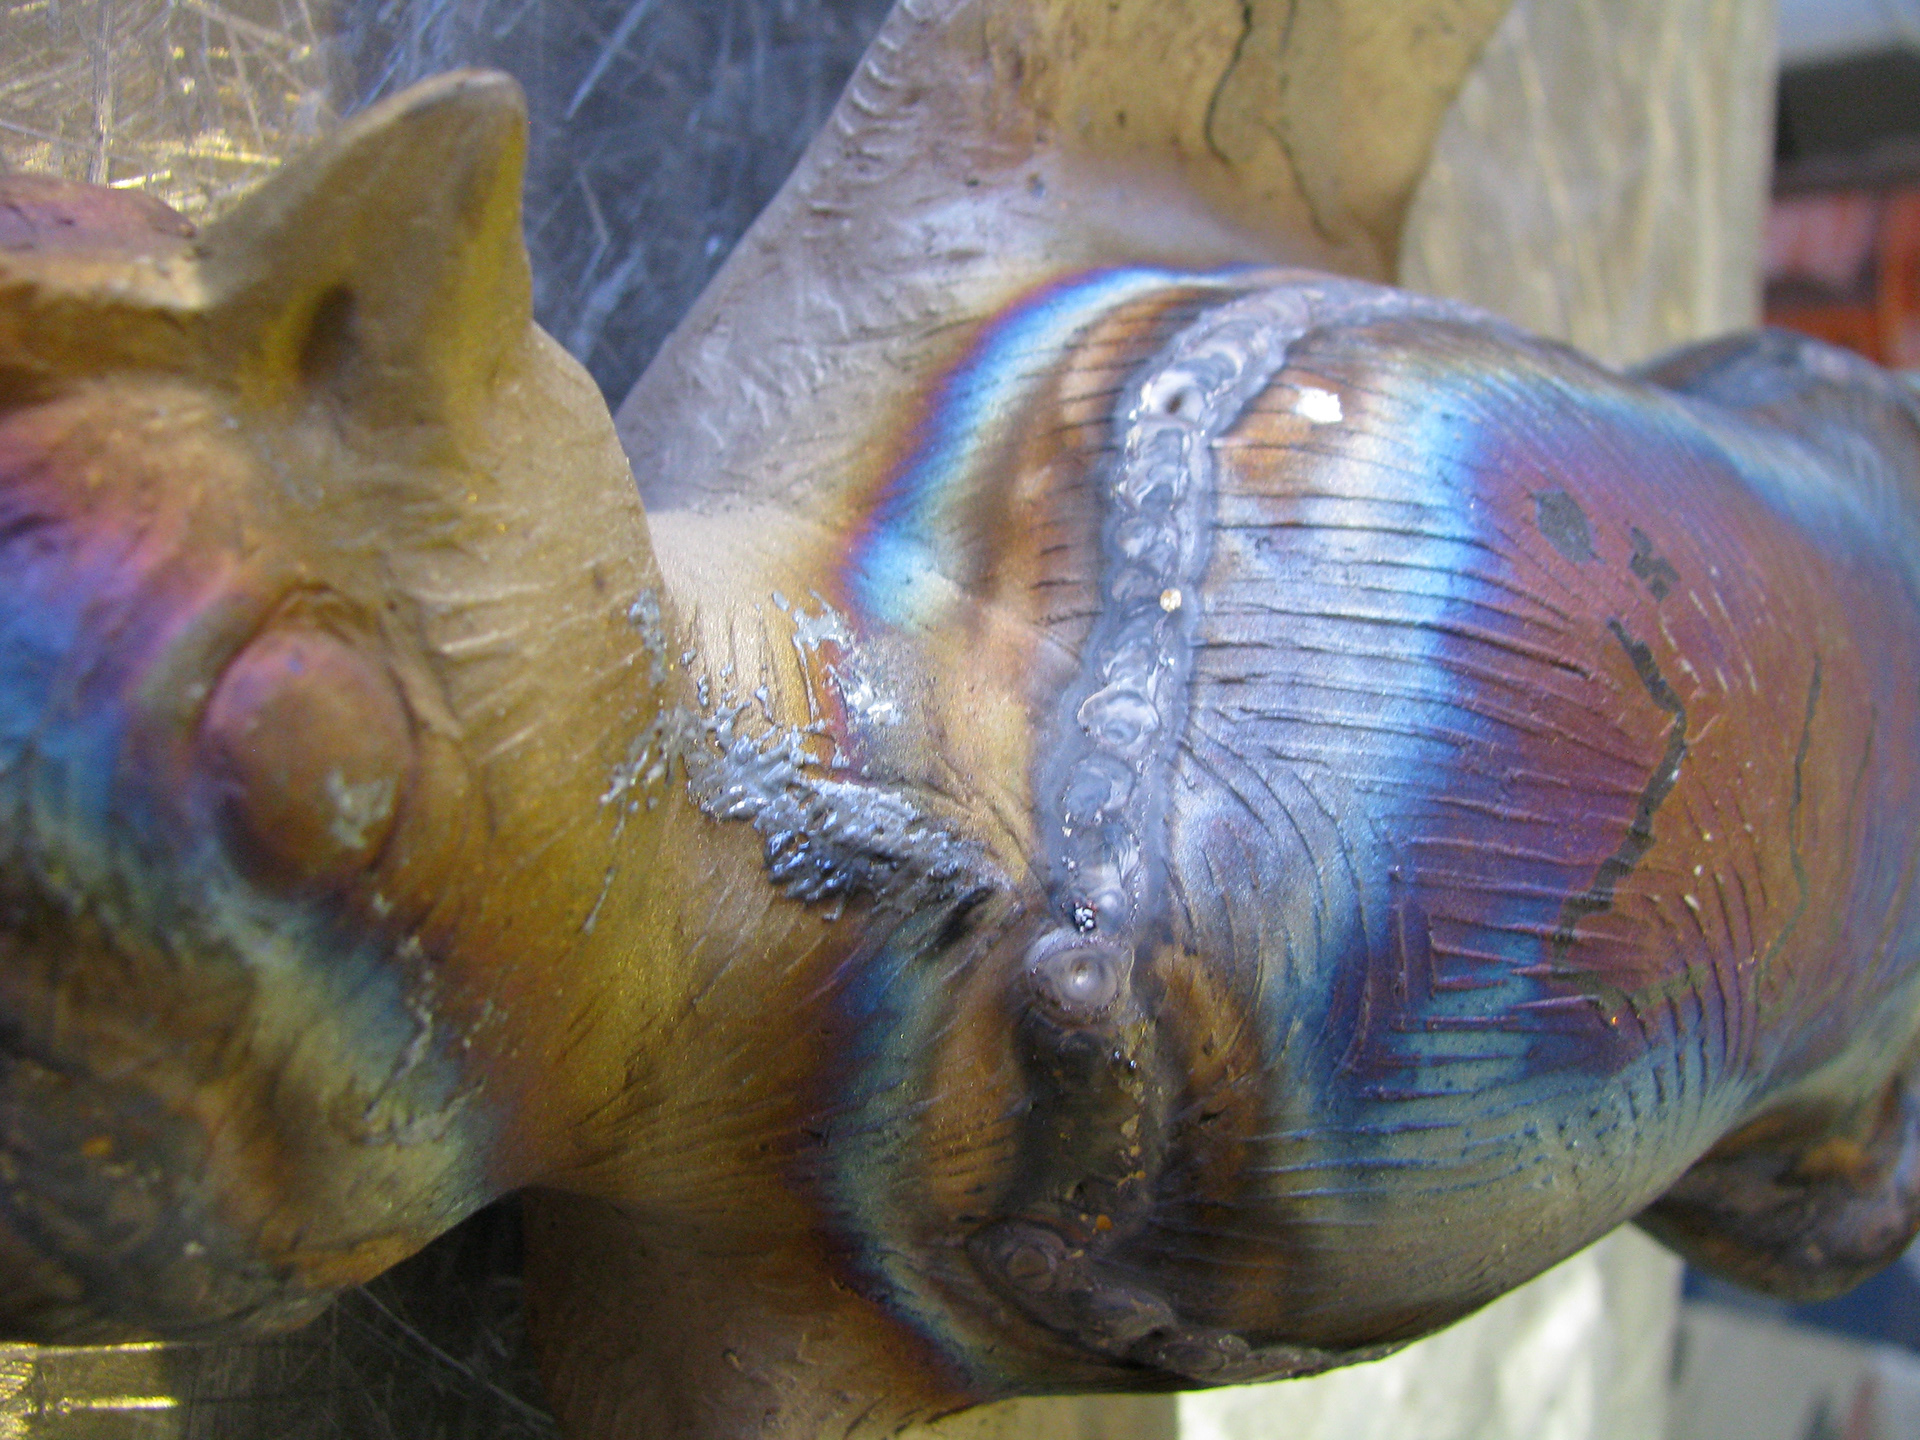
A low spot on the feathers from a thin area in the wax stage gets filled in with weld.
This image is upside down to the prior image, but here the weld fill is chased out to look like feathers again.
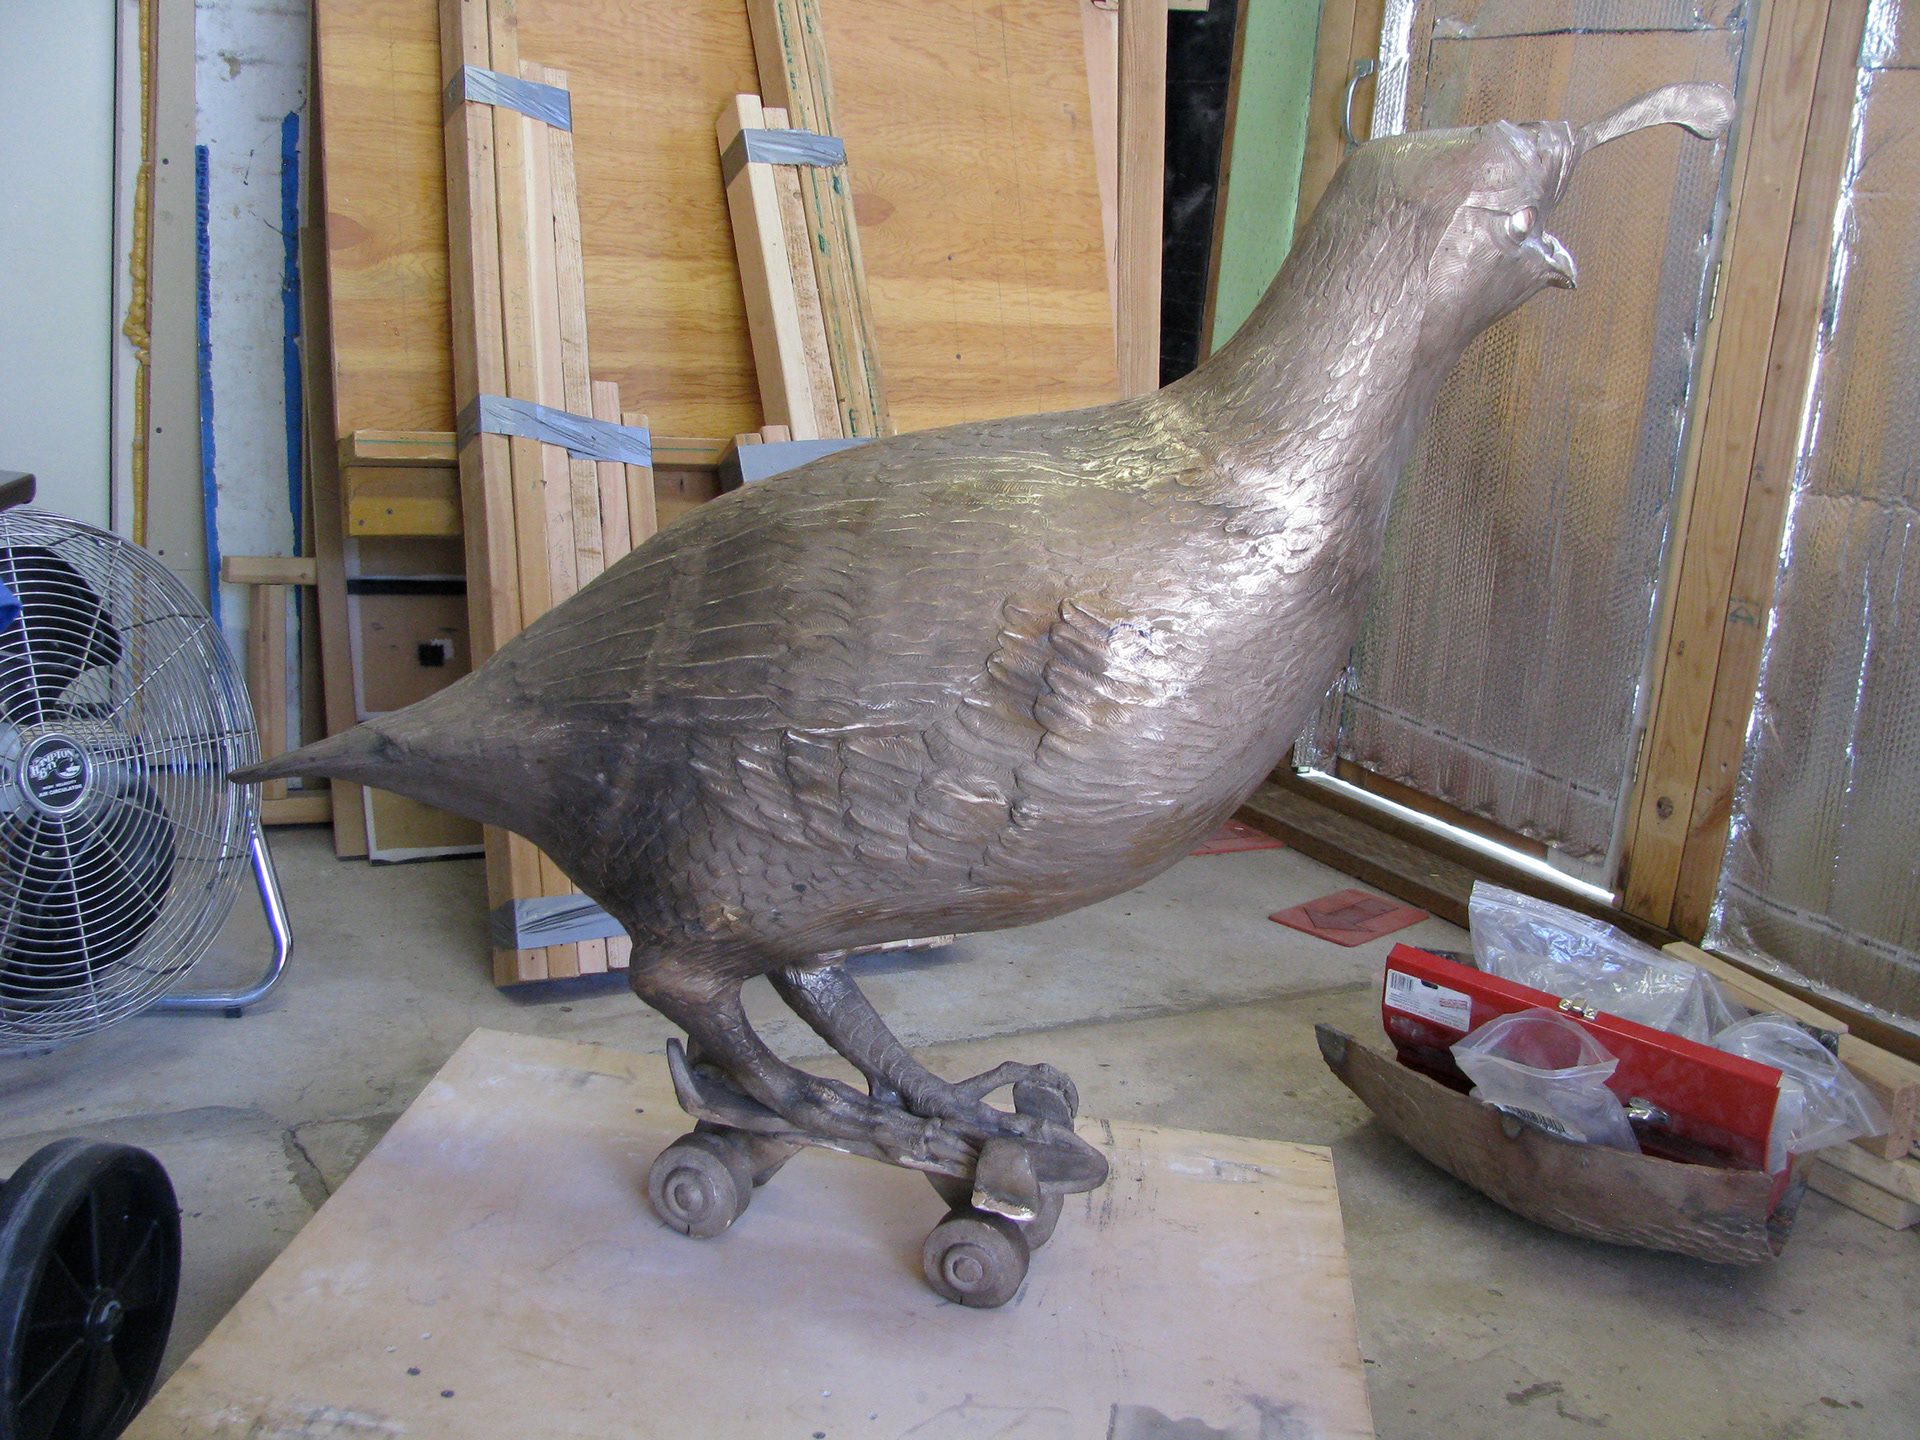
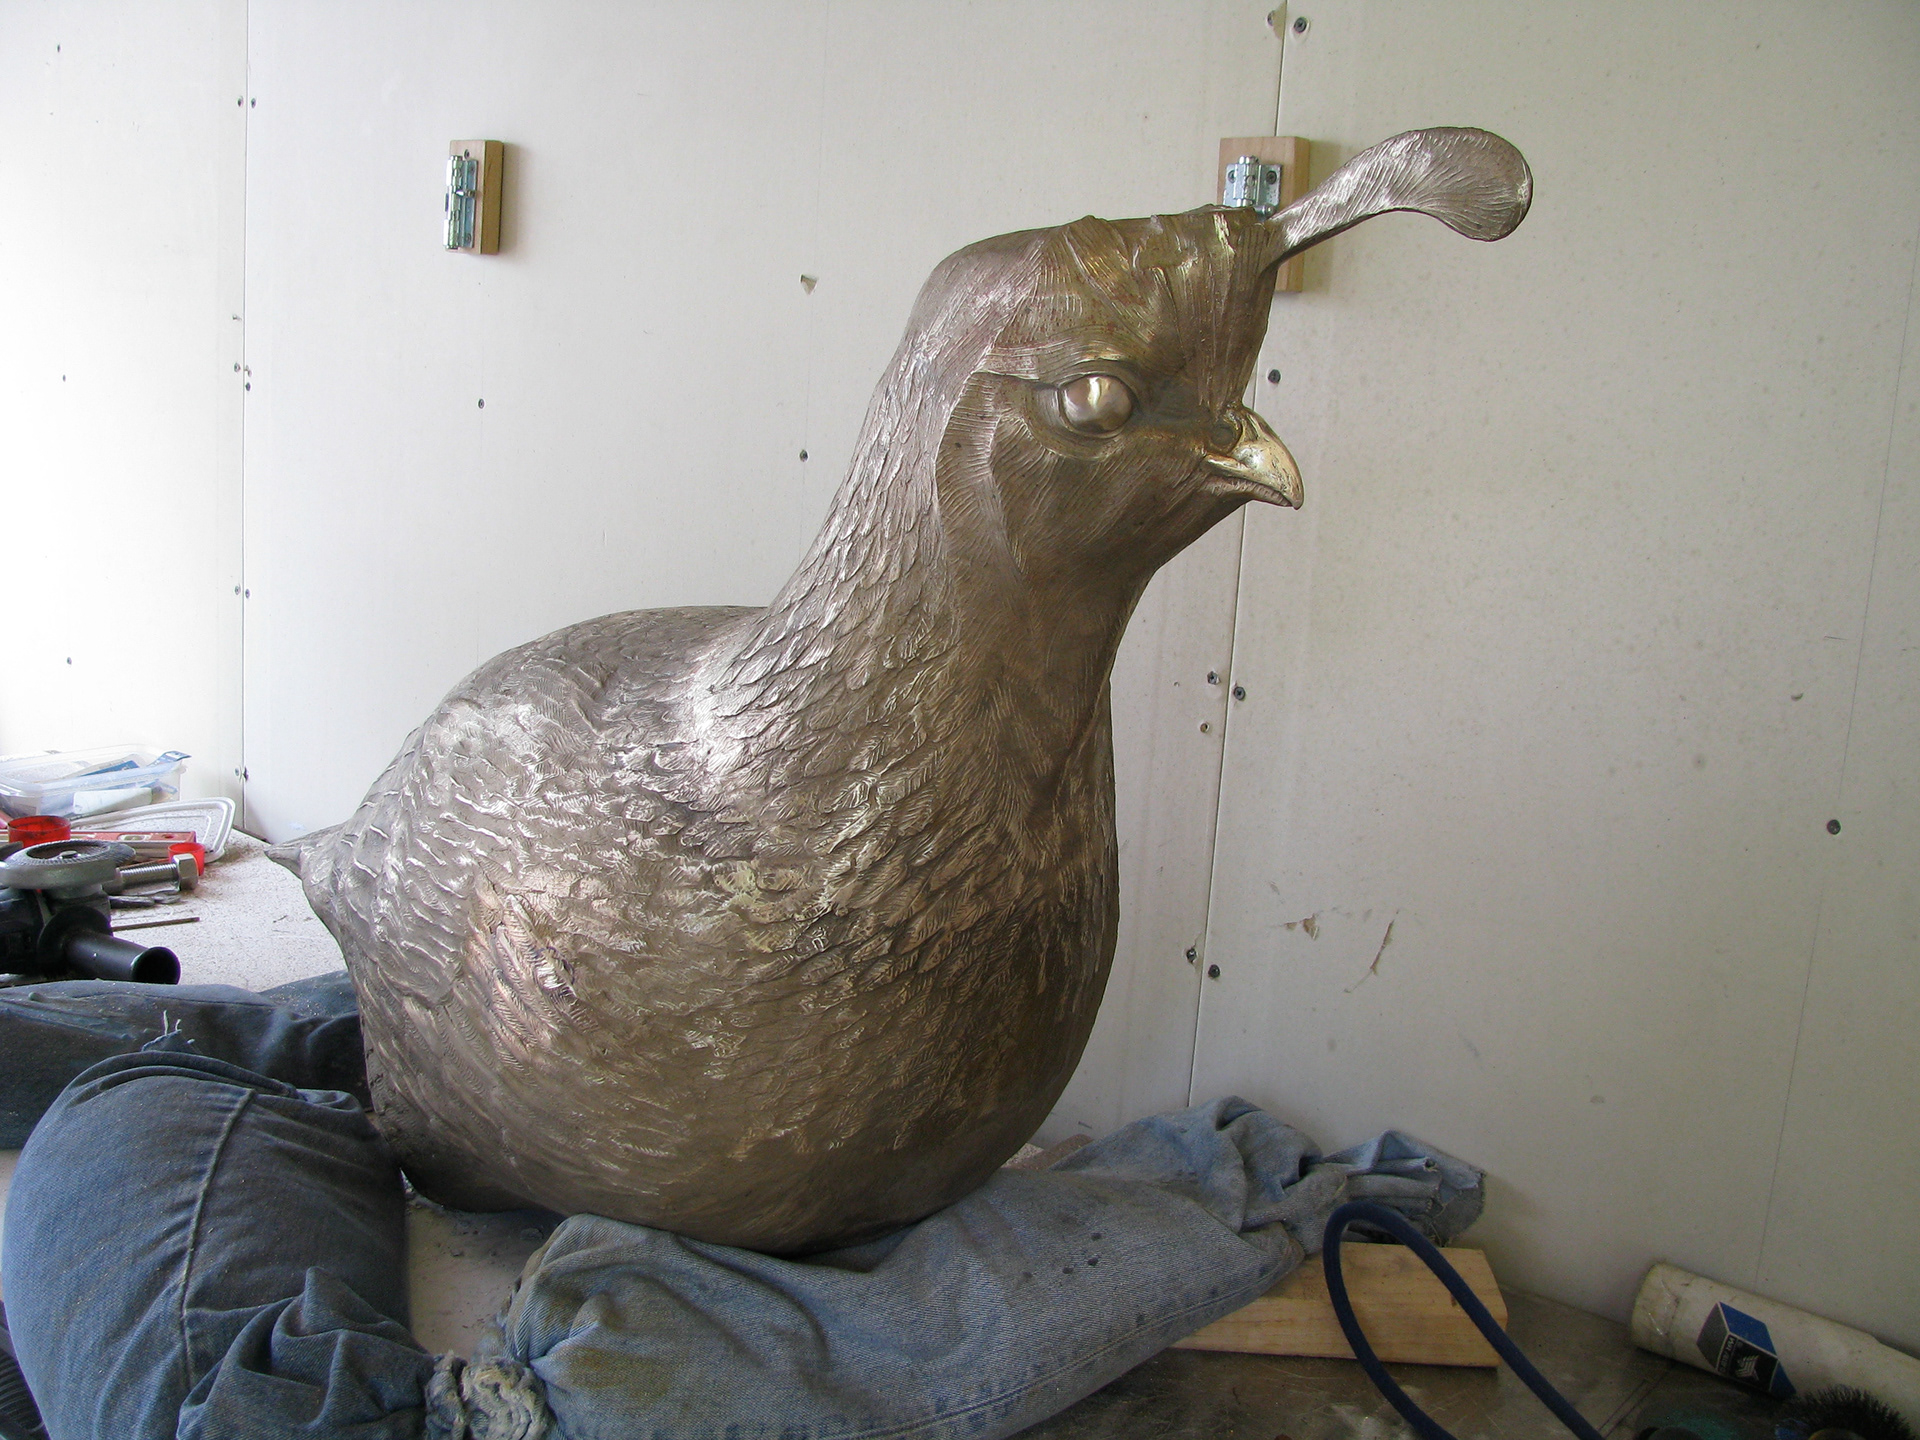
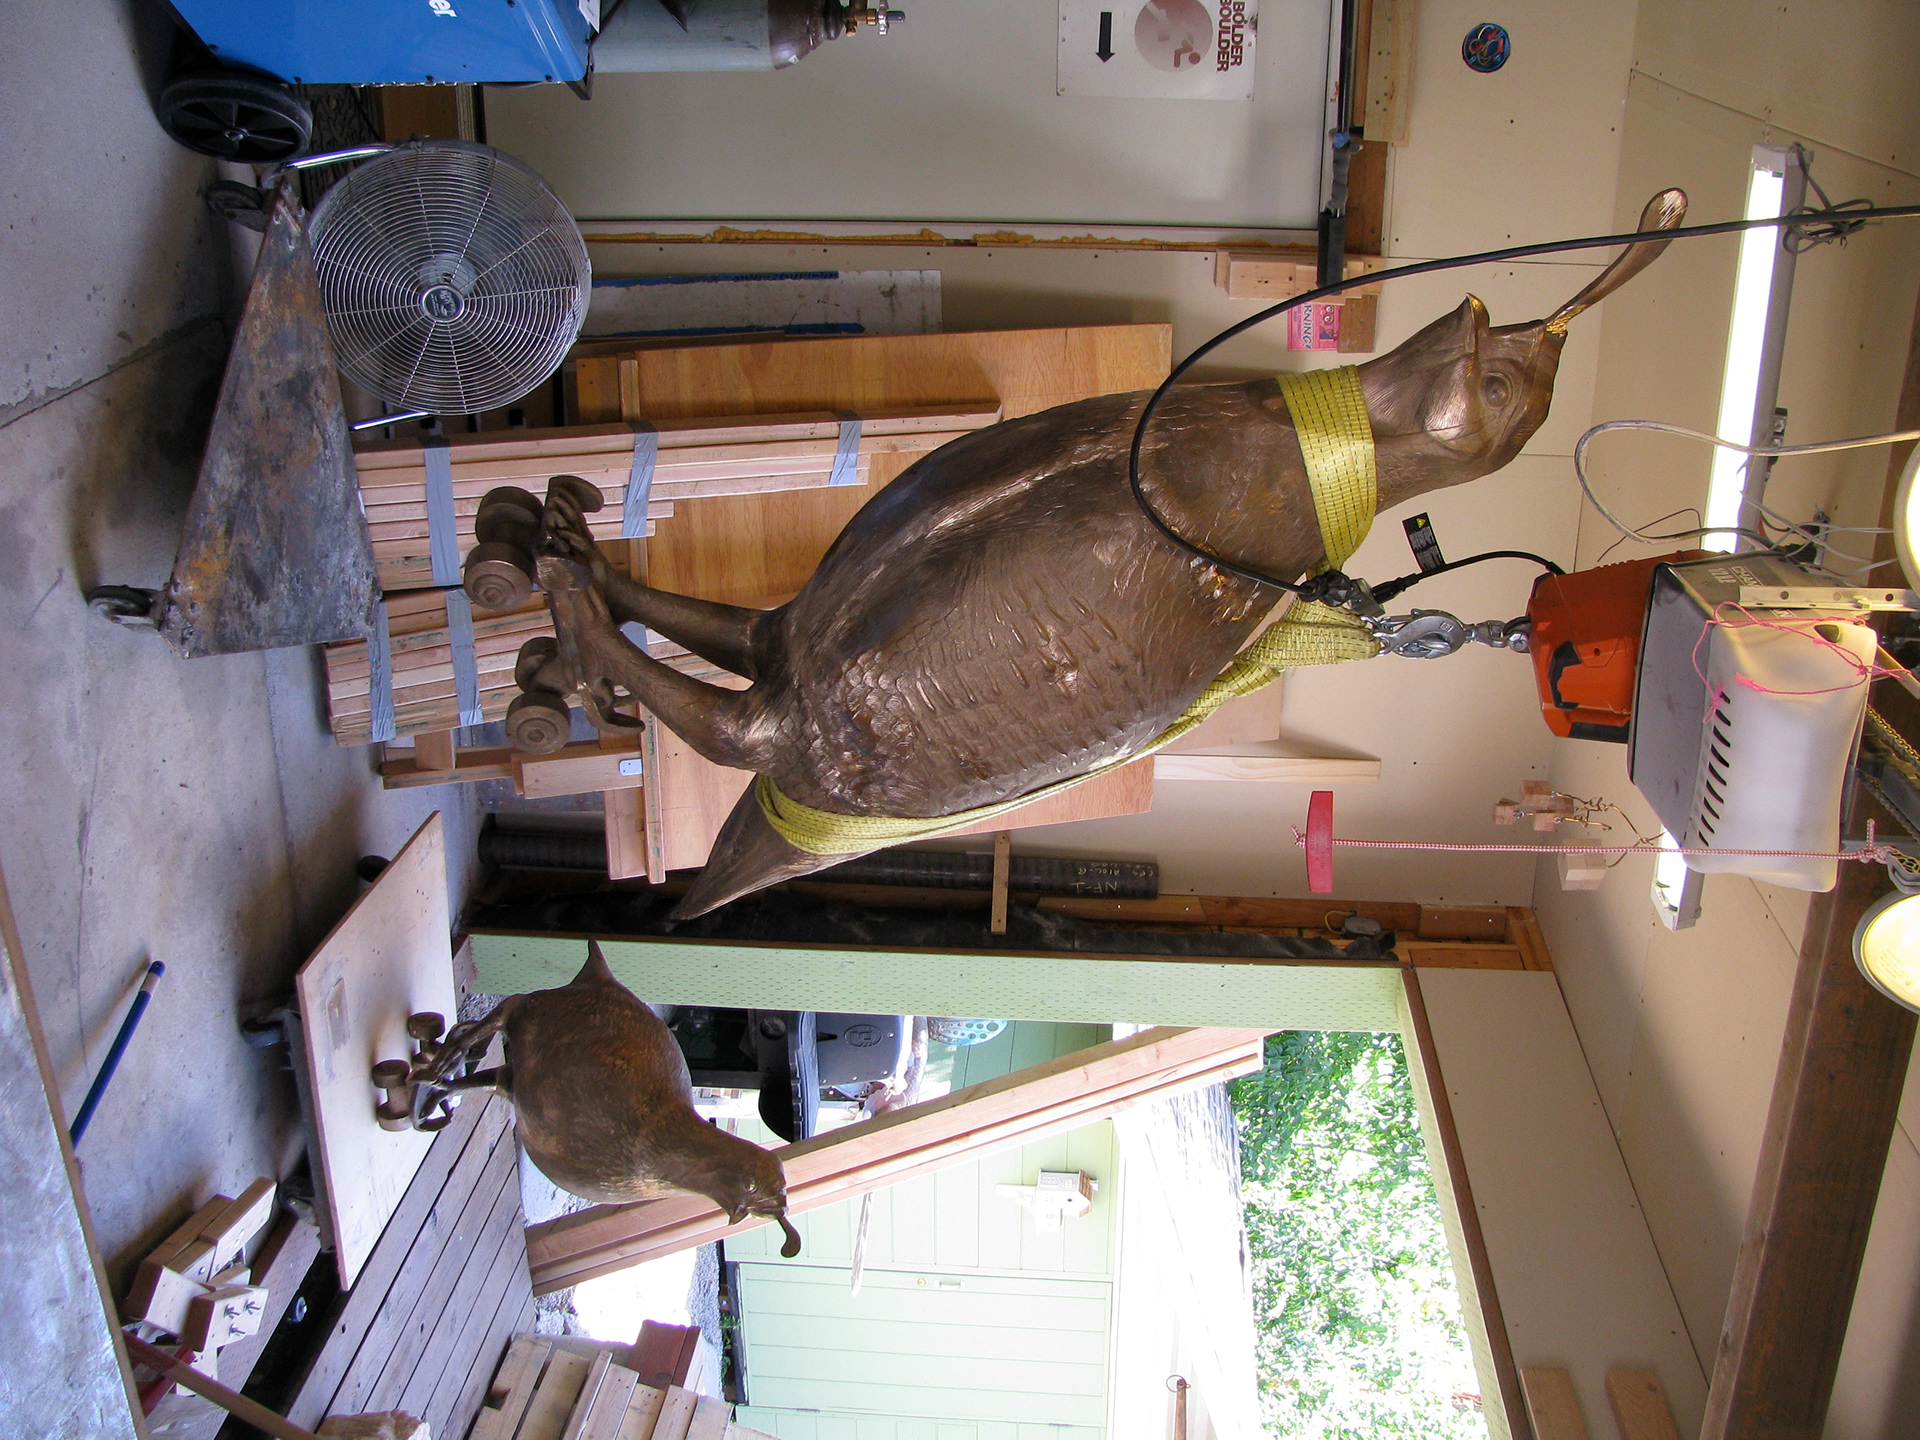
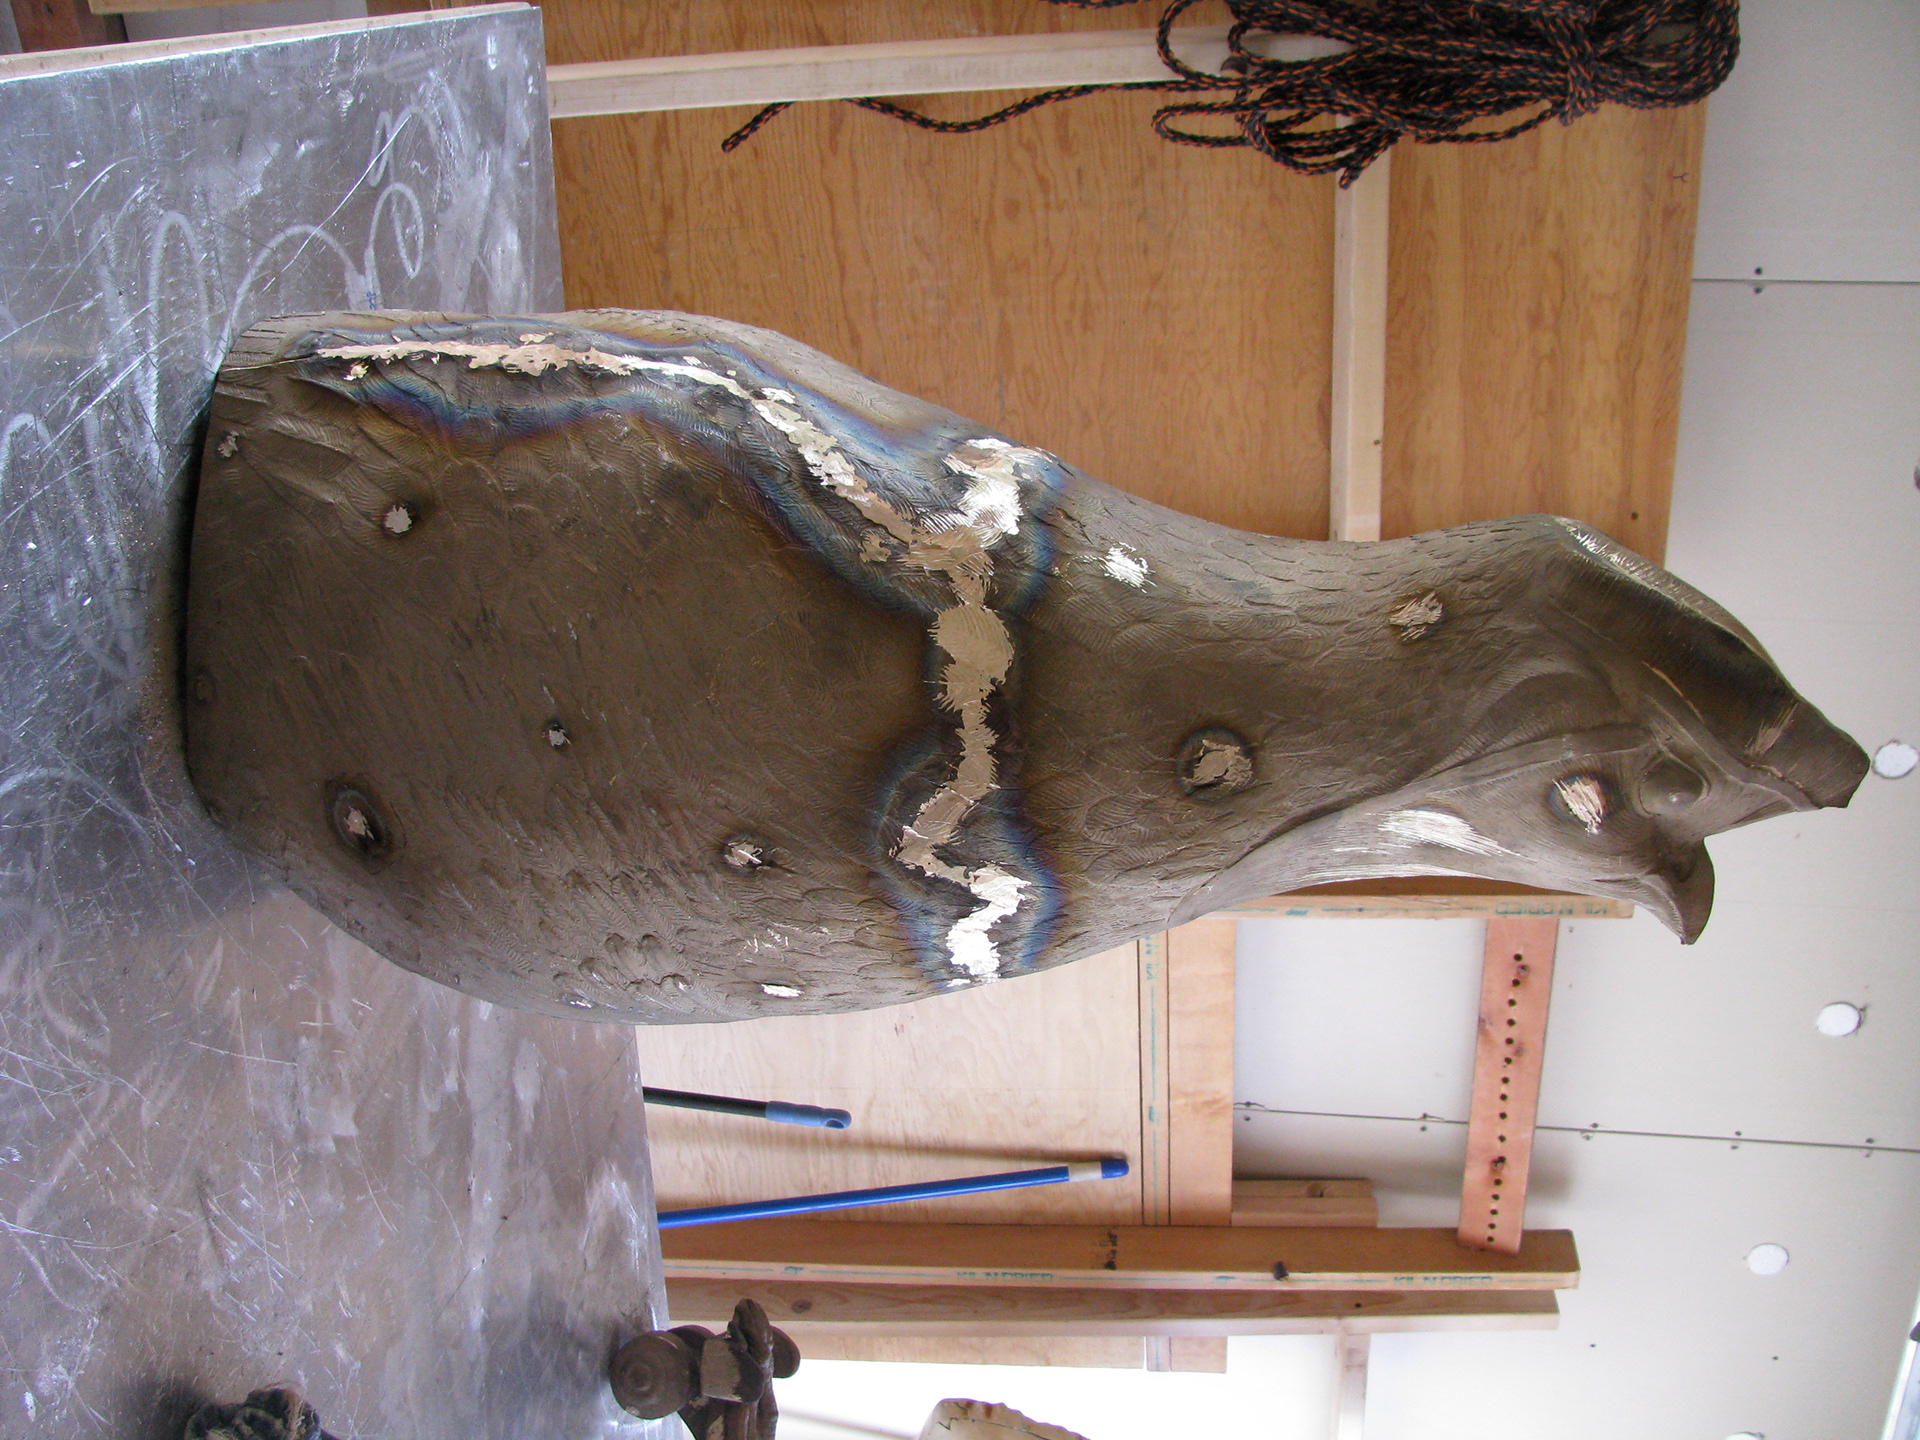
The hen has made the transformation to bronze. Her rolling through my new shop has me feeling pretty good.
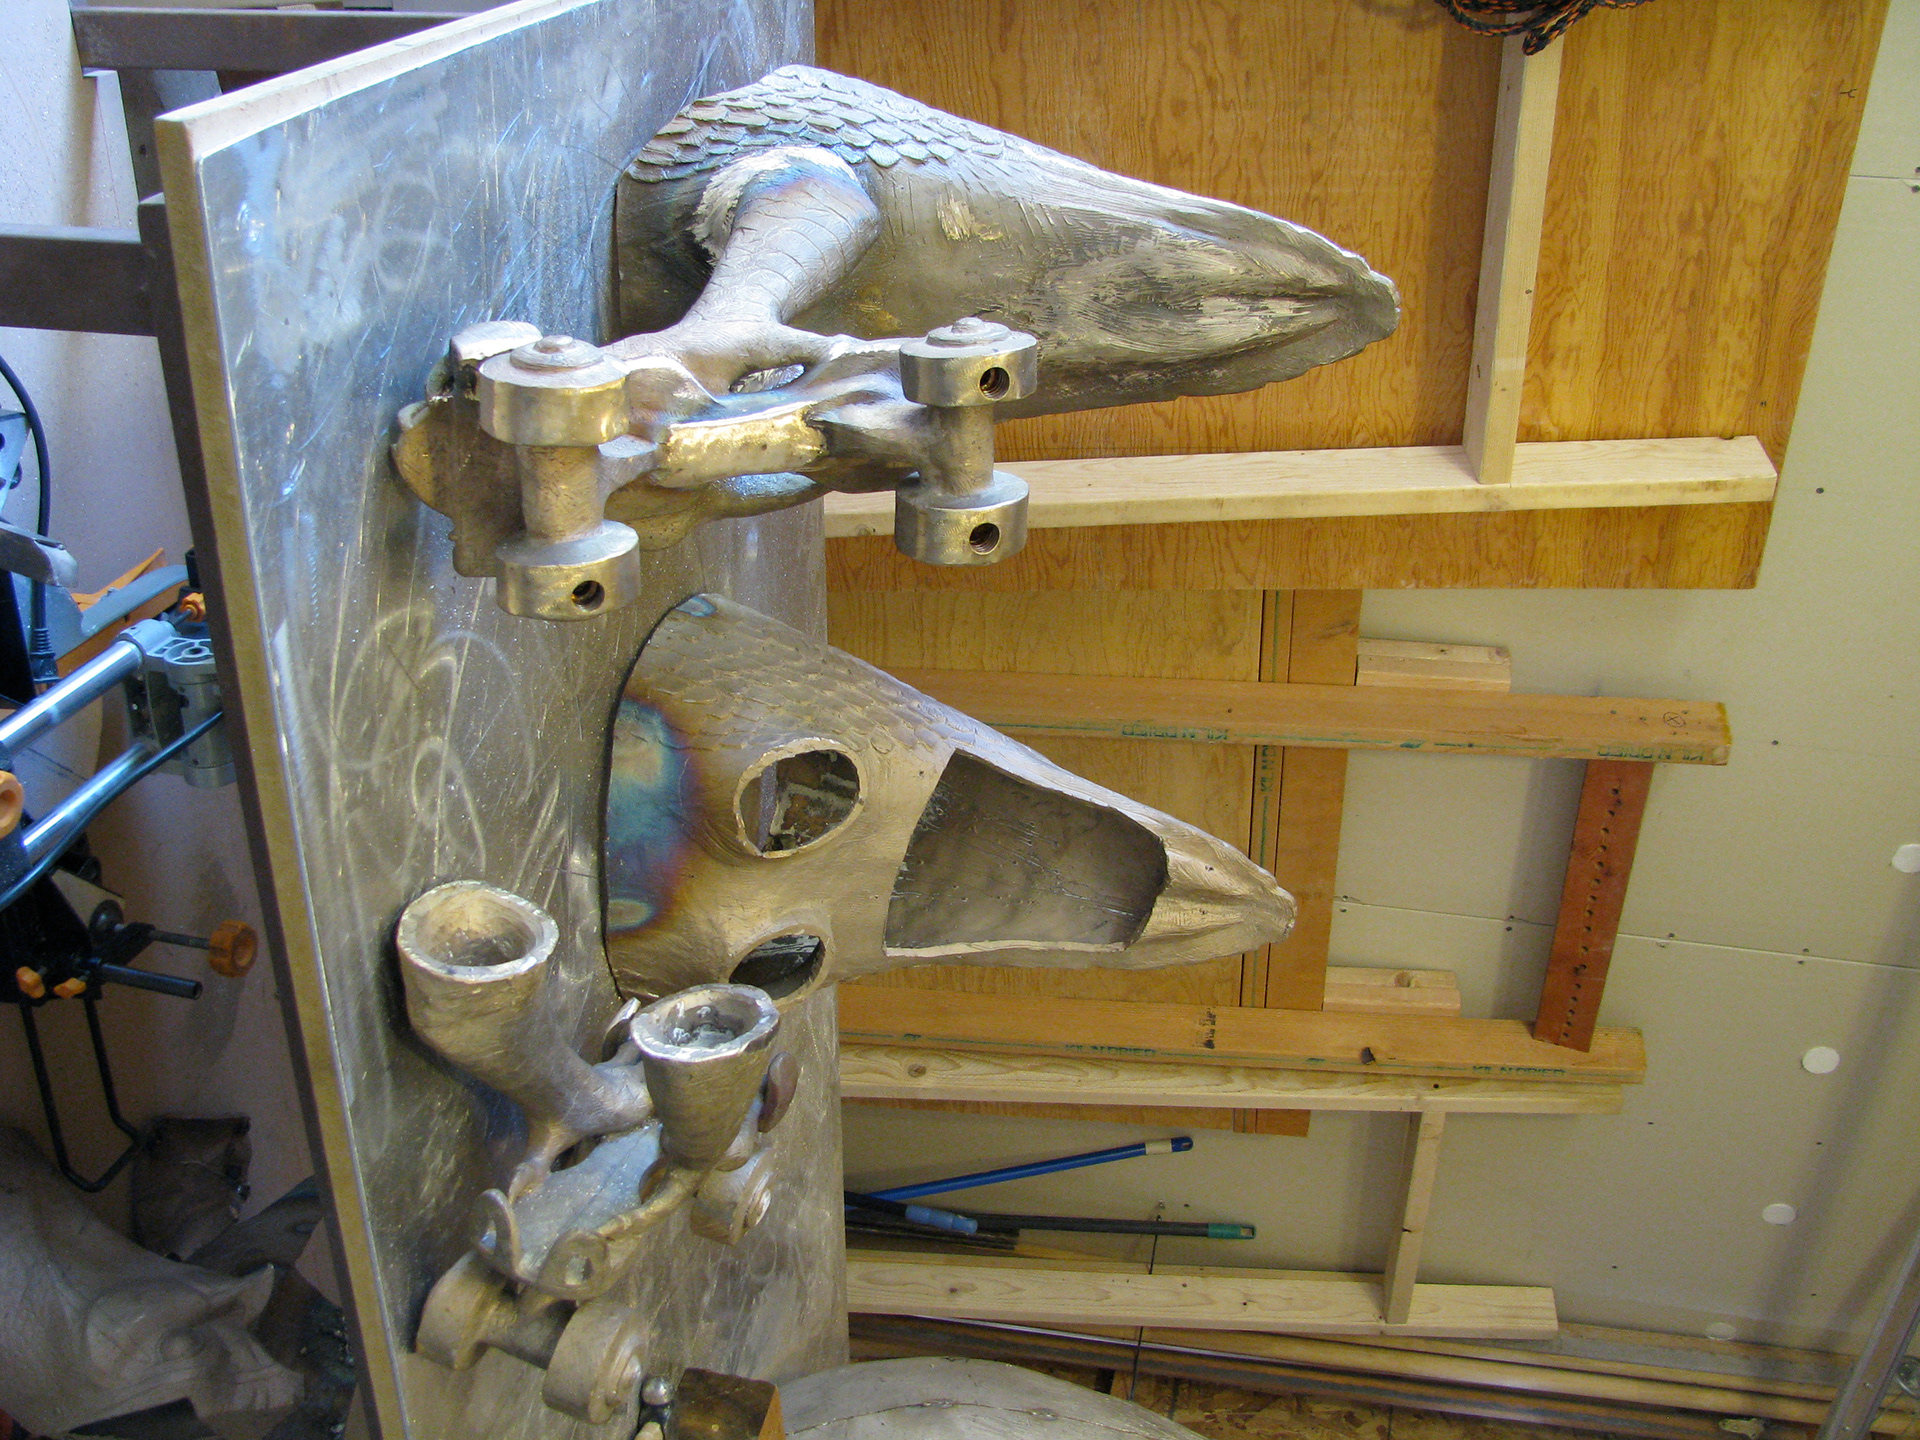
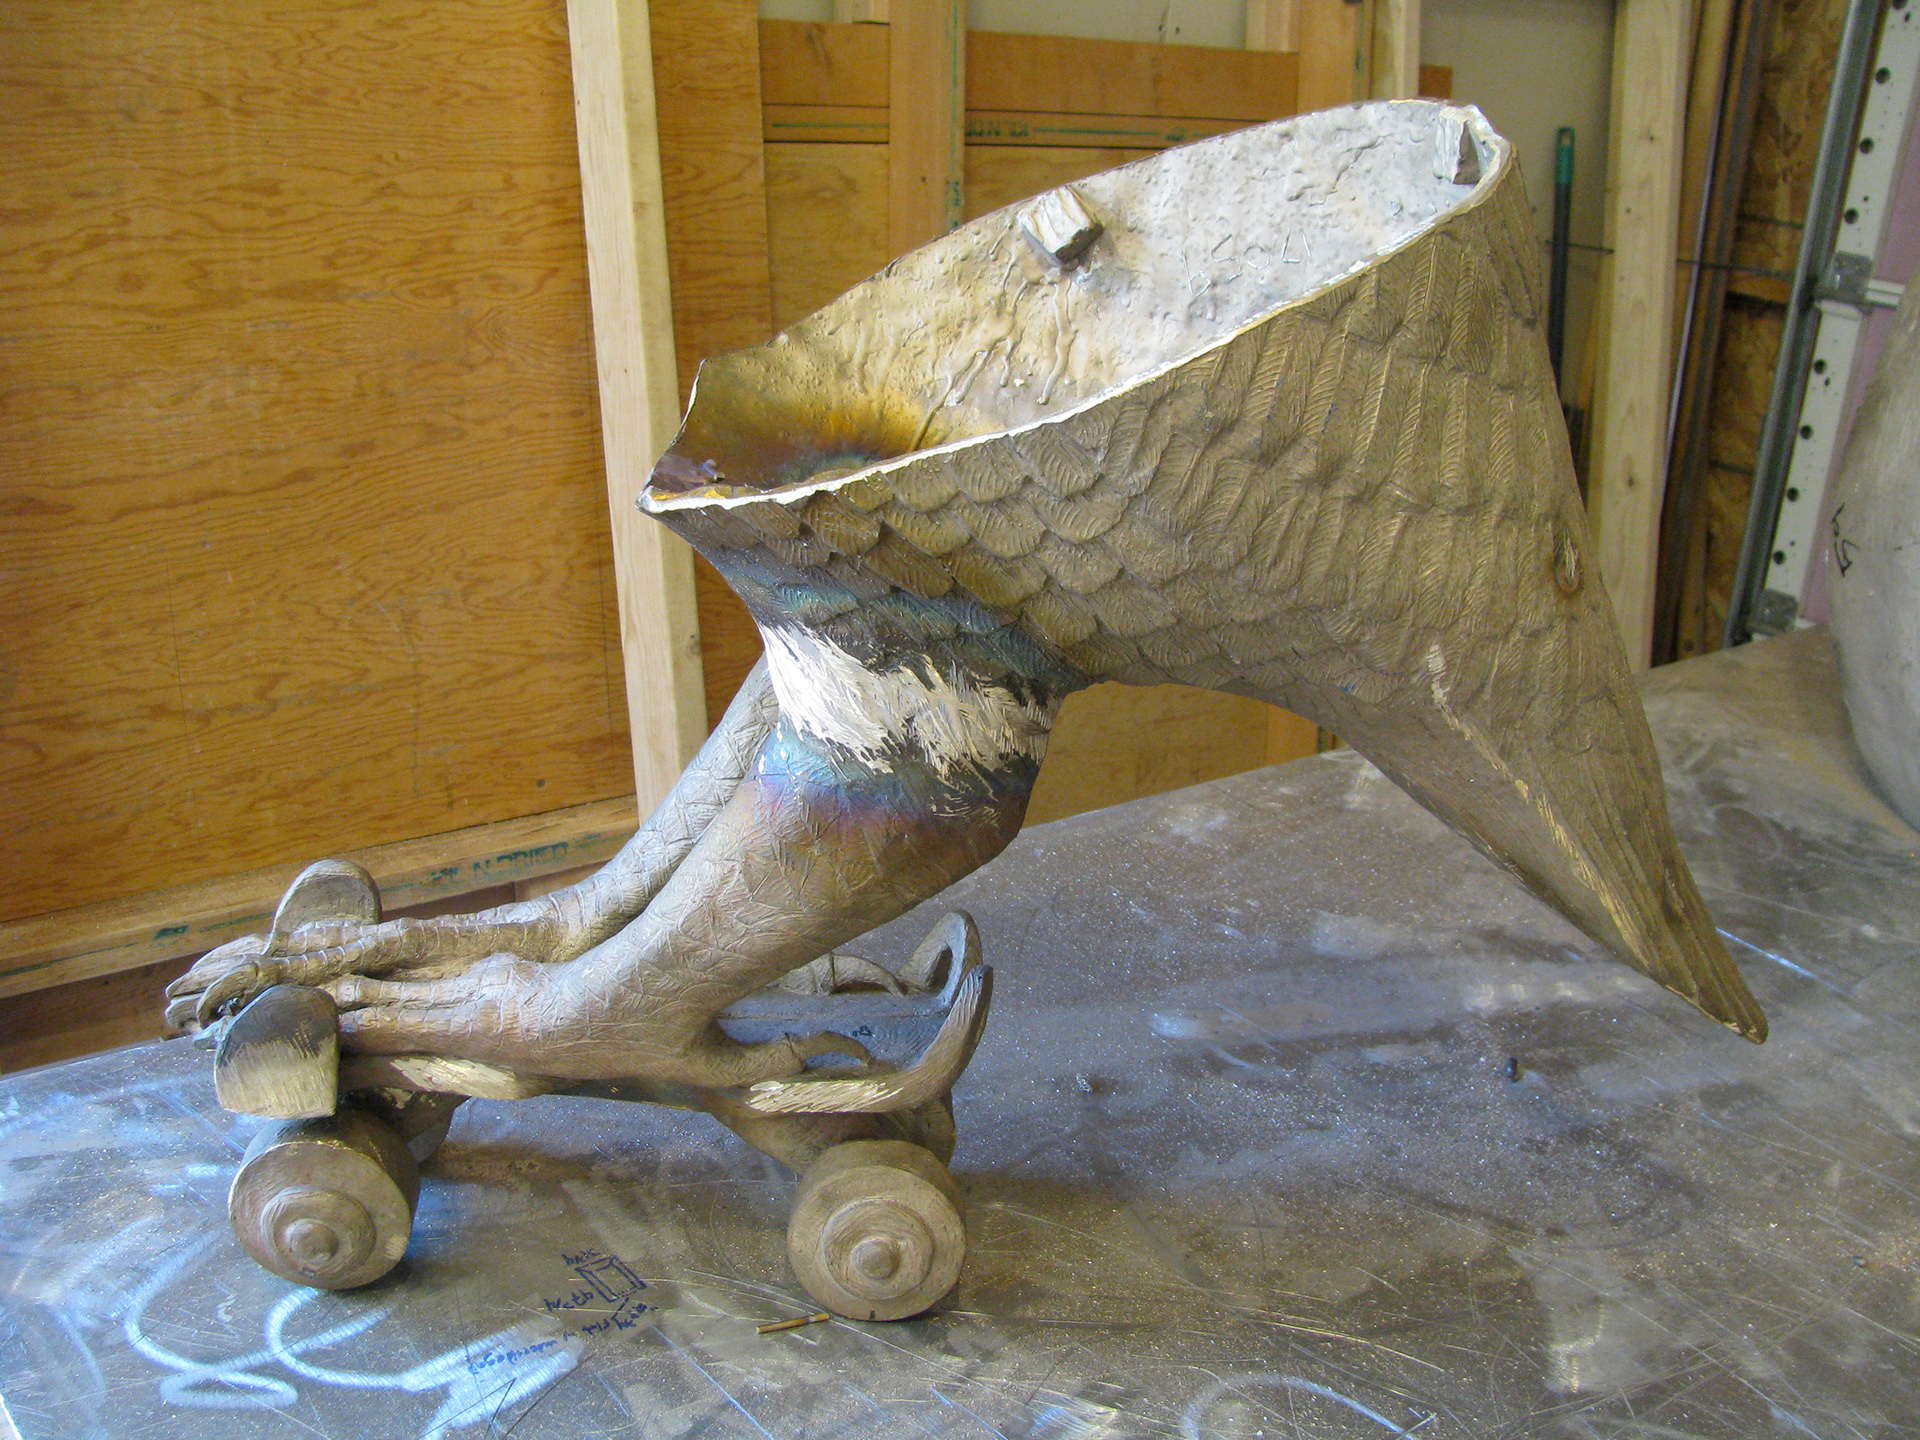
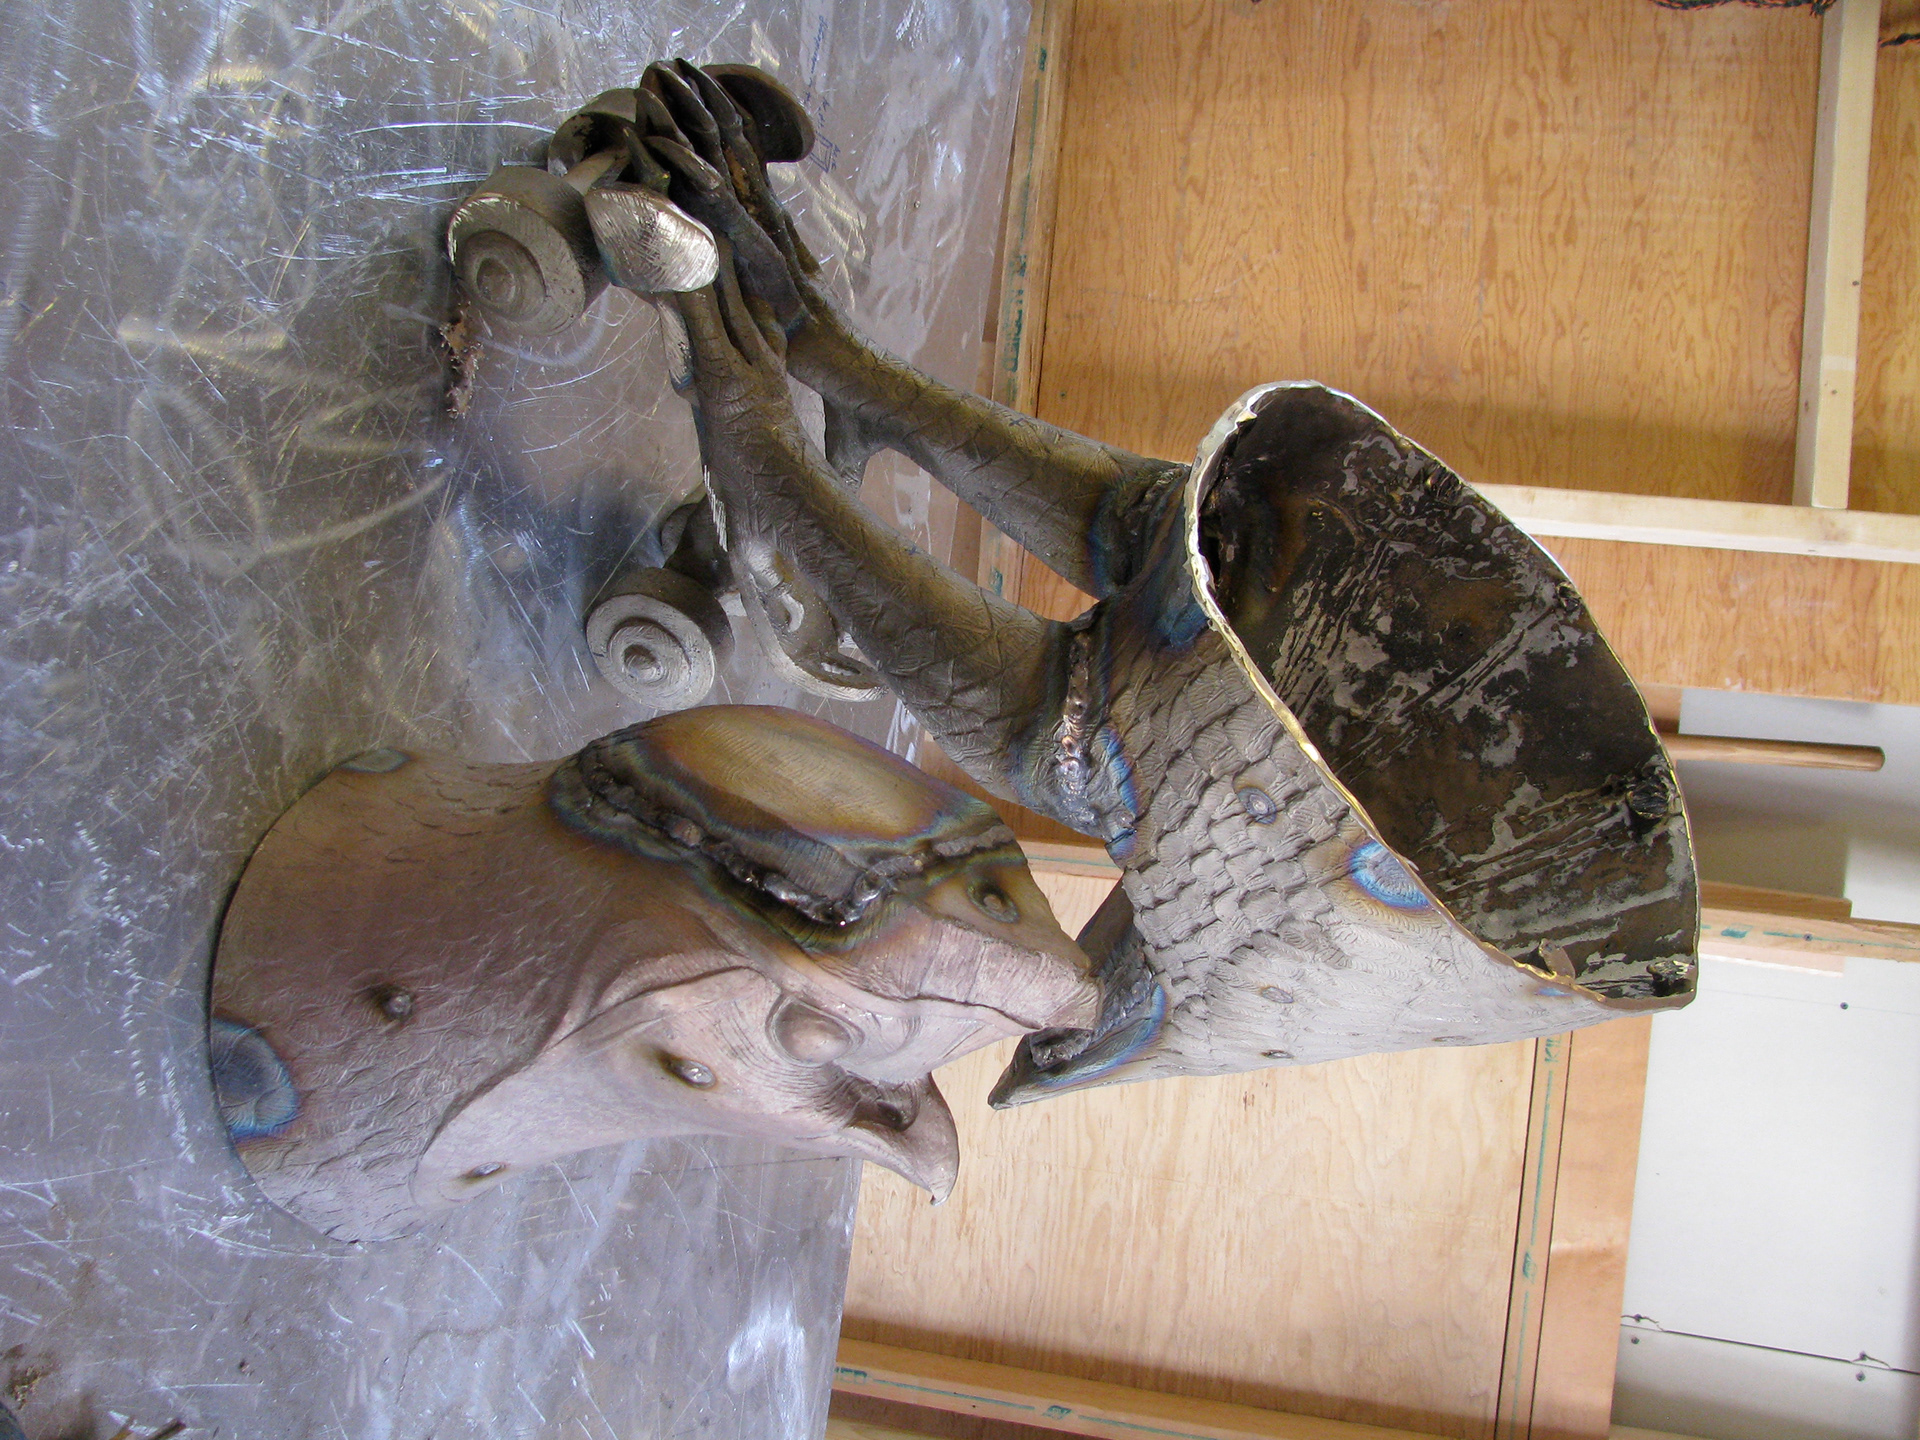
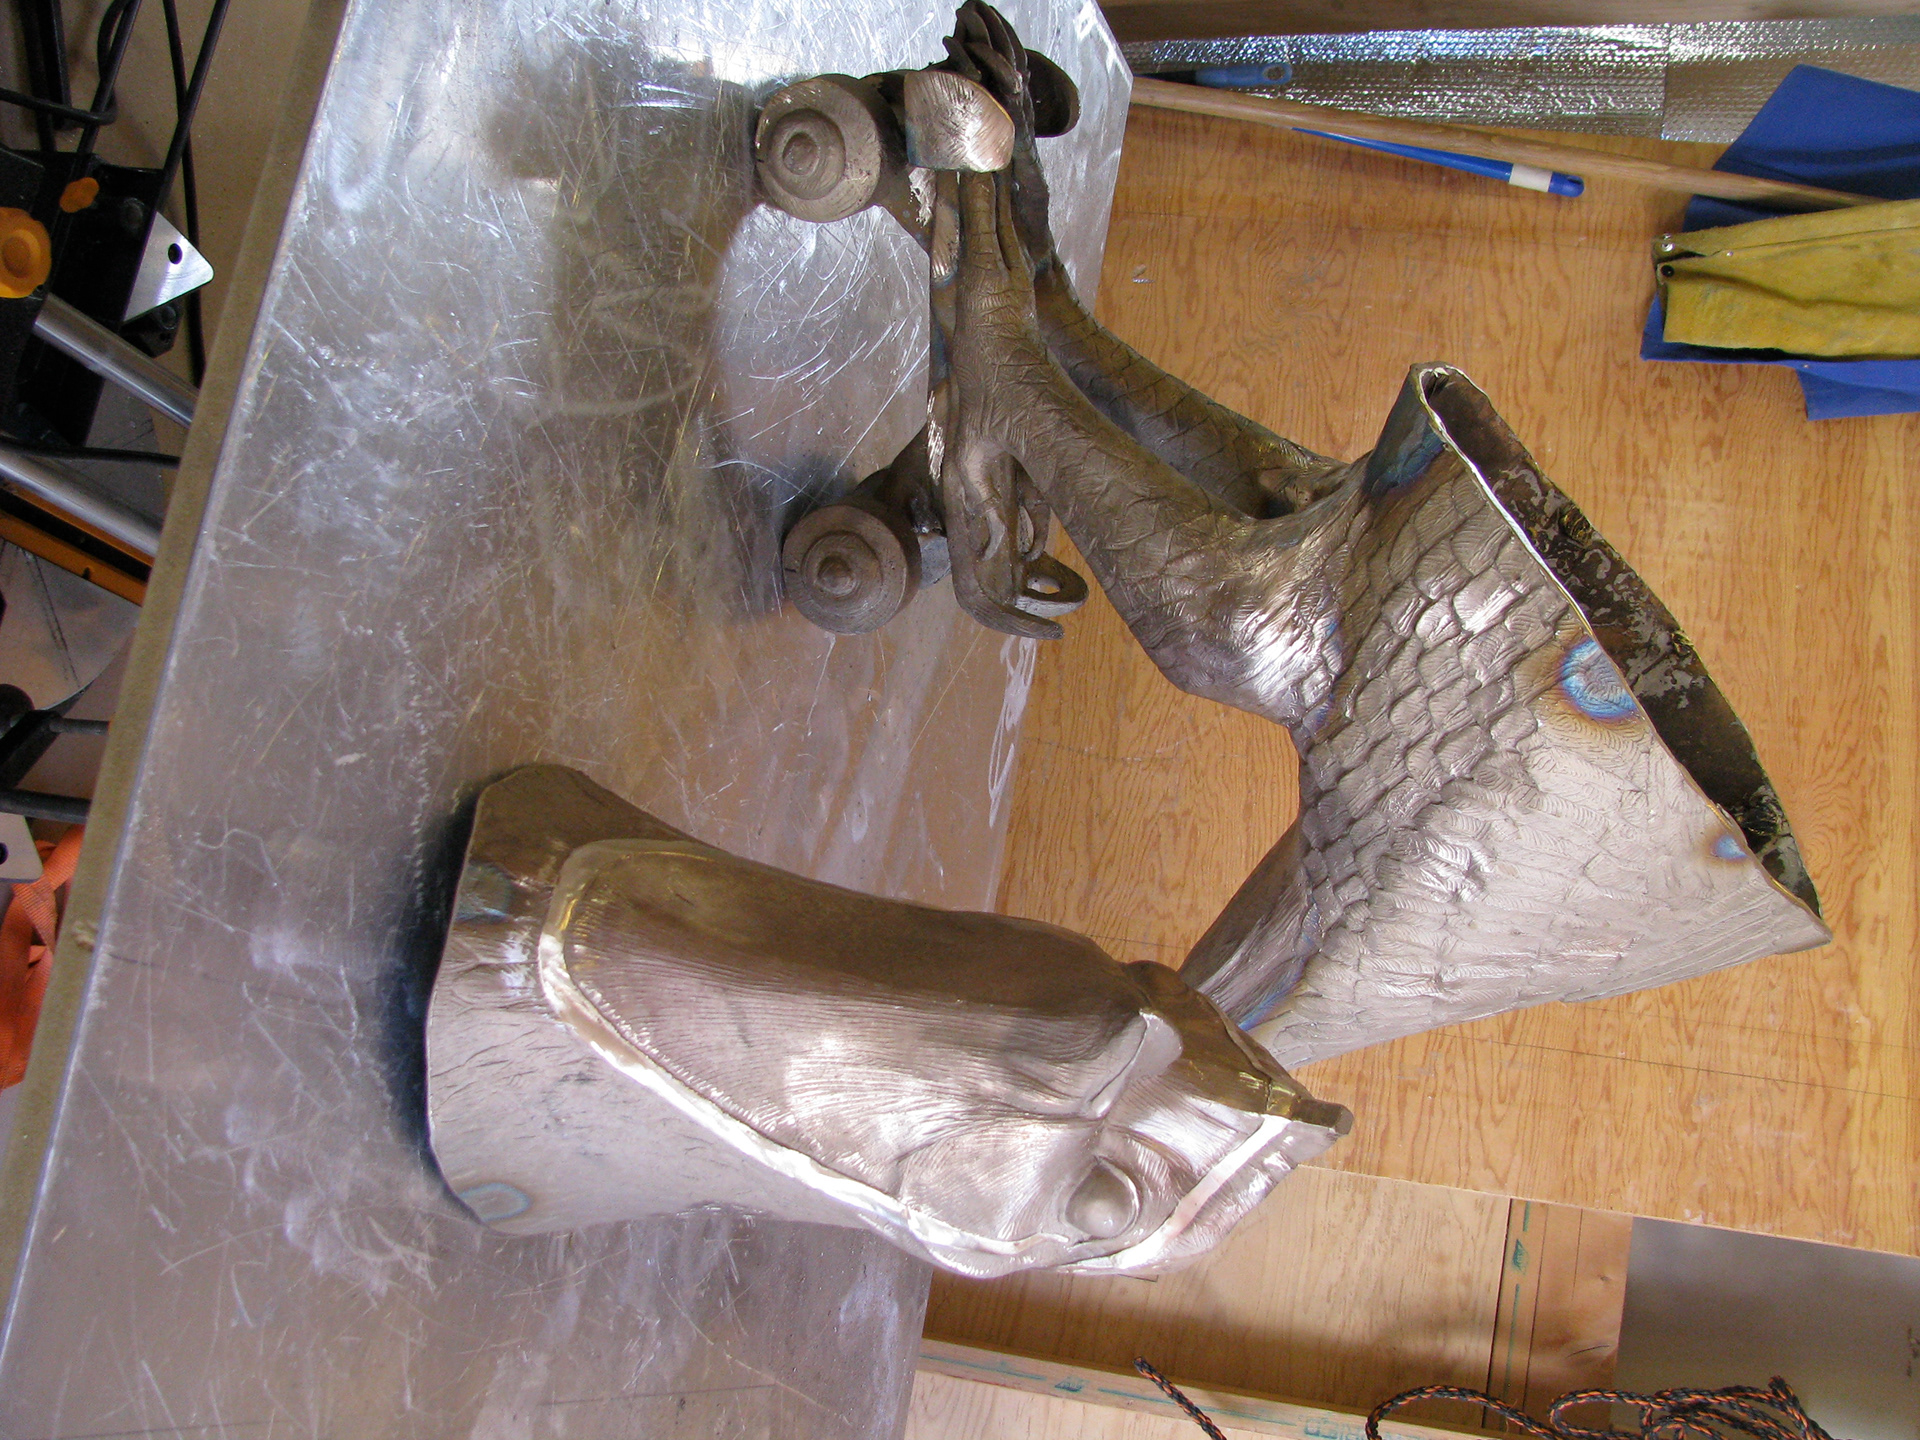
For the Bucks I have drilled and tapped the skates, and will weld them from the inside and outside to assure the welds are insurmountable. There are many large "windows" cut out of the forms, as seen under the tail, ensuring the ceramic shell can flow over/through the form evenly. The completed tail had the same window.
Rough-chasing of the weld line between the legs and tail.
Lest we forget, there are three chick forms that will create 8 chicks for the final pieces. Here I'm getting the little armatures started.
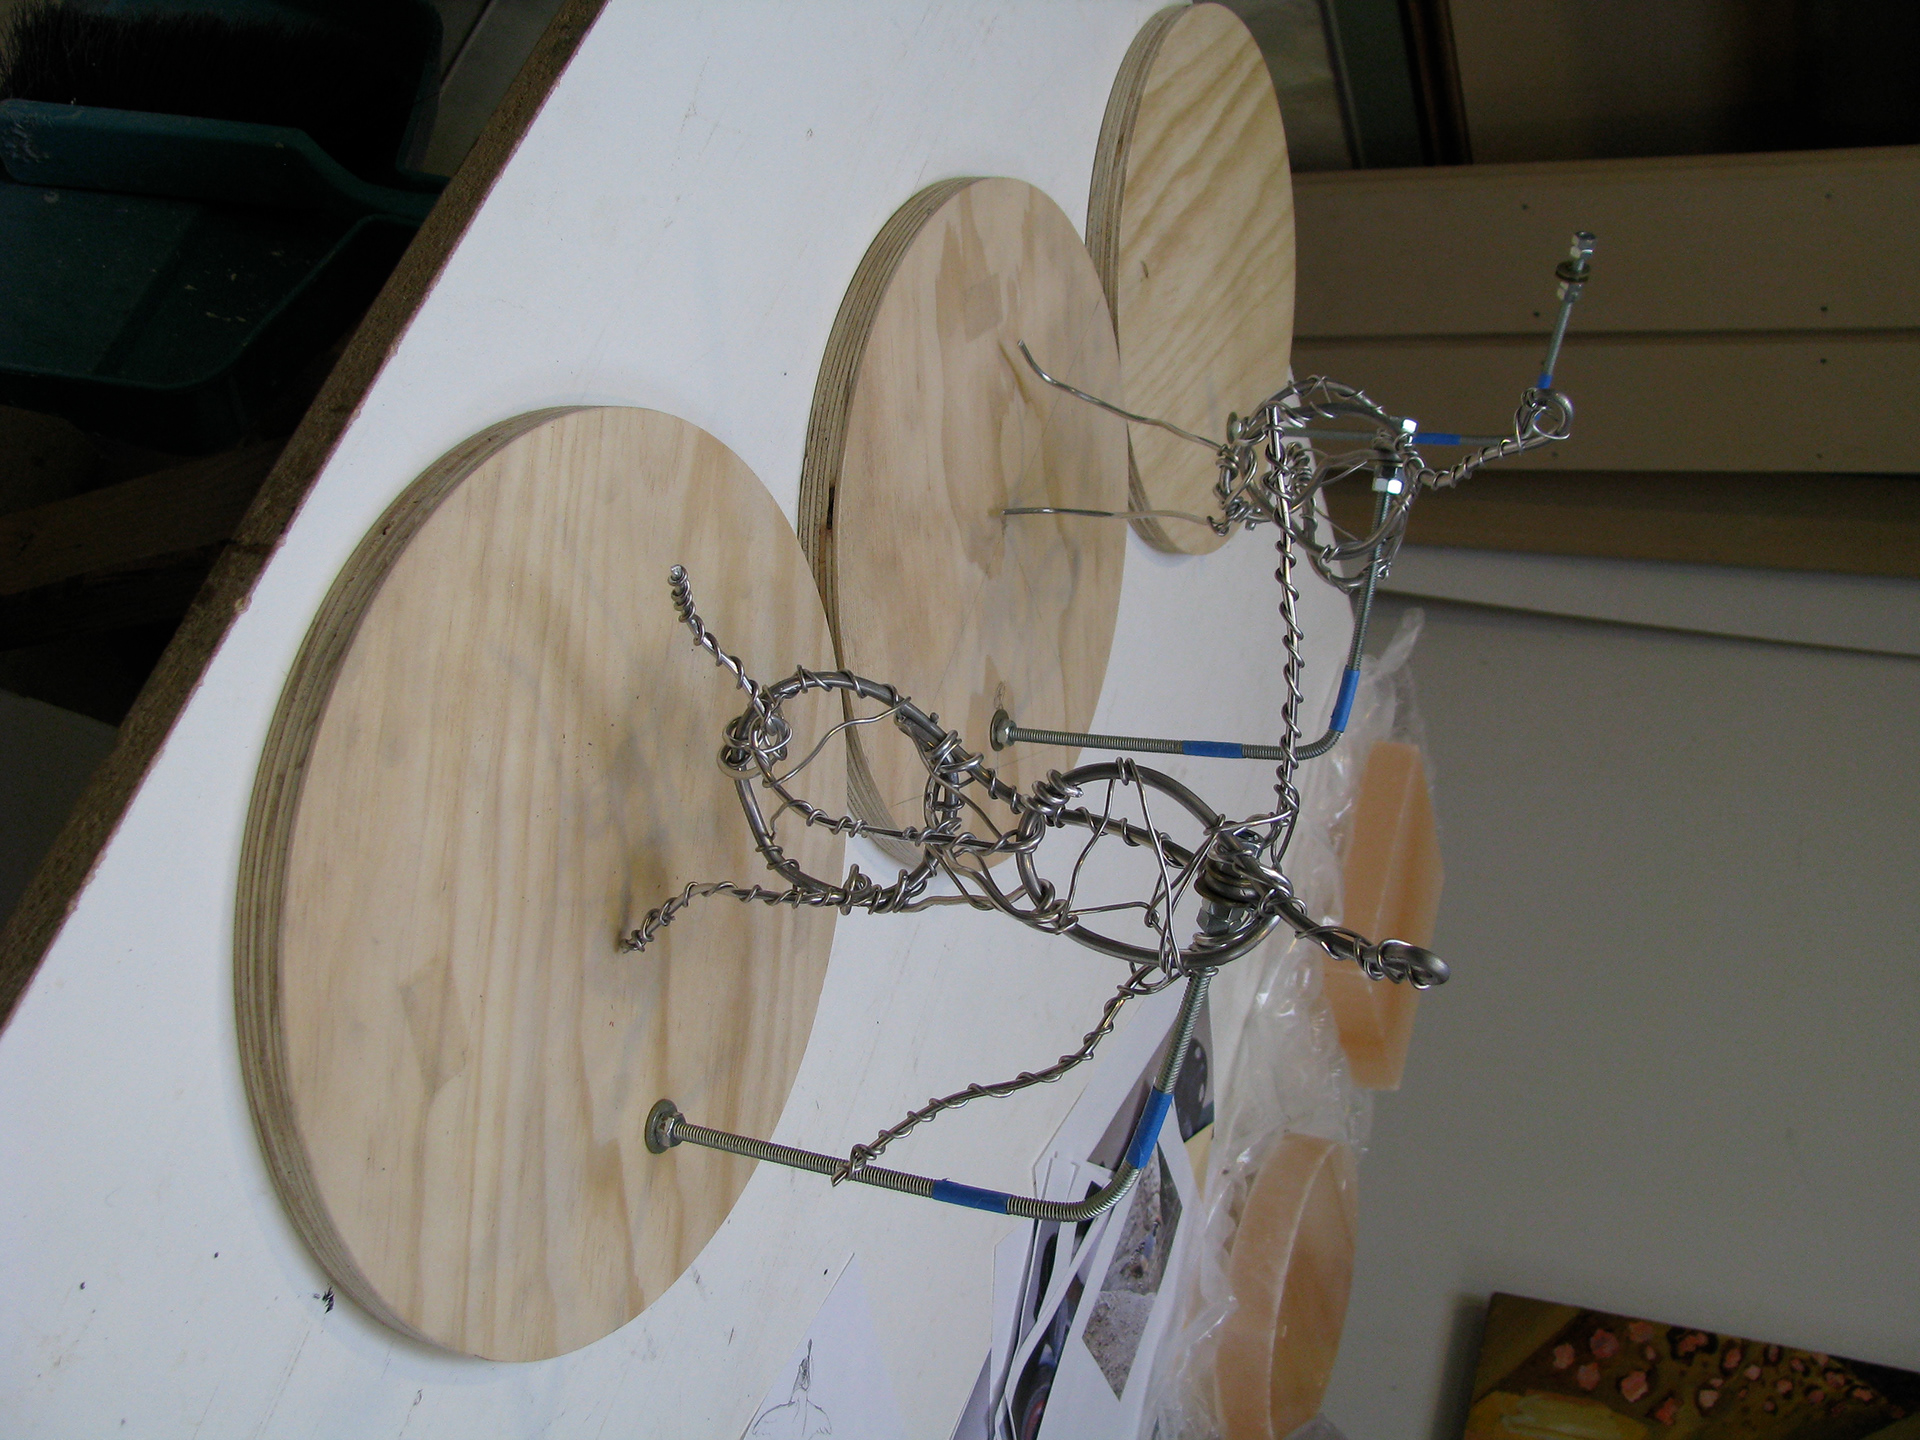
Standing Chick in early phase.
Standing Chick near completion.
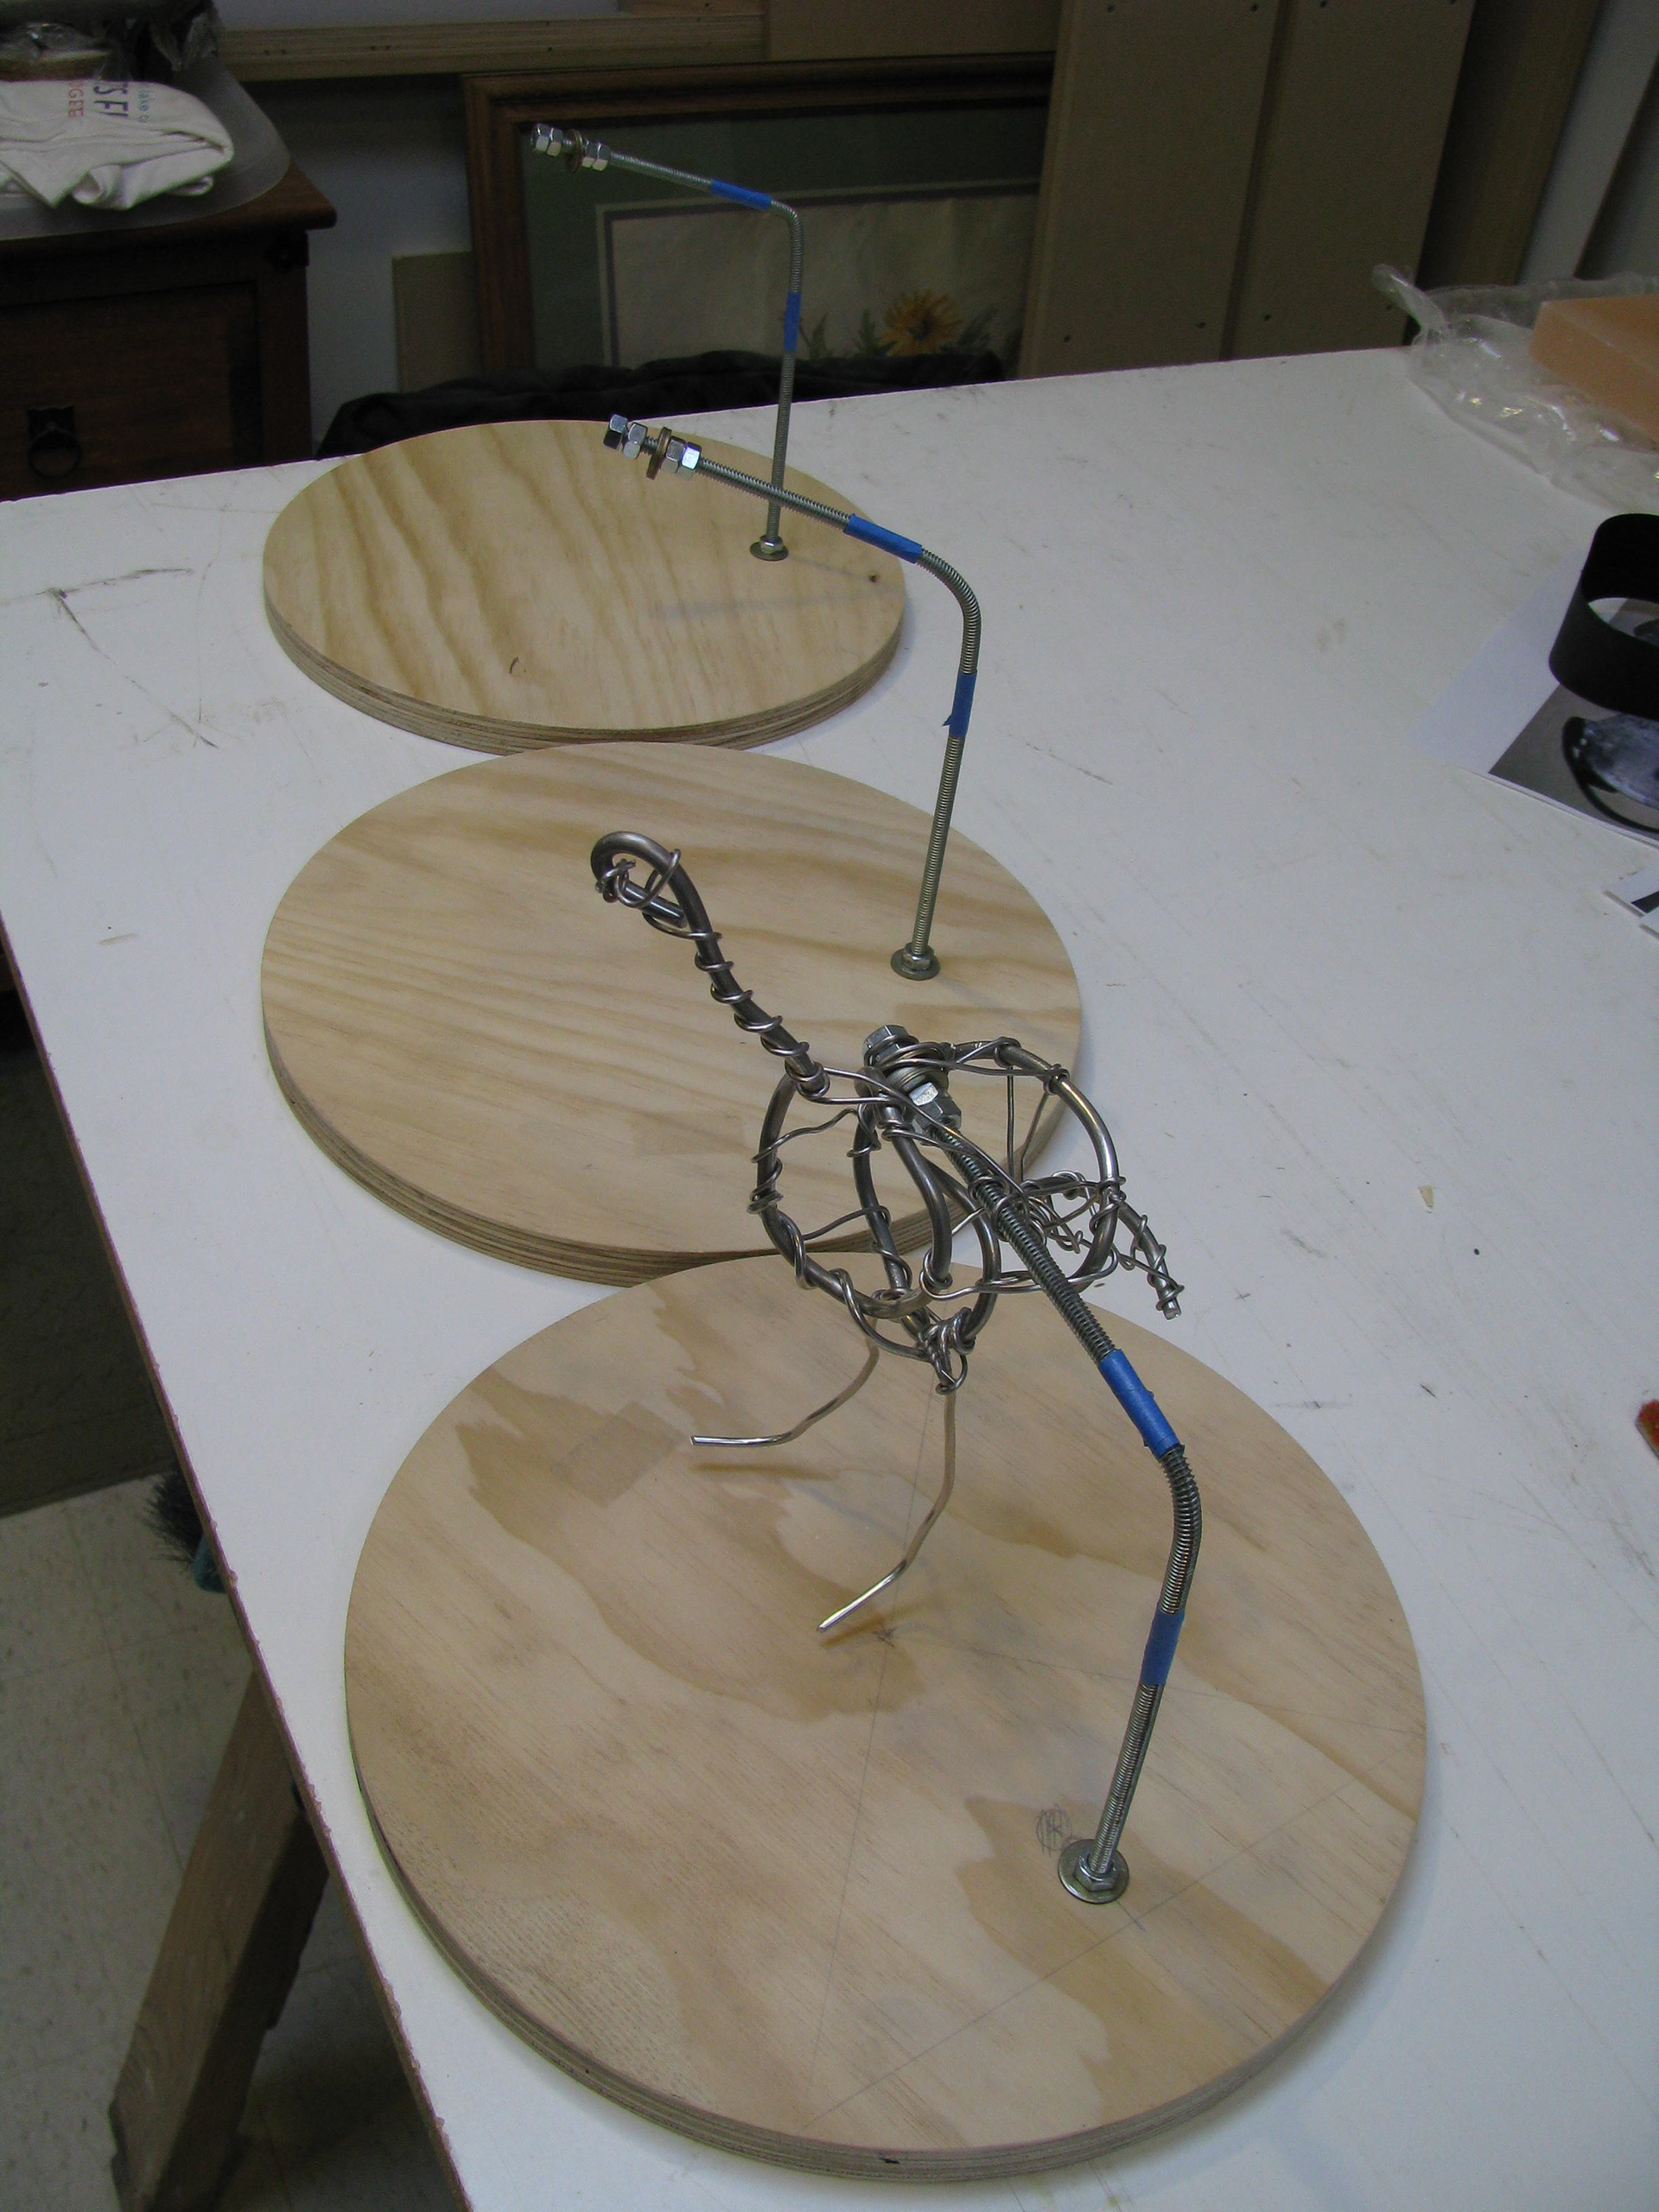
Flying Chick in early yikes!
Flying Chick near completion.
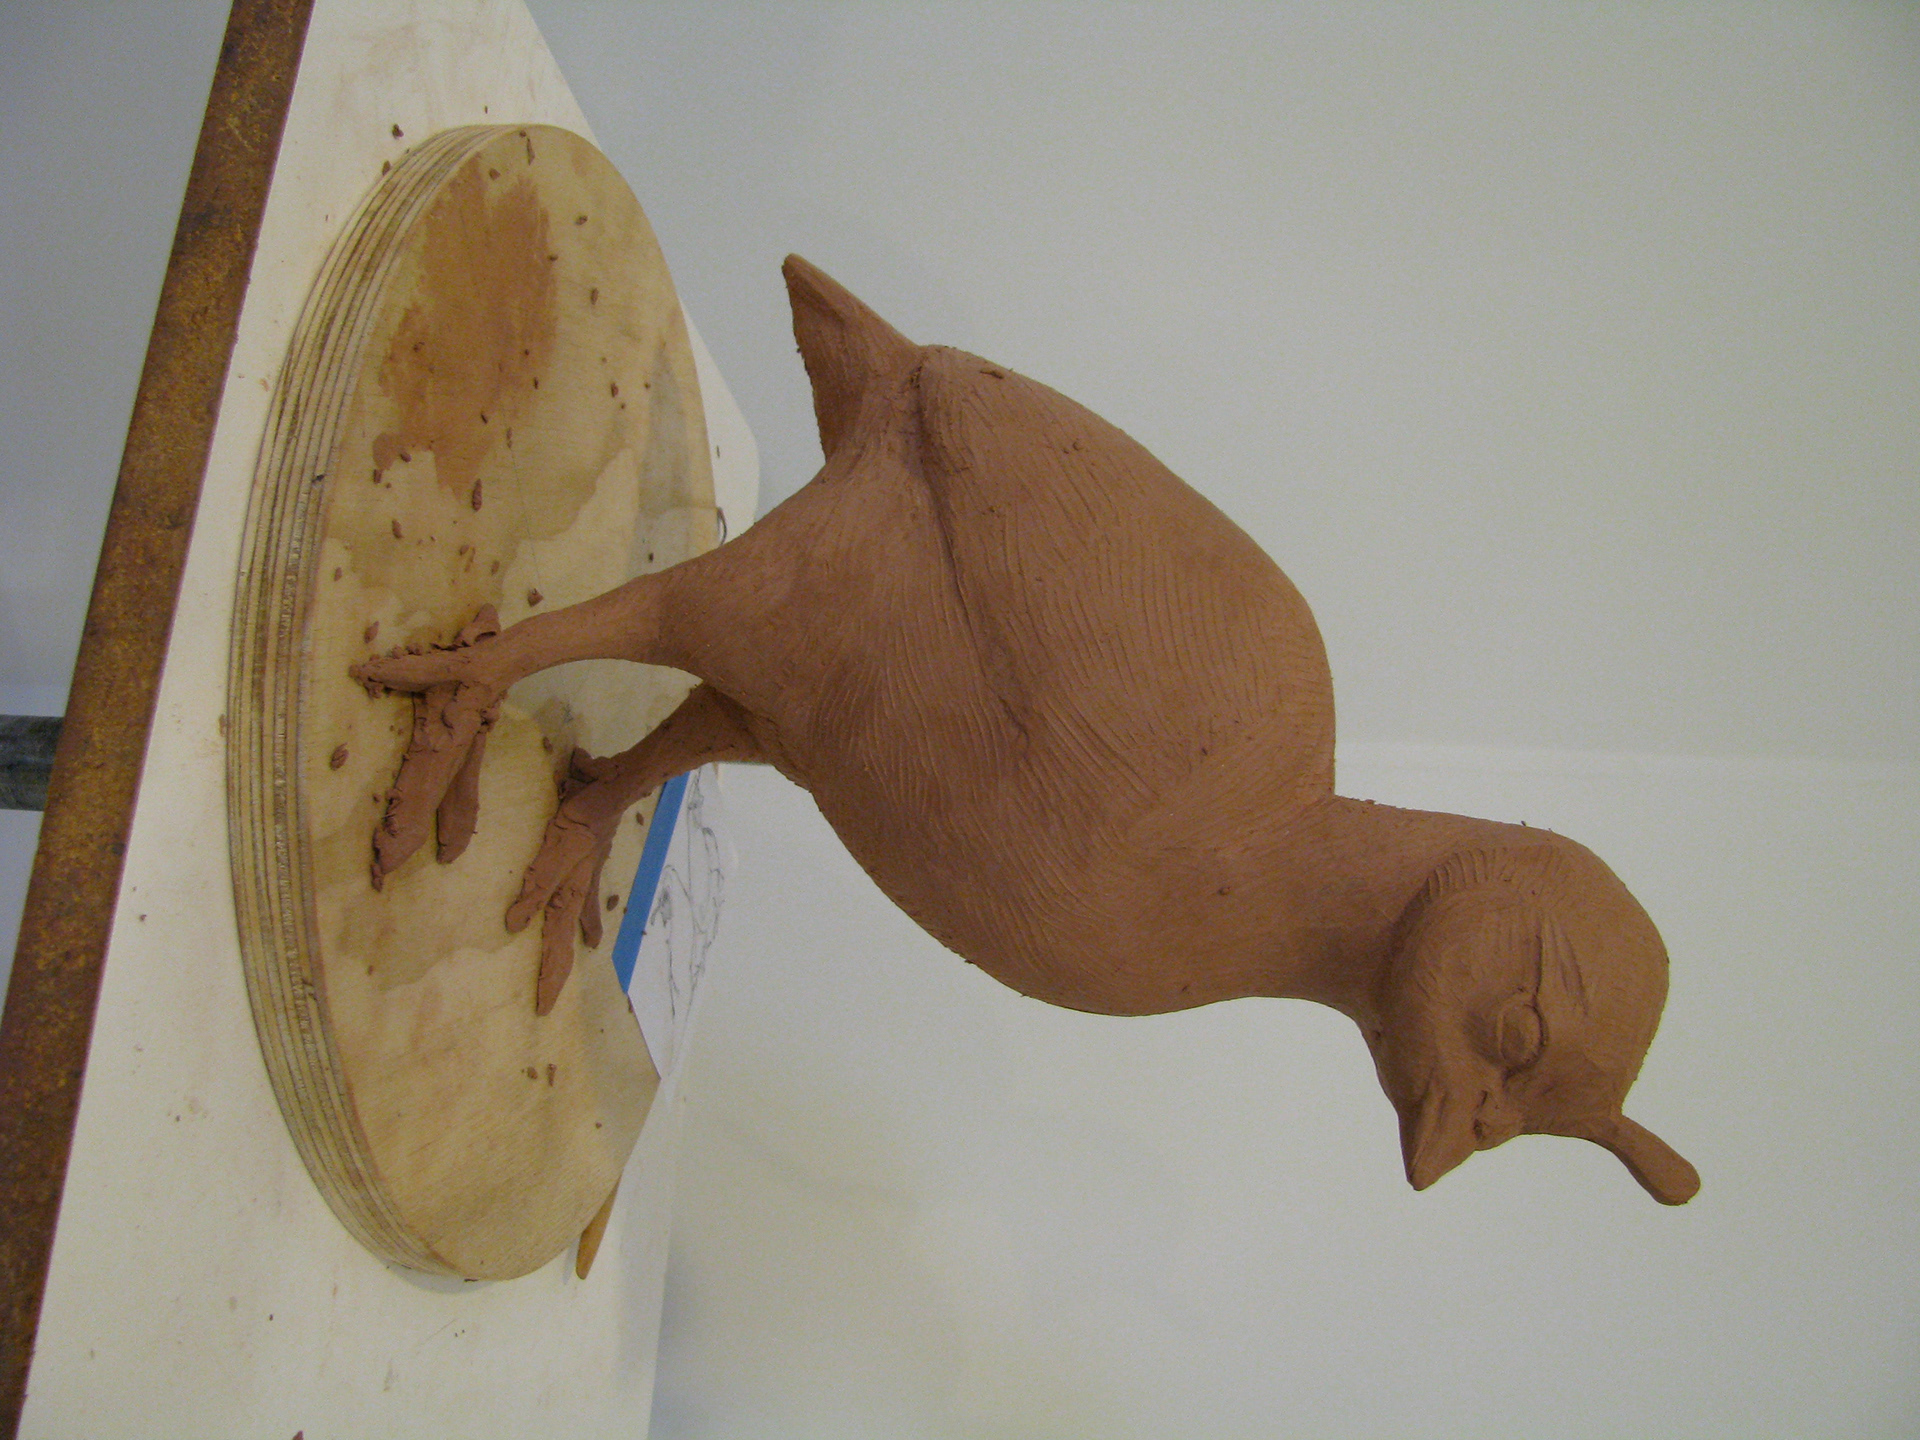
Reeling Chick in penguin phase.
Reeling Chick near completion.
I am pressed for time between the two big commissions, and have the foundry pull the molds of the little birds. They pull the wax forms as well and I pick them up and chase the wax back together, so that they can cut it apart again for bronze pour.
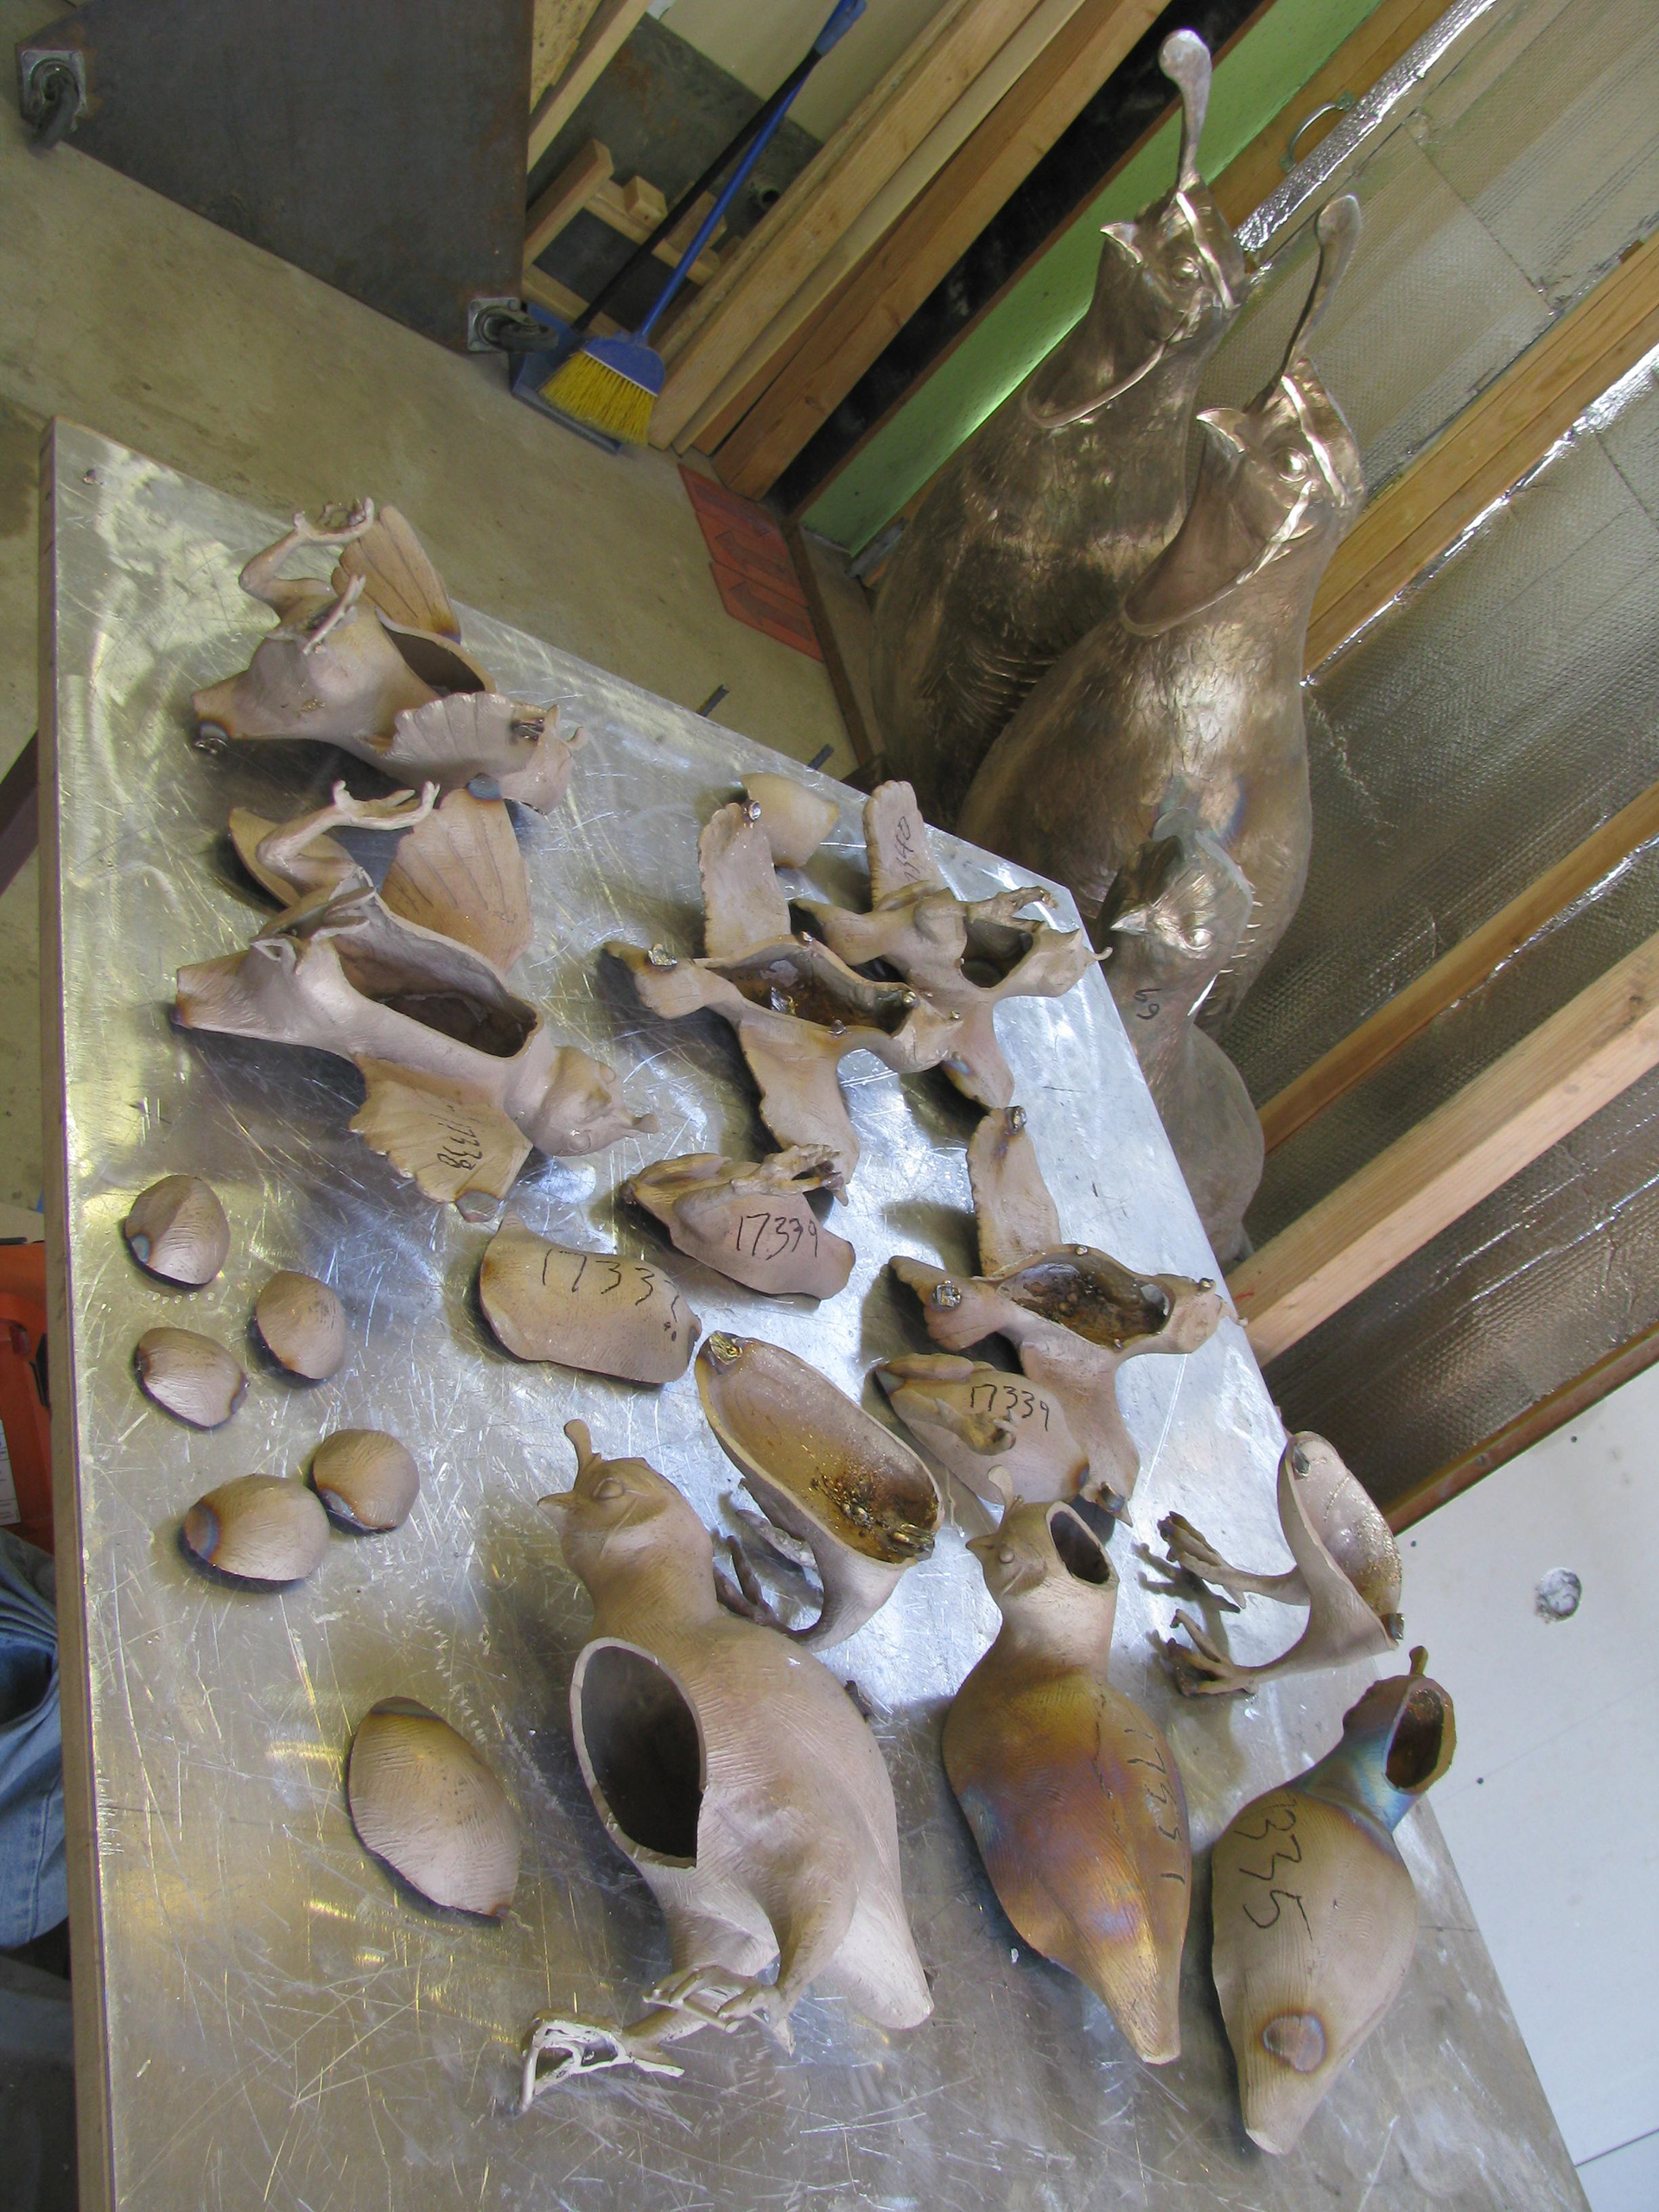
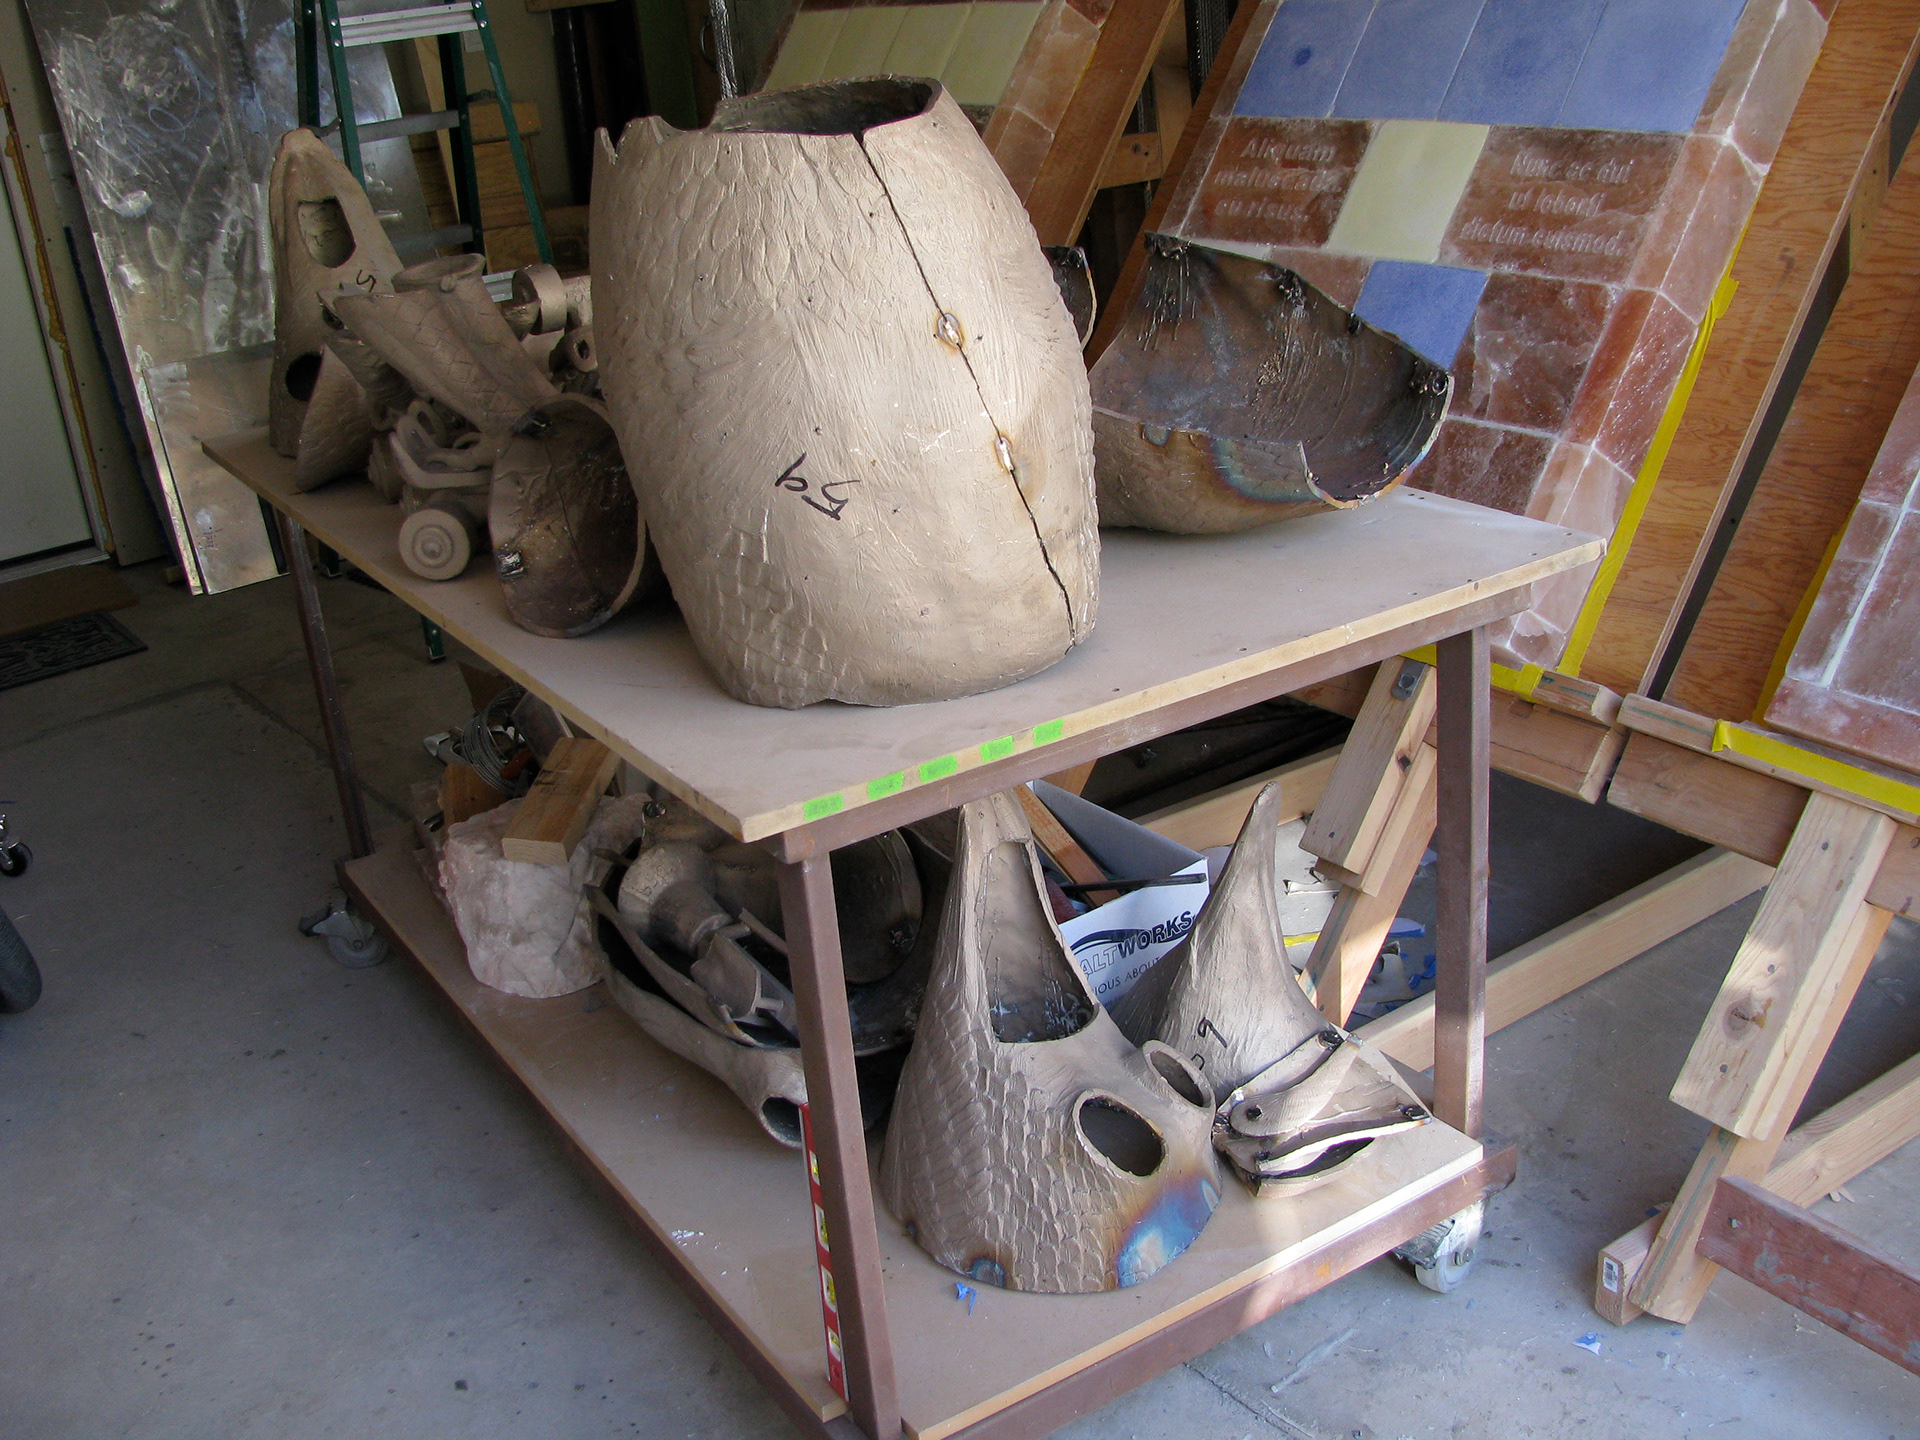
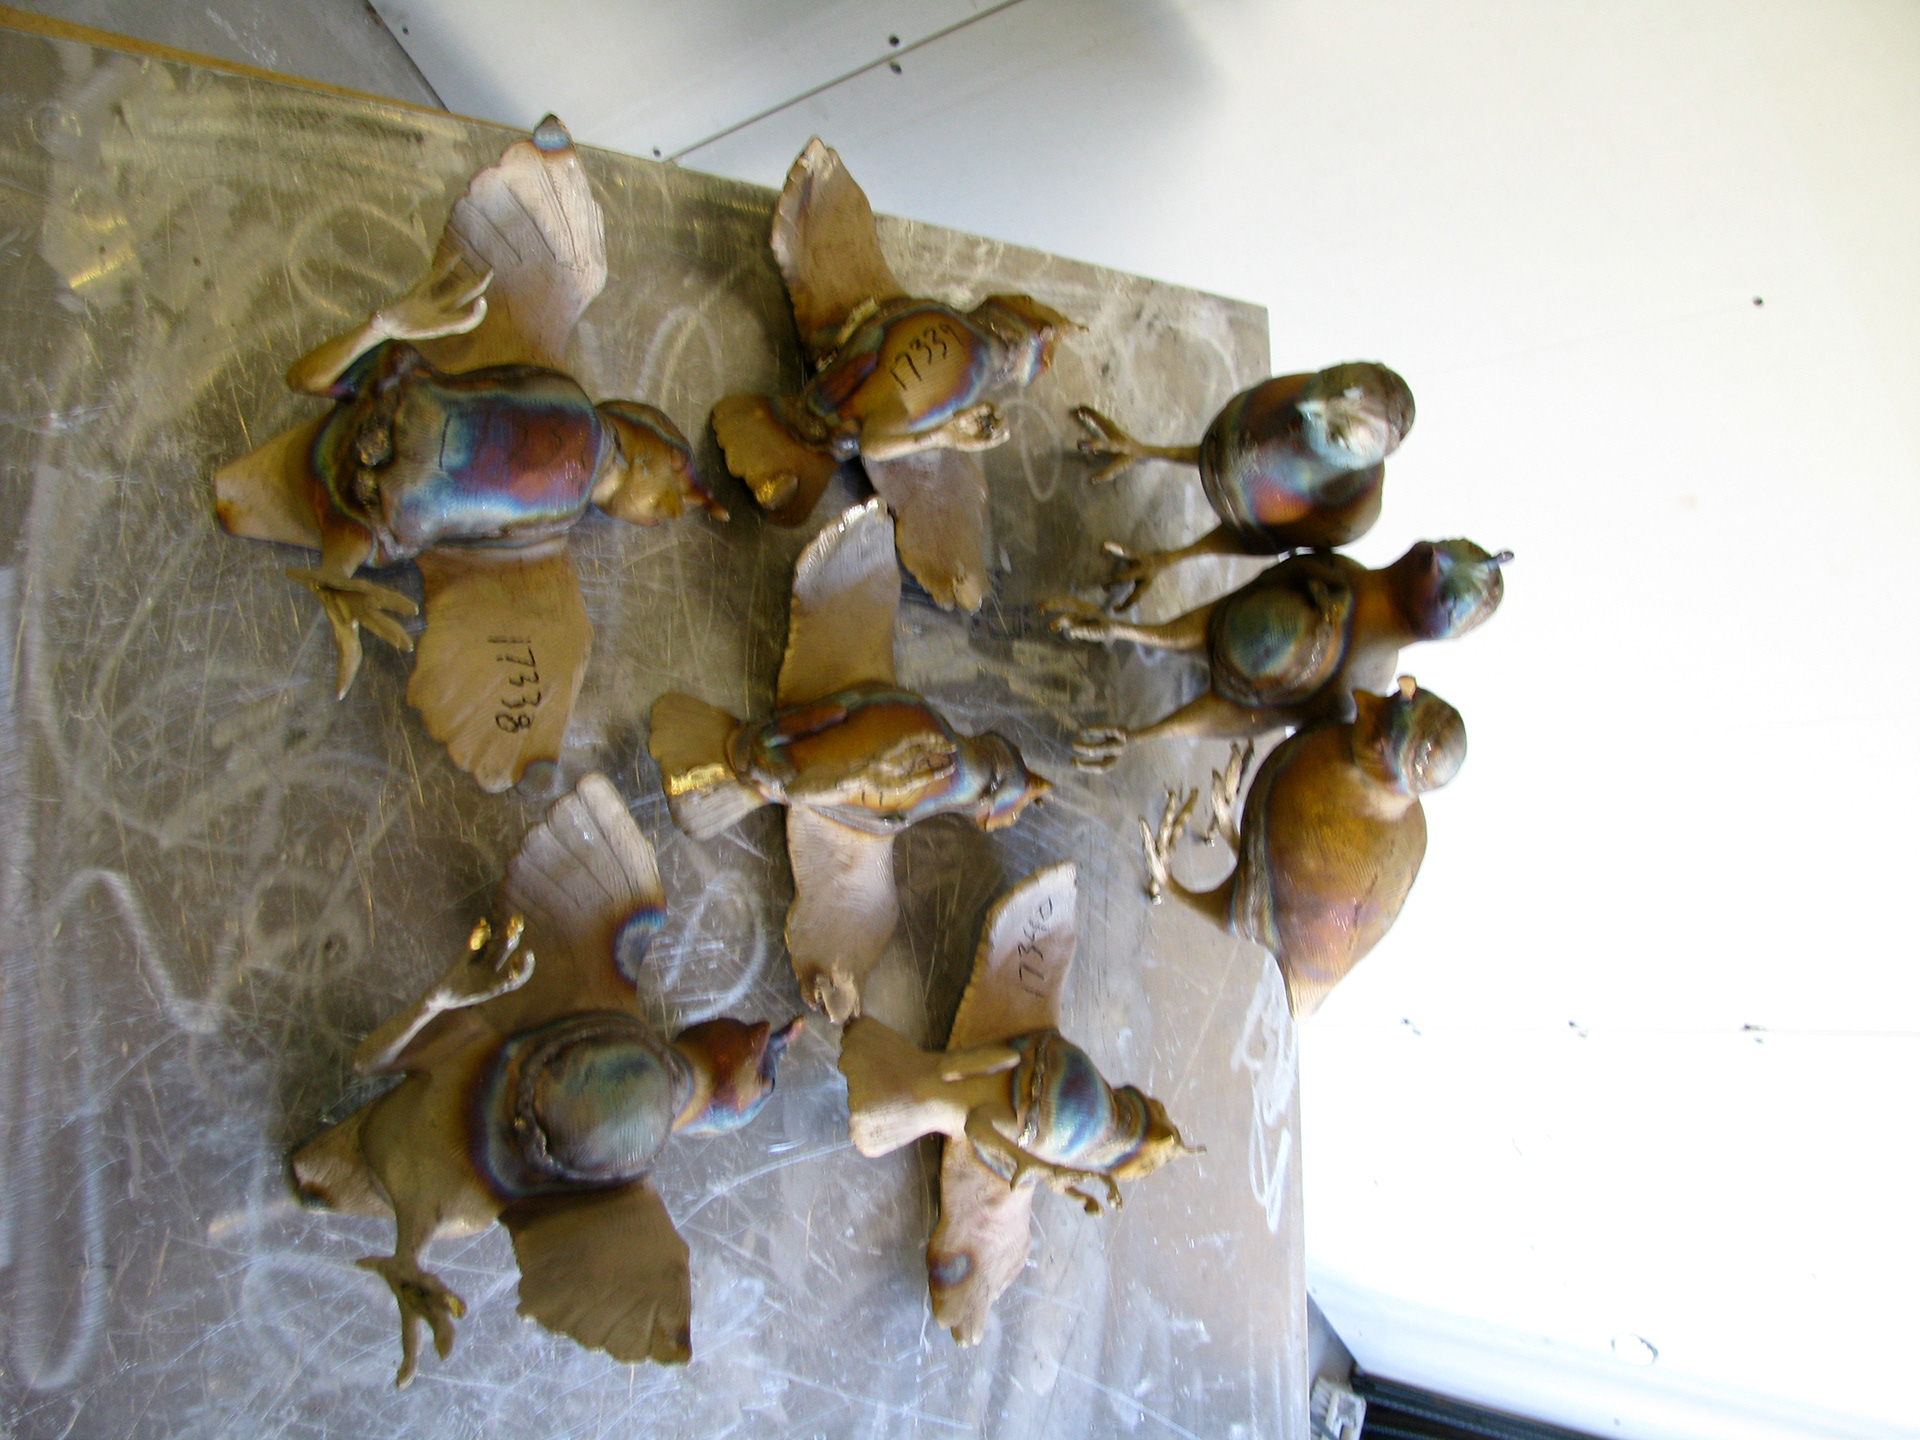
Rough-cast chicks return from foundry.
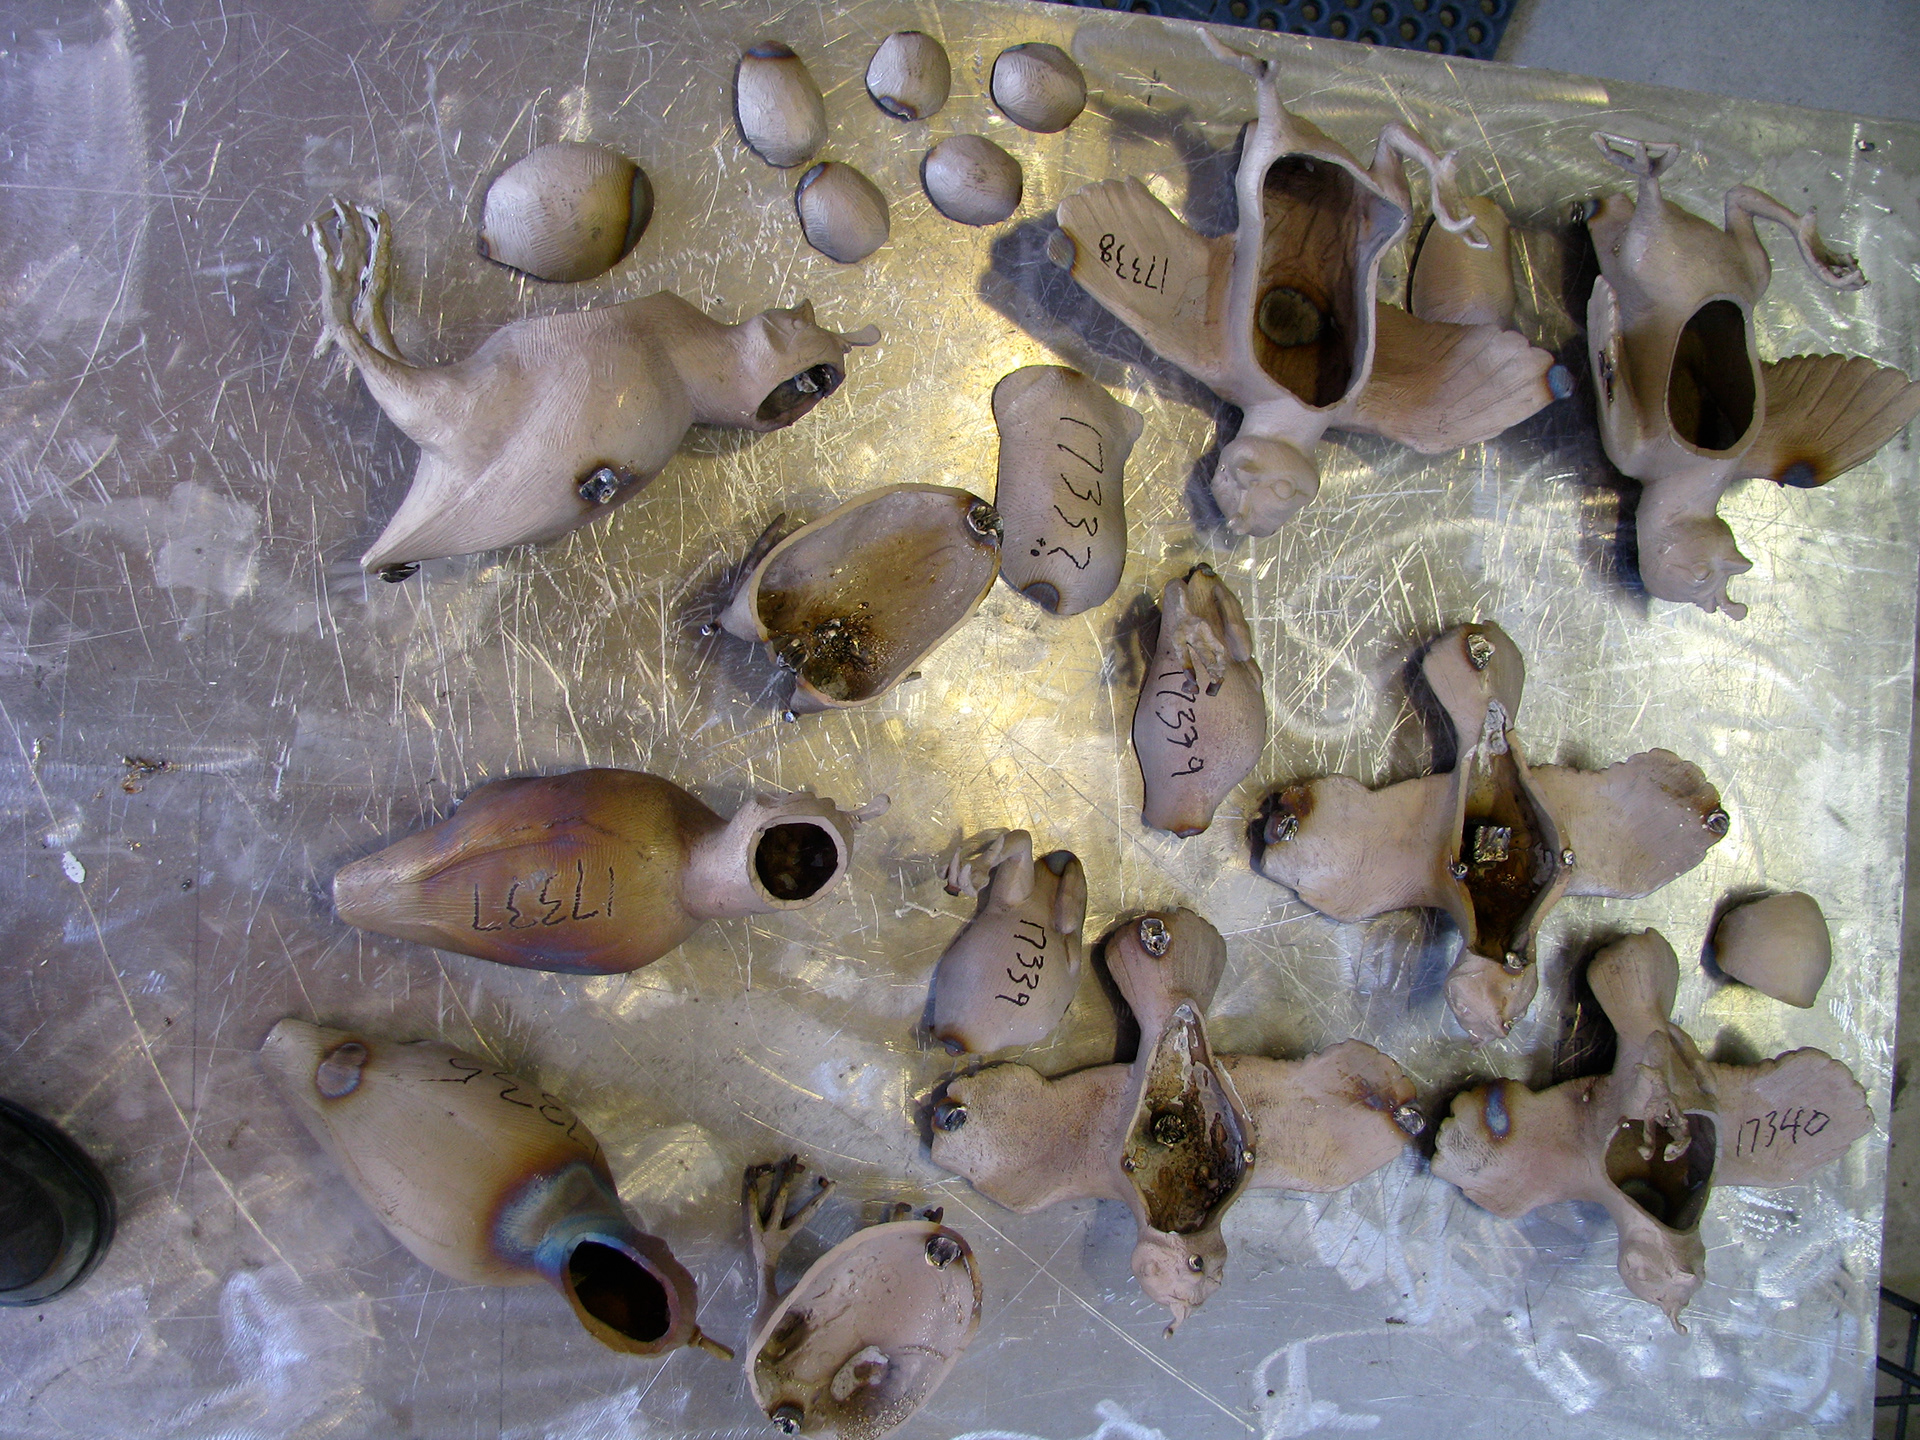
First step is chasing out all the melt marks where the casting sprews were melted off, then fit all the parts.
A low and clean weld makes for a quick chasing job.
All welded out and ready for chasing.
The scorch mark acne on the quail head are where steel pins were pushed through the wax layer to stabilize the ceramic form once the wax is melted away. The bronze traps the pins and they must be knocked out and their holes filled with weld.
All the windows are welded back in place and chased out.
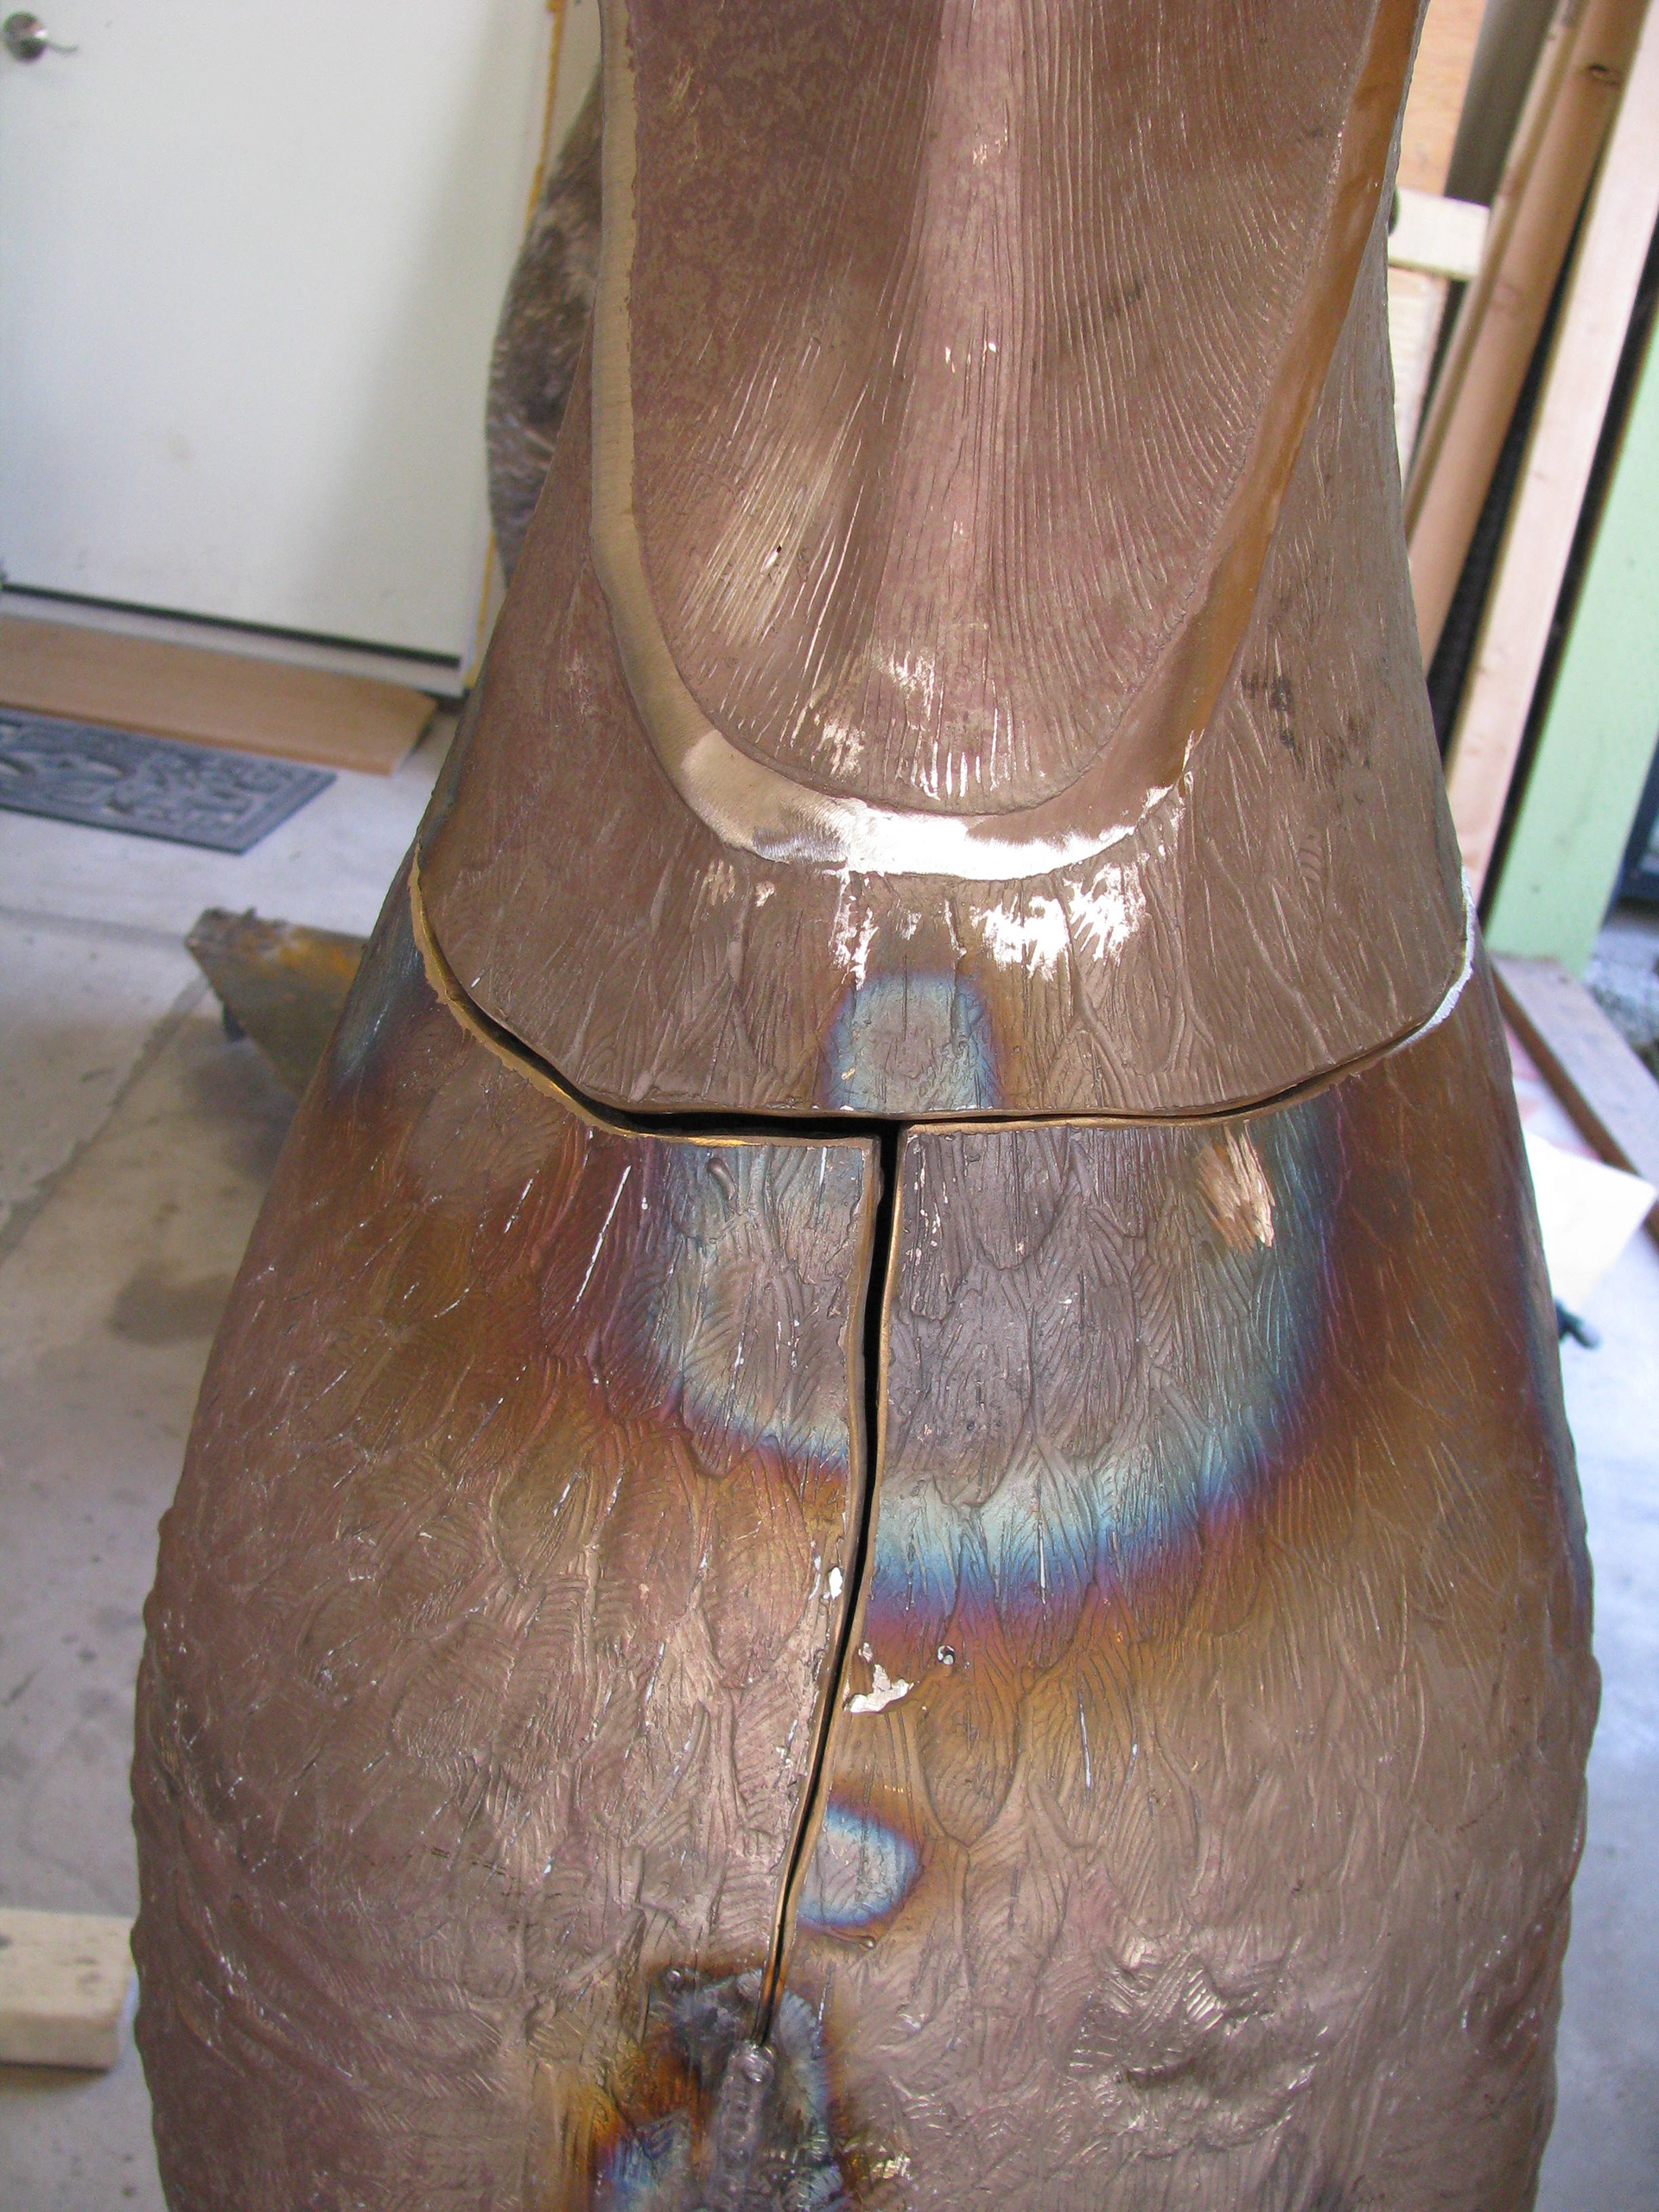
The major halves of the body are tacked together, then the tail is welded on.
Once tacked into place the welding process can still move/torque the form, so I work around a bit and leave the central body panels a bit open til the head is fit into place.
A few good hammer blows from the inside, pounding around the back and moving to the front seam will re-stretch the metal from where it shrank and flexed in wax and / or metal pour.
The seams are all aligned and ready for strong tack welds, followed by adding in short seam welds that start and stop on opposite sides to keep everything in place. Then I lay in long continuous welds and endeavor to keep them low and follow any surface contours as closely as possible.

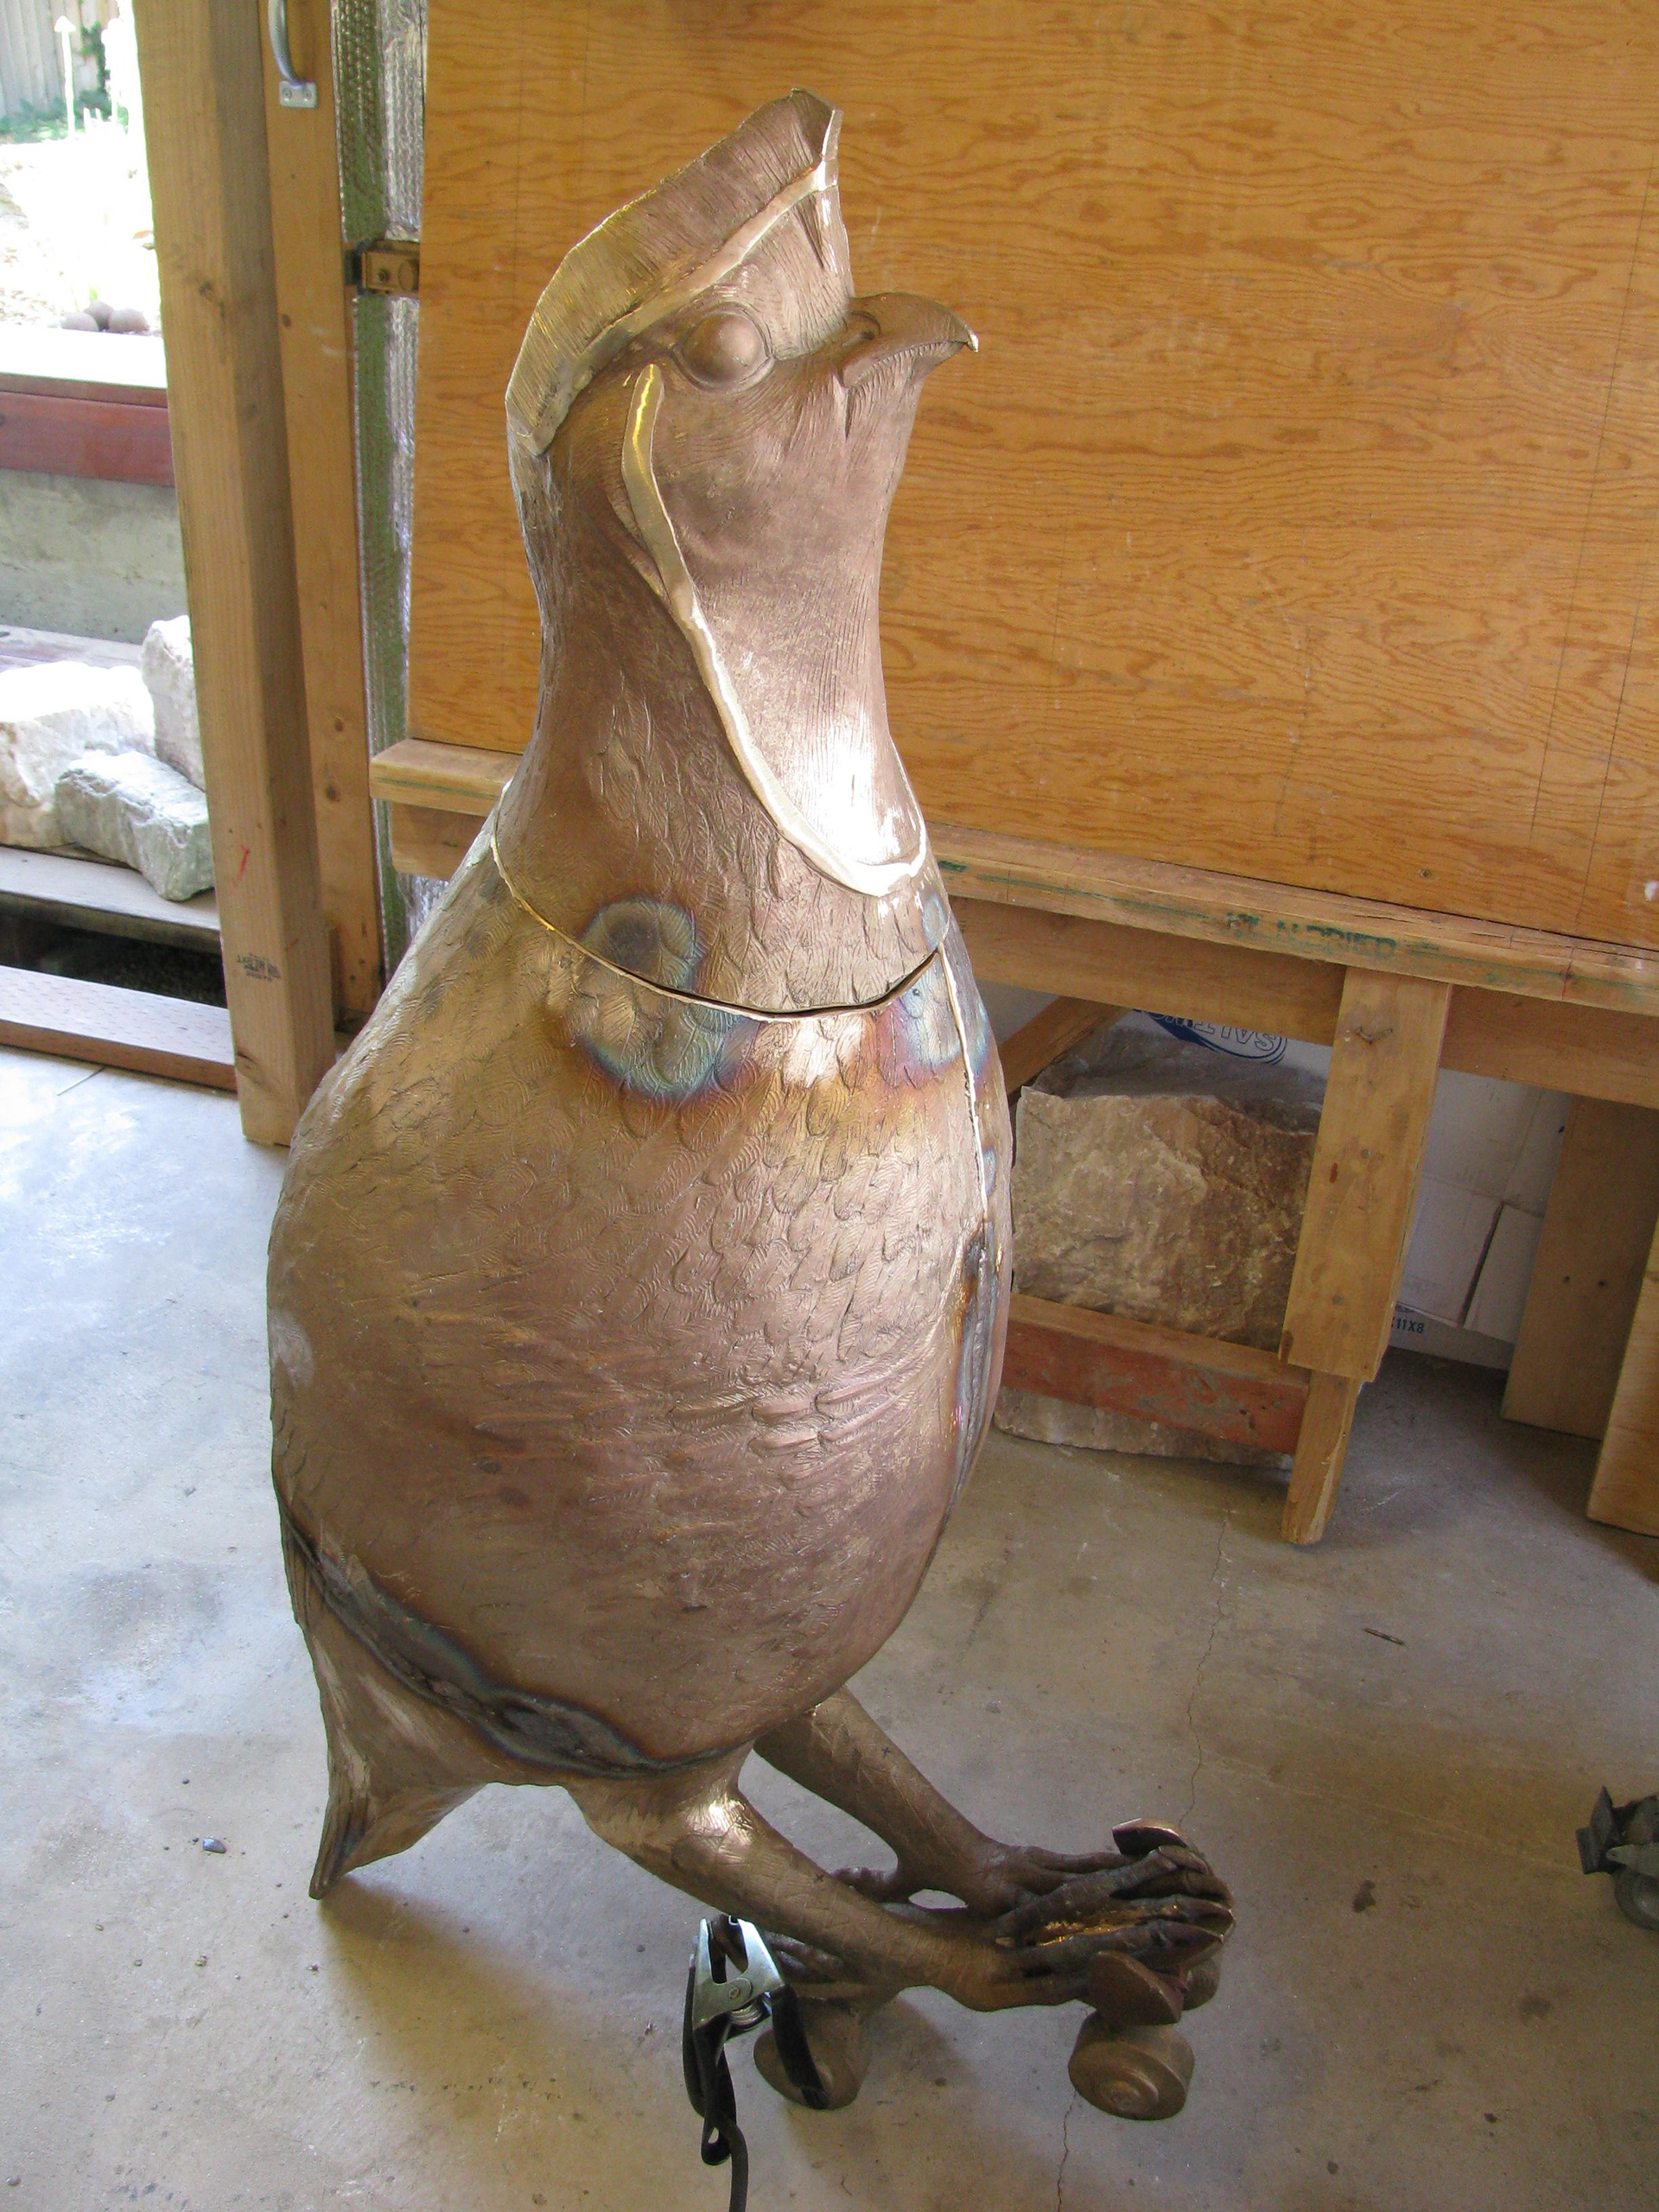
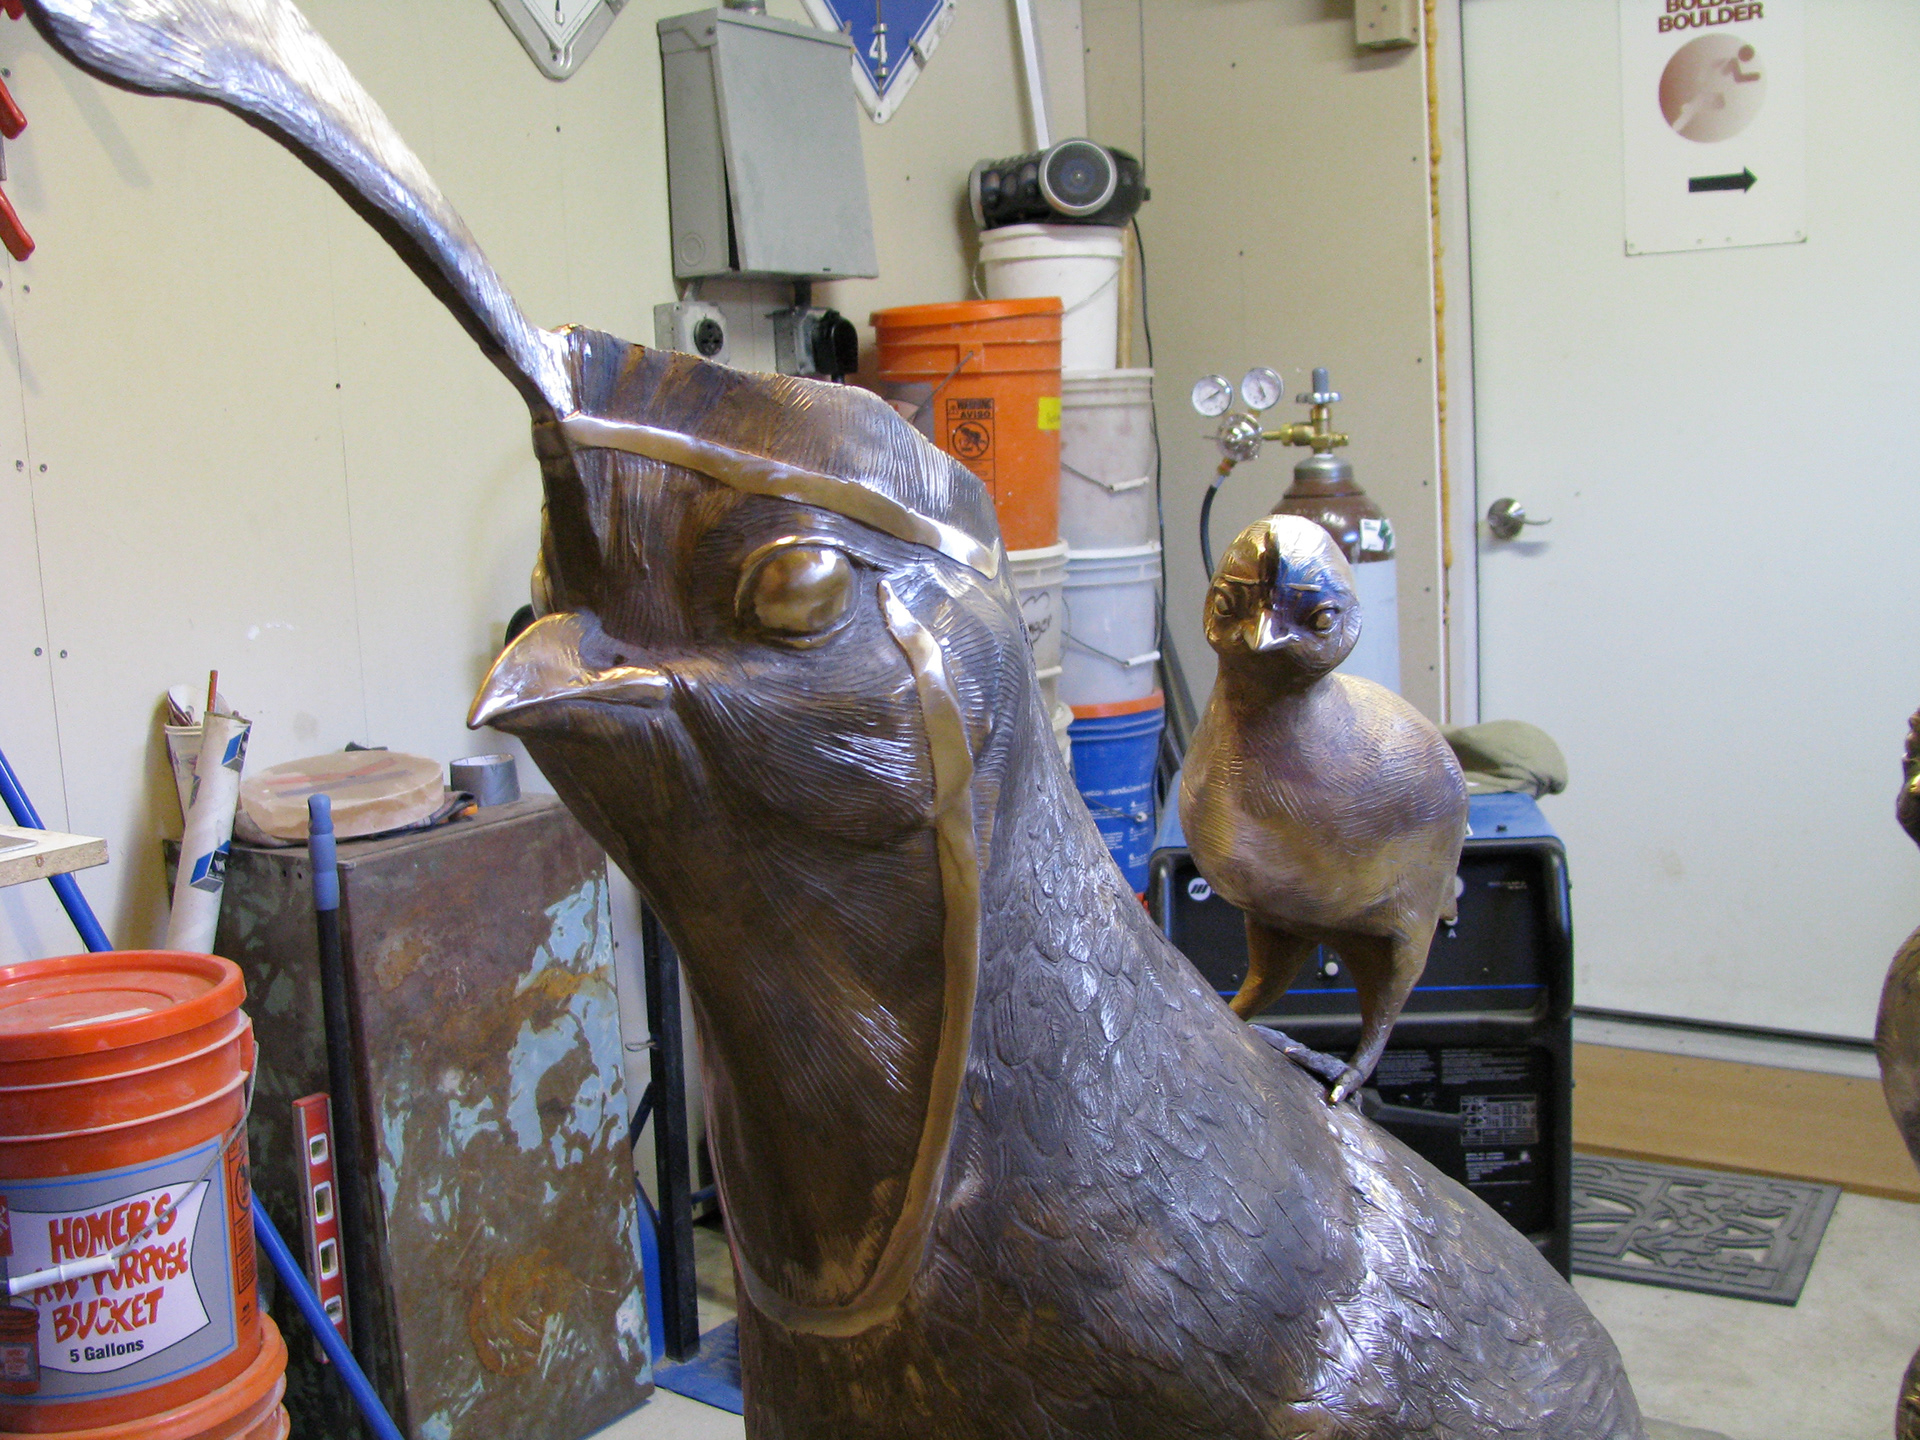
All the big welds have come together. Now just the topknot!
Topknot is in place and he is chased out and flying over to roost with the Hen while I prep the second Buck- the next one is the Frankenquail. I will hammer his insides til he is ringing like a giant bronze bell, and still he will fight me.

Here I have cinch straps and about 500lbs of pressure from the hoist to nudge the bad seams.
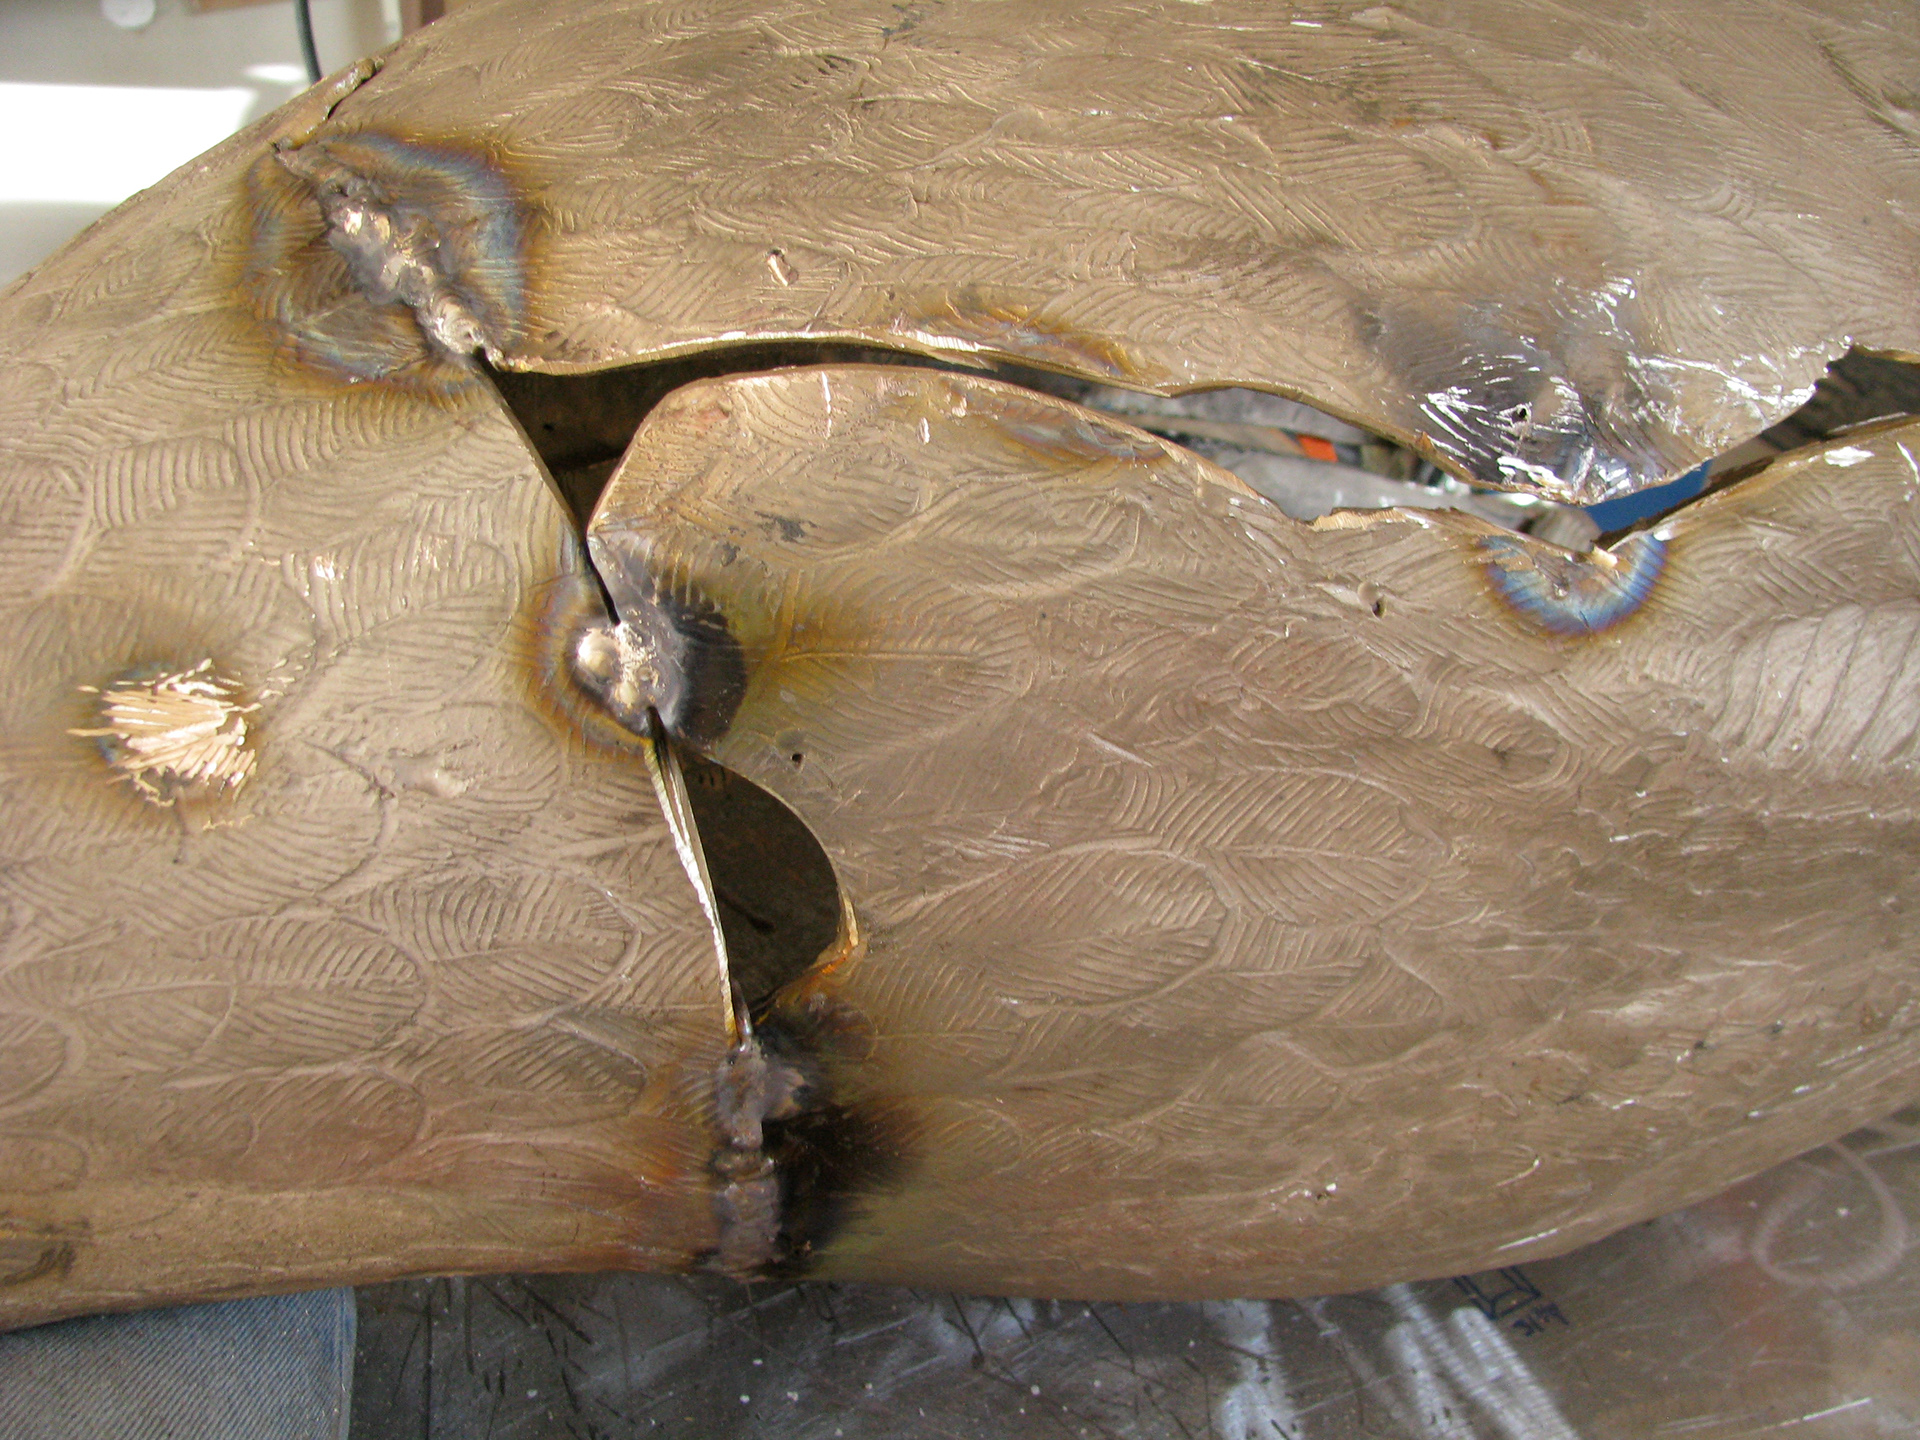
This is one of the worst casting fouls I've seen from the foundry. The head is entirely new as it was unusable and had to be recast. The rest is all workable- just some bad metal shrinkage that flexed the forms and caused losses at the edges, coupled with big jogs into the body that acted as keys on the lost head that now must be filled with weld and chased.
Where to start...
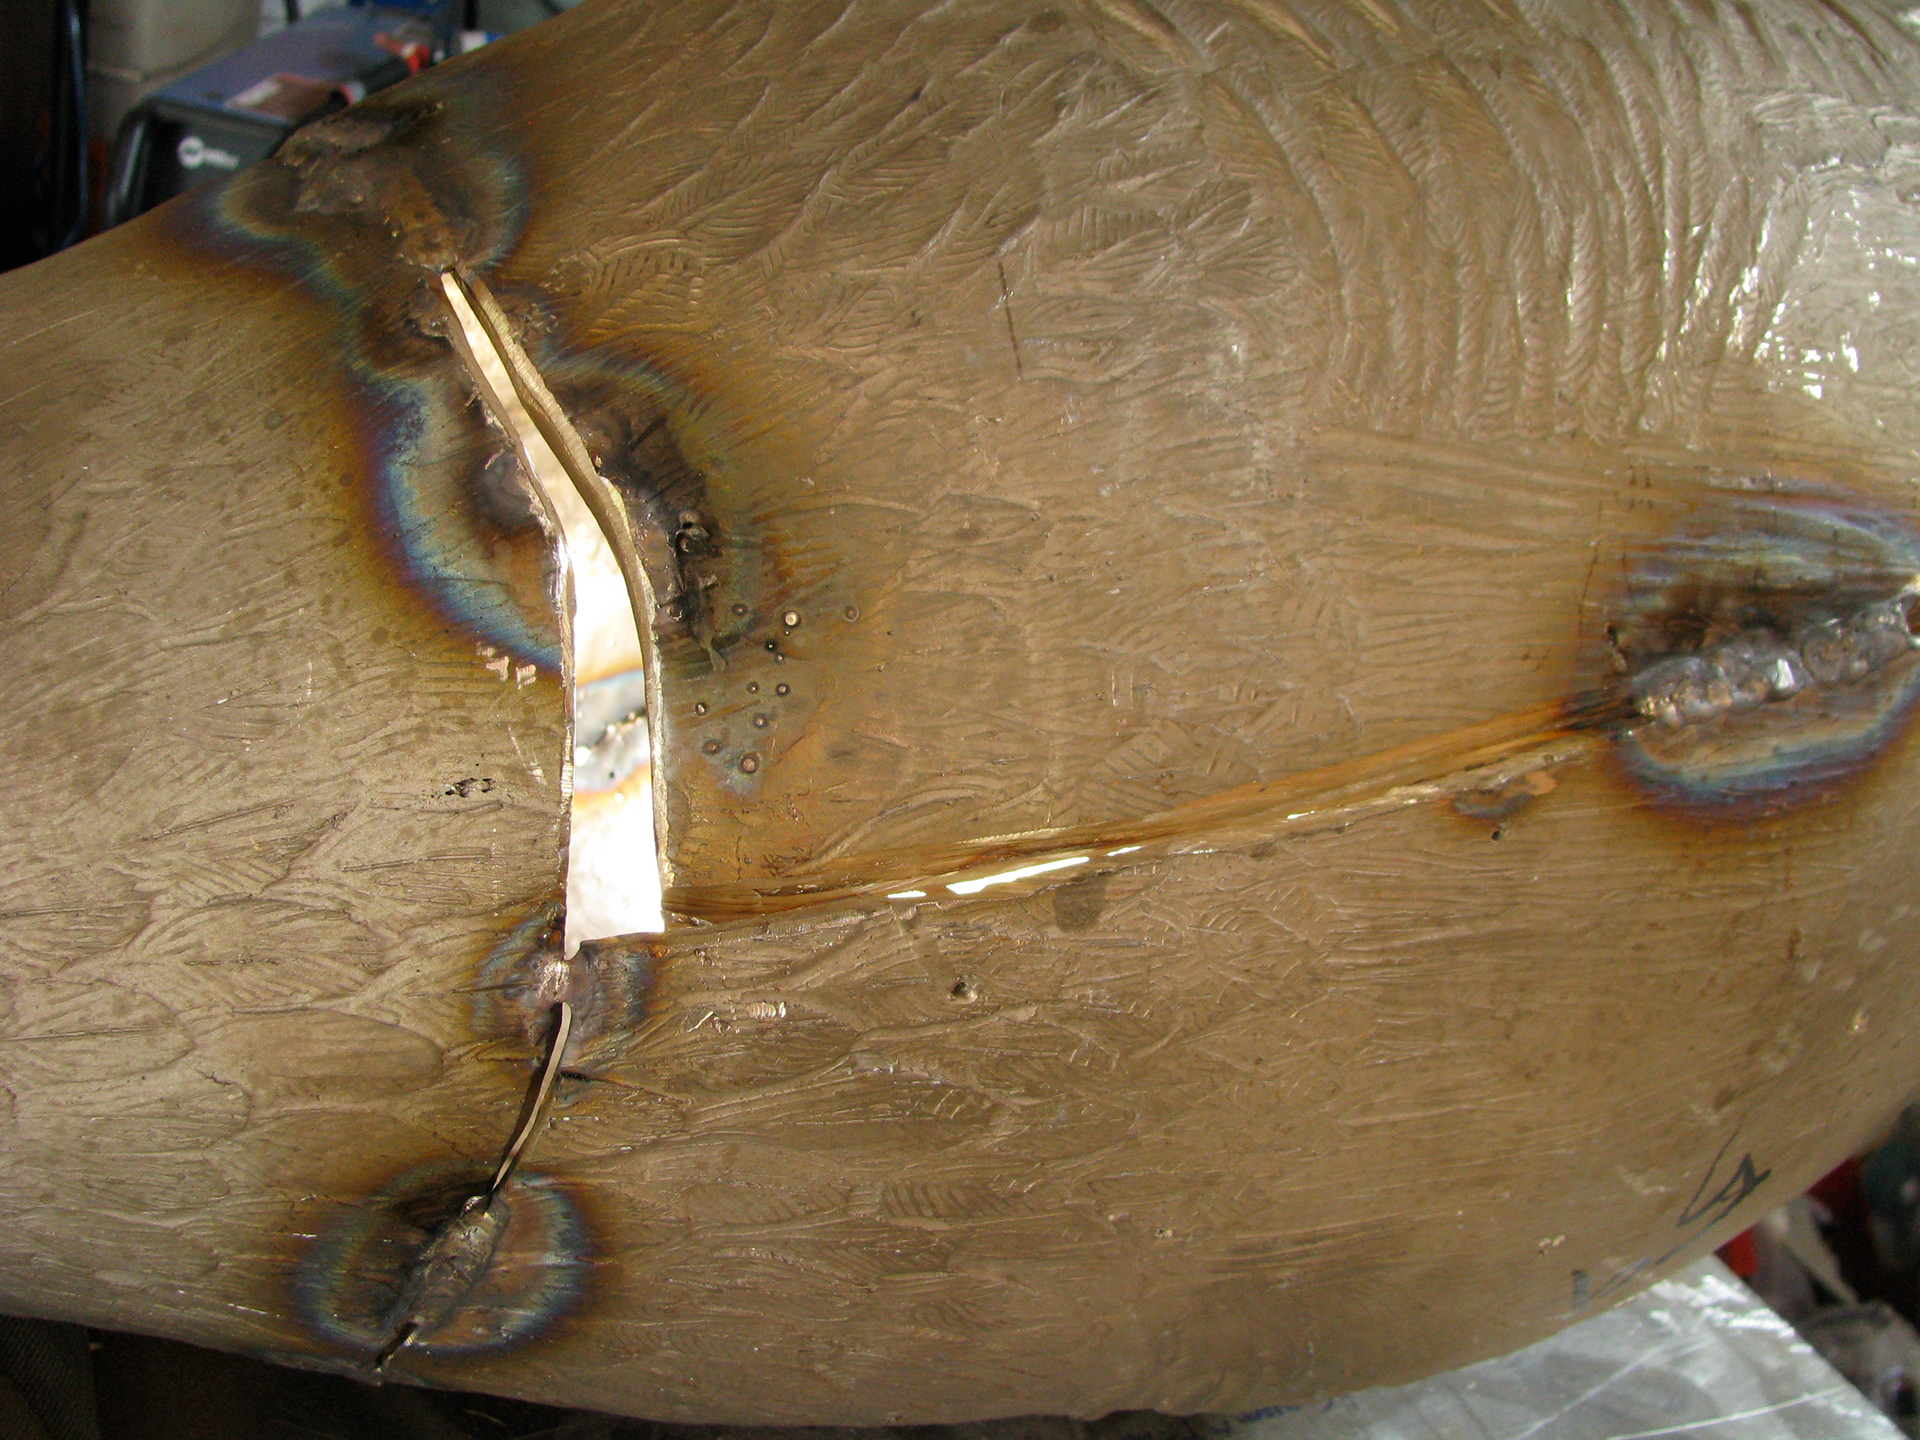
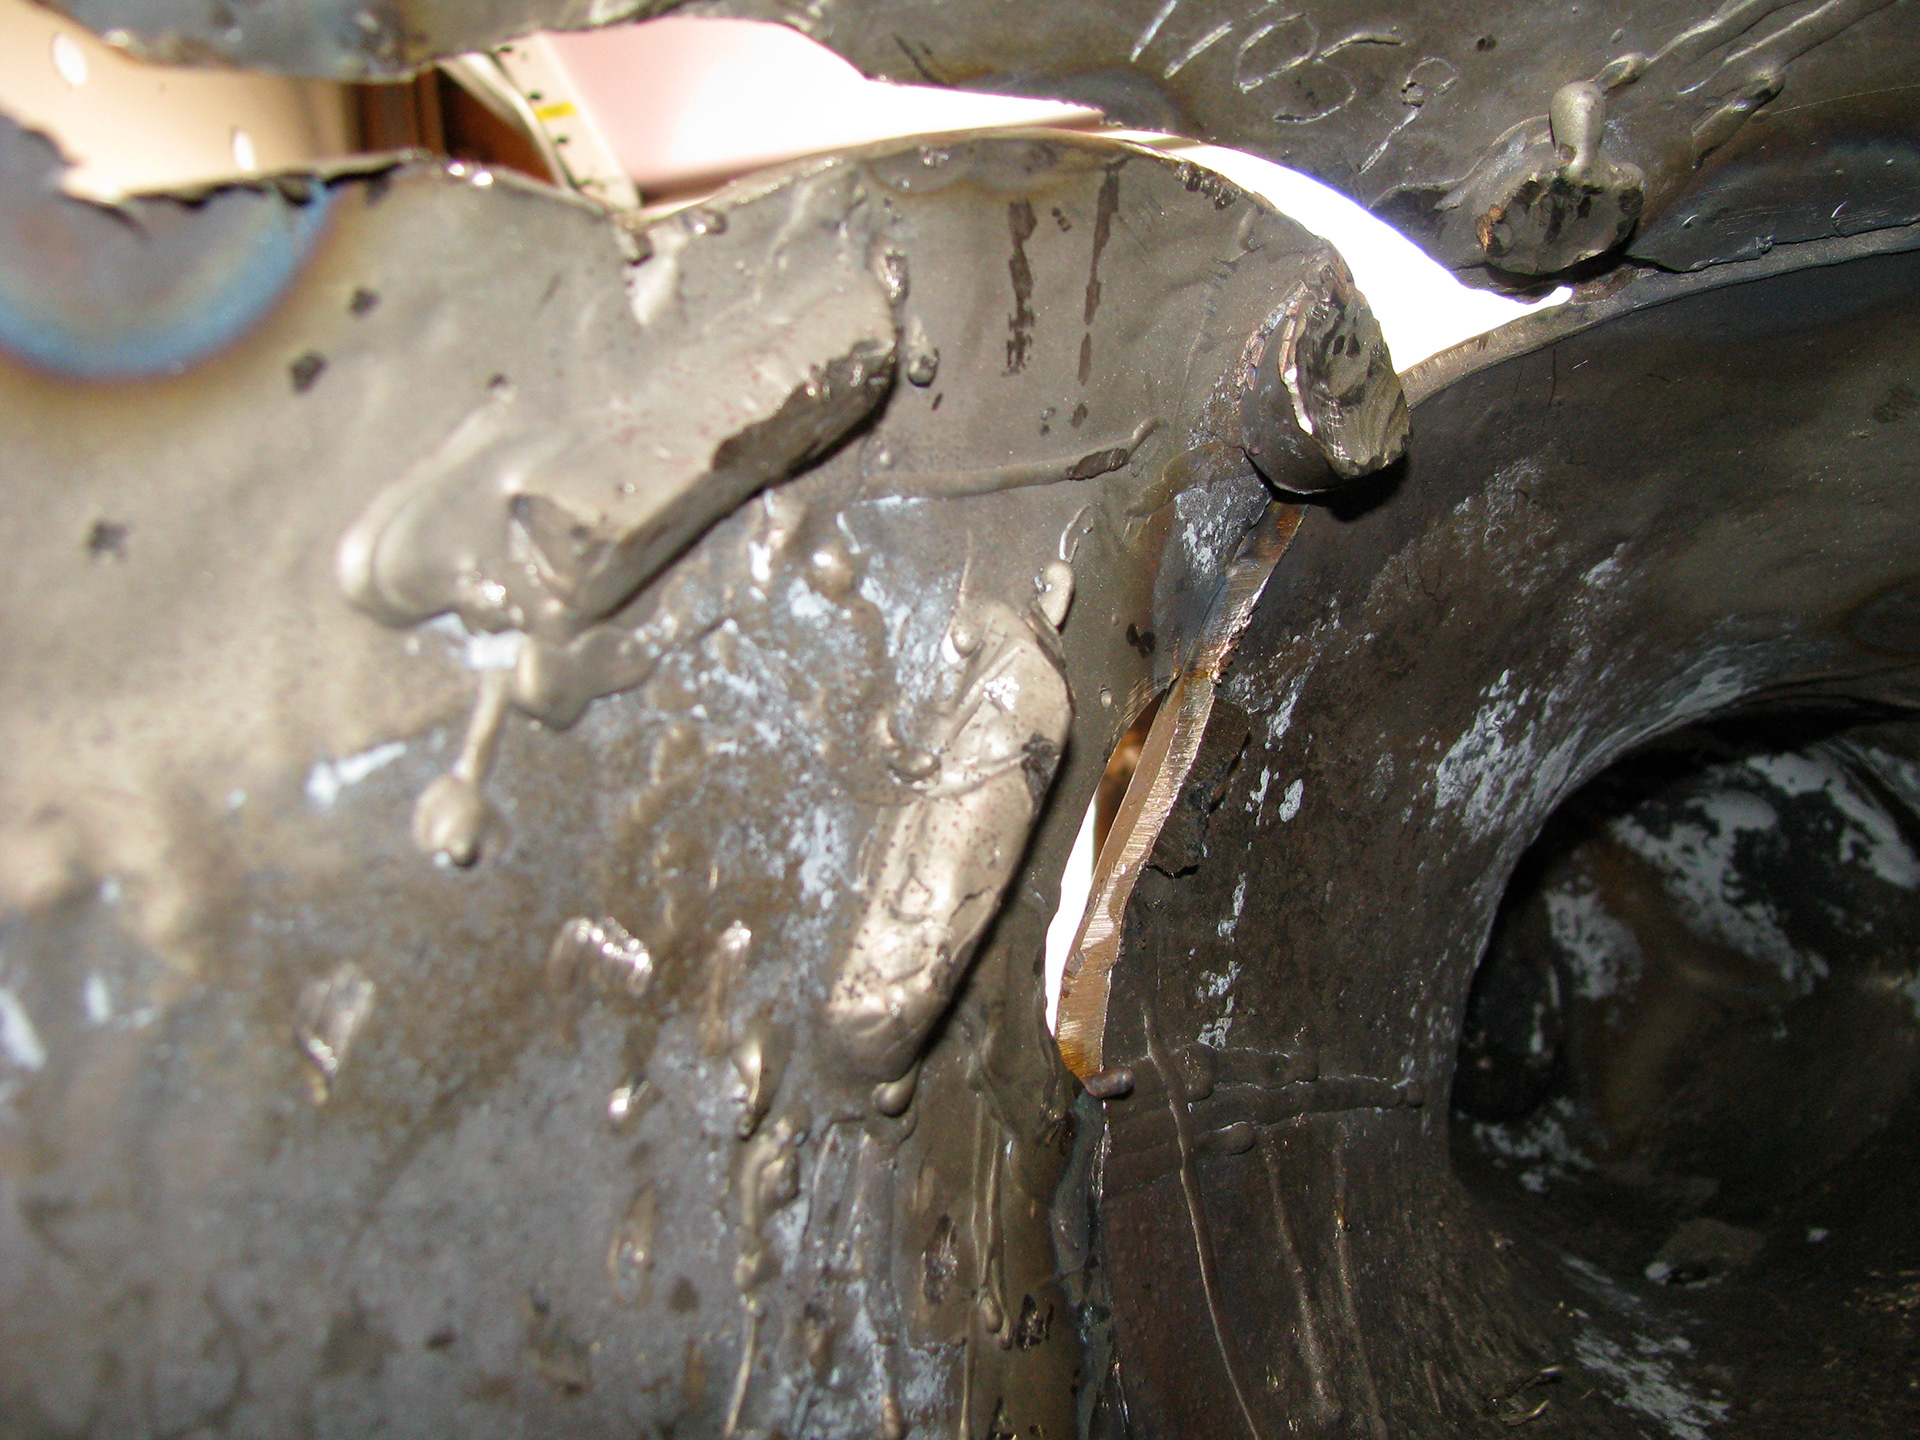
All those rough gaps eventually squeezed out with a compromise of this final sliver.
As the weld pulled together the body panel heated and torque throughout the form released and drew the panel inward. I had to back-fill a wide area to compensate.
Rough-chasing the welds.
Frankenquail was the first of the Bucks to come together, I showed him last so we could establish what welding is about, then scare ourselves with this. I determined that I would weld his skates tail on last and pair him with the Hen to give him further structural support- besides I don't think he could handle being a single father after all that hammering.
The first of the chicks are lined up and tacked into place.
Once all the chicks are in place I come back and lay down some fat welds, then chase it all.
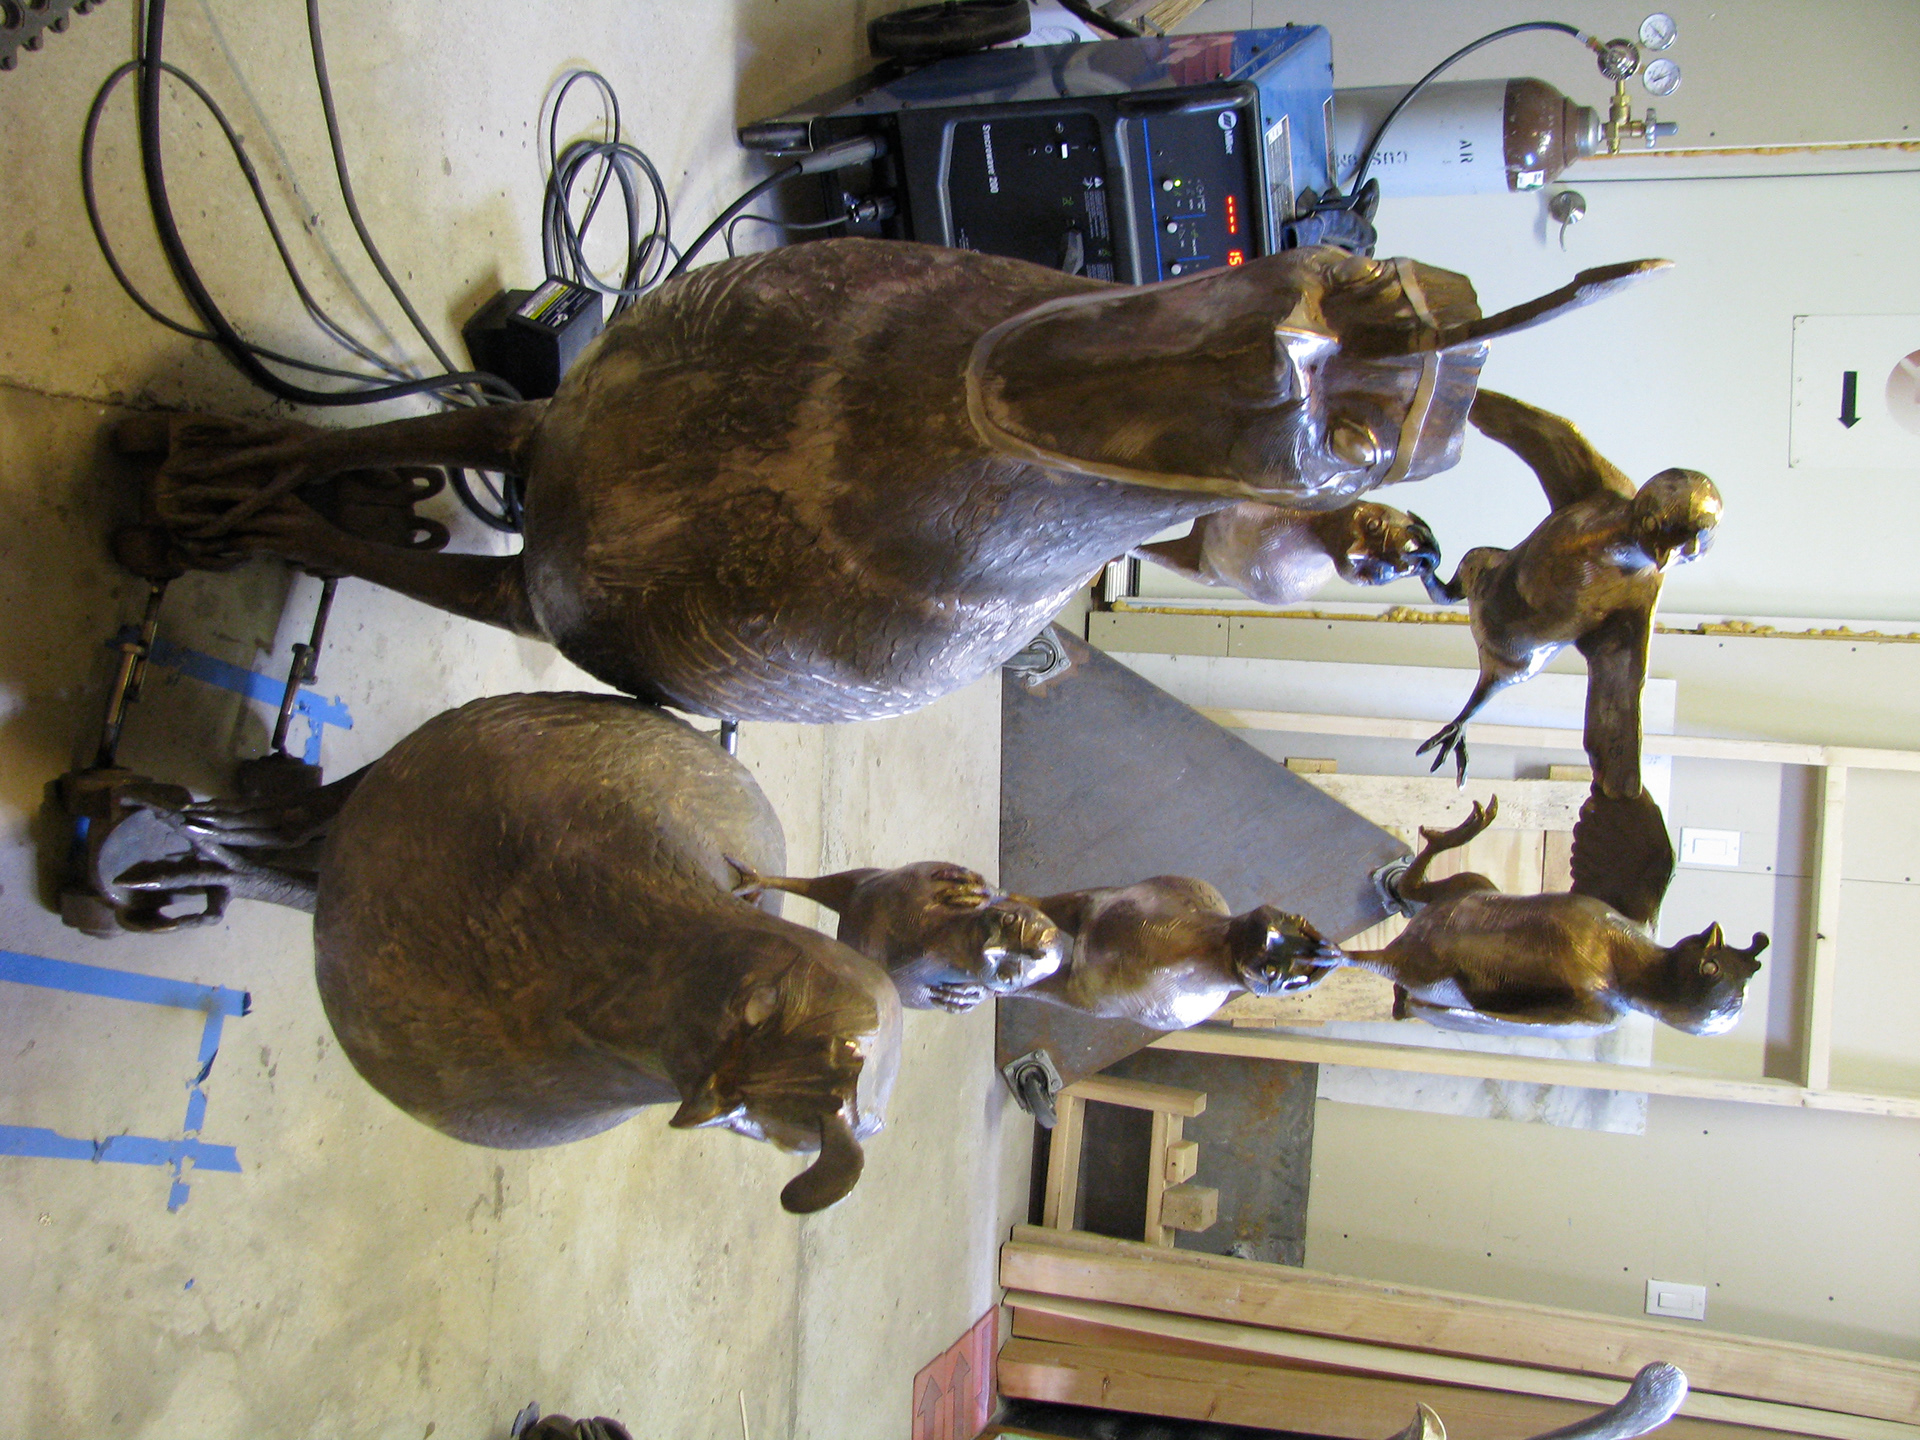
Next a chick alights on the Hen.
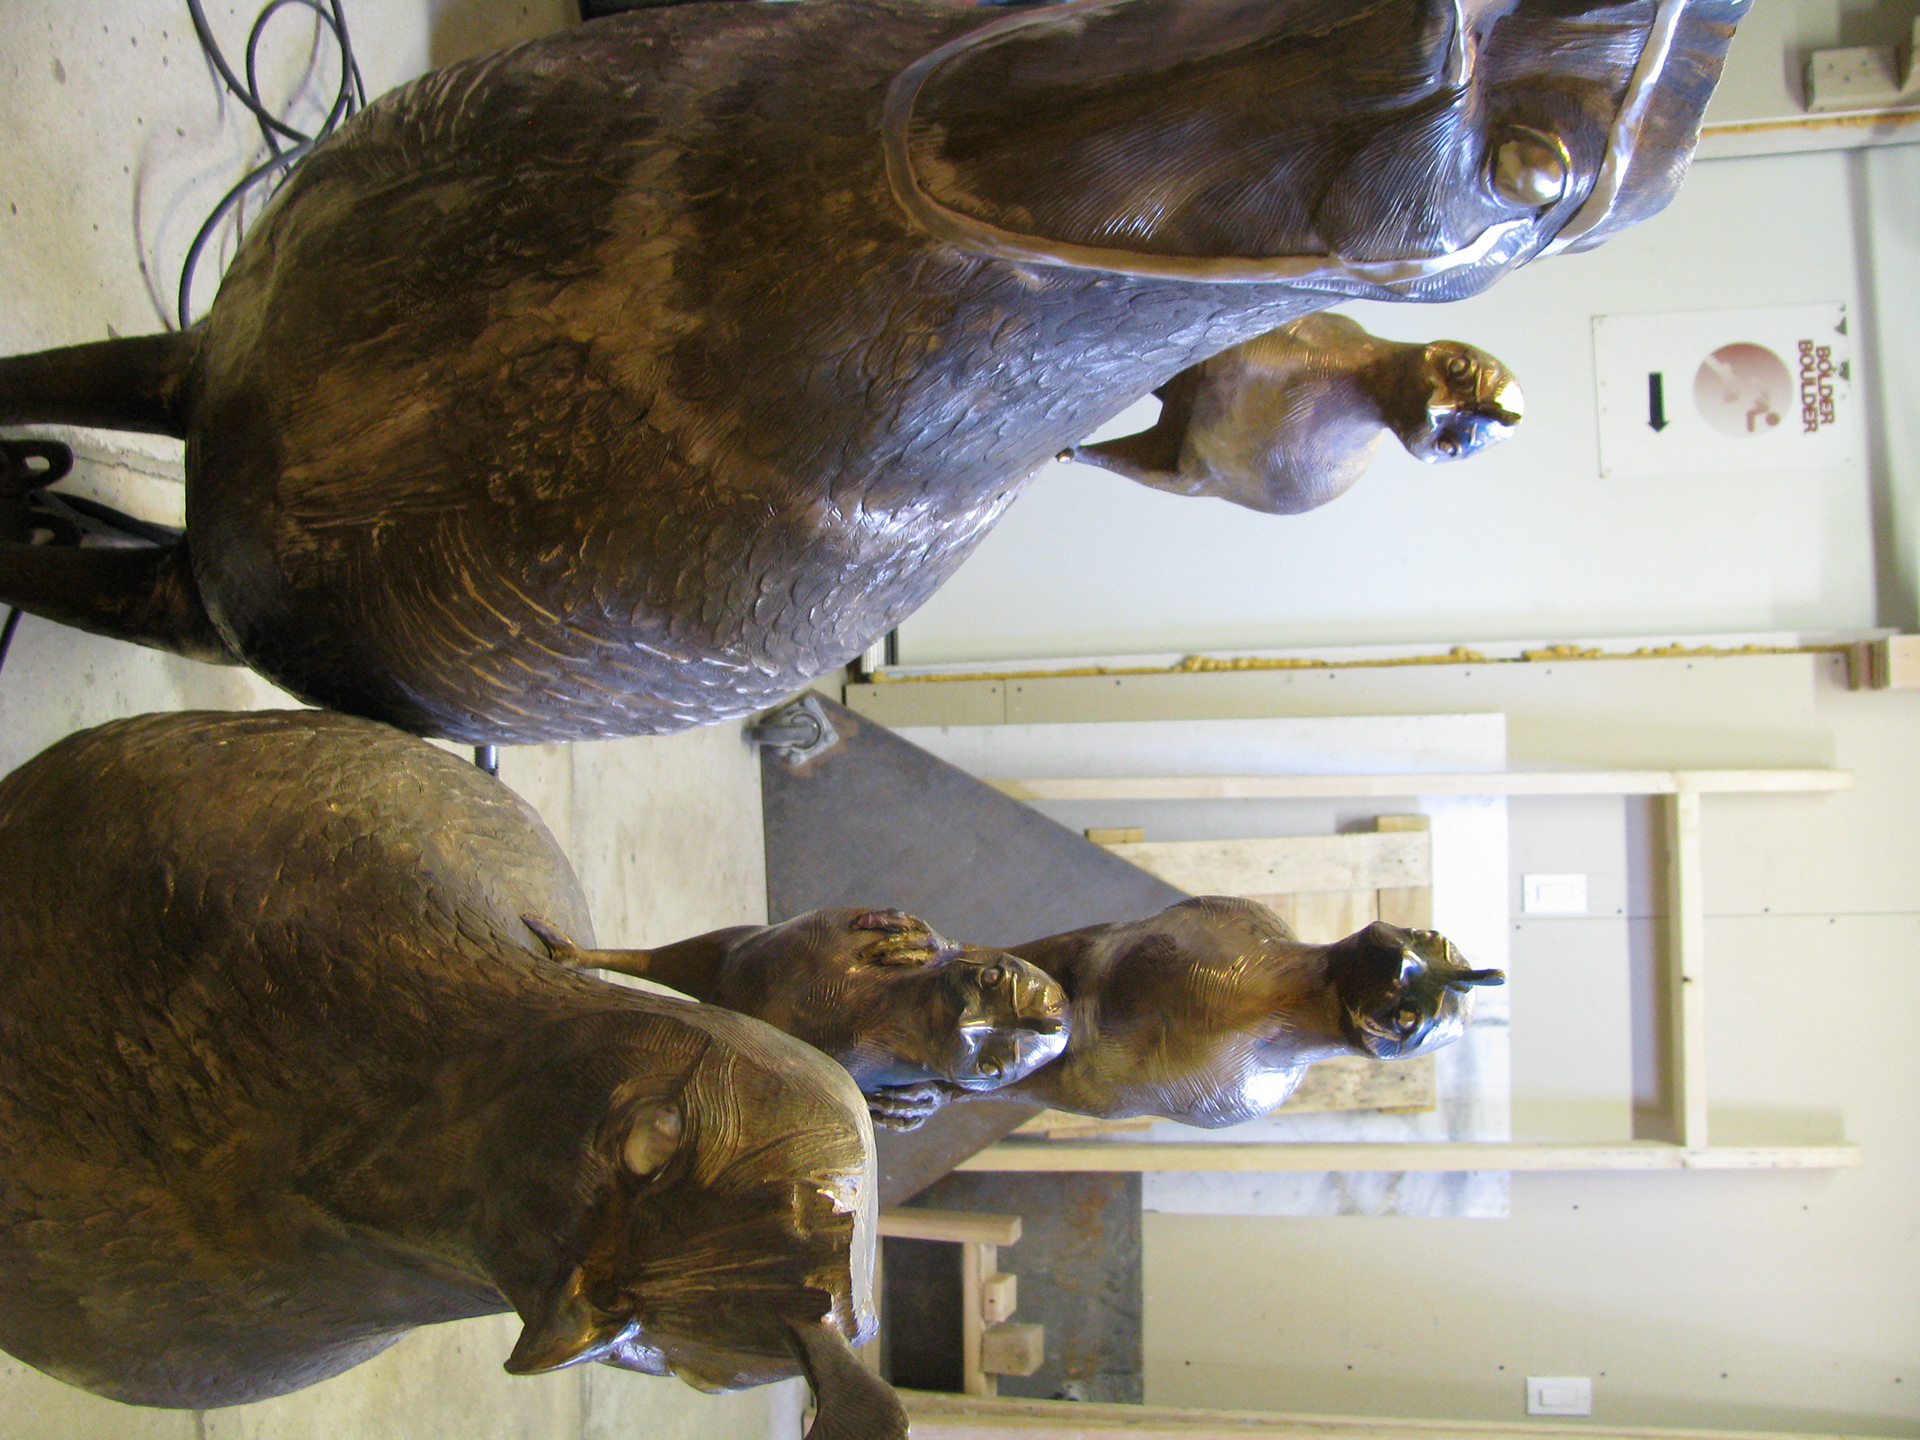
I heat and hammer the toes of the next chick to hold the shoulders of the chick below.
I altered every wax form so that no two chicks are the same.
This was a fun one to place.
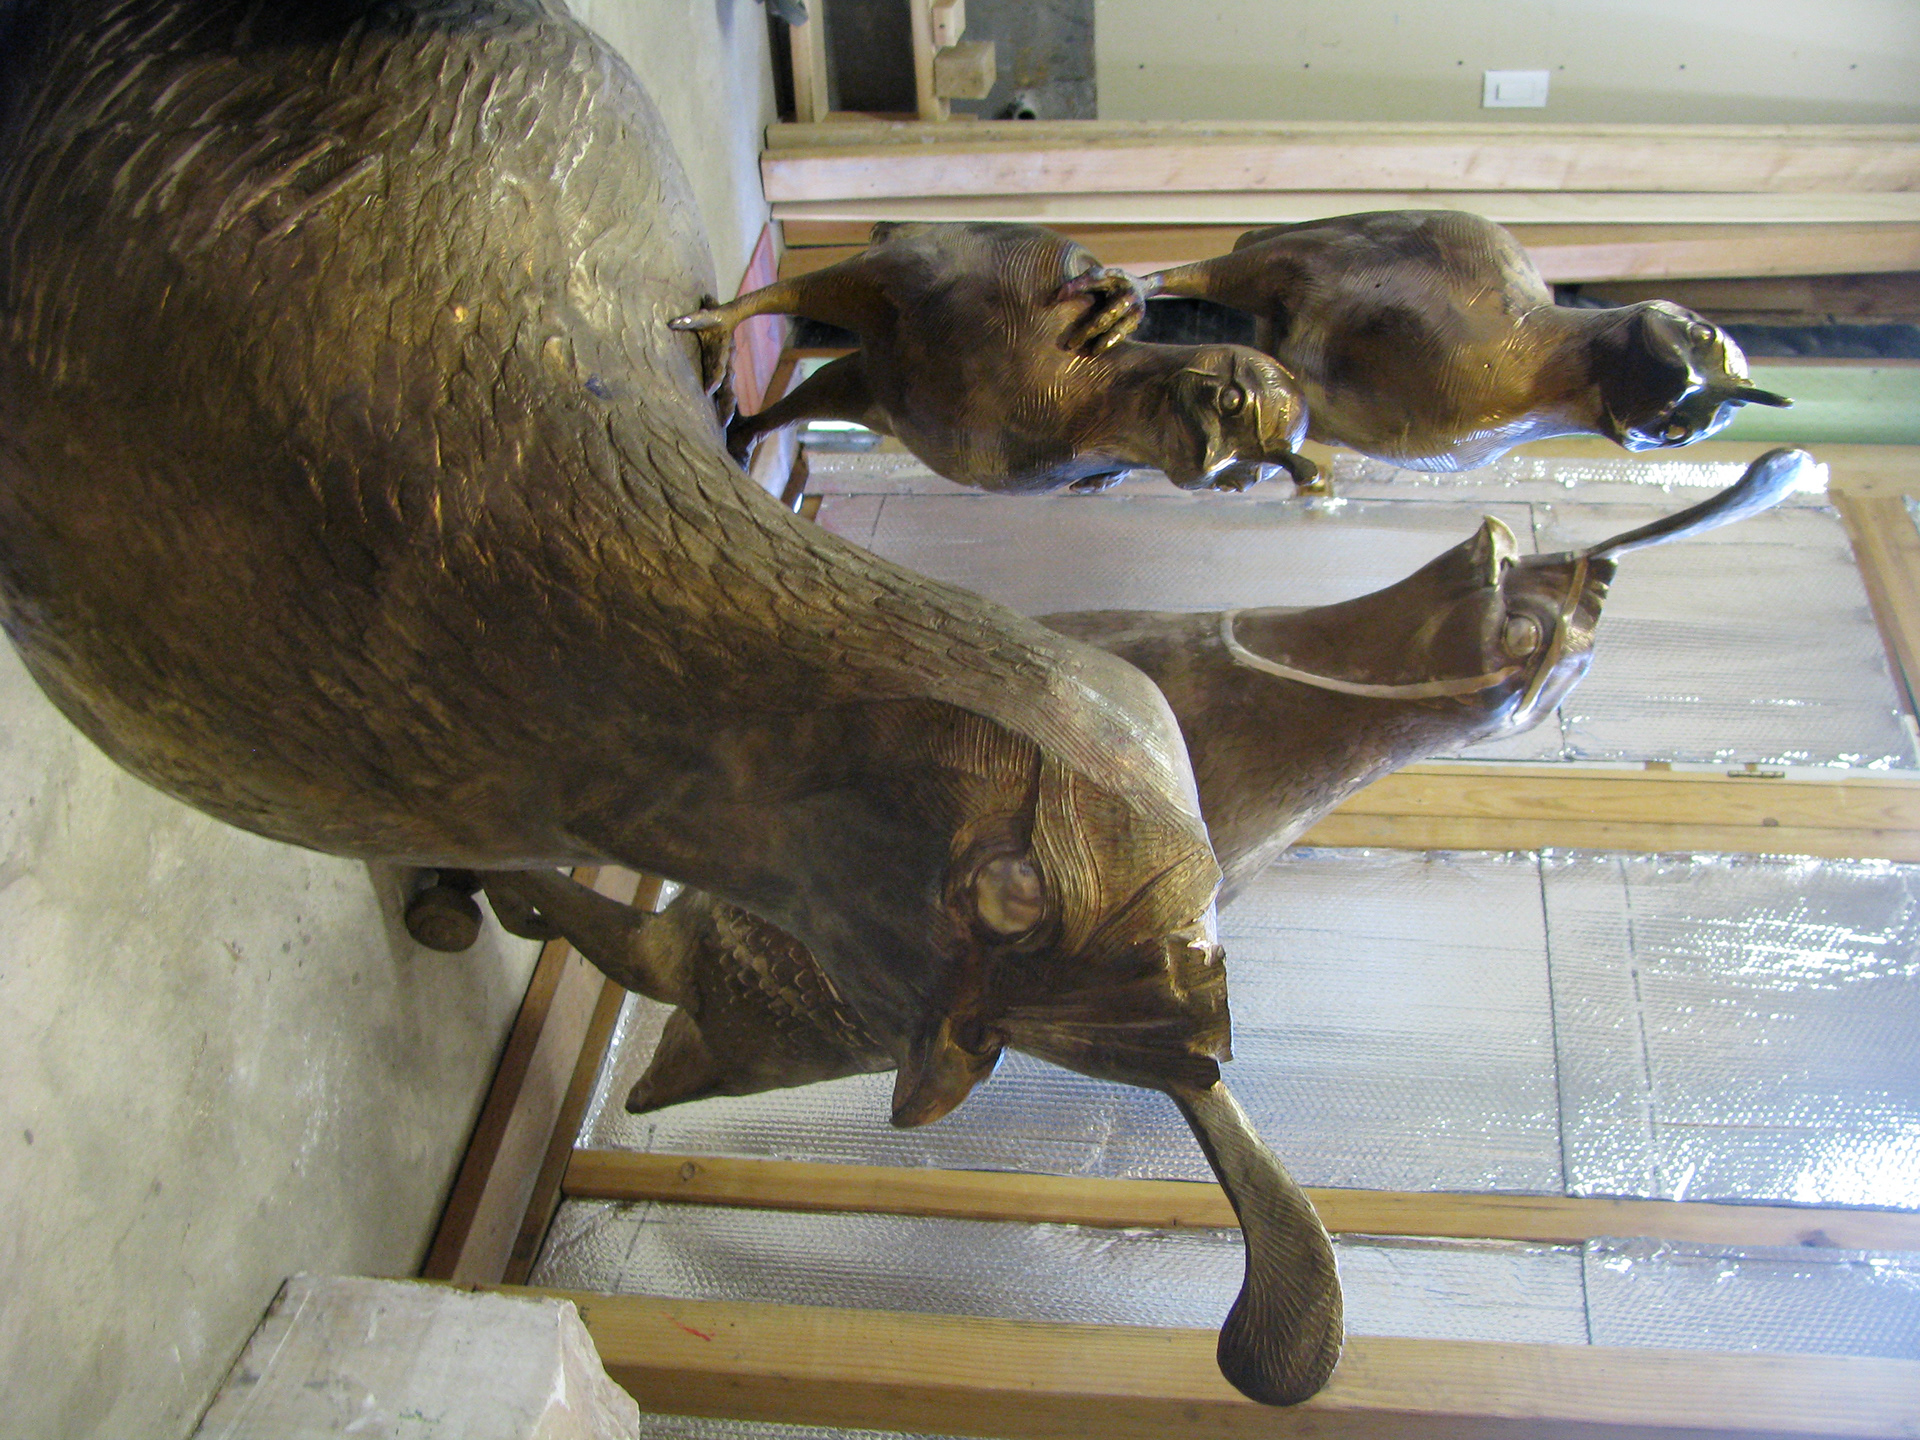
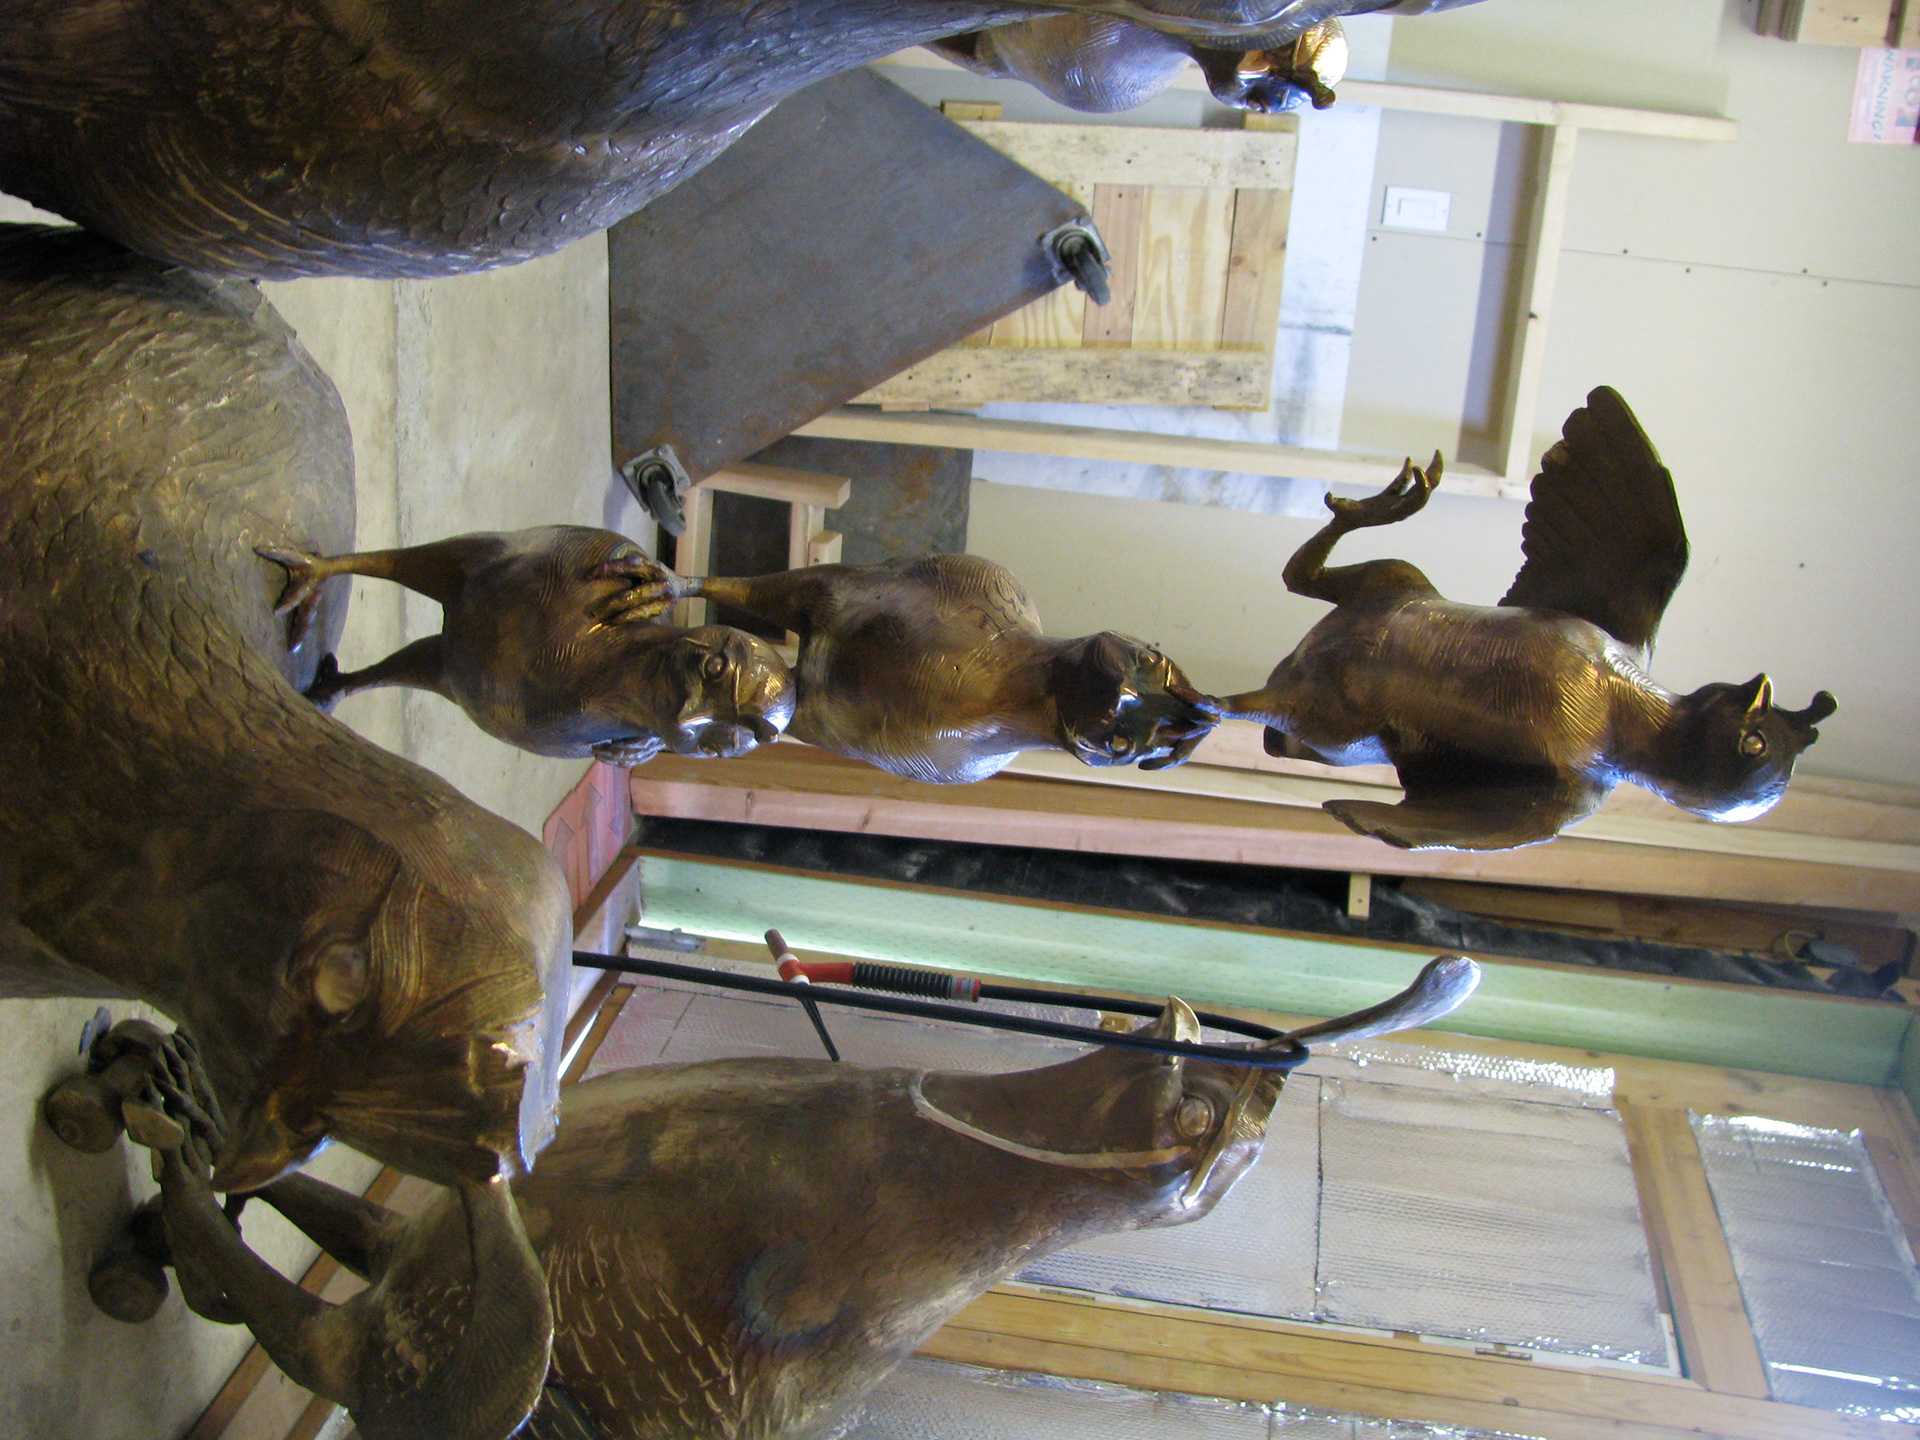
These two chicks are losing their balance!
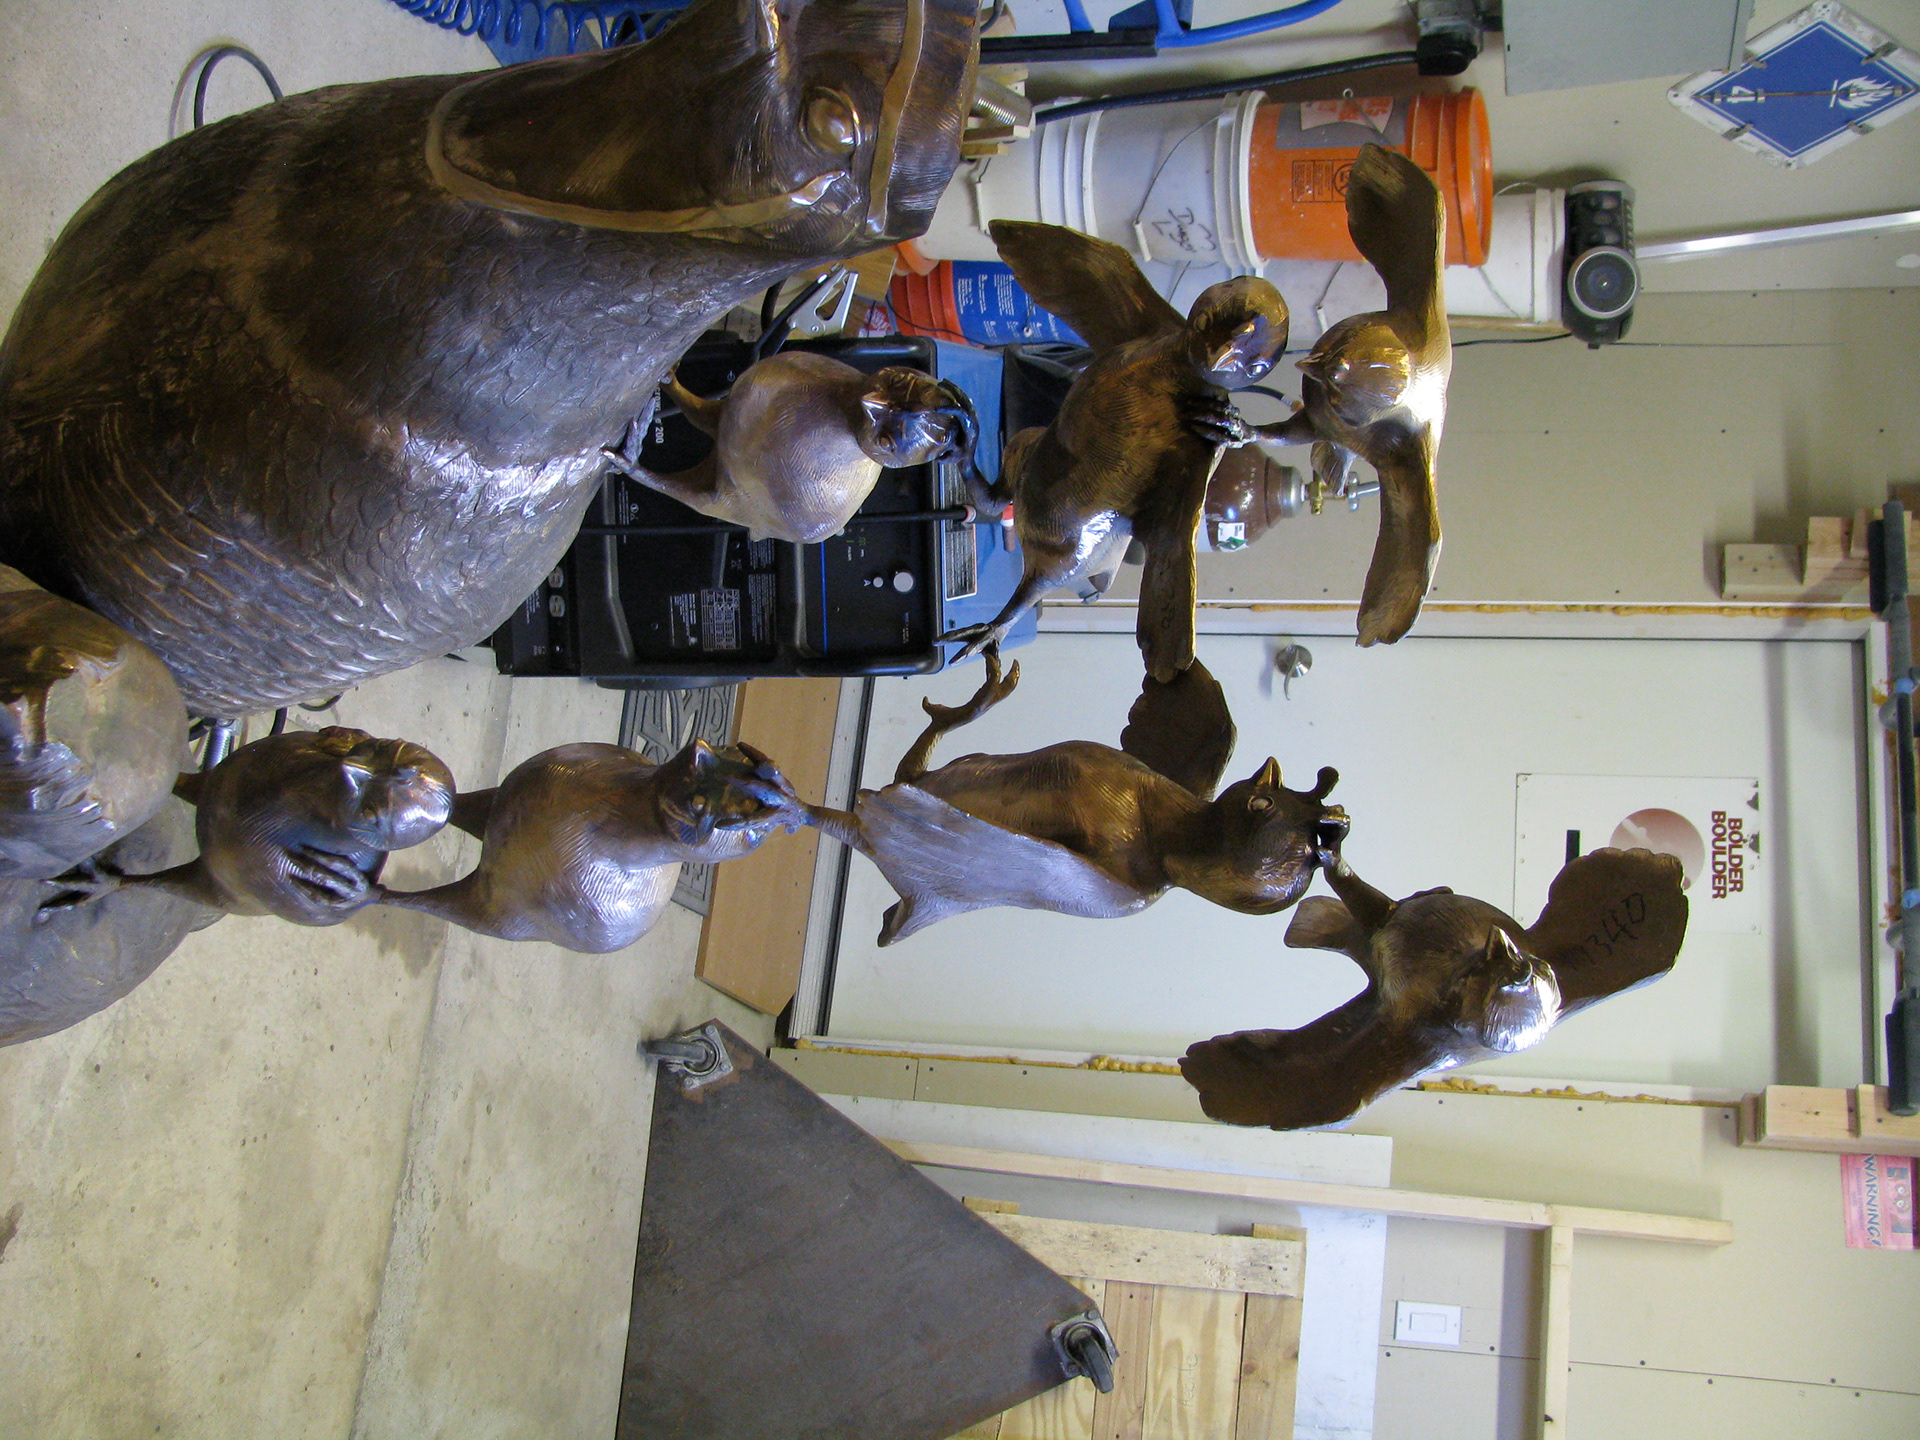
These chicks are breaking into flight! All 7 chicks are in place, next I lay in some solid welds.
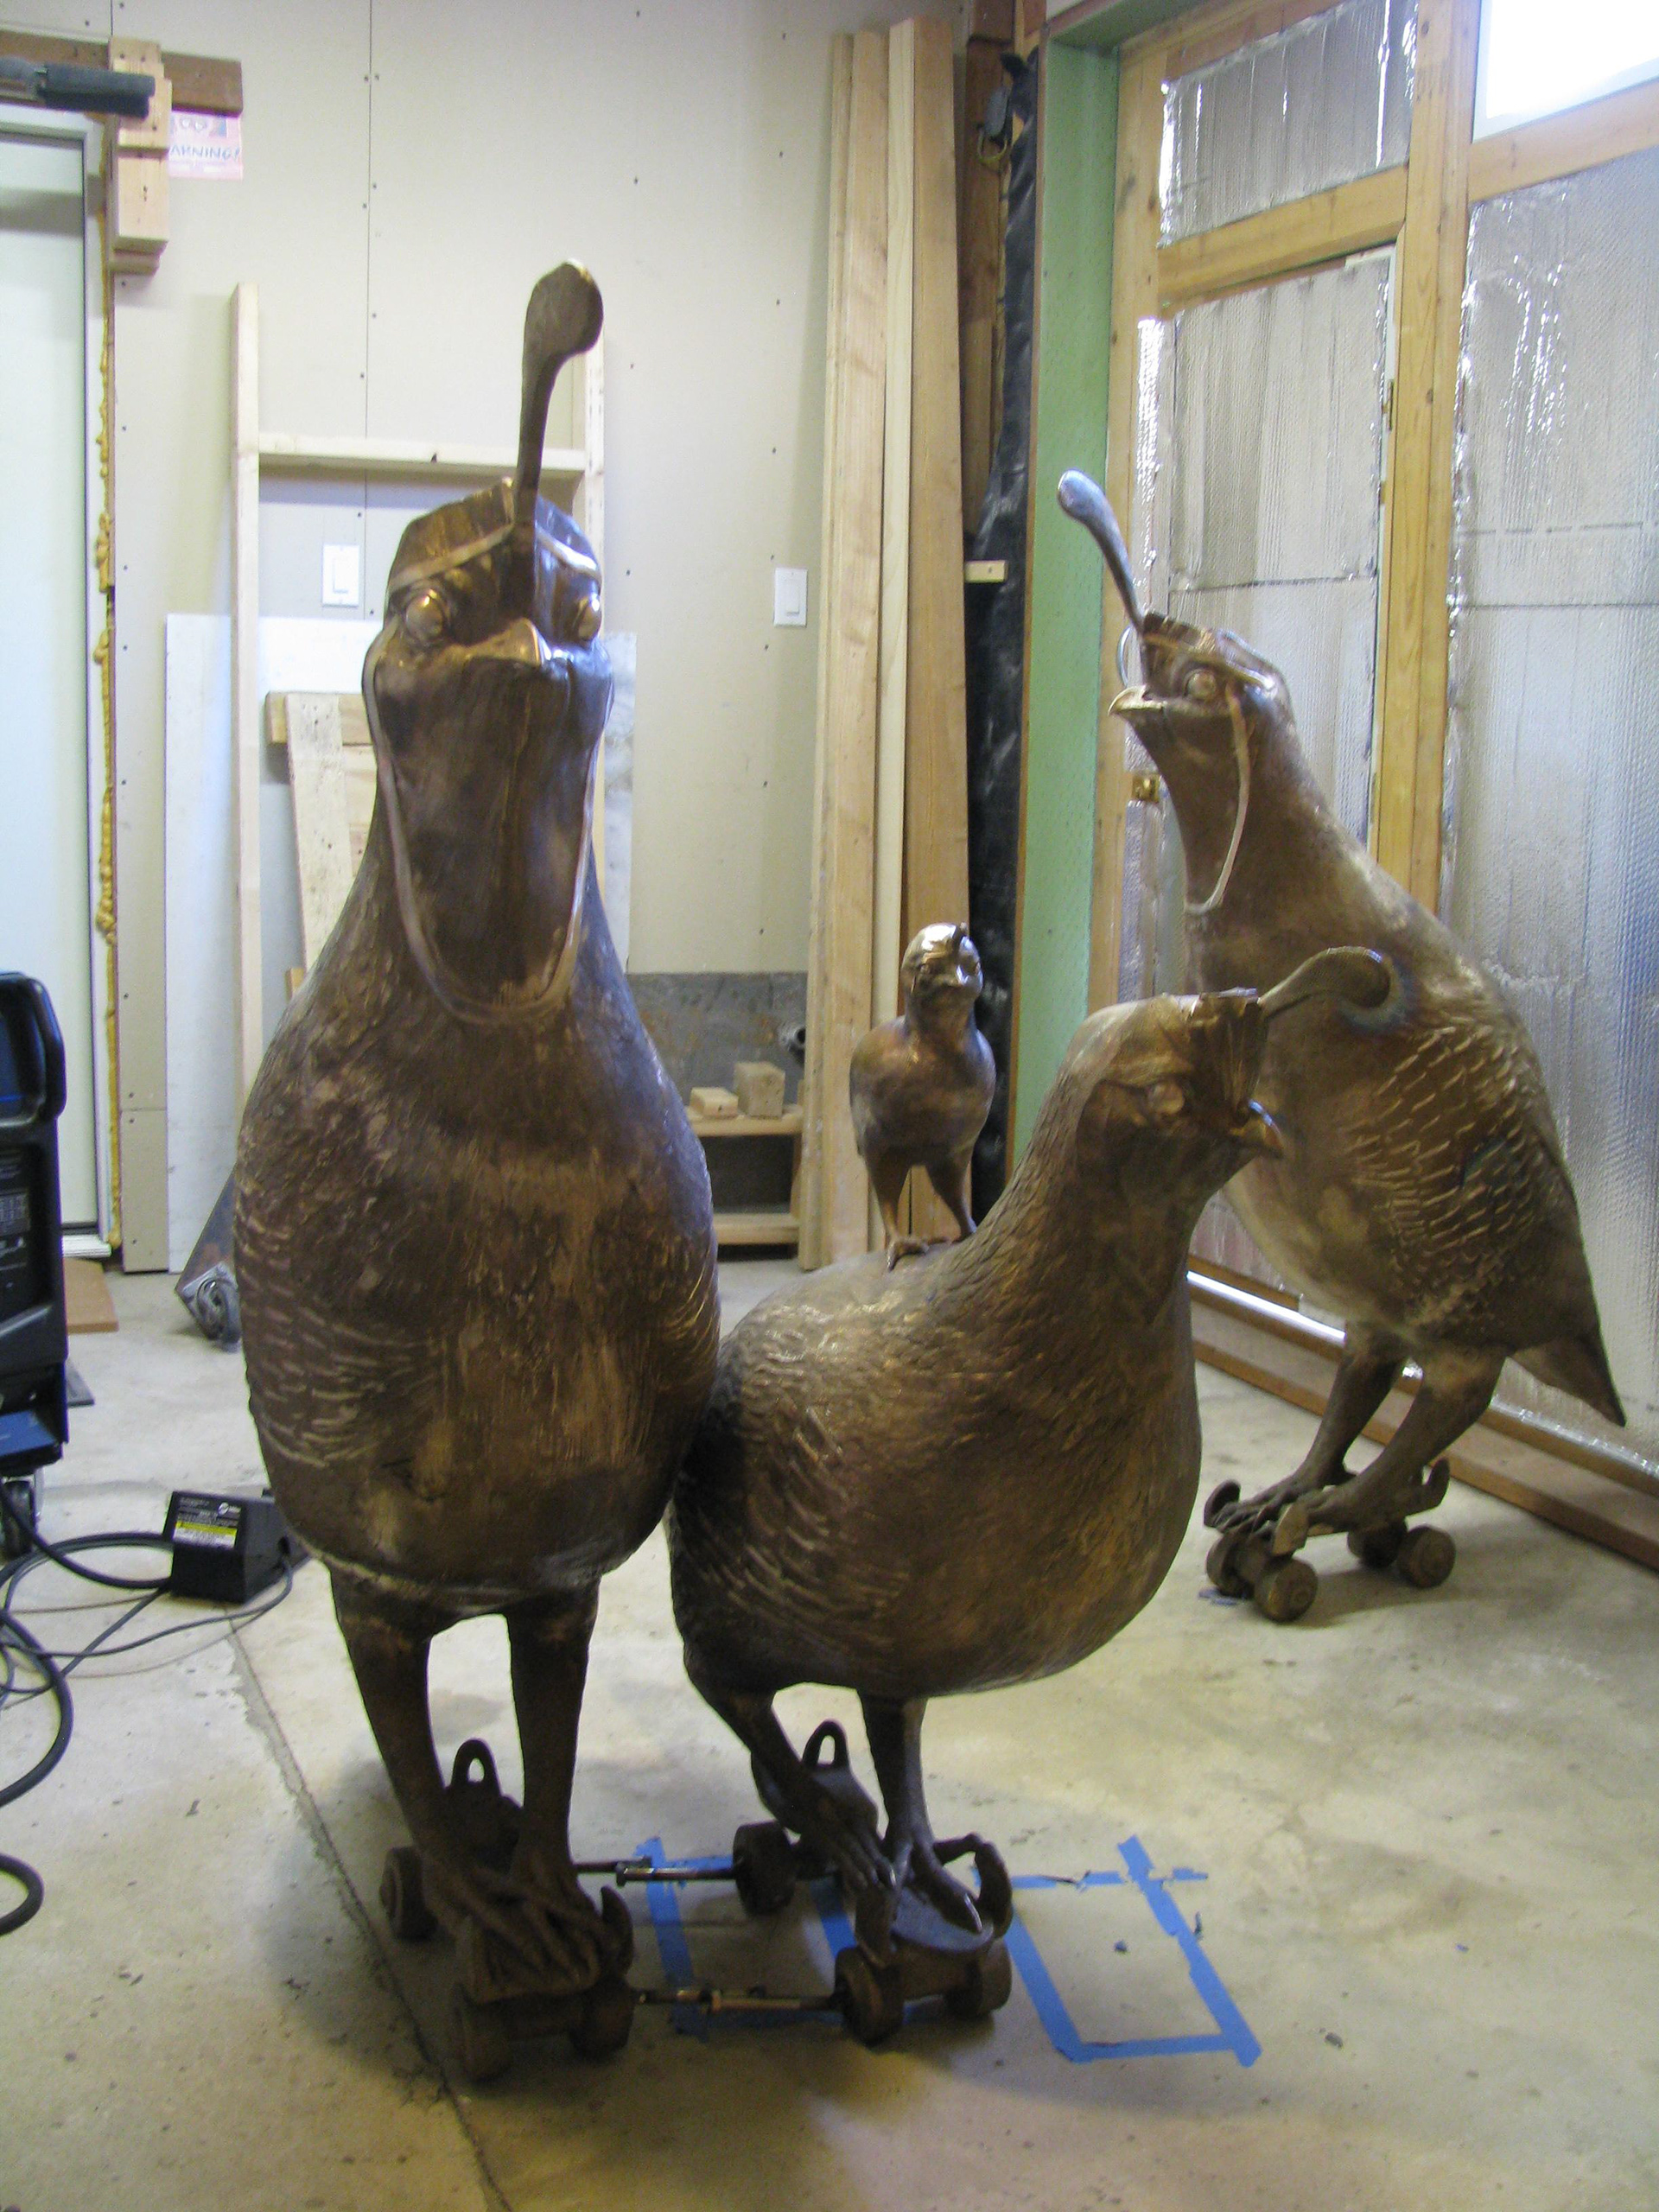
The full acrobatic troop is called Rolling Covey.

I wanted one more point of contact for a few of them, but couldn't see how to achieve it without being another month out to cast more chicks- or take it apart and lose the acrobatic feel that was part of what the Arts Council had liked about it and approved it because they expected it would be treated nicely in the park.

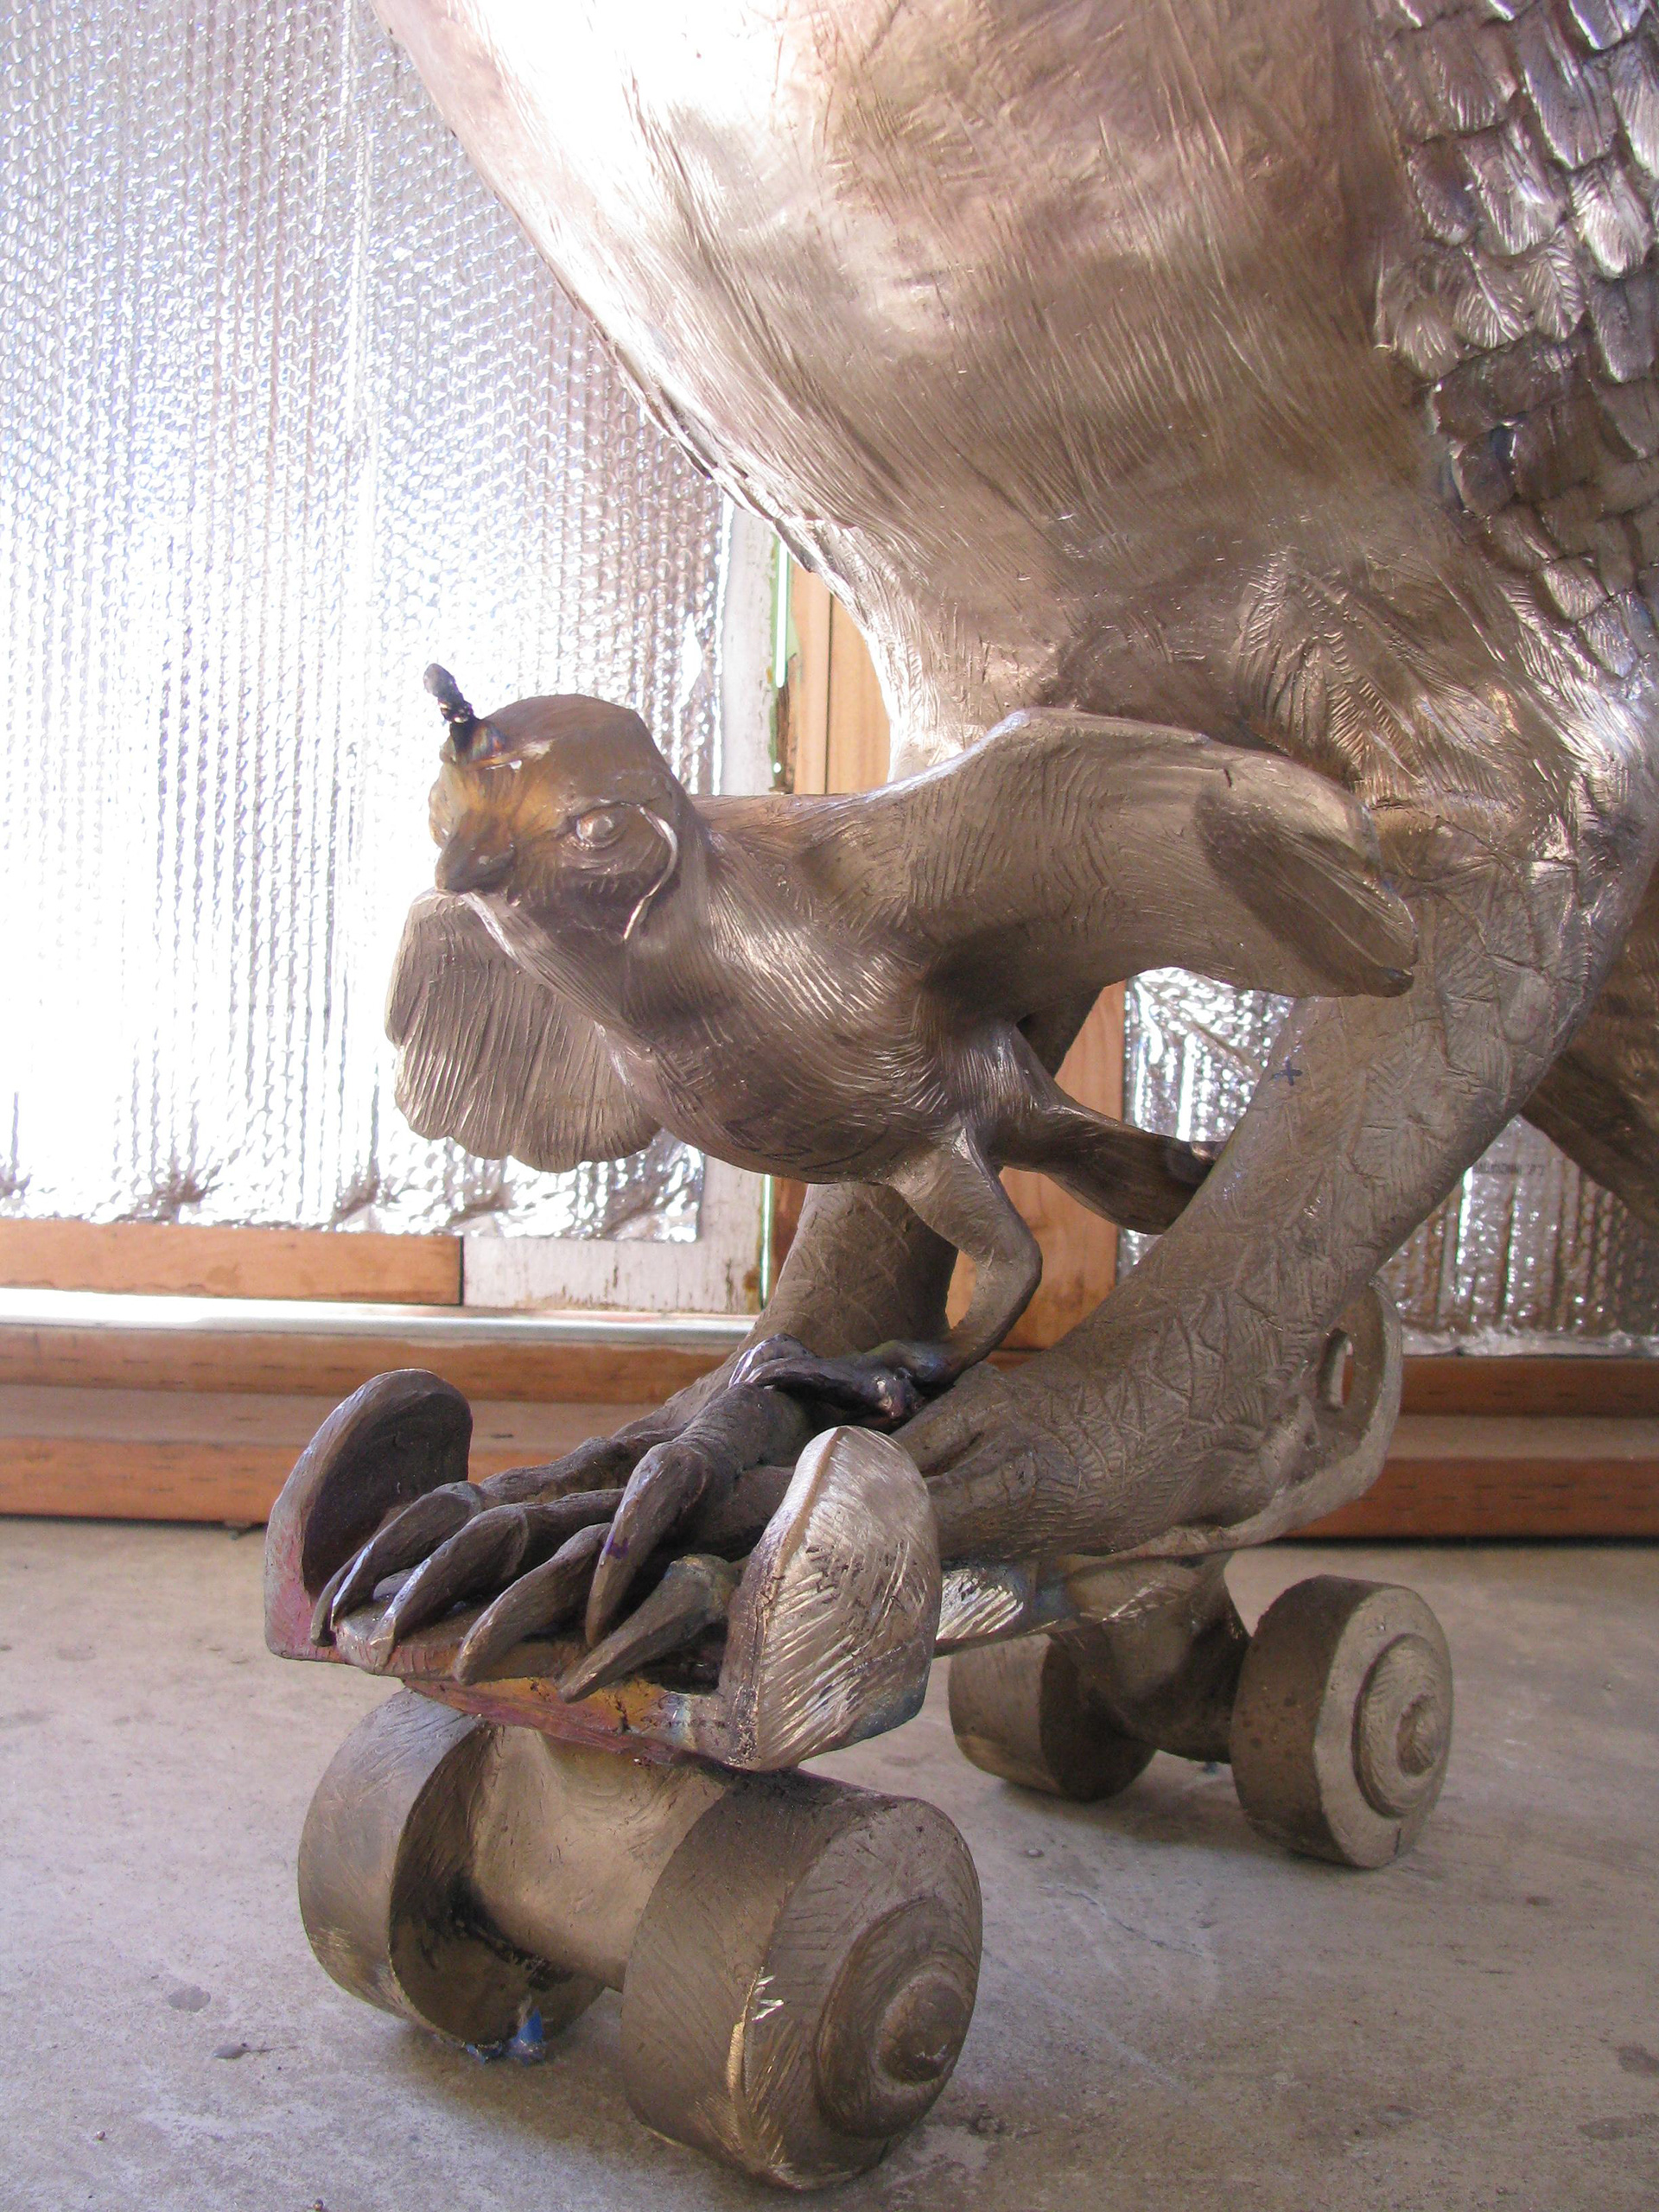
This little chick is "Skating to Fly", the single chick on the single Buck.
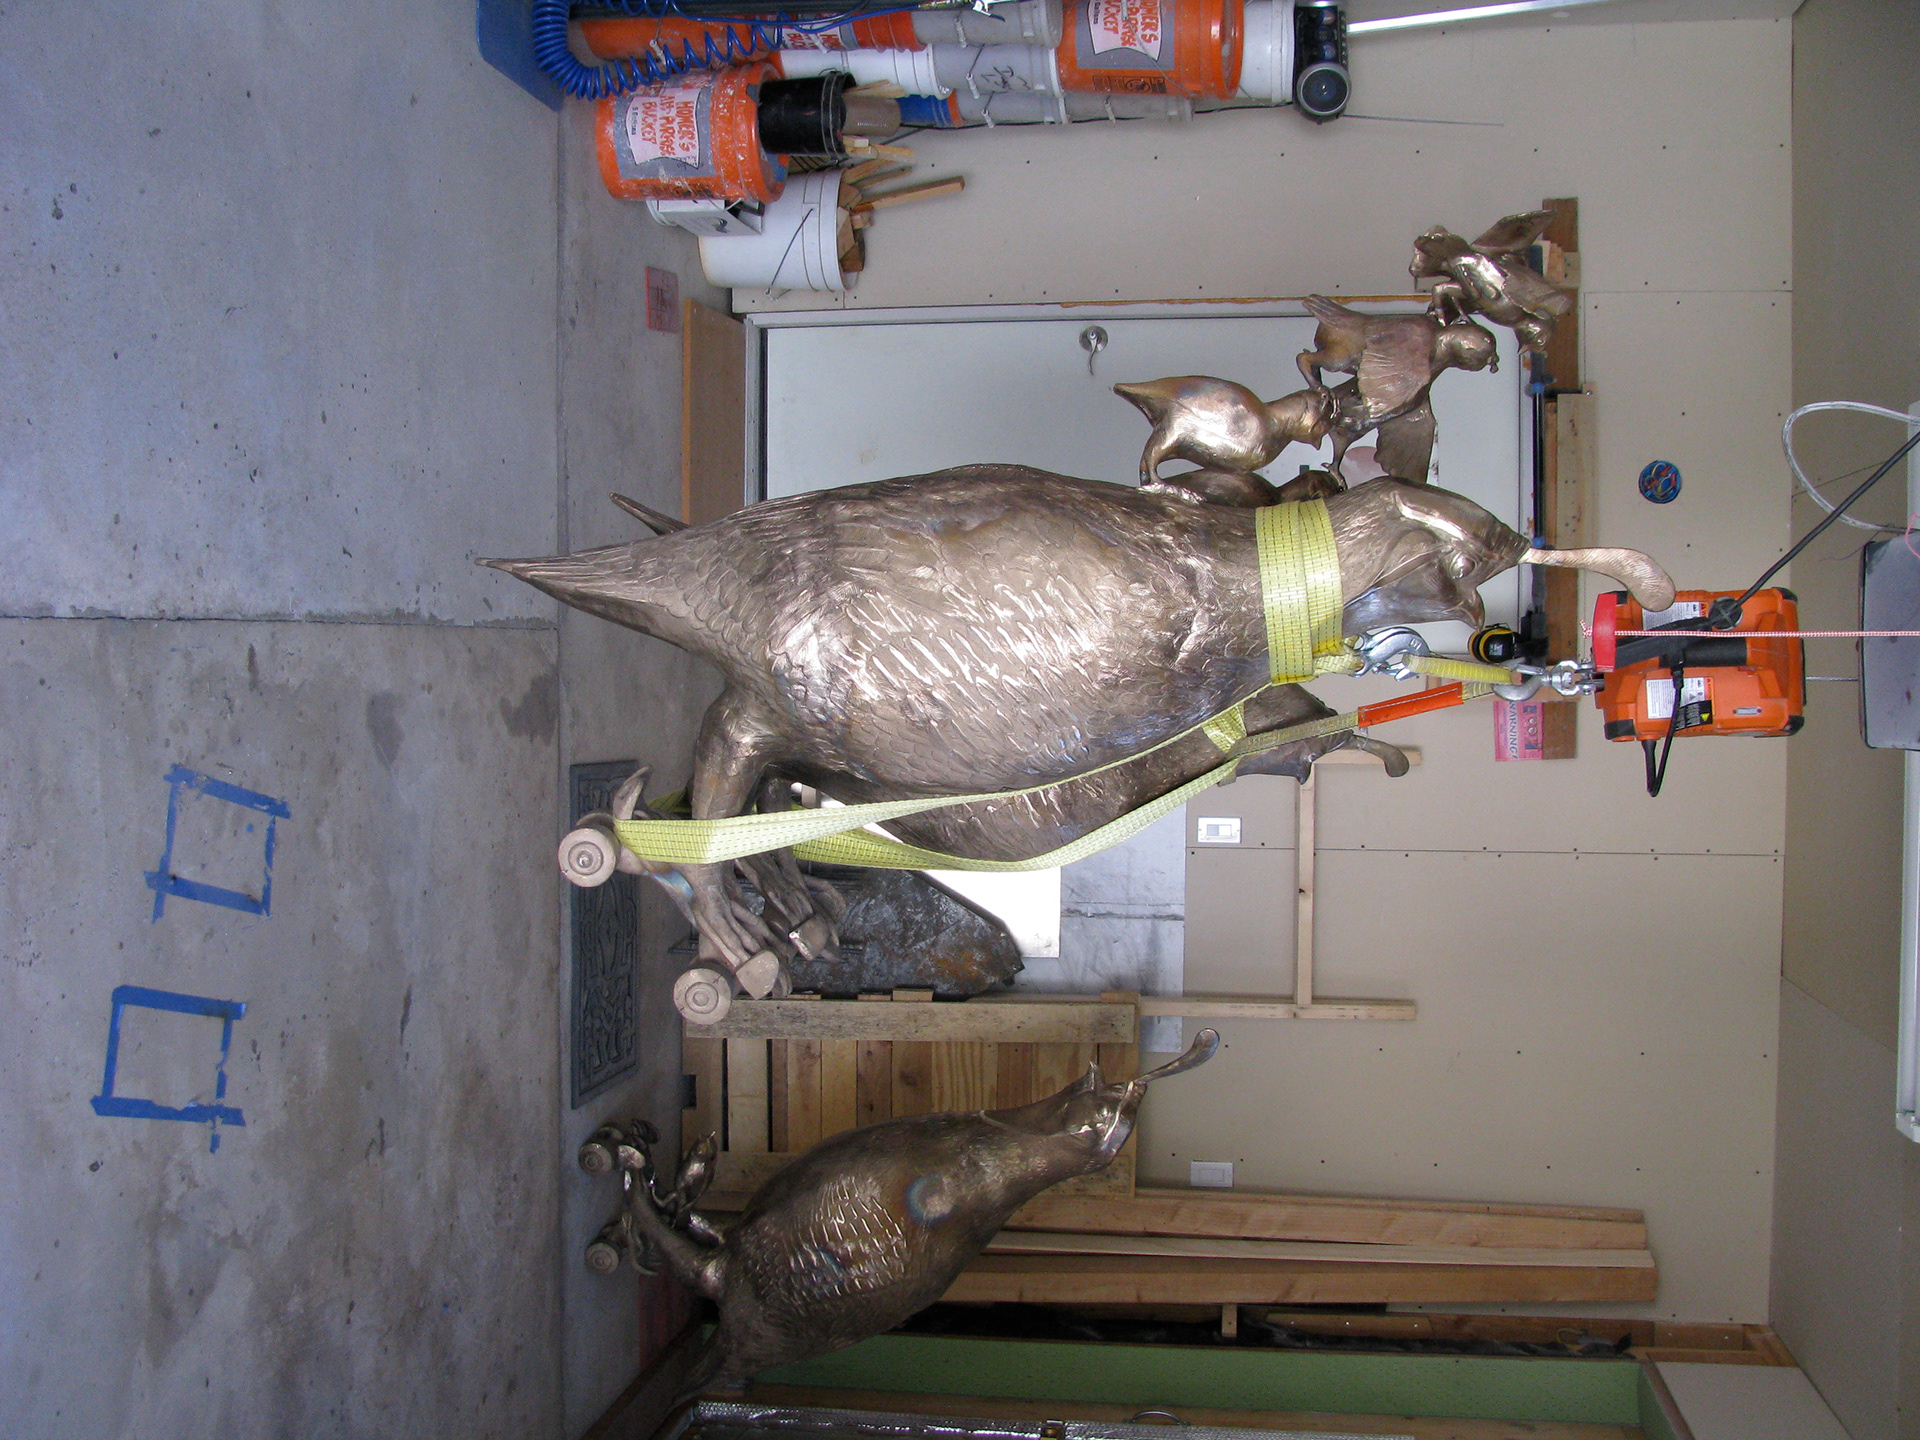
The little hoist pulls Rolling Covey up.
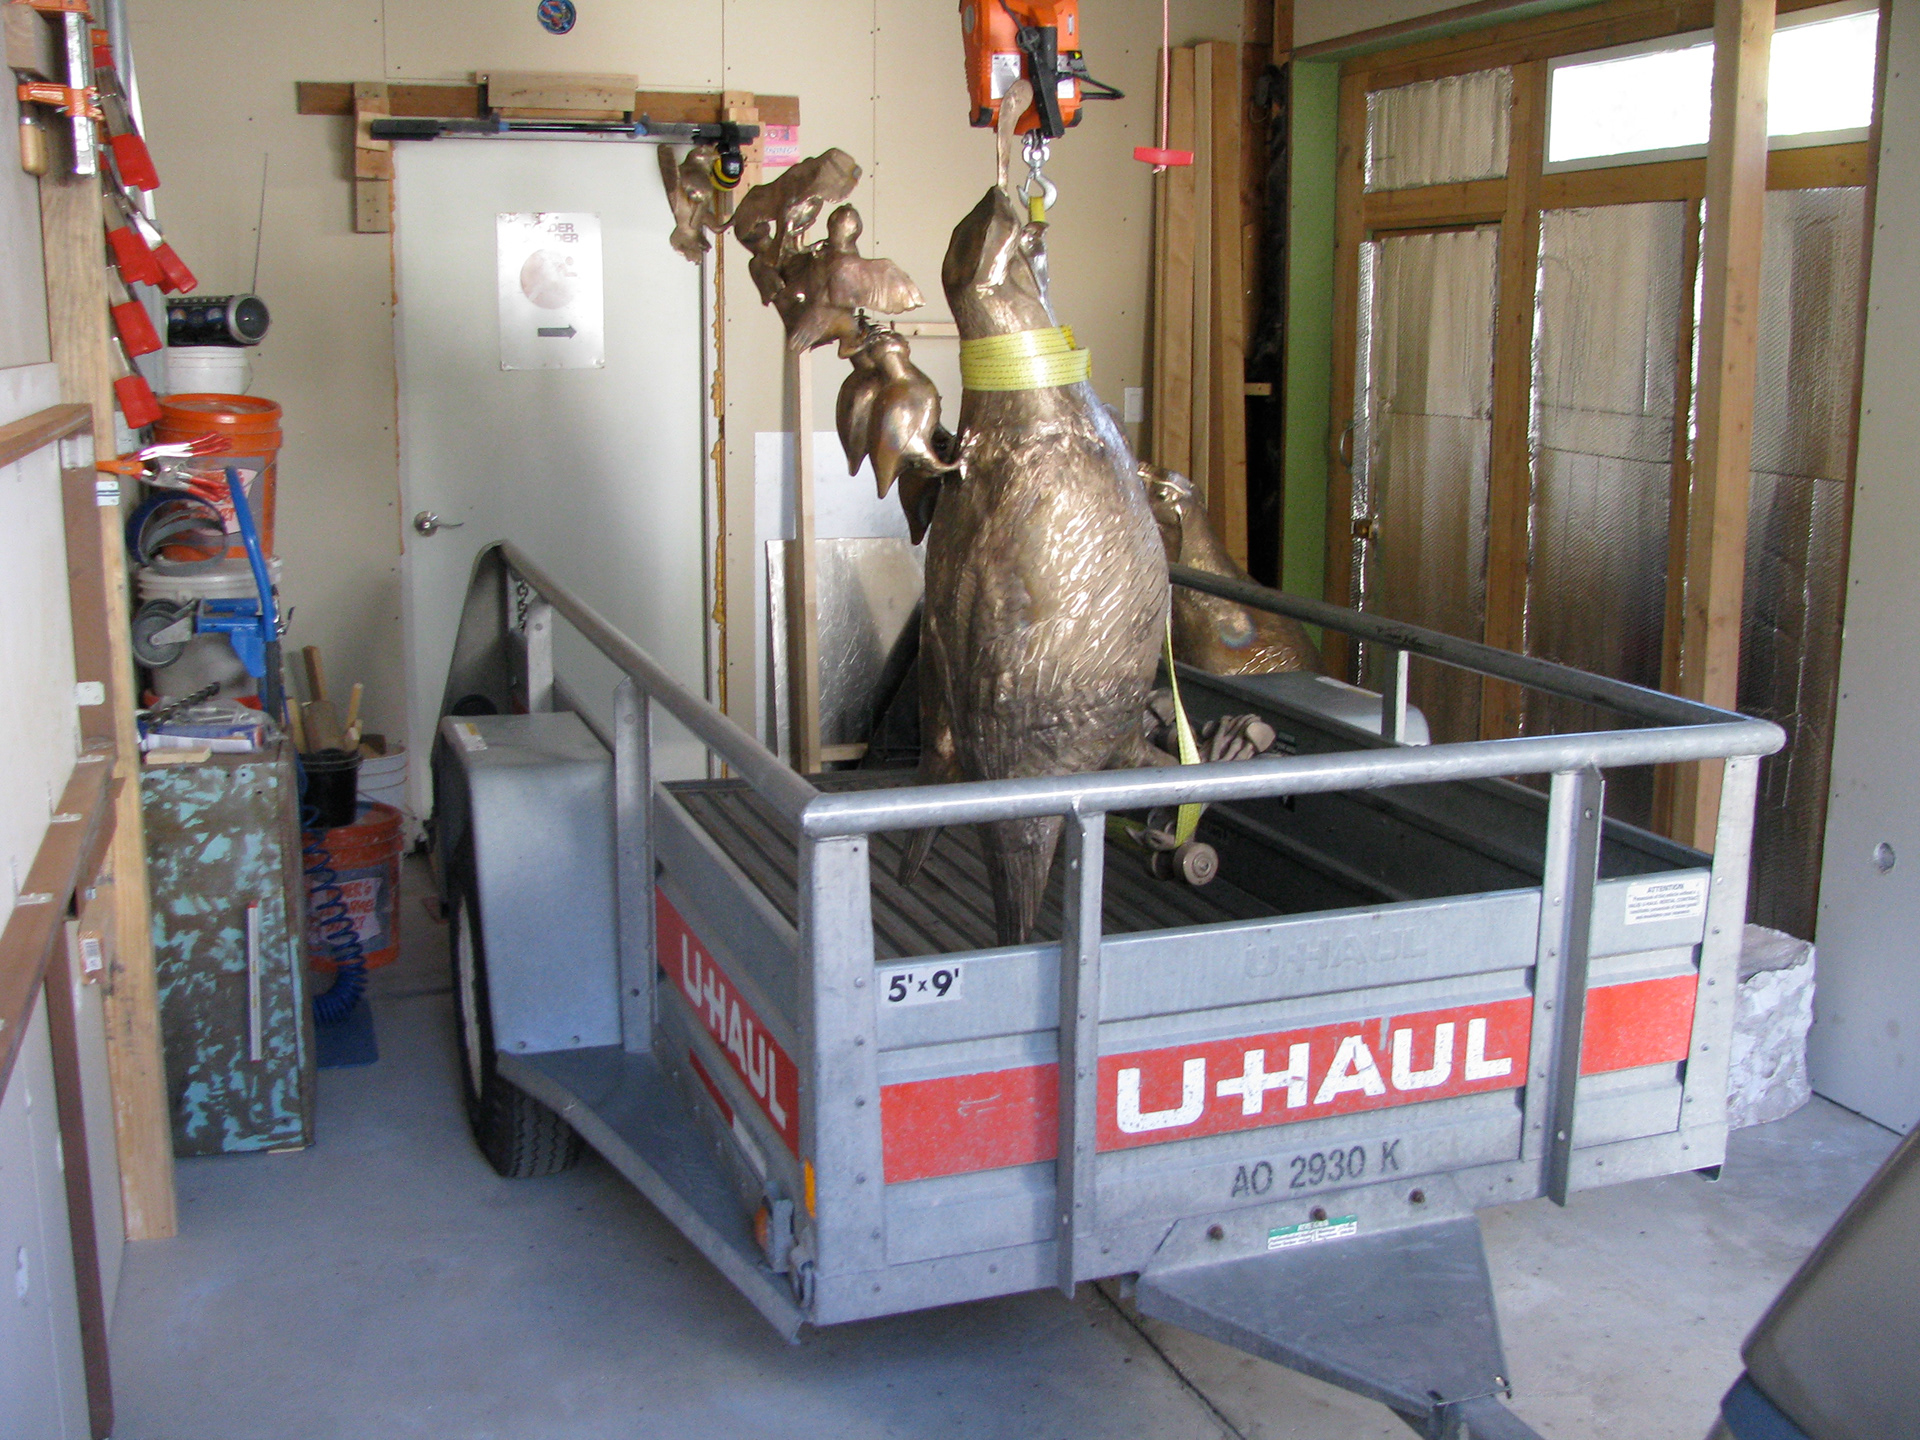
I drive the trailer under them, then set them in the trailer. Pull out and repeat for the Skating to Fly.
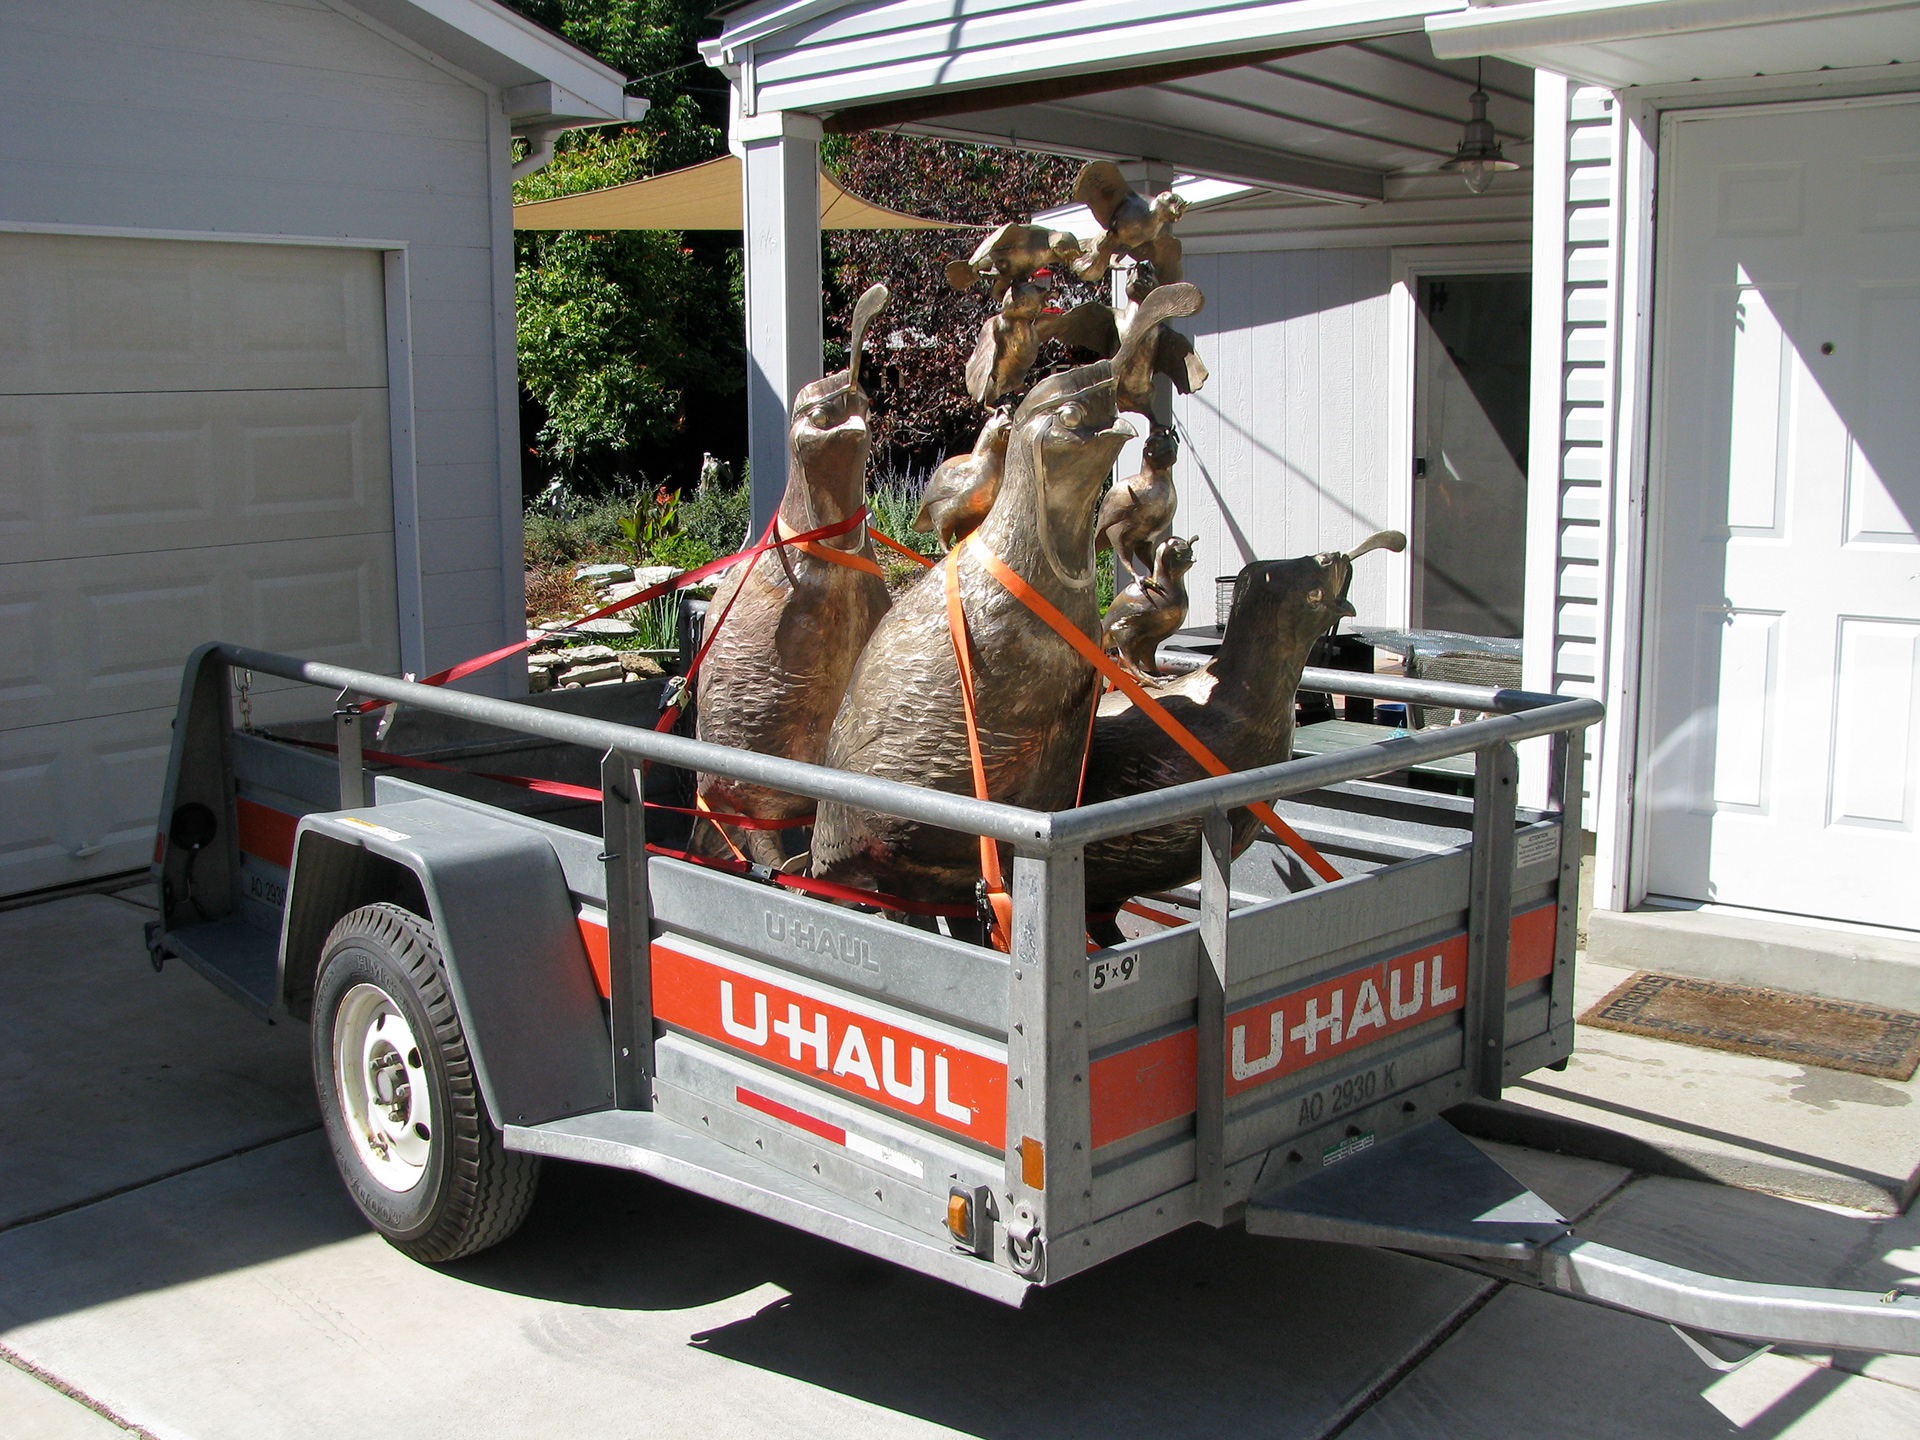
Everyone is in the trailer and cinched in place.
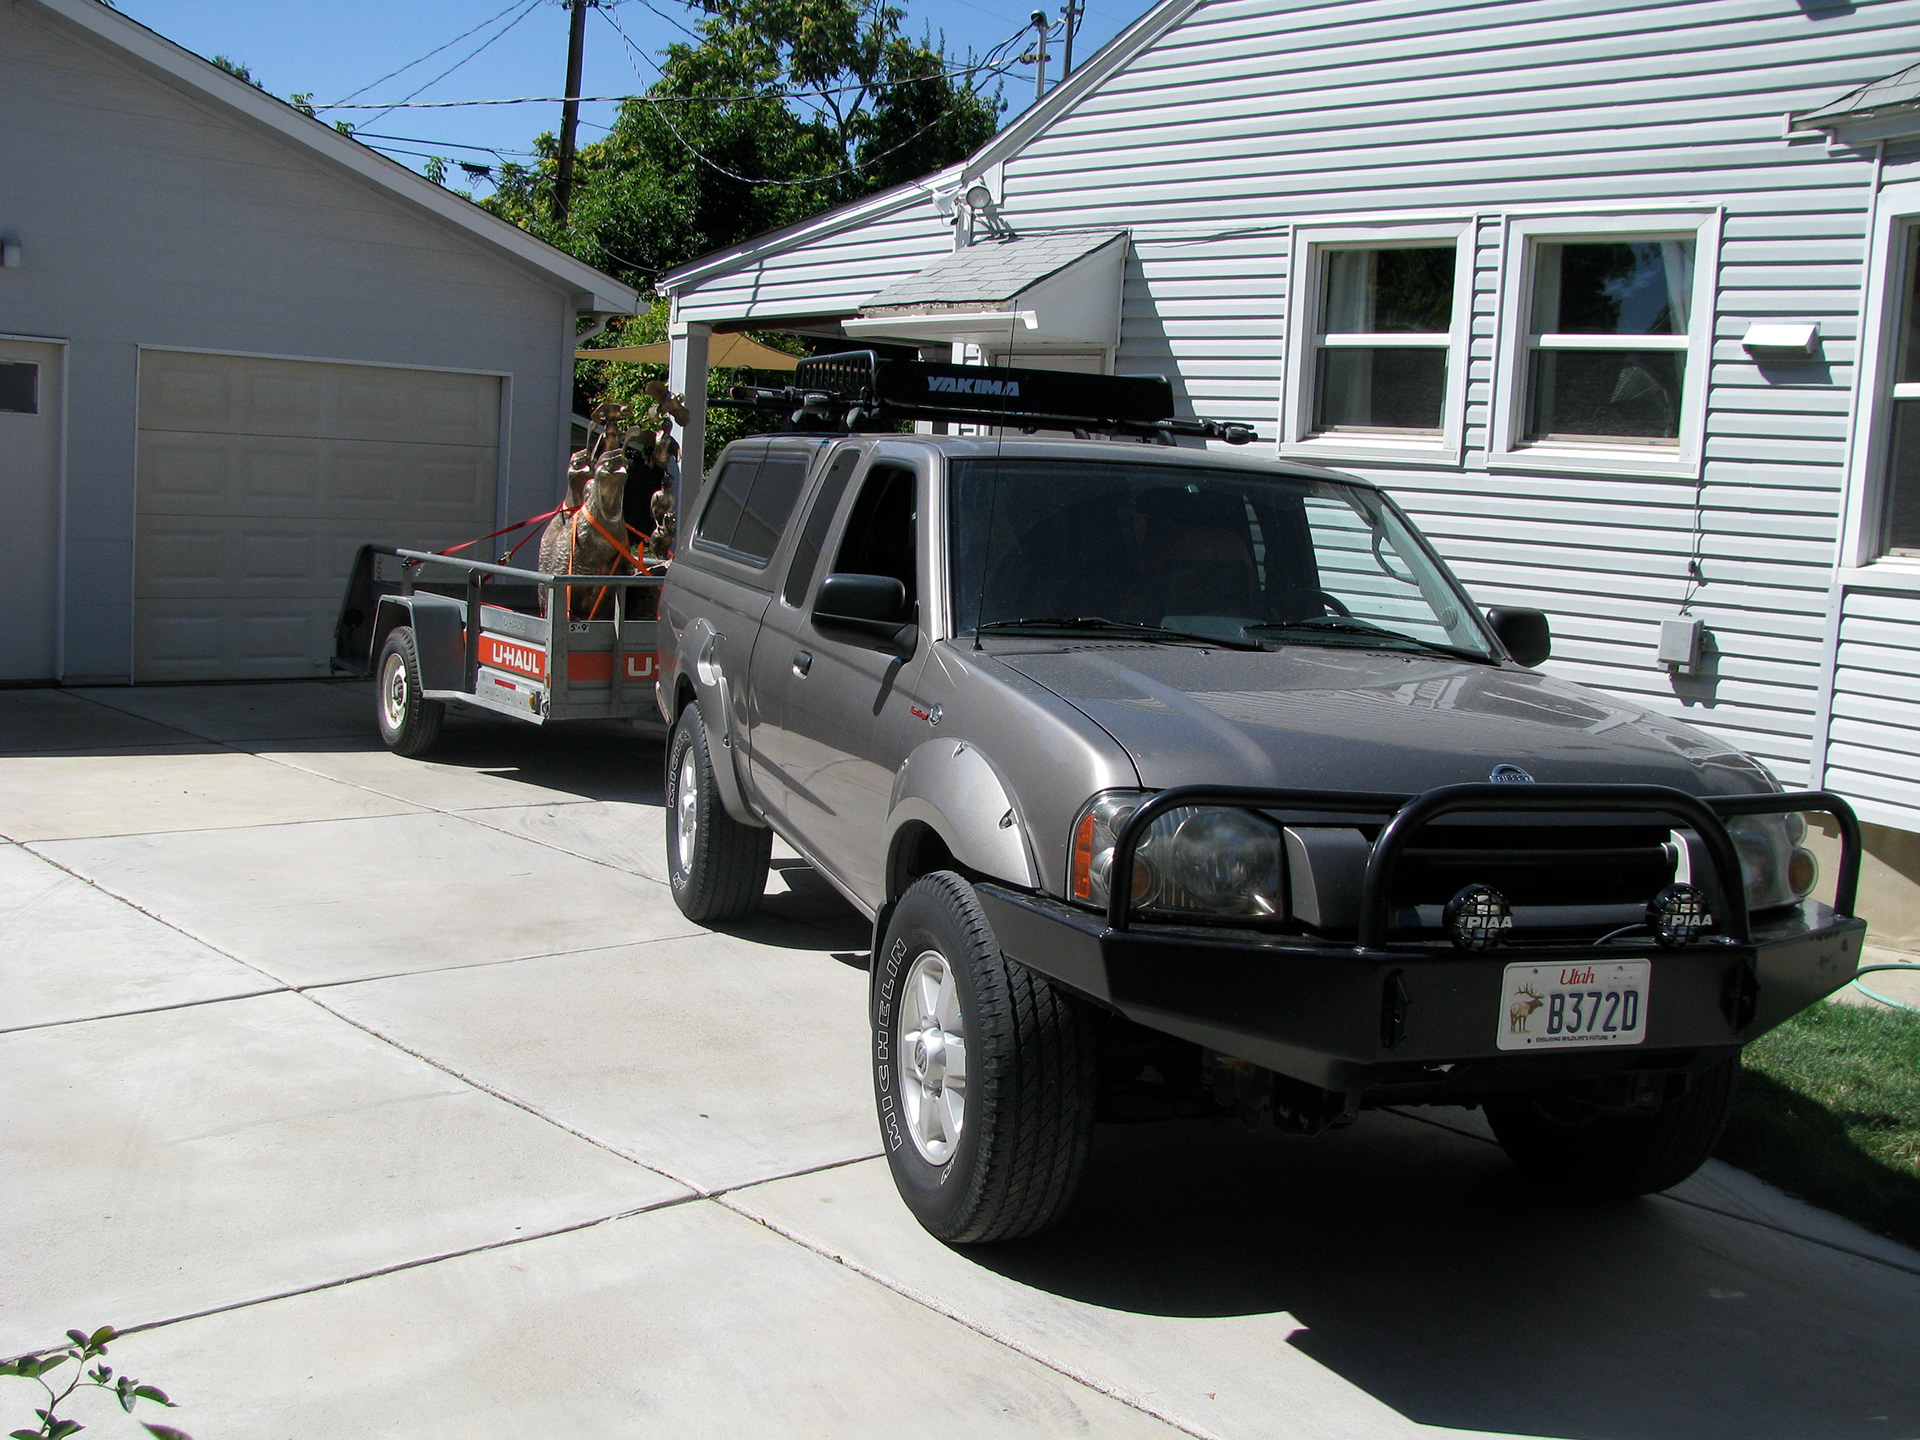
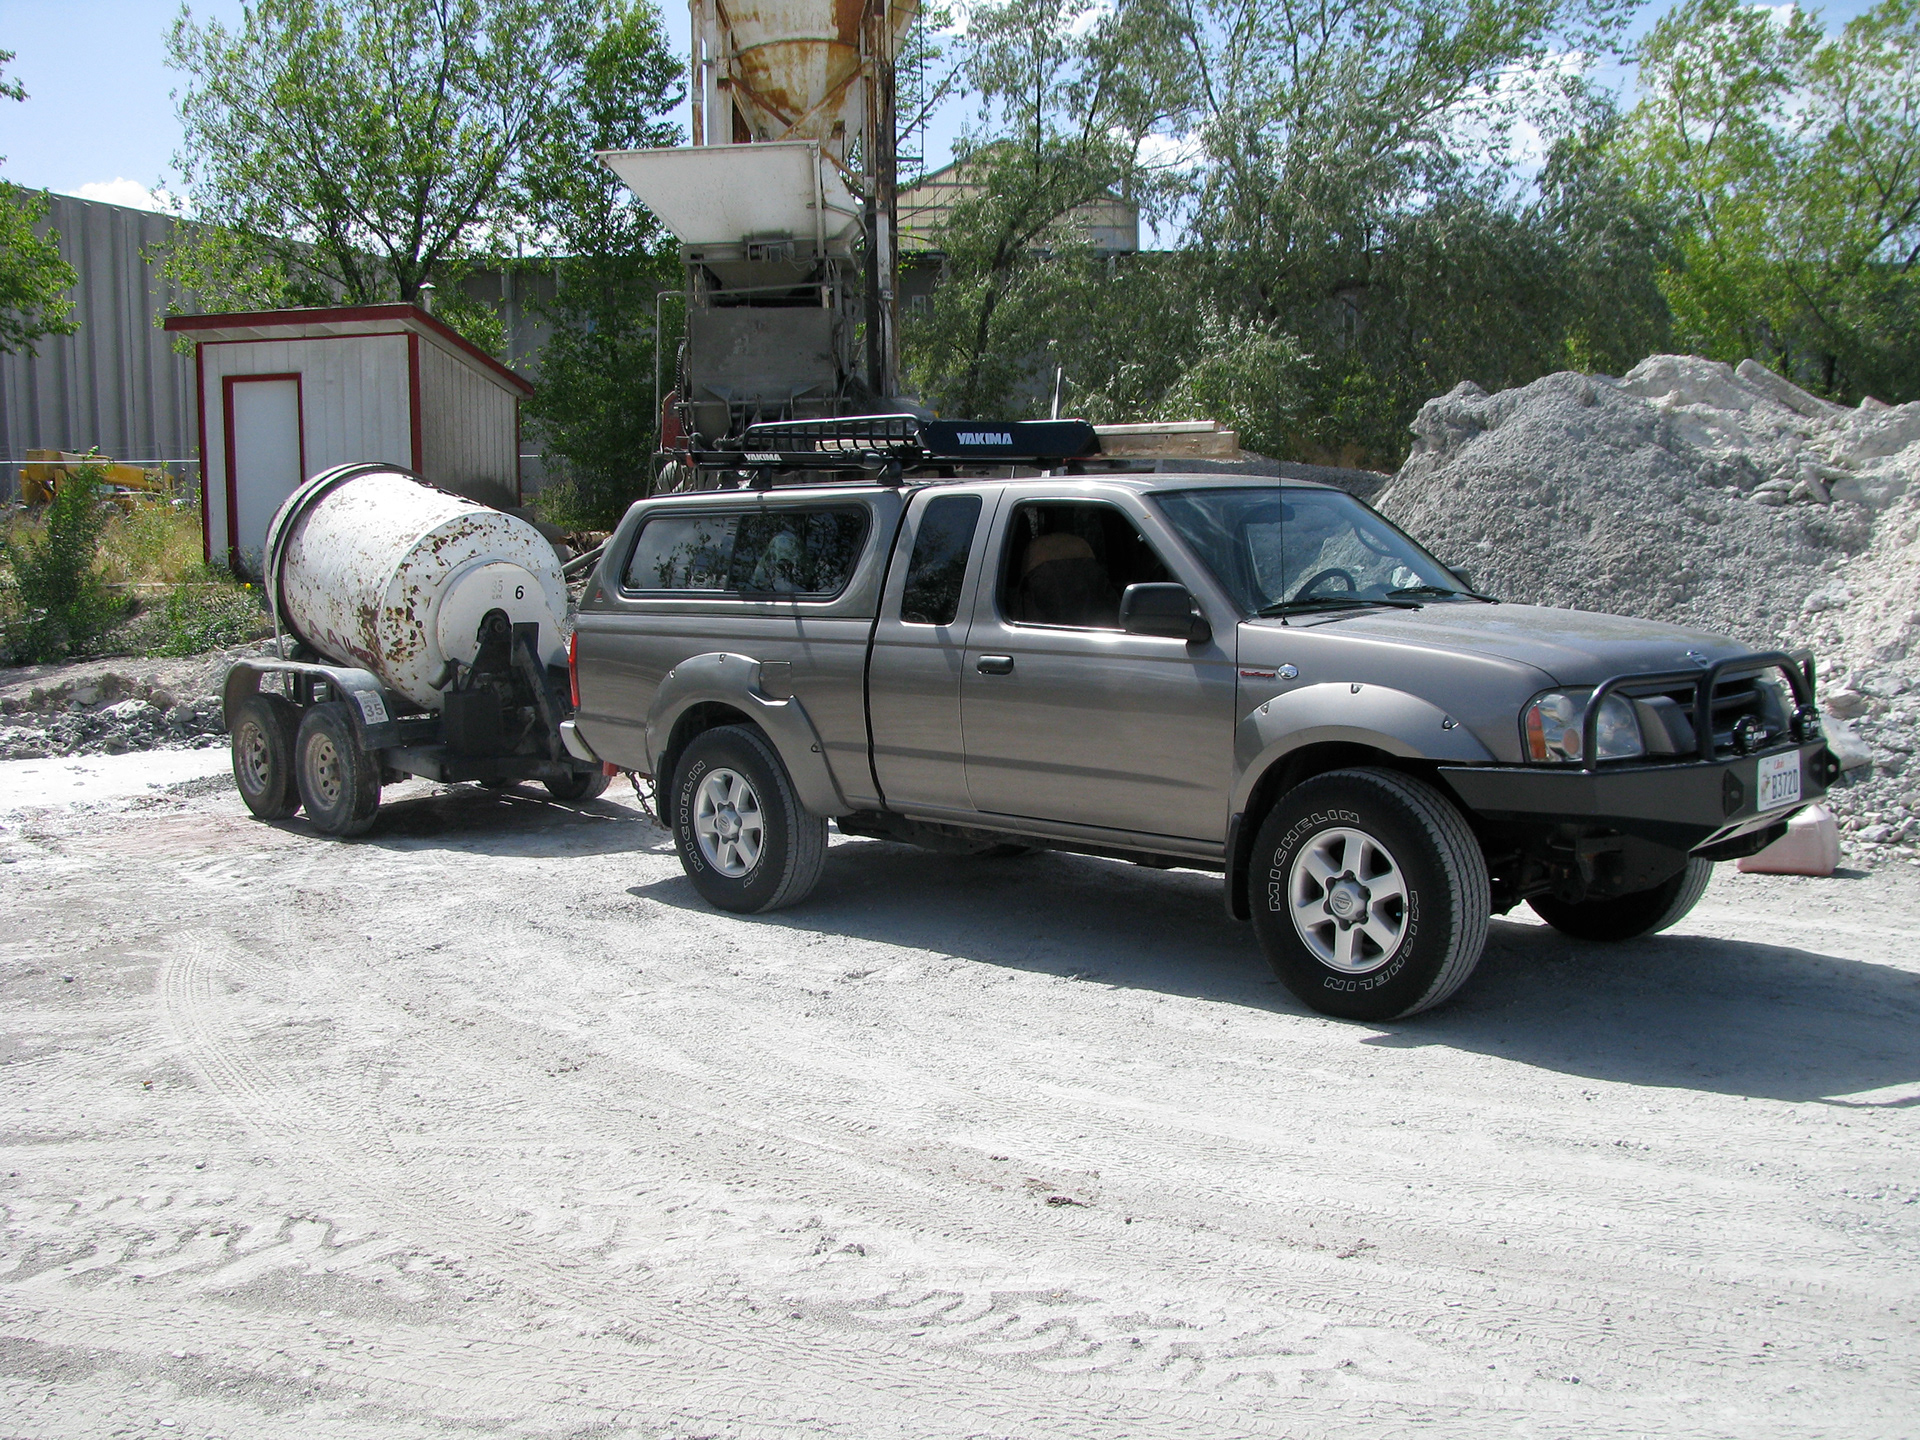
I'll stop after a few corners and rework the webbing before heading onto the highway.
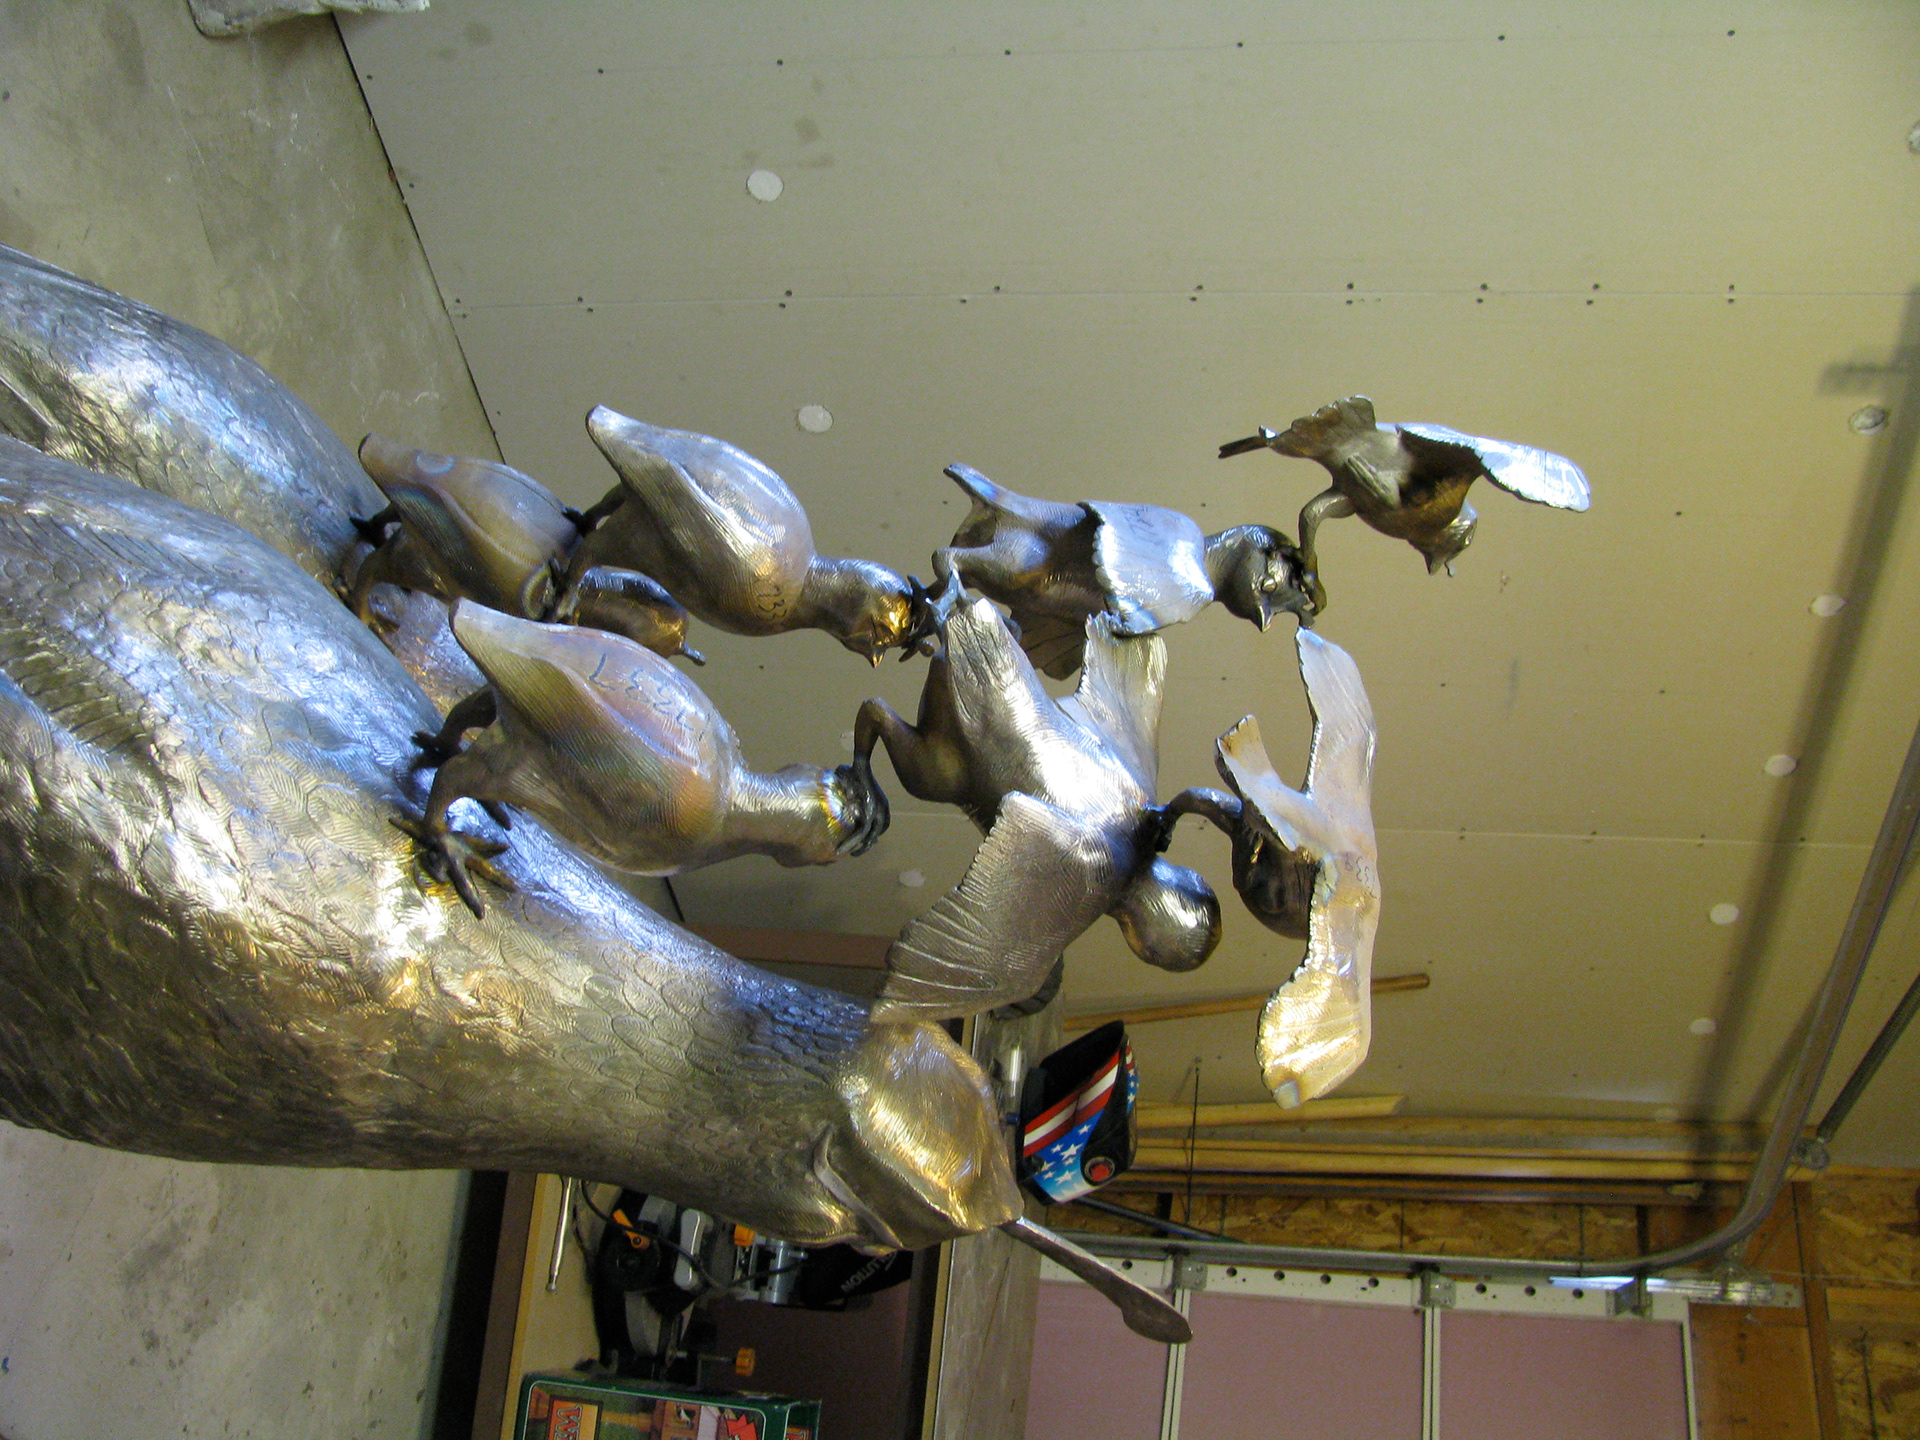
Rolling Covey is sandblasted and ready for patina.
The finished forms are held at the foundry while I wait for the go-ahead from the City to lay the foundation. Once I get the go-ahead and the sites are blue-staked, I dig out the holes, lay in wooden forms, and pick up the concrete.
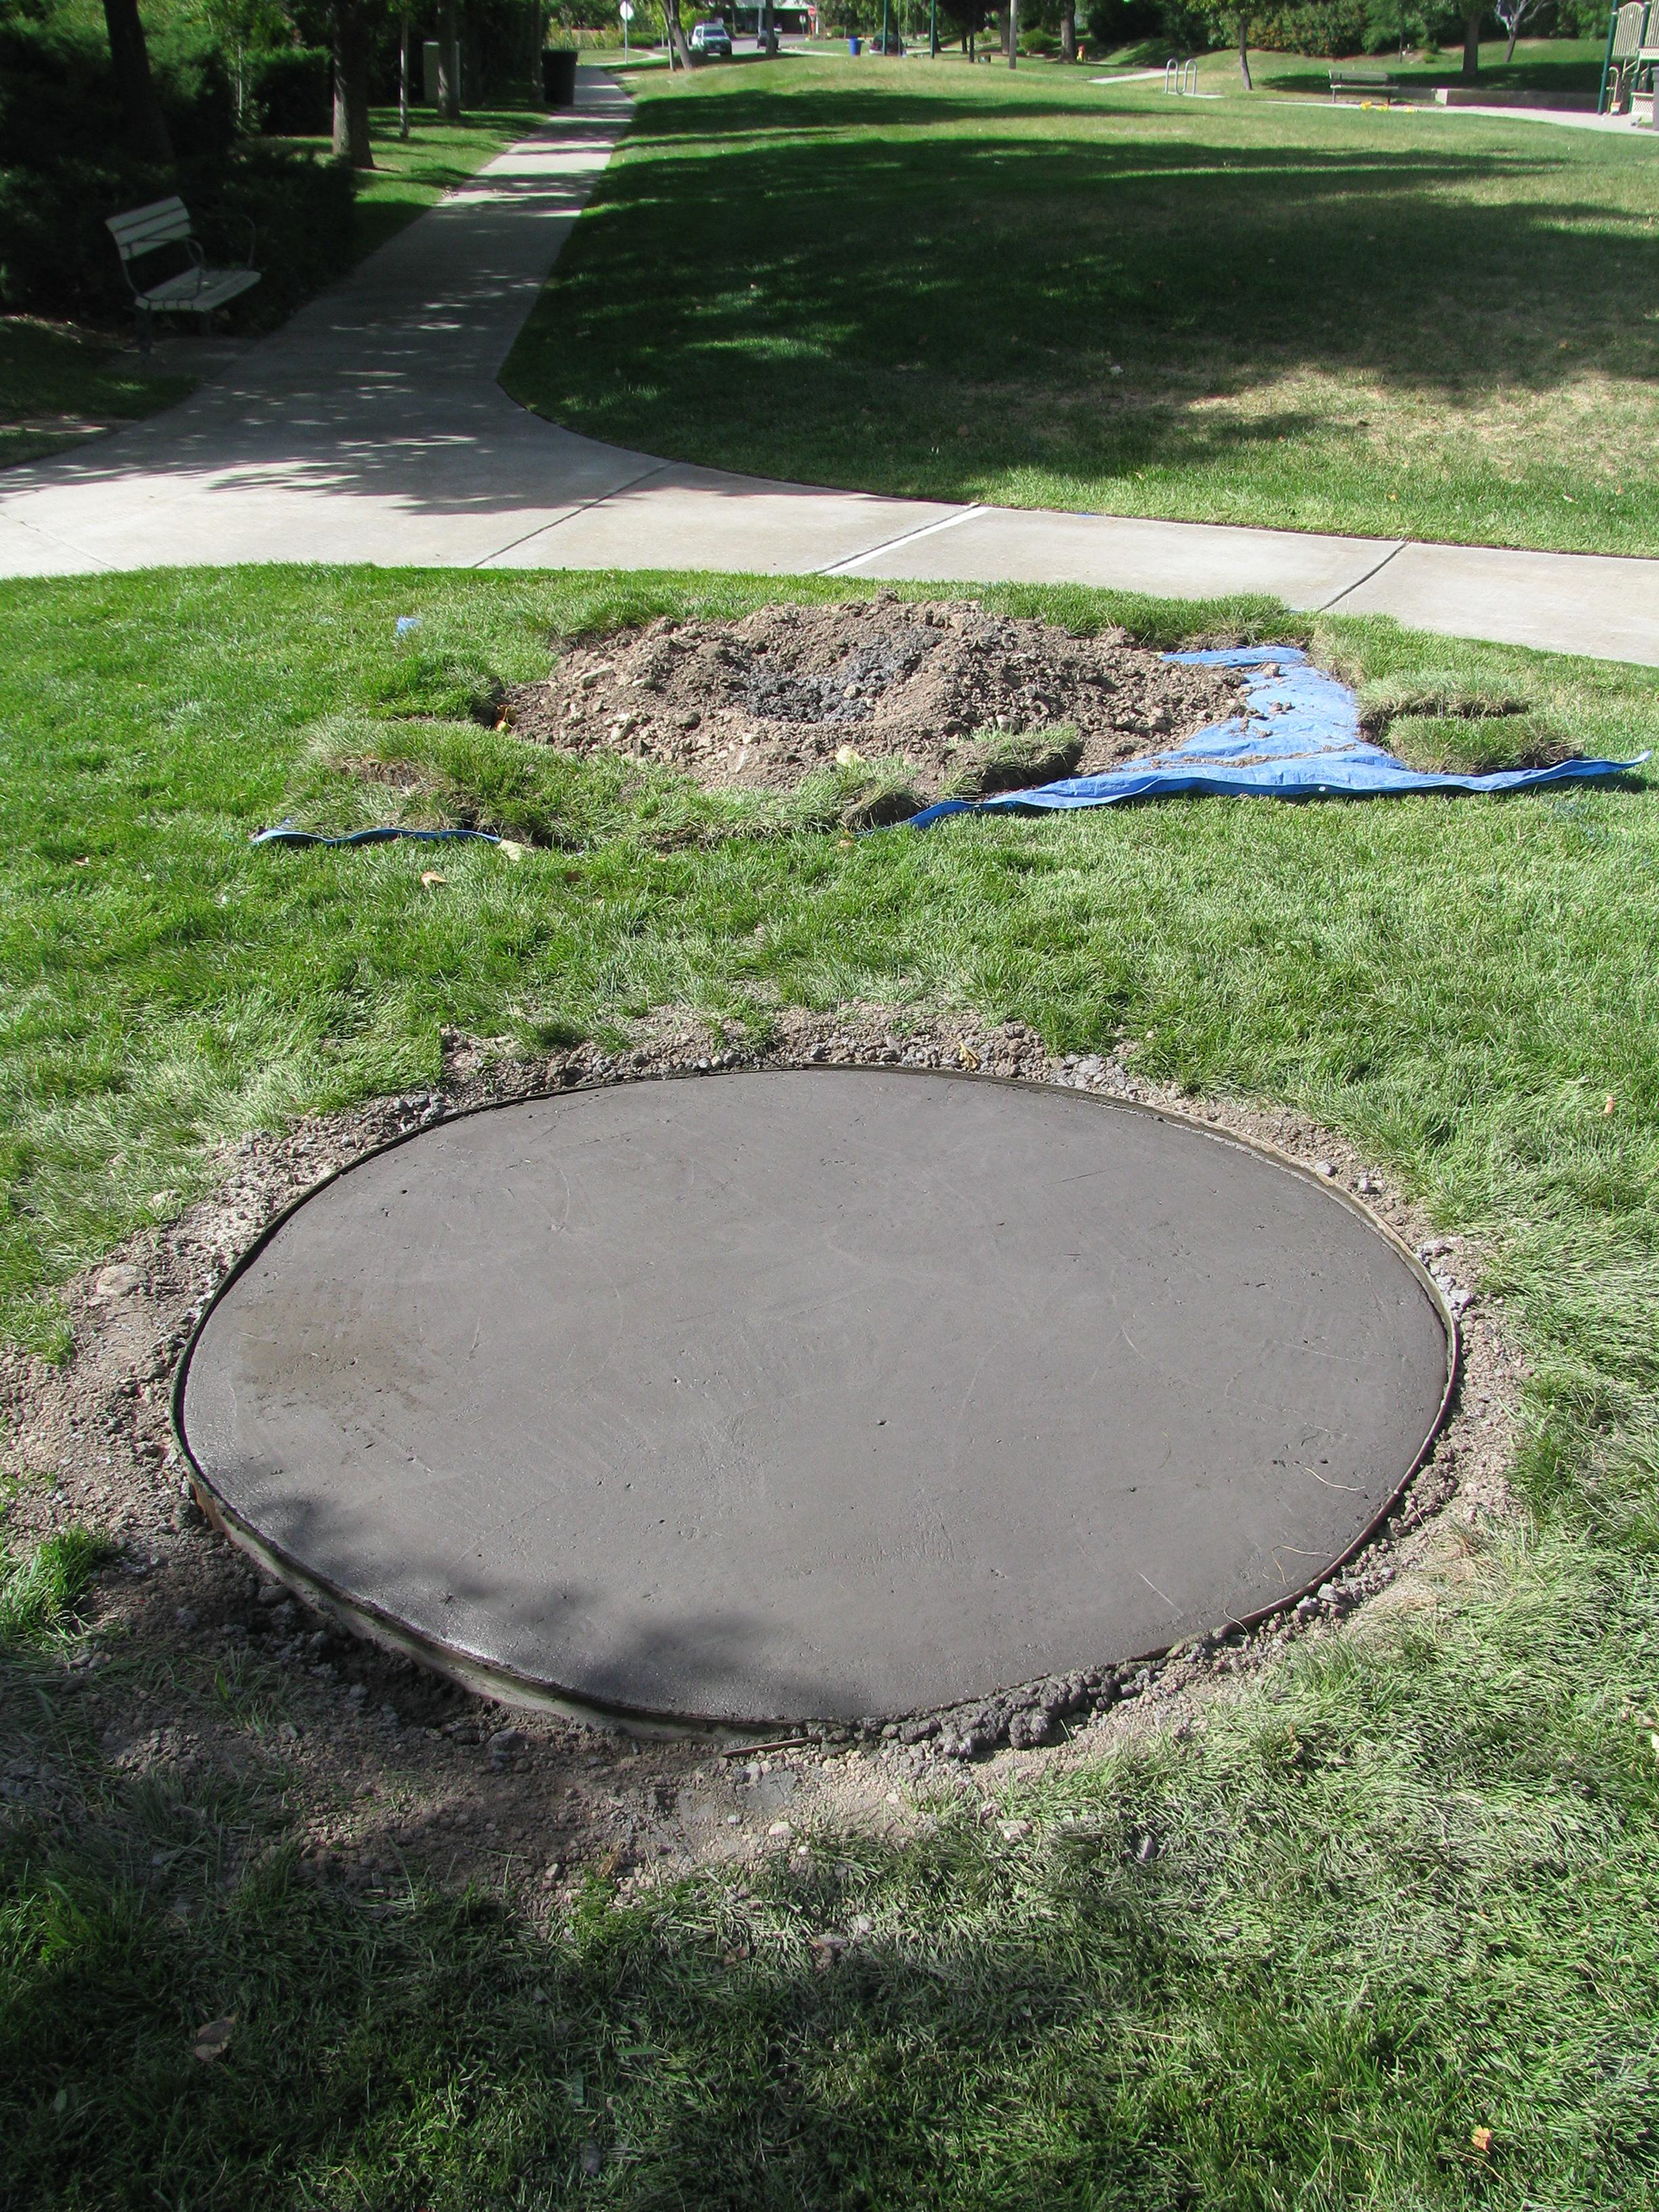
A footing anchors the base a few feet down with a welded rebar structure, the flat is backed with expanded metal and the concrete has dye added to offset it from the sidewalk. This is the site for Rolling Covey.
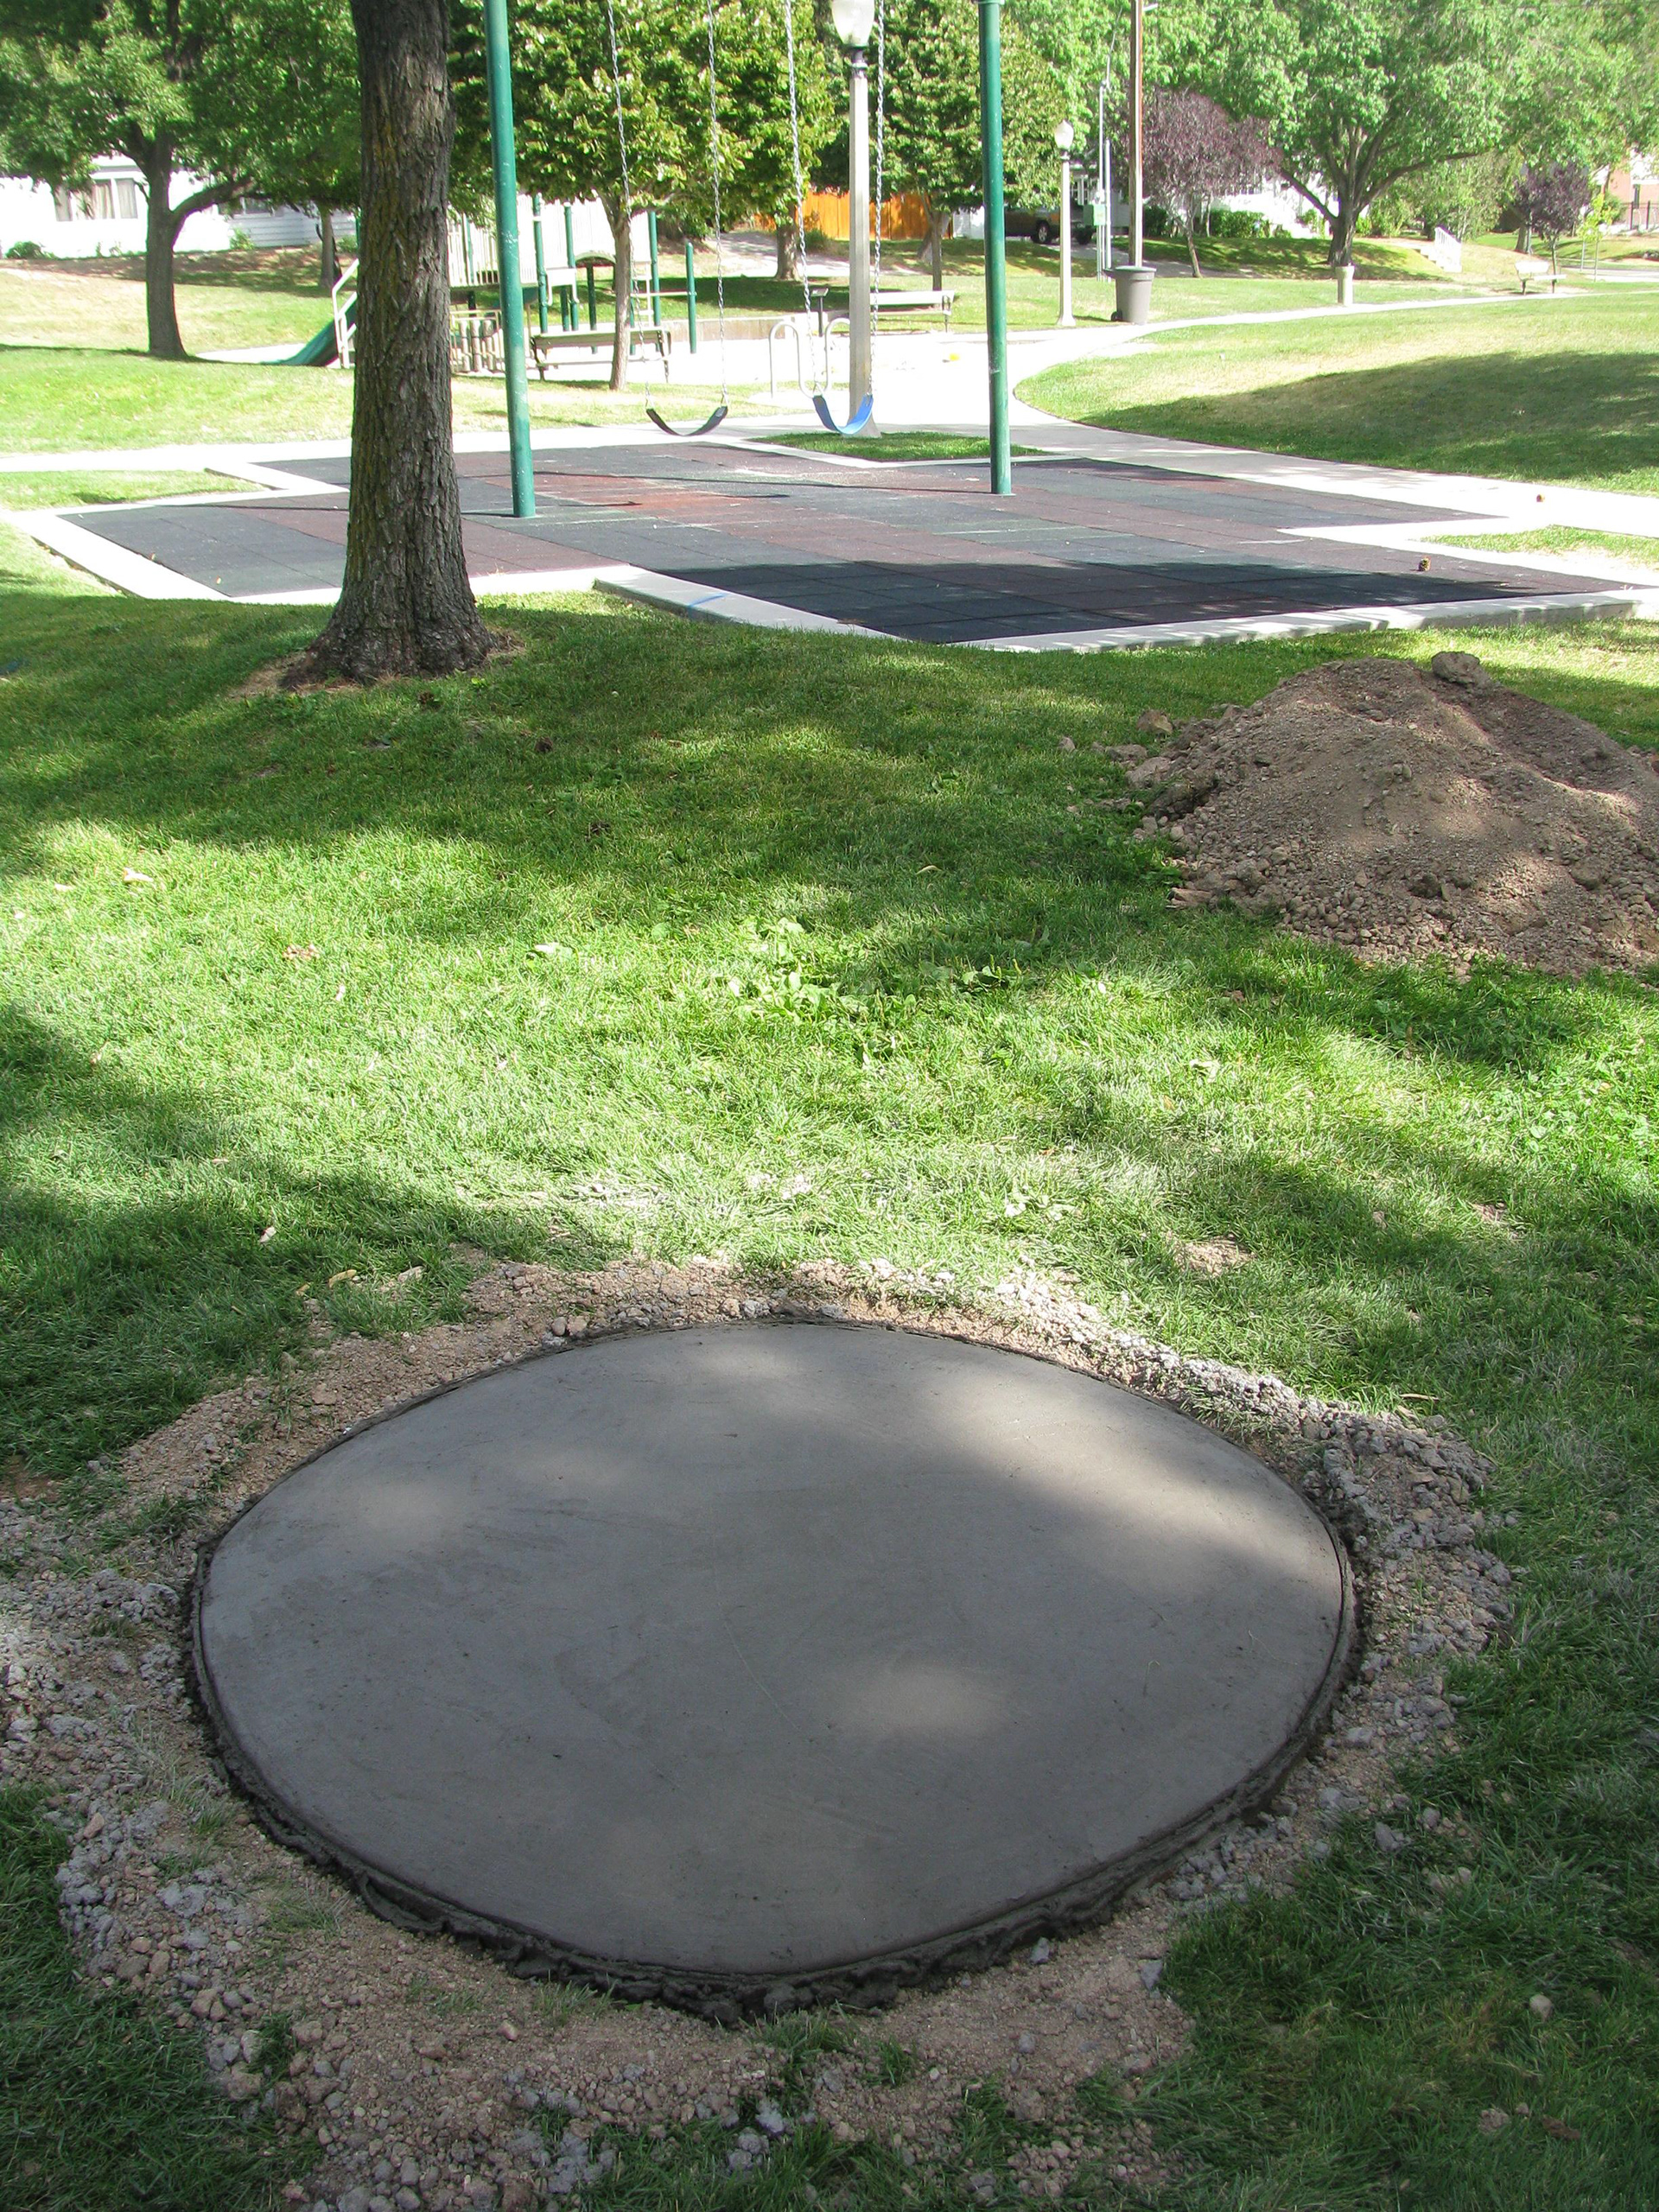
This is the site for Skating to Fly.